How to Run an Avalanche Node [AVAX Node Requirements]

![How to Run an Avalanche Node [AVAX Node Requirements]](/v3/img/containers/blog_main/blockchain.jpg/0ee7c10cd1b2699b0fec51a87d63af75/blockchain.jpg?id=1739046670)


If you're looking to support the Avalanche network—or earn staking rewards—running an Avalanche node is a great way to get involved. In this guide, I’ll first run through AVAX node hardware requirements and then show you how to run an Avalanche node, step-by-step.
#What is Avalanche (AVAX)?
Avalanche is a high-throughput blockchain platform designed for decentralized applications (DApps) and custom blockchain networks. AVAX is the native cryptocurrency of the Avalanche blockchain platform.
#What is an Avalanche node?
An Avalanche (AVAX) node is a computer running the Avalanche blockchain software that helps maintain the network by validating transactions, proposing new blocks, and keeping a copy of the blockchain.
#Why Run an Avalanche Node?
Before jumping in, here’s why setting up your own AVAX node is worth the effort:
-
Network Participation: Help validate transactions and secure the Avalanche blockchain.
-
Self-Reliance: Avoid relying on third-party services to interact with the network.
-
Staking: Lock up AVAX tokens and earn rewards by becoming a validator.
-
Performance: Running your own node can improve latency and privacy for dApps or tooling.
#Avalanche Node Requirements (AVAX Requirements)
To run an Avalanche node efficiently, here’s what your server should have:
-
CPU: Minimum of 8 virtual CPUs for handling validation processes and network tasks.
-
Memory: At least 16 GB of RAM to ensure smooth performance under load.
-
Storage: 1 TB of SSD storage, preferably NVMe, to support fast read/write speeds for blockchain data.
-
Operating System: Ubuntu 22.04 or 24.04 is recommended for compatibility.
-
Network Access: A public IP address with open TCP ports 9650 and 9651 for API communication and peer-to-peer traffic.
Note: we will be using SSH to connect to the remote server from our local terminal; you can check out how to configure ssh while setting up the server here
#How to Run An Avalanche Node: Step-By-Step
In this section, you’ll follow the steps for setting up and running an Avalanche node on a Linux system. For this demonstration, a dedicated Ubuntu 24.04 server was used.
#Step 1: Deploy a Dedicated Server
-
Deploy a dedicated server, or use your preferred provider with required specs.
-
Create a new instance:
-
Select Ubuntu 24.04 LTS as your OS.
-
Choose a plan with at least 8 vCPUs and 16GB RAM.
-
Opt for high-performance SSD storage (1TB NVMe).
-
-
Enable networking:
-
Make sure your server has a public IPv4 address.
-
Configure the firewall to allow TCP ports 9650 and 9651.
-
#Step2: Connect to your remote server via SSH
Run the below command on your local terminal to connect to the remote server:
ssh root@<your-server-ip> -i ~/.ssh/id_rsa
Replace <your-server-ip> with your server’s primary IP address.
Note that for this step to work successfully, you should have generated an SSH key and added the SSH public key to your remote server.
#Step3: Update System Packages
To make sure your server has the latest security patches and software versions, start by updating the package list and upgrading all installed packages using the system’s package manager. This ensures your environment is stable and ready for the Avalanche node installation.
sudo apt update && sudo apt upgrade -y

Add the user to the sudo group and switch to the new user:
adduser avalanche
usermod -aG sudo avalanche
su - avalanche

Once you switch to the new user, the terminal prompt will change to reflect that you’re now logged in as the new user.

#Step 4: Install AvalancheGo (Core Avalanche Node Software)
AvalancheGo is the official implementation of an Avalanche node.
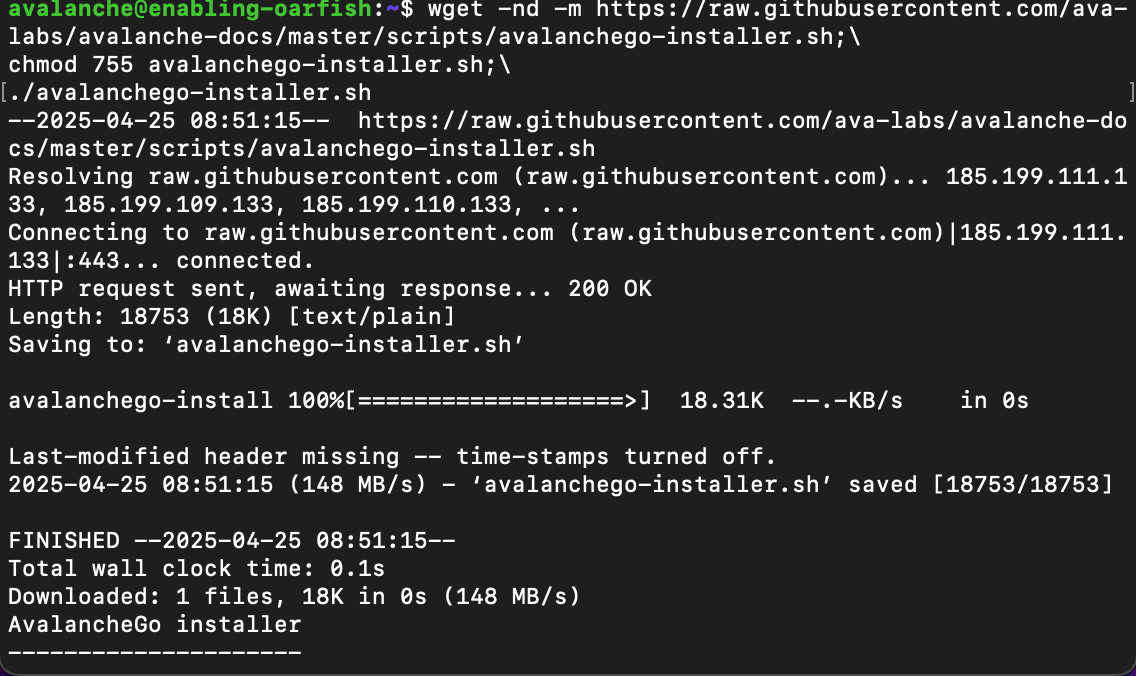
To download and run the script, enter the following in the terminal:
wget -nd -m https://raw.githubusercontent.com/ava-labs/avalanche-docs/master/scripts/avalanchego-installer.sh;\
chmod 755 avalanchego-installer.sh;\
./avalanchego-installer.sh
The output should look something like this:
Next, the script will prompt you to enter information about the networking environment

Since Cherry Servers provides a static IP by default, enter 2 when prompted. The installer will then try to auto-detect the IP and ask for confirmation.
Next you are prompted to type y to confirm the detected IP, or n if it's incorrect or blank—you’ll then be prompted to manually enter the correct IP.

Next, you’ll configure RPC port access for your node. Avalanche RPC ports allow external services to query the node’s state, send commands, or interact with the Avalanche platform and its chains (like submitting transactions). You’ll see the following prompt:
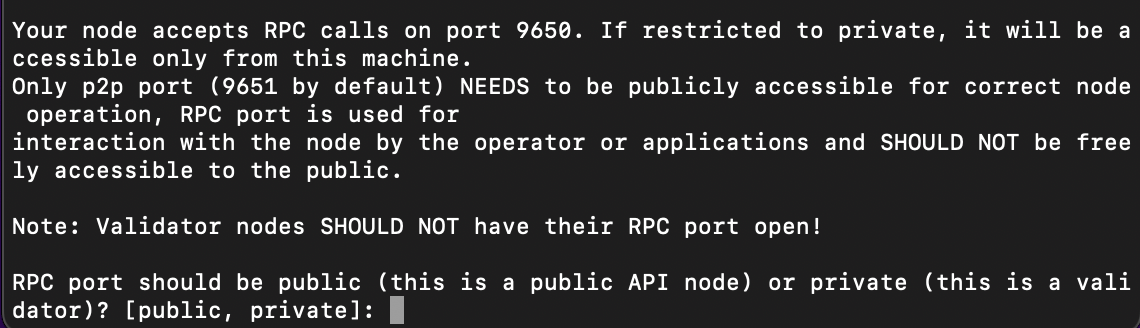
For this guide, we’ll be selecting private, since we're not aiming to serve external clients like dApps or wallets. This setup is more secure and ideal for validator nodes or personal use where public access isn’t required.
✅ Use
privateif your node is meant for internal use or validating and doesn't need to respond to external API requests.
🌐 Usepubliconly if you intend to provide a public API node that external applications can access (e.g., wallets, explorers, or dApps). In such cases, be sure to implement proper access controls and security.
The script will then prompt you to choose whether to enable state sync setting or not:

For this setup, we’ll be turning state sync on, as it significantly speeds up the bootstrapping process by syncing only the current state of the network. This is ideal for most use cases, including validator nodes. However, if you need access to full historical blockchain data (i.e., you're running an archival node), you should turn state sync off instead.
Once this selection is made, the script will proceed to create a system service and automatically start the Avalanche node.
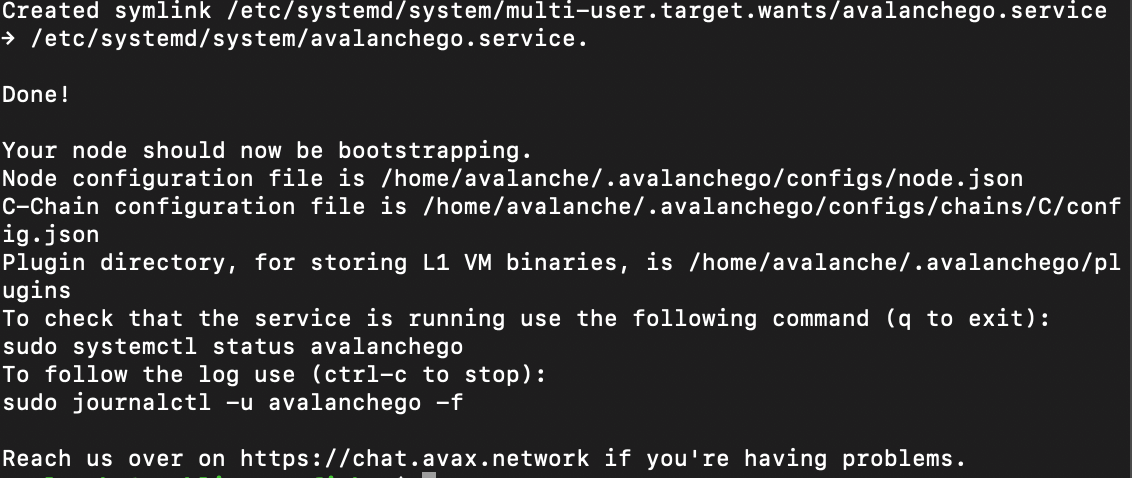
AvalancheGo should be running in the background as a service. You can check that it's running with:
sudo systemctl status avalanchego
Here’s an example of what the latest logs from the node should look like:
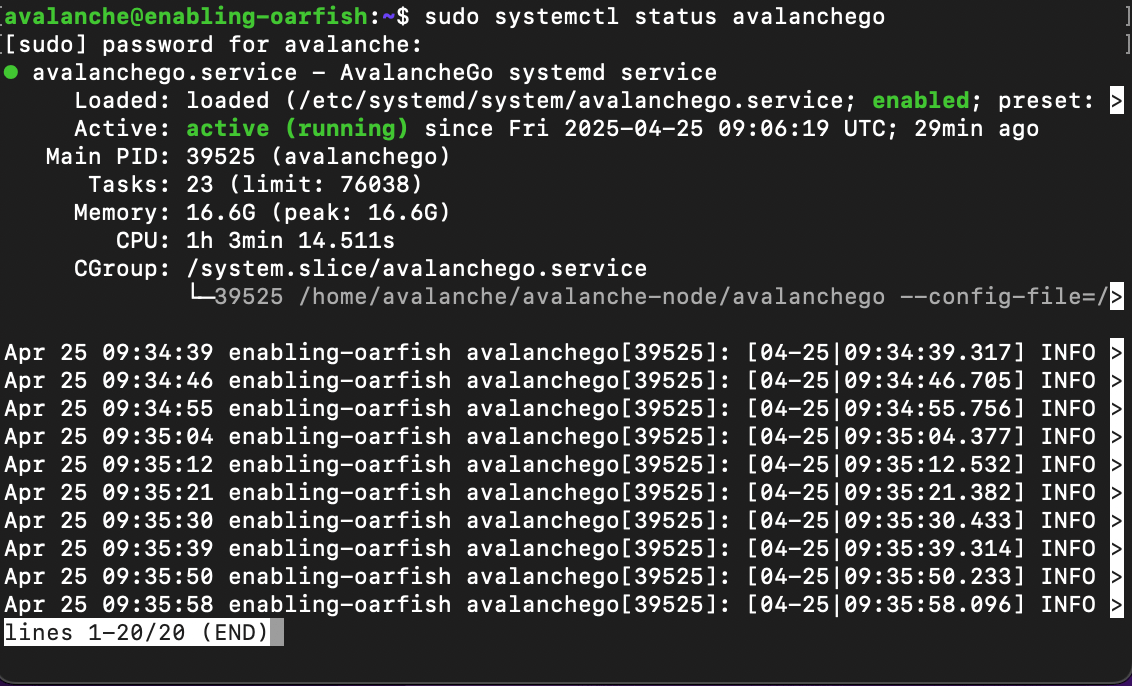
Pay attention to the "active (running)" status, which indicates that the service is running correctly. You might need to press q to return to the command prompt.
Your node should now be bootstrapping. You can track its progress by running the following command:
sudo journalctl -u avalanchego -f
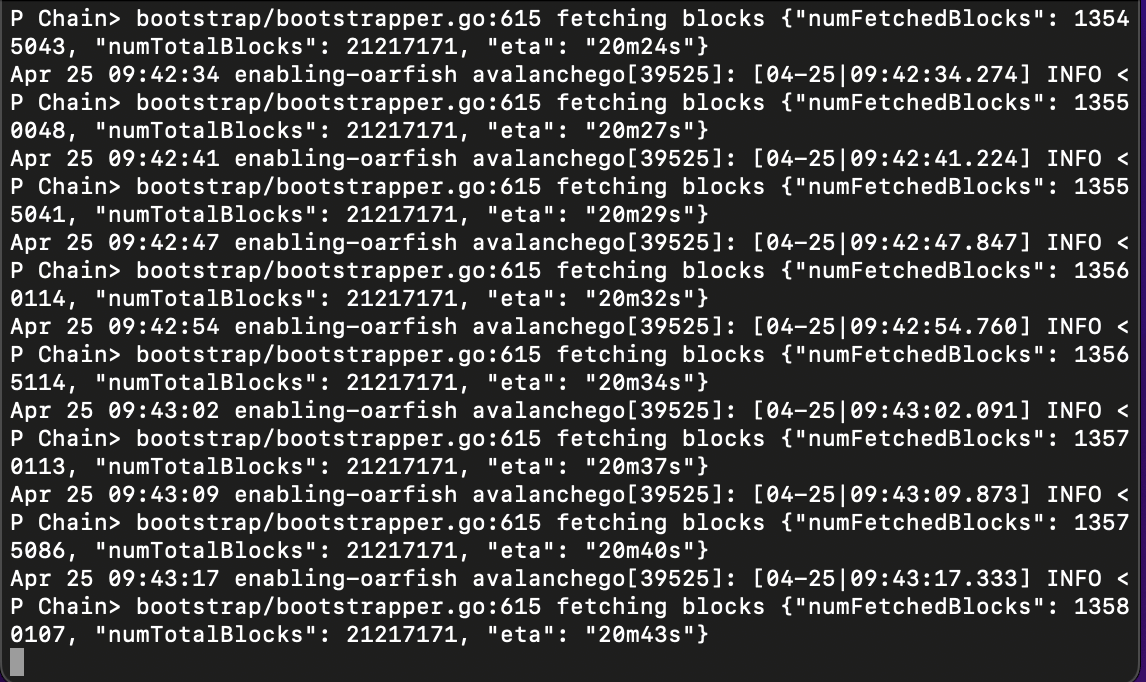
Press Ctrl+C when you want to stop viewing the node’s output.
#Step 5: Managing Your Node
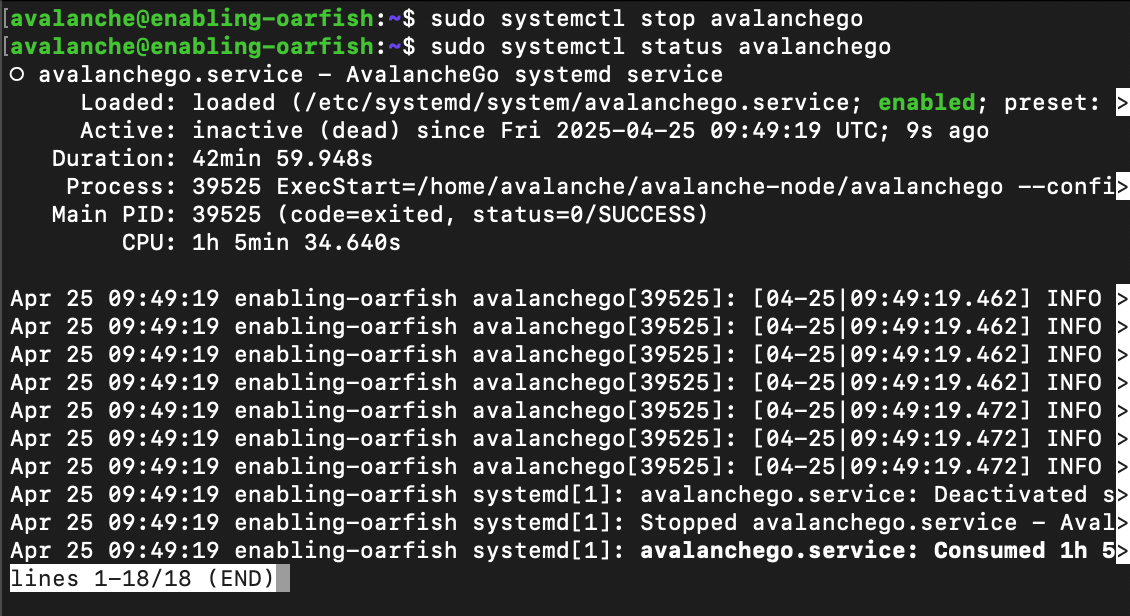
To stop the node:
sudo systemctl stop avalanchego
To start the node:
sudo systemctl start avalanchego
To restart the node:
sudo systemctl restart avalanchego
To upgrade your node to the latest version:
./avalanchego-installer.sh
The script will detect the existing installation, stop the service, upgrade to the latest version, and restart the service.

#Step 6: (Optional) Become a Validator and Stake AVAX
To validate blocks and earn rewards:
-
Acquire at least 2,000 AVAX (current minimum stake).
-
Create a wallet at wallet.avax.network.
-
Add your node ID and staking duration.
-
Stake tokens and begin validating!
#Conclusion
You’ve successfully set up your Avalanche node. Whether you're running a validator or a public API node, your setup is now ready to participate in the Avalanche network. For more details and advanced configurations, check out the Avalanche documentation. Now, you're ready to leverage the power of Avalanche and blockchain technology!
To explore more about Cherry Servers and optimize your blockchain servers, visit the We3 solutions page.