How to Use argparse in Python to Build Command-Line Interfaces


Python programmers often use command-line interfaces (CLIs) to create reliable programs. CLIs provide an efficient and swift way to interact with your program through a terminal. But how are these CLIs built? That is where Python’s argparse comes in.
This tutorial will provide step-by-step instructions on how to use the argparse module when programming using Python.
#How to use argparse?
The Python argparse module is an important tool that assists in handling command-line interfaces. It allows the user to call their Python codes using command line prompts.
In this argparse tutorial, you’ll learn to:
- Install argparse using pip
- Build a command-line interface with argparse
- Add positional arguments
- Add optional arguments
- Create sub-parsers in argparse
- Recognize the advantages and disadvantages of using Python argparse
#Understanding Python command-line arguments
When you run a Python application, you execute a command like python index.py. However, you can write your Python program to accept command line arguments when executing the Python code file. For example, you can run a Python code file with arguments like python index.py arg1 arg2. Then, you can use arg1 and arg2 values to do some operations in your Python code.
#How to use command line arguments in Python
Python incorporates three ways in which these arguments could be dealt with.
- Using sys.argv
- Using the getopt module
- Using the argparse module
The argparse module is often the best of the three methods because of its wide array of options, including positional arguments, default values for arguments, and help messages. Therefore, this article will discuss how to use argparse in Python.
Deploy and scale your Python projects effortlessly on Cherry Servers' robust and cost-effective dedicated or virtual servers. Benefit from an open cloud ecosystem with seamless API & integrations and a Python library.
#Install argparse using pip
Using the pip package manager is the most common way to install argparse. However, you should have a Python version above 2.3. It is best to use version 2.7 or higher since the argparse module is kept within the Python standard library rather than as a separate package in older versions.
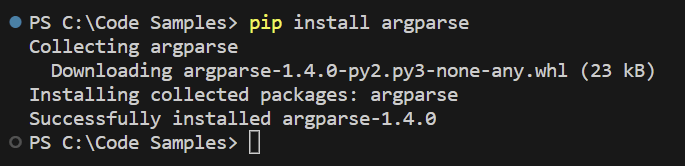
Run the following command to install argparse.
pip install argparse
Output
#Build a command-line interface with argparse
To start creating CLIs using argparse, we need to follow the below steps.
#Step 1: Import the argparse module
Import argparse using the below statement to start using it.
import argparse
#Step 2: Create a parser
Next, you have to create an ArgumentParser object. ArgumentParser objects are used for two main functions:
- Storing information about arguments that your Python script will accept
- Providing methods to parse those arguments.
To create a basic ArgumentPaser with no defined arguments, use the following code.
parser = argparse.ArgumentParser(description='Description of your program')
#Step 3: Define arguments
This step includes defining the command line arguments that have been accepted by the Python program. The argparse module recognizes two different types of arguments:
- Positional Arguments - Arguments that need to be in the correct order. The first positional argument must come first, the second must be placed second, etc.
- Optional Arguments - Optional arguments have default values.
Here is an example of defining a positional argument that represents a file path.
parser.add_argument('directory', help='Path to the input file')
The name of the argument comes first. In this case, it is a 'directory'. The help parameter gives us a small description of the argument.
#Step 4: Parsing arguments
After defining the arguments, the arguments have to be parsed. Parsing is the process of converting source code into machine language that the computer can understand. Here the code is converted into an Abstract Syntax Tree, which represents a structured format. The purpose of this process is to make the Python interpreter's and compiler’s job easier.
The code below accomplishes this.
args = parser.parse_args()
The parse_args() method parses the argument and returns an object containing the values of the parsed arguments.
#Step 5: Accessing parsed values
It is now possible to access the values of the parsed arguments. For example, if we want to access the value of the file argument, which was defined in Step 3, we can use the code below.
file_path = args.file
#Step 6: Running the program with command-line arguments
Finally, execute the program in a command prompt while providing the arguments required.
python your_program.py path/to/input_file
Now that you have learned how to use argparse for simple use cases let's extend our knowledge with more concepts.
#Adding positional arguments
When we expect a command-line argument from the user, we need a method to assign that value to a variable in our script. There are two ways we can do that. If the argument is a required input to run the script, we can ask the user to provide the arguments directly after the script file name without providing any names.
For example, python index.py 5.
In this case, we use the position of the arguments (in the above example, 5 is the first argument) to associate the arguments with their relevant variables.
import argparse
parser = argparse.ArgumentParser()
parser.add_argument("number", type=int, help="an integer number")
args = parser.parse_args()
result = args.number * 2
print("Result:", result)
In the above code, the positional argument named "number" is defined using argparse. The user does not need to use a flag when providing the argument value.
Note: In this example, the value is expected to be an integer due to the specified type=int. If the value cannot be converted to an integer, a TypeError will occur.
Output

#Adding optional arguments
If the arguments are not required, we call them optional arguments. As they are optional, we can't rely on the position because users may choose to skip certain arguments, thereby changing their order. In such cases, users will have to use explicit flags to name their arguments, as shown below.
import argpars
parser = argparse.ArgumentParser()
parser.add_argument("--number", type=int, help="an integer number")
args = parser.parse_args()
result = args.number * 2
print("Result:", result)
The above code uses the flag "--number" to specify the argument. The value provided after the flag will be assigned to the "number" argument.
Output

#Using short names for optional arguments
If you try to use too many optional arguments, it can be annoying to the user to type long flag names. Therefore there is an option to shorten the arguments as we write them.
parser.add_argument('-el', '--element', help="Specify the name of the element(e.g., Silver, Gold)")
parser.add_argument('-c', '--color', help="Specify the color of the element (e.g., red, gold)")
In the above example, the letters "el" has been used to shorten the argument "element" while the letter "c" has been used to shorten the argument "color."
#Argument types
In a certain argument, the type refers to the expected type for the input value. We can prevent unwanted errors by ensuring the input values are interpreted and validated correctly. For that, we can specify a type of argument using the type parameter.
Example 1 - Using an integer as the input value.
parser.add_argument("sum", type=int, help="The addition of the numbers inputted")
Example 2 - Using a floating number as the input value.
parser.add_argument("amount", type=float, help="The amount to be converted")
#Sub-parsers in argparse
If you need to run multiple commands with different sets of arguments in the same script, argparse provides a way to create sub-parsers. These allow you to set up separate command-line interfaces for each command.
For example, if your script has two modes - compress and decompress - with their own options, you can create sub-parsers to manage each.
import argparse

# Create the main parser
parser = argparse.ArgumentParser(description='Math Operations')

# Create sub-parsers
subparsers = parser.add_subparsers(dest='operation', help='Available operations')

# Create a sub-parser for the 'add' operation
add_parser = subparsers.add_parser('add', help='Addition')
add_parser.add_argument('numbers', nargs='+', type=int, help='Numbers to add')

# Create a sub-parser for the 'subtract' operation
subtract_parser = subparsers.add_parser('subtract', help='Subtraction')
subtract_parser.add_argument('numbers', nargs='+', type=int, help='Numbers to subtract')

# Parse the command-line arguments
args = parser.parse_args()

# Process the selected operation

if args.operation == 'add':
result = sum(args.numbers)
elif args.operation == 'subtract':
result = args.numbers[0] - sum(args.numbers[1:])

print(result)
Outputs
Using the sub-parser for the Add operation.

Using the sub-parser for the Subtract operation.

#Advantages of using Python argparse
Python argparse has certain advantages, which make it preferable to use compared to other available choices. The benefits of using argparse include:
- argparse is part of the Python library. Therefore it comes preinstalled on most systems;
- Prefix charts can be customized;
- argparse is relatively easy to use;
- Offers the capability to customize the name of the program;
- Enables to view the custom usage help;
- The user can also set prefixes for the files that contain arguments;
- Provide options to allow or disallow abbreviations;
- Supports subcommands;
- Supports variable numbers of parameters for a single option;
- Provide a help message which describes your program.
#Disadvantages of Using Python argparse
While Python argparse has many advantages, it also comes with disadvantages. Users should be aware of these before choosing to use argparse. These drawbacks include:
- Advanced features such as type validation, default value generation, and support for configuration are not supported in argparse;
- Using argparse can be quite tedious as it requires a lot of groundwork.
#Conclusion
In this article, we have explained all the important concepts, highlighted different ways how to use argparse in Python. These detailed steps with examples will guide you from installing argparse to running your program with command line arguments.
We have also highlighted the advantages and disadvantages of using argparse. You can read them carefully and decide whether or not to use argparse based on your requirements. Whether you are a beginner or an experienced professional, mastering argparse can improve your skills and enhance your Python programs.
Thanks for learning with Cherry Servers! Our open cloud infrastructure, including dedicated and virtual servers, and anonymous hosting, gives developers full control, stable workloads, and free technical support. After successfully installing Python on Ubuntu, continue leveraging Python and Cherry Servers and manage your cloud environment via API access by checking our Python library.