How to Set Up ZFS File System for PostgreSQL on Ubuntu 22.04?


Zettabyte File System (ZFS) is a local file system with an integrated volume manager that shines as one of the most robust, scalable, and easy-to-administer file systems available today. ZFS is unique by its awareness of the underlying structure of the disks, allowing it to grow automatically when adding new disks to the storage pool.
In addition to being a solid choice for many system administration workloads, ZFS is widely accessible on a variety of operating systems, including Linux, FreeBSD, Illumos, Mac OS and Windows. In this article we are going to use Ubuntu 22.04 to show how you can set up ZFS for a PostgreSQL database service.
#ZFS Features
ZFS has a gazillion of handy features that make it a distinct file system. It always helps to know how exactly a technology can help you before deciding to use it. Let’s go through some of the benefits of ZFS.
#Indefinite Storage Capacity
The maximum storage capacity of ZFS is designed to be so large that it shouldn‘t ever be encountered in practice. For instance, a theoretical maximum size of a zpool is 256 quadrillion zebibytes (2128 bytes), your zpool can consist of a maximum number of 264 devices, and store files up to 16 exbibytes (264 bytes) large.
#Block-level Deduplication
ZFS provides deduplication on a data block level. If you try to store the same file to the same zpool twice, only a single file will be stored. Even more, such deduplication granularity ensures that if you have a file consisting of several data blocks and you try to save the same file with a single byte changed, only this single block with a changed byte will be written on a filesystem.
#Variable Block Sizes
The default block size of ZFS is 128 kilobytes, but you may change it anytime. While changing the block size will have an effect on new files only, it can have a performance impact depending on your application. For instance, the default block size of PostgreSQL is 8 kilobytes, so fetching bigger blocks from the file system may be a waste of disk bandwidth.
#Copy on Write
In contrast to a traditional filesystem, every time you modify a file ZFS writes new blocks to the filesystem and, when the writing is done, ZFS updates the file‘s metadata pointers to unlink the old blocks and link to the new blocks of data. As metadata update is performed in a single operation, your system may crash in the middle of the writing process and still maintain filesystem consistency leaving you either with the old, or with the new version of a file.
#Adaptive Replacement Cache (ARC)
Rather than relying on your operating system‘s page cache ZFS has a separate caching mechanism. In addition to saving the most recently used data, which most operating systems do, ARC also weights the data by how frequently it is being used and stores it in RAM. As the ARC algorithm is much less trivial, it typically ensures an increased number of cache hits.
#Built-in compression
ZFS filesystem supports built-in compression on a zpool layer to save disk space and reduce file read time. Using LZ4 compression is recommended for nearly any use case of ZFS, since the possible CPU overhead is relatively low when compared with potential LZ4 compression gains.
#Automated Data Corruption Repair
While traditional filesystems may use checksum verification on a per-block basis, ZFS checksum algorithm works on a filesystem layer. This makes it possible for ZFS to find any complete blocks written to an incorrect locations, and improve data integrity. Even more, if you have any type of redundancy – mirror or any type of zraid – on your ZFS filesystem, ZFS will not only detect corrupted data, but also self-heal by fetching the correct data from another location.
#Snapshots
Snapshot is a read-only copy of a ZFS filesystem taken at a moment in time that tracks filesystem changes. A snapshot initially consumes no disk space, and only starts taking additional storage pool space by continuing to refecence the old data once you start making changes to the filesystem. ZFS snapshots can be created, cloned, backed up and rolled back to. By continuously creating, transfering and restoring snapshots you can create synchronization and redundancy between two or more machines.
Run your PostgreSQL deployments in a high-performing and cost-effective open cloud infrastructure. Cherry Servers' bare metal cloud and virtual servers offer automatic scaling, pay-as-you-go pricing, and free 24/7 technical support.
#ZFS Architecture
ZFS is based on a pooled storage architecture that makes traditional volumes obsolete. All storage in a zpool is shared, and you can grow and shrink the pool automatically on demand. Let’s go through the main building blocks of ZFS filesystem – zpools, vdevs and devices.
#Zpool Layer
Zpool is the highest abstraction layer of ZFS filesystem containing one or more virtual devices (vdevs). It manages physical storage and data replication for ZFS datasets that share the same storage space within a zpool. Zpools can be scaled up and down automatically, which is one of the core benefits of using ZFS in the first place. Writes to a zpool are always striped semi-evenly across all available vdevs, so there is no fault tolerance at the zpool level.
A zpool may contain any number of vdevs. Their topologies and sizes aren’t required to match. You must specify at least one vdev when creating a zpool, but there’s a possibility to add new vdev devices to the storage pool later.
#Vdev Layer
Virtual devices (vdevs) are the core building blocks of a zpool. Vdev is a logical device that represents an underlying data storage topology. It may be a single disk with no data redundancy, or some type of redundant structure like mirror, RAIDz1, RAIDz2 or RAIDz3.
- Single disk topology has no redundancy and is not recommended for most use cases where data persistency matters.
- In a mirror topology each data block is stored on every device in the mirror. High performance and solid redundancy make mirror topology the most popular vdev in production environments. You may even create more than one mirror layer.
- In a RAIDz topology 1, 2 or 3 parity blocks are allocated for each data stripe, respectively RAIDz1, RAIDz2 and RAIDz3. RAIDz is mostly a niche topology, because it is less performant in most scenarios and more complicated to manage.
In addition to traditional storage vdevs that are also special purpose vdevs that you may use in certain niche scenarios:
- LOG vdev – it stores ZFS intent log (ZIL) that tracks pending synchronous write operations. ZIL is by default stored in RAM and in the storage pool. When data in RAM is lost due to a power outage, ZFS must access ZIL on a zpool and apply unfinished write operations. However, this operation competes with all other zpool activities. This may become a problem when you have an application that performs lots of random write operations. In such a scenario it is worth having a small, dedicated LOG vdev.
- CACHE vdev – it is a layer 2 ARC cache that stores data blocks on a dedicated vdev. As the main ARC cache operates in memory it is much faster and using a layer 2 cache is only useful when your frequently requested data exceeds your memory capacity.
#Device Layer
Every vdev consists of one or more physical devices. Any random-access block device with a descriptor /dev is fit to serve as the building block for vdev. This is typically a physical disk, although you may use RAIDs, loop devices, tmpfs volumes or even raw files as well. Nevertheless, using raw files makes you implicitly dependent on the underlying file system and is only recommended for testing purposes.
There is also a special SPARE device that belongs to the entire pool and serves as a temporary replacement for a degraded device in a mirror or RAIDz vdev topology. The whole purpose of a hot spare device is to shorten the period in which vdev runs in a degraded state.
If you would like to dive deeper, feel free to watch the video on ZFS architecture basics by the creators of ZFS Matt Ahrens and George Wilson.
#Install ZFS on Ubuntu 22.04
There are a few ways to install ZFS on an Ubuntu 22.04 system:
- You may install the operating system on ZFS when using a live CD. There is a great official how-to guide from ZFS creators on how to do that. Such configuration allows you to reap all the benefits of a ZFS file system but introduces a high amount of complexity.
- Next, you may install the operating system on a device with a standard ext4 file system and have your ZFS file system on another device for storage purposes only. Such configuration is simple to implement but requires you to have extra storage disks.
- Finally, you may take a hybrid approach and install the operating system on a logical partition with a standard ext4 file system and have your ZFS file system on another logical partition on the same device. Such configuration is simple to implement and does not require extra storage disks.
We are going to take the hybrid approach and install operating system and ZFS on separate partitions on the same physical disk using Cherry Servers Custom Partitioning Layout functionality.
#Prerequisites
- A Dedicated Server with Ubuntu 22.04 and 30GB Custom Partition for the operating system from Cherry Servers.
- PostgreSQL 14 pre-installed on the main partition.
- Root access to the server.
#Install ZFS
First things first. Let‘s update package repositories and install ZFS binaries to your newly deployed Ubuntu 22.04 system.
apt update && apt install zfsutils-linux -y
After installation is finished, you will have two command line utilities - zfs and zpool - installed for creating and administering ZFS filesystems. Feel free to double check whether they are available:
zfs -V
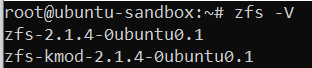
zpool -V
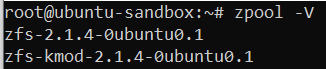
With both binaries installed successfully we can move on to the next step.
#Create Logical Devices
Now let’s check our disk volumes. As we started with a Dedicated Server from Cherry Servers that included a custom partition for the operating system, our device layout looks like this:
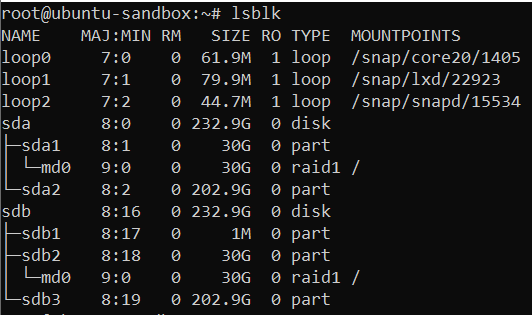
lsblk
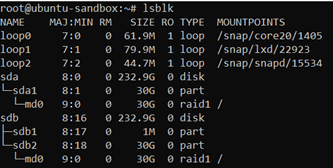
We can see two physical disks - sda and sdb - with ~240GB of storage size. As we selected 30GB for our operating system partition size, there are two 30GB disk volumes - sda1 and sdb2 - that are configured with RAID1 topology. The rest of the space is unpartitioned and unformatted, so we need to do that ourselves.
We will use the fdisk utility to create our custom partitions. First, use the fdisk utility with the first disk that is mounted at /dev/sda.
fdisk /dev/sda
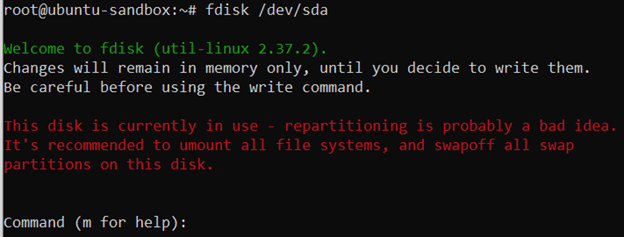
You are getting a red warning, because part of the disk is currently used for storing your operating system. That‘s fine.
Enter n to create a new partition:
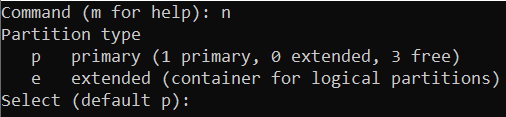
Press ENTER to select the default value and create a new primary partition:
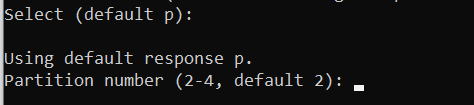
Press ENTER to select the default value and assign number 2 to the partition:

Press ENTER to select the default value for the first sector:

Press ENTER once again to select the default value for the last sector and the new partition will be created:

You may confirm the updated partition table by entering p:
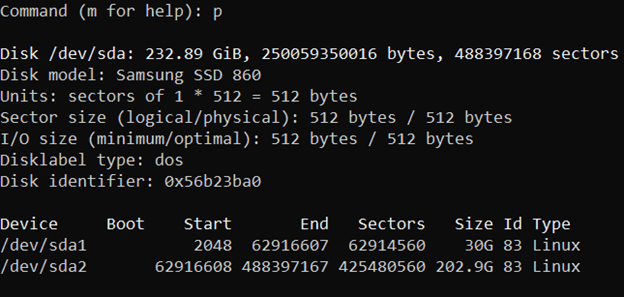
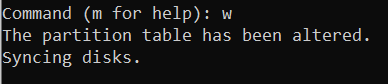
All seems good. Enter w to save the new configuration:
Repeat the process to create a second partition for the /dev/sdb disk.
If all went well, you should now have two new partitions of ~202GB that you will be able to use as devices for your ZFS pool:
lsblk
As you can see, we now have two beautiful partitions - sda2 and sdb3 - ready to be formatted and used in your ZFS pool.
#Create zpool
We are finally ready to create a new ZFS storage pool that is going to be used for a PostgreSQL 14 database. Let’s create a new zpool by using the zpool create command. A default zpool create command syntax is as follows:
zpool create [-o property=value] [-O file-system-property=value] pool-name vdev…
The actual command is as follows:
zpool create -o ashift=12 -O canmount=on -O atime=off -O recordsize=8k -O compression=lz4 pg mirror /dev/sda2 /dev/sdb3
We are using the following options to tweak PostgreSQL performance:
-o ashift=12- this property sets the disk sector size to212 = 4096 bytesand overwrites the default value of29 = 512 bytesthat is still widely used for backwards compatibility reasons.-O canmount=on– this property allows the ZFS dataset to be mountable, and ensures it is mounted upon creation.-O atime=off- this property makes ZFS filesystem avoid reading files when the data is being written.-O recordsize=8k- this option sets the recordsize of a ZFS dataset to 8k to match PostgreSQL page size and avoid unnecessary write operations.-O compression=lz4- this option enables a high-performance lz4 compression algorithm.
You won’t get any output after successfully creating a zpool, but you may double check its status with the following command:
zpool status
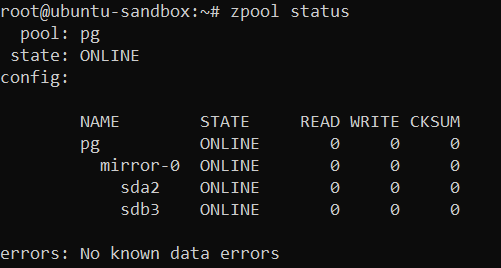
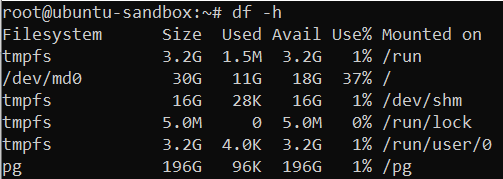
Good job, your zpool is up and running. It is mounted on the root directory by default:
df -h
💡 Pro Tip: If you were to create a zpool by using dedicated disk devices instead of logical partitions, it is best to target devices by their serial numbers. Use lsblk -o name,model,serial command to get device serial numbers, find corresponding disks at /dev/disk/by-id/ directory and use them for your vdevs when creating a zpool.
#Move PostgreSQL to ZFS
The database is now running on your operating system’s ext4 filesystem, but we want to move it to your newly created ZFS filesystem. PostgreSQL stores data in /var/lib/postgresql/14/main directory, as defined in the data_directory variable in the /etc/postgresql/14/main/postgresql.conf configuration file.
First, stop PostgreSQL daemon:
systemctl stop postgresql
Now move the entire parent directory to a ZFS filesystem:
mv /var/lib/postgresql/14/ /pg
Set a new mountpoint for your ZFS pool:
zfs set mountpoint=/var/lib/postgresql pg
Finally, start PostgreSQL daemon once again:
systemctl start postgresql
Congrats, you are now running your PostgreSQL database on ZFS. You can double check that your main ZFS filesystem is successfully mounted as the parent directory of your PostgreSQL data_directory at `/var/lib/postgresql:
df -h
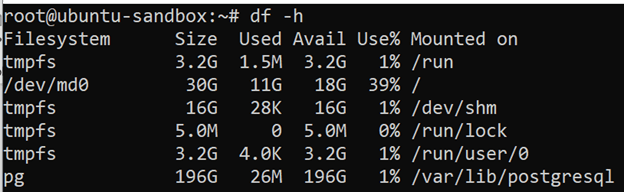
You may now scale your database indefinitely by adding more disks to the server and extending your zpool.
#Optimize PostgreSQL for ZFS
In addition to making standard PostgreSQL performance tuning, you may tweak your PostgreSQL configuration to make it more performant on a ZFS filesystem.
Open your PostgreSQL configuration file /etc/postgresql/14/main/postgresql.conf and add the following lines to the bottom:
full_page_writes=off- ZFS uses copy-on-write, so using full page writes to prevent torn pages is redundant and should be turned off.wal_init_zero=off- Copy-on-write systems do not benefit from prematurely filling WAL files with zeroes.wal_recycle=off- On a copy-on-write system it is faster to create new WAL files rather than recycle the old ones.
Reload PostgreSQL daemon for the changes to take into effect:
systemctl reload postgresql
#Conclusion
ZFS is a performant and reliable file system that can move your PostgreSQL database to the next level. It really makes sense to use ZFS with PostgreSQL as a substitute for cloud-based proprietary databases, especially in situations when you are obliged to keep your data in-house. As some Dedicated Servers can have up to 32 storage disks, you can scale up to 512TB HDD or 128TB SSD storage which is more than enough for most of the use cases.


