How to Install Minecraft Server on Ubuntu [Java and Bedrock] 6 Steps

![How to Install Minecraft Server on Ubuntu [Java and Bedrock] 6 Steps](/v3/img/containers/blog_main/cloud_computing.jpg/5982b1adf933064618994915989c8491/cloud_computing.jpg?id=1739046670)


Many players want to create and host their own Minecraft servers to create their community, but this can be tedious as it includes technical tasks. Therefore, I’ve created this comprehensive step-by-step tutorial, where you’ll learn how to install Minecraft on Ubuntu: Java and Bedrock editions. We also cover how to host a Minecraft server, server requirements, and cross-platform compatibility.
#Minecraft editions
Minecraft comes in two editions: Java and Bedrock. The Minecraft Java edition is the original version, and the Bedrock edition is more affordable and optimized for playing on any device.
When it comes to cross-platform play, the Minecraft Java edition allows only cross-play between Windows, Mac, and Linux. In contrast, the Minecraft Bedrock edition supports cross-play with Windows 10, Windows 11, Xbox, Nintendo Switch, PS4, and mobile.
#How to host a Minecraft server?
To host a Minecraft server, you can install it directly on your home computer or laptop, use a dedicated Minecraft hosting service, or rent a virtual or dedicated server from a cloud hosting provider for complete control with full customization.
In this tutorial, we’ve used Cherry Servers virtual dedicated server, Cloud VDS 2 with a pre-installed Ubuntu to create the Minecraft servers. The server comes with 4vCores, 16GB of RAM, and a 100GB NVMe disk capacity.
#Minecraft server requirements
Minecraft server requirements depend on the number of concurrent players and mods or plugins, as the world size/complexity and more demanding mods may increase hardware needs. Although Minecraft does not require the best high-end computer, it does require a decent modern computer configuration and a dedicated server is recommended for more resource-intensive Minecraft Java Edition.
#Prerequisites
To follow this tutorial and install Minecraft server on Ubuntu, you will need the following:
- A Minecraft account with either the Java or Bedrock game edition installed;
- The latest Ubuntu installed;
- An account on Cherry Servers cloud provider.
#How to install Minecraft server on Ubuntu?
The general process for running the Minecraft server on Ubuntu includes downloading the latest Java or Bedrock edition server file, configuring the server, and launching the game.
In the first part, I’ll demonstrate how to install Minecraft on Ubuntu: Java edition. You can jump directly to part two of this tutorial to create a Minecraft Bedrock server.
#1. Install Minecraft on Ubuntu: Java edition
The Minecraft Java edition was the first edition created and allows Windows, Mac, and Linux cross-play. This first section will show how to install Minecraft server on Ubuntu: Java edition, including the configuration.
#Step 1: Install Java runtime
We need to install the Java runtime to run the Minecraft server.
Install Java JRE with the following command:
sudo apt-get update
sudo apt install default-jre-headless
Check if Java jre has been installed with the following command:
Java -version
You should see something similar:
openjdk version "17.0.9" 2023-10-17
OpenJDK Runtime Environment (build 17.0.9+9-Debian-1deb12u1)
OpenJDK 64-Bit Server VM (build 17.0.9+9-Debian-1deb12u1, mixed mode, sharing)
#Step 2: Create a dedicated system user
As the Minecraft server will be publicly accessible, you should take special care of the server's security. For example, the server should not be run by root or any user with privileged rights.
Create a user minecraft that we will use to run the server.
To create a non-privileged user, use the following command:
sudo useradd -r -U -d /usr/local/games/minecraft_server/ -s /usr/sbin/nologin minecraft
Then create the folders where we store the server's executable files.
Create the folder with the following command:
sudo mkdir -p /usr/local/games/minecraft_server/Java
Now, permit user minecraft to the newly created folder:
sudo chown -R minecraft: /usr/local/games/minecraft_server/
#Step 3: Download Minecraft server Java edition
We can now switch to the user minecraft:
sudo su - minecraft -s /bin/bash
Let’s work in the Minecraft server folder:
cd /usr/local/games/minecraft_server/Java
To download the server, use the following command:
wget https://piston-data.mojang.com/v1/objects/8dd1a28015f51b1803213892b50b7b4fc76e594d/server.jar
You can find the latest Minecraft Java server at https://www.minecraft.net/en-us/download/server.
We now have a file called server.jar in the folder.
#Step 4: Initialize setup
Let us now run the server:
Java -Xmx1024M -Xms1024M -jar server.jar nogui
In case you encounter the following error:
ubuntu Error: LinkageError occurred while loading main class net.minecraft.bundler.Main Java.lang.UnsupportedClassVersionError: net/minecraft/bundler/Main has been compiled by a more recent version of the Java Runtime (class file version 61.0); this version of the Java Runtime only recognizes class file versions up to 55.0,
You can install a more recent JRE version using apt-get and by specifying the JRE version by doing sudo apt install openjdk-21-jre-headless and then relaunch the server.
The server will exit with an exception, which is expected:
[23:29:01] [ServerMain/ERROR]: Failed to load properties from file: server.properties
Java.nio.file.NoSuchFileException: server.properties
	at sun.nio.fs.UnixException.translateToIOException(UnixException.Java:92) ~[?:?]
	at sun.nio.fs.UnixException.rethrowAsIOException(UnixException.Java:106) ~[?:?]
	at sun.nio.fs.UnixException.rethrowAsIOException(UnixException.Java:111) ~[?:?]
	at sun.nio.fs.UnixFileSystemProvider.newByteChannel(UnixFileSystemProvider.Java:218) ~[?:?]
	at Java.nio.file.Files.newByteChannel(Files.Java:380) ~[?:?]
	at Java.nio.file.Files.newByteChannel(Files.Java:432) ~[?:?]
	at Java.nio.file.spi.FileSystemProvider.newInputStream(FileSystemProvider.Java:422) ~[?:?]
	at Java.nio.file.Files.newInputStream(Files.Java:160) ~[?:?]
	at ame.b(SourceFile:62) ~[server-1.20.4.jar:?]
	at amb.a(SourceFile:138) ~[server-1.20.4.jar:?]
	at amc.<init>(SourceFile:12) ~[server-1.20.4.jar:?]
	at net.minecraft.server.Main.main(SourceFile:112) ~[server-1.20.4.jar:?]
	at net.minecraft.bundler.Main.lambda$run$0(Main.Java:54) ~[?:?]
	at Java.lang.Thread.run(Thread.Java:840) ~[?:?]
[23:29:01] [ServerMain/WARN]: Failed to load eula.txt
[23:29:01] [ServerMain/INFO]: You need to agree to the EULA in order to run the server. Go to eula.txt for more info.
This process has also created other files in the folder:
$ ls
eula.txt  libraries  logs  server.jar  server.properties  versions
Following the exception, we will accept the Minecraft End-user license agreement (EULA) by replacing false to True in EULA.txt:
sed -i 's/\bfalse\b/TRUE/' eula.txt
Running the server again with Java -Xmx1024M -Xms1024M -jar server.jar nogui works now:
$ Java -Xmx1024M -Xms1024M -jar server.jar nogui
Starting net.minecraft.server.Main
[23:37:36] [ServerMain/INFO]: Environment: Environment[sessionHost=https://sessionserver.mojang.com, servicesHost=https://api.minecraftservices.com, name=PROD]
[23:37:37] [ServerMain/INFO]: No existing world data, creating new world
[23:37:38] [ServerMain/INFO]: Loaded 7 recipes
[23:37:38] [ServerMain/INFO]: Loaded 1271 advancements
[23:37:38] [Server thread/INFO]: Starting minecraft server version 1.20.4
[23:37:38] [Server thread/INFO]: Loading properties
[23:37:38] [Server thread/INFO]: Default game type: SURVIVAL
[23:37:38] [Server thread/INFO]: Generating keypair
[23:37:38] [Server thread/INFO]: Starting Minecraft server on *:25565
[23:37:38] [Server thread/INFO]: Using epoll channel type
[23:37:38] [Server thread/INFO]: Preparing level "world"
[23:37:42] [Server thread/INFO]: Preparing start region for dimension minecraft:overworld
[23:37:43] [Worker-Main-4/INFO]: Preparing spawn area: 0%
[23:37:43] [Worker-Main-2/INFO]: Preparing spawn area: 0%
[23:37:43] [Worker-Main-6/INFO]: Preparing spawn area: 0%
[23:37:44] [Worker-Main-7/INFO]: Preparing spawn area: 0%
[23:37:44] [Worker-Main-3/INFO]: Preparing spawn area: 1%
[23:37:45] [Worker-Main-5/INFO]: Preparing spawn area: 2%
[23:37:45] [Worker-Main-5/INFO]: Preparing spawn area: 3%
[23:37:46] [Worker-Main-6/INFO]: Preparing spawn area: 4%
[23:37:46] [Worker-Main-1/INFO]: Preparing spawn area: 5%
[23:37:47] [Worker-Main-4/INFO]: Preparing spawn area: 9%
[23:37:47] [Worker-Main-2/INFO]: Preparing spawn area: 10%
[23:37:48] [Worker-Main-6/INFO]: Preparing spawn area: 13%
[23:37:48] [Worker-Main-3/INFO]: Preparing spawn area: 15%
[23:37:49] [Worker-Main-5/INFO]: Preparing spawn area: 17%
[23:37:49] [Worker-Main-2/INFO]: Preparing spawn area: 20%
[23:37:50] [Worker-Main-2/INFO]: Preparing spawn area: 23%
[23:37:50] [Worker-Main-4/INFO]: Preparing spawn area: 25%
[23:37:51] [Worker-Main-7/INFO]: Preparing spawn area: 29%
[23:37:51] [Worker-Main-4/INFO]: Preparing spawn area: 32%
[23:37:52] [Worker-Main-4/INFO]: Preparing spawn area: 34%
[23:37:52] [Worker-Main-3/INFO]: Preparing spawn area: 37%
[23:37:53] [Worker-Main-5/INFO]: Preparing spawn area: 40%
[23:37:53] [Worker-Main-4/INFO]: Preparing spawn area: 43%
[23:37:54] [Worker-Main-7/INFO]: Preparing spawn area: 46%
[23:37:54] [Worker-Main-4/INFO]: Preparing spawn area: 48%
[23:37:55] [Worker-Main-5/INFO]: Preparing spawn area: 53%
[23:37:55] [Worker-Main-5/INFO]: Preparing spawn area: 55%
[23:37:56] [Worker-Main-7/INFO]: Preparing spawn area: 58%
[23:37:56] [Worker-Main-7/INFO]: Preparing spawn area: 60%
[23:37:57] [Worker-Main-6/INFO]: Preparing spawn area: 64%
[23:37:57] [Worker-Main-6/INFO]: Preparing spawn area: 68%
[23:37:58] [Worker-Main-2/INFO]: Preparing spawn area: 70%
[23:37:58] [Worker-Main-1/INFO]: Preparing spawn area: 74%
[23:37:59] [Worker-Main-5/INFO]: Preparing spawn area: 77%
[23:37:59] [Worker-Main-3/INFO]: Preparing spawn area: 81%
[23:38:00] [Worker-Main-1/INFO]: Preparing spawn area: 84%
[23:38:00] [Worker-Main-3/INFO]: Preparing spawn area: 87%
[23:38:01] [Worker-Main-3/INFO]: Preparing spawn area: 90%
[23:38:01] [Worker-Main-6/INFO]: Preparing spawn area: 94%
[23:38:02] [Worker-Main-6/INFO]: Preparing spawn area: 97%
[23:38:02] [Server thread/INFO]: Time elapsed: 19828 ms
[23:38:02] [Server thread/INFO]: Done (23.425s)! For help, type "help"
We now have a terminal where we can administer the Minecraft server by typing commands.
Type Ctrl+C to stop the server.
Notice that we are running the server with the
-noguiswitch as it is preferable on server environments. You can remove this switch to use the server GUI.
#Step 5: Launch Minecraft Java server in screen
Now, install screen, which is a terminal multiplexer application. It will allow us to detach and reattach to our Minecraft server when needed. This will also allow you to quit your terminal while keeping the Minecraft server running.
Run the following command to install screen:
sudo apt install screen -y
Once screen is installed, we can launch the server in a detached screen terminal:
screen -S mc_Java_server -dm Java -Xmx1024M -Xms1024M -jar server.jar nogui
Feel free to adjust the memory parameters
XmxandXmsto your liking - the more users connected to your servers, the more RAM you need to allocate to your Minecraft server.
#Step 6: Join the Minecraft Java server
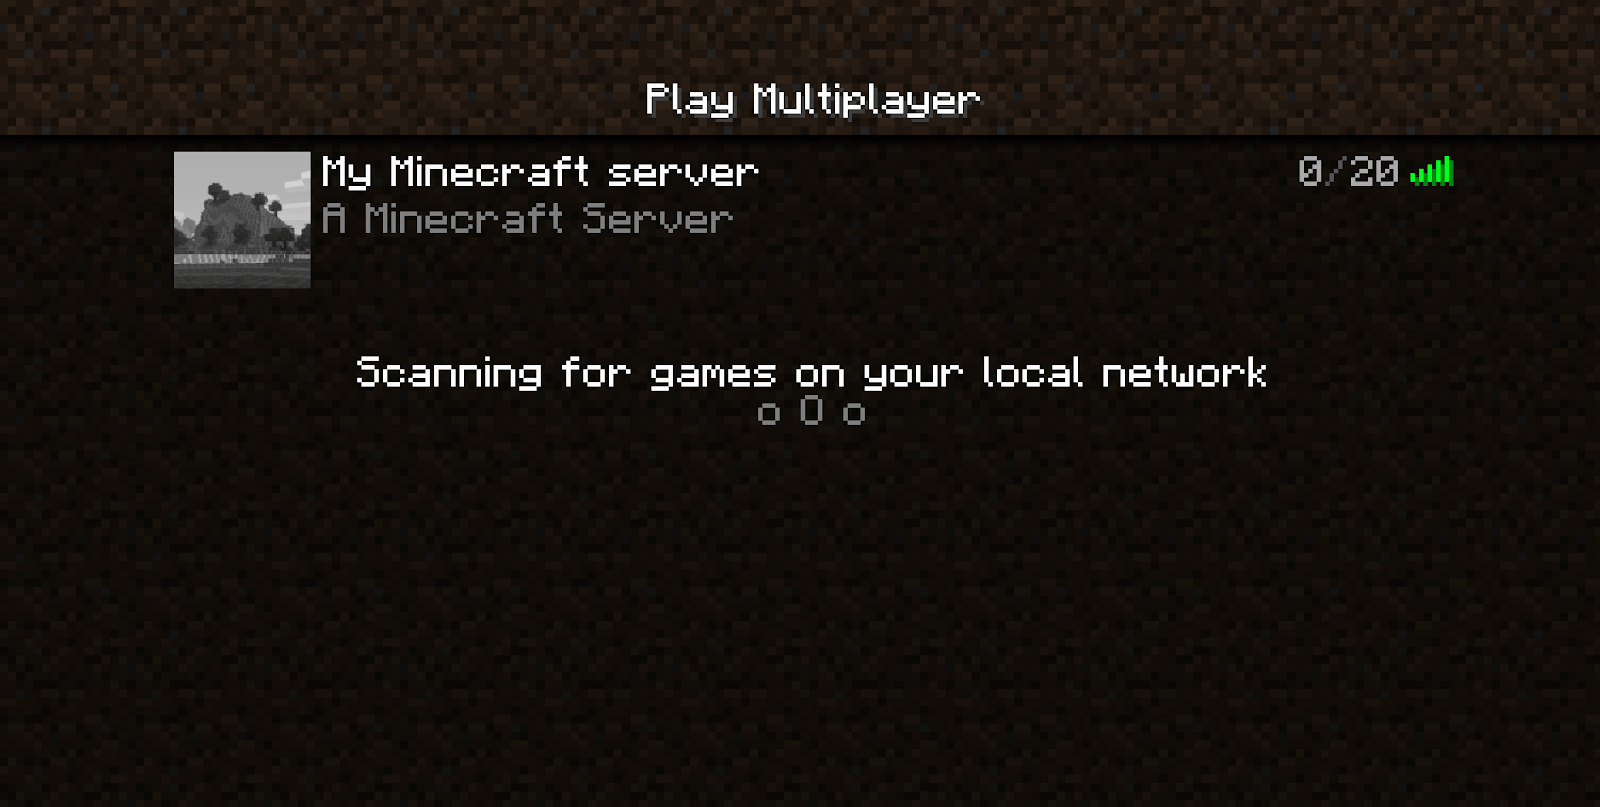
You can now add a new Minecraft server. Launch the game and go to Multiplayer. Then add your server using its IP address:
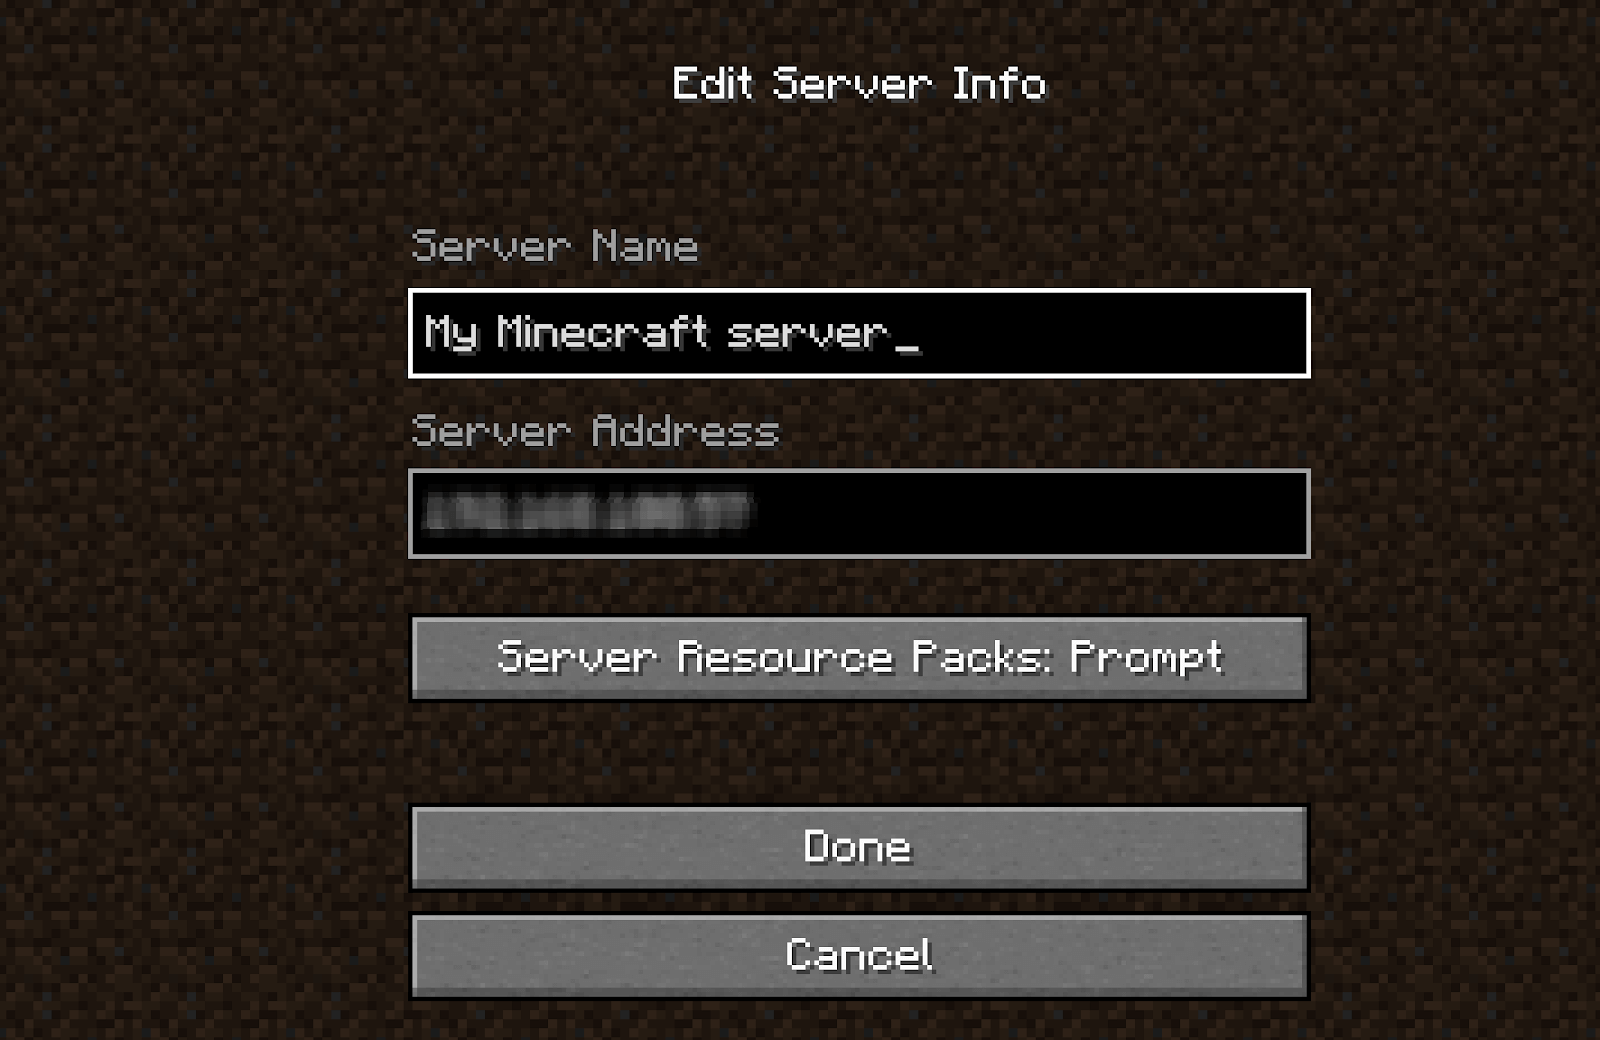
The menu should indicate that the server is reachable (green signal bar):

Click on join, and you are now in your own Minecraft world!
Also read: How much does a Minecraft server cost?
#2. Install Minecraft on Ubuntu: Bedrock edition
While the Minecraft Bedrock edition runs only on Windows 10 and 11 and consoles, you can install its server application on Ubuntu. Follow the steps below to proceed.
#Step 1: Install Minecraft Bedrock server
Download the Bedrock server in the /tmp folder:
cd /tmp
wget https://minecraft.azureedge.net/bin-linux/bedrock-server-1.20.51.01.zip
You can find the link to the latest Minecraft Bedrock server on Minecraft website:
Right-click on the Download button and click on copy link.
We can now extract the files in the /usr/local/games/minecraft_server/bedrock:
apt-get install unzip
sudo unzip -d /usr/local/games/minecraft_server/bedrock bedrock-server-1.20.51.01.zip
Let us now fix the permission:
sudo chown -R minecraft: /usr/local/games/minecraft_server/
#Step 2: Launch Minecraft Bedrock server
We now switch to our Minecraft user:
sudo su - minecraft -s /bin/bash
We need to go into the bedrock folder:
cd bedrock
Create a file called launch_mc_bedrock_server.sh with nano and paste the following content in it:
#!/bin/bash
LD_LIBRARY_PATH=. ./bedrock_server
Make the file executable:
chmod +x launch_mc_bedrock_server.sh
We can finally launch our Bedrock server, in a screen, to keep the server running:
screen -S mc_bedrock_server ./launch_mc_bedrock_server.sh
You should see an output similar to the one below:
NO LOG FILE! - setting up server logging...
[2024-01-24 10:09:28:218 INFO] Starting Server
[2024-01-24 10:09:28:218 INFO] Version: 1.20.51.01
[2024-01-24 10:09:28:218 INFO] Session ID: 5405dc57-73b9-4c43-b5c9-4cc6869feab4
[2024-01-24 10:09:28:218 INFO] Build ID: 20414424
[2024-01-24 10:09:28:218 INFO] Branch: r/20_u5
[2024-01-24 10:09:28:218 INFO] Commit ID: 62ad6027dc354090f841dd996363408bb43fdfd4
[2024-01-24 10:09:28:218 INFO] Configuration: Publish
[2024-01-24 10:09:28:219 INFO] Level Name: Bedrock level
[2024-01-24 10:09:28:220 INFO] No CDN config file found for dedicated server
[2024-01-24 10:09:28:220 INFO] Game mode: 0 Survival
[2024-01-24 10:09:28:220 INFO] Difficulty: 1 EASY
[2024-01-24 10:09:28:221 INFO] Content logging to console is enabled.
[2024-01-24 10:09:28:543 INFO] Opening level 'worlds/Bedrock level/db'
[2024-01-24 10:09:29:080 INFO] IPv4 supported, port: 19132: Used for gameplay and LAN discovery
[2024-01-24 10:09:29:080 INFO] IPv6 supported, port: 19133: Used for gameplay
[2024-01-24 10:09:29:086 INFO] Server started.
[2024-01-24 10:09:29:086 INFO] ================ TELEMETRY MESSAGE ===================
[2024-01-24 10:09:29:086 INFO] Server Telemetry is currently not enabled.
[2024-01-24 10:09:29:086 INFO] Enabling this telemetry helps us improve the game.
[2024-01-24 10:09:29:086 INFO]
[2024-01-24 10:09:29:086 INFO] To enable this feature, add the line 'emit-server-telemetry=true'
[2024-01-24 10:09:29:086 INFO] to the server.properties file in the handheld/src-server directory
[2024-01-24 10:09:29:086 INFO] ======================================================
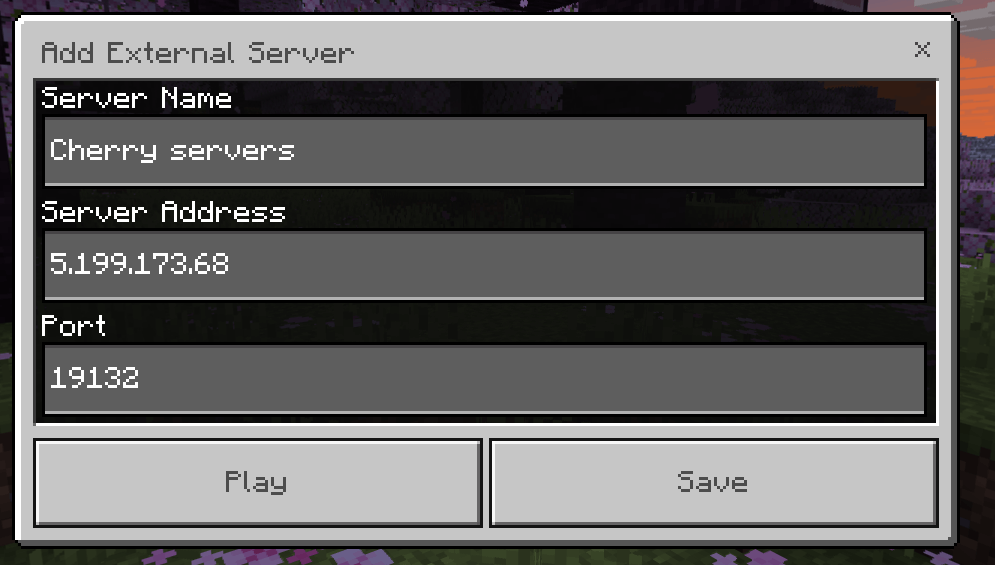
#Step 3: Join the Minecraft Bedrock server
Now that our server is running, you can launch the game and join the Minecraft server by clicking the Add server button in the Servers section.

This will spawn you in a new world in Minecraft Bedrock!
#Conclusion
In this tutorial, I've shown how to install Minecraft on Ubuntu: Java and Bedrock editions. You've learned the basics of setting up and running your own Minecraft servers on Ubuntu, as well as cross-platform compatibility, how to host a Minecraft server and general Minecraft server requirements. Knowing this helps you choose the server editions that will work best for you!