Chainlink Node Requirements: How to Set up a Chainlink Node


As the blockchain technology continues to grow and evolve, smart contracts have become an important and major part of the ecosystem, they automate agreements and transactions without the need of a middleman.
But there’s a catch: smart contracts can only “see” what’s happening on the blockchain. So when they need information from the outside world for instance weather data, sports scores, or market prices — they hit a wall.
That’s where oracles come in.
Oracles act as the bridge between blockchains and real-world data, making it possible for smart contracts to react to things happening off-chain. And when it comes to oracles, Chainlink is one of the most trusted names out there. It’s a decentralized oracle network that lets smart contracts securely tap into external data and services.
If you’re someone who wants to be part of that ecosystem, running a Chainlink node is a solid way to do it. You’ll help feed data to smart contracts and, in return, earn rewards for your contribution.
In this guide, I'll briefly explain Chainlink, its key roles, and Chainlink Node requirements and then show you how to run a Chainlink node.
#What is Chainlink?
Chainlink helps smart contracts get real-world data they can’t access on their own. On its own, a smart contract cannot access anything outside the blockchain, i.e. web APIs, external data feeds, or even traditional banking systems. Chainlink helps to fix that, making it possible for smart contracts to securely pull in off-chain data and send data back out too.
The network is powered by a bunch of independent node operators. These nodes gather, verify, and deliver data from different sources to smart contracts. Because it’s decentralized, Chainlink avoids the problems that come with relying on a single data source — like one point of failure or the risk of someone tampering with the data.
#What is a Chainlink Node?
Chainlink nodes are like the unsung heroes of the Chainlink network. Basically, they're individual units that grab outside information and feed it directly to smart contracts. Think of them as always on the lookout for data requests on the blockchain. Once they spot one, they zip out to fetch the needed info from various off-chain sources and then shoot it right back to the smart contract that asked for it.
What's cool is that folks who run these nodes can tweak them to connect with specific APIs, pull together data in different ways, and handle all sorts of tasks based on what's needed. By doing all this, they're absolutely essential in keeping the Chainlink network honest and running smoothly.
#Key Roles of a Chainlink Node
Chainlink nodes perform several essential functions within the network:
-
Data Retrieval: Nodes fetch data from off-chain sources, such as APIs, databases, or other external systems, as requested by smart contracts.
-
Data Validation: They validate the authenticity and accuracy of the retrieved data to ensure it meets the required standards.
-
Data Delivery: Validated data is then transmitted back to the blockchain, where it can be utilized by smart contracts.
-
Job Execution: Nodes execute predefined jobs that dictate how data should be processed and delivered, allowing for complex workflows and computations.
-
Security Maintenance: By operating reliably and securely, nodes uphold the trustworthiness of the Chainlink network, preventing malicious activities and data tampering.
#Chainlink Node Requirements
Running a Chainlink node isn't just a walk in the park; it really needs a robust setup to make sure everything's reliable, secure, and performs at its best. Whether you're just dabbling with a node for development or planning to throw it into a live production setting, you'll need to hit certain hardware and software marks. We've got the lowdown on the recommended Chainlink node requirements specs, straight from Chainlink's official guidelines, right here.
#Chainlink Node Hardware Requirements
The hardware requirements for running a Chainlink node depend on the workload it handles, particularly the number of jobs it services.
-
Minimum for Development and Testing:
-
CPU: 2 cores
-
RAM: 4 GB
-
Storage: 100 GB SSD
-
-
Recommended for Production Environments:
-
CPU: 4 cores
-
RAM: 16 GB
-
Storage: 200 GB SSD
-
Note: If you're running a local PostgreSQL database alongside the Chainlink node, additional resources may be necessary to ensure optimal performance.
#Chainlink Node Software Requirements
-
Operating System: Ubuntu 22.04 or 24.04 server is recommended for compatibility.
-
Docker: For containerizing the Chainlink node and its dependencies.
-
Docker Compose: To manage multi-container Docker applications.
-
PostgreSQL: Version 12 or later, serving as the database for the Chainlink node.
-
Ethereum Client Access: A connection to an Ethereum node with WebSocket support. For this guide, we'll utilize Alchemy as our Ethereum client provider.
Security Tip: Ensure that your PostgreSQL instance is secured, especially if it's accessible over the network. Configure
pg_hba.confandpostgresql.confappropriately, and consider using SSL connections.
By adhering to these Chainlink requirements, you'll establish a robust foundation for your node, ensuring it operates efficiently and securely within the decentralized oracle network.
#Choosing the Right Infrastructure
For this guide, we’ll be using a virtual server with dedicated compute resources suitable for running a production-ready Chainlink node. While we will be using Cherry Servers’ Performance VDS 2 as an example, you can run a Chainlink node on any cloud provider or bare-metal server that offers similar specs.
Recommended Minimum Specs:
-
Processor: 4 vCores @ 4.5GHz or equivalent
-
Memory: 16GB RAM
-
Storage: 200GB NVMe SSD
-
Network: 1Gbps uplink with at least 10TB egress traffic
-
Operating System: Ubuntu 20.04+ (we recommend Ubuntu 24.04)
-
Remote Access: SSH or console-based remote management
This type of setup ensures stable performance and fast disk I/O—both crucial for handling job processing and data interactions efficiently.
You can provision a server with these specs on many providers such as AWS, Google Cloud, DigitalOcean, Cherry Servers, or even your own hardware.
#Environment Setup
#Step 1: Provisioning Your Server
-
Select the Performance VDS 2 Plan:
-
Access Your Server:
-
Once the server is deployed, access it via SSH:
ssh root@YOUR_SERVER_IP -i ~/.ssh/id_rsa -
Replace
YOUR_SERVER_IPwith the actual IP address of your Cherry Servers instance.
Note that for this step to work successfully, you should have generated an SSH key and added the SSH public key to your remote server.
-
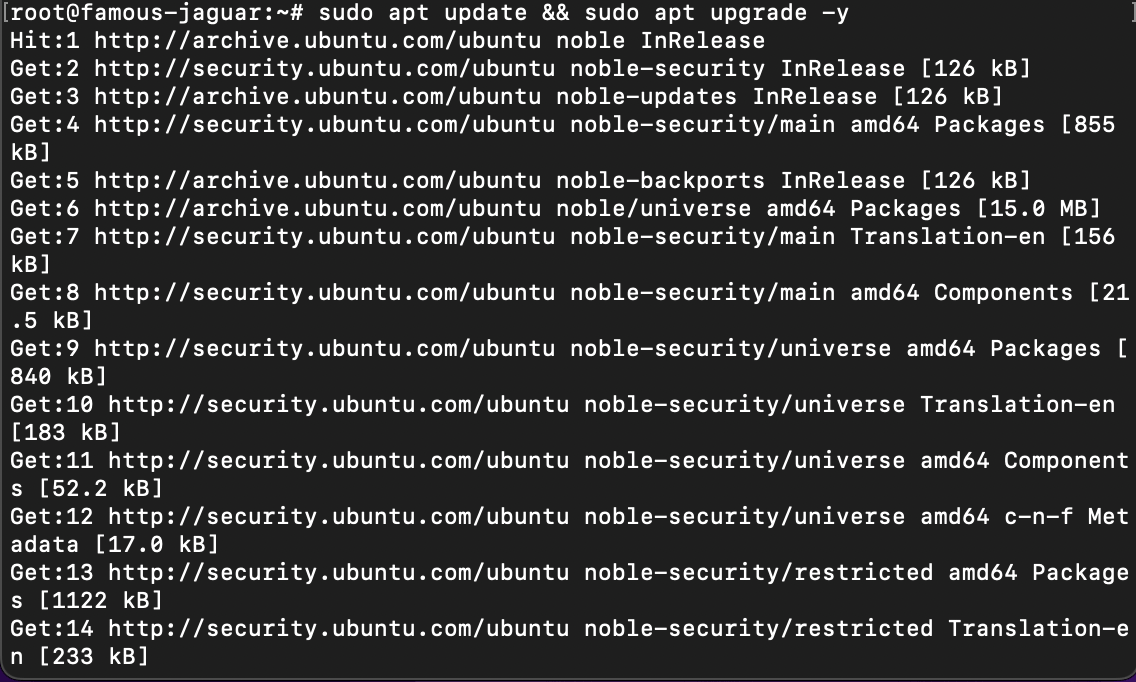
#Step 2: Update and Upgrade The System
Ensure the system is up-to-date to avoid compatibility issues:
sudo apt update && sudo apt upgrade -y
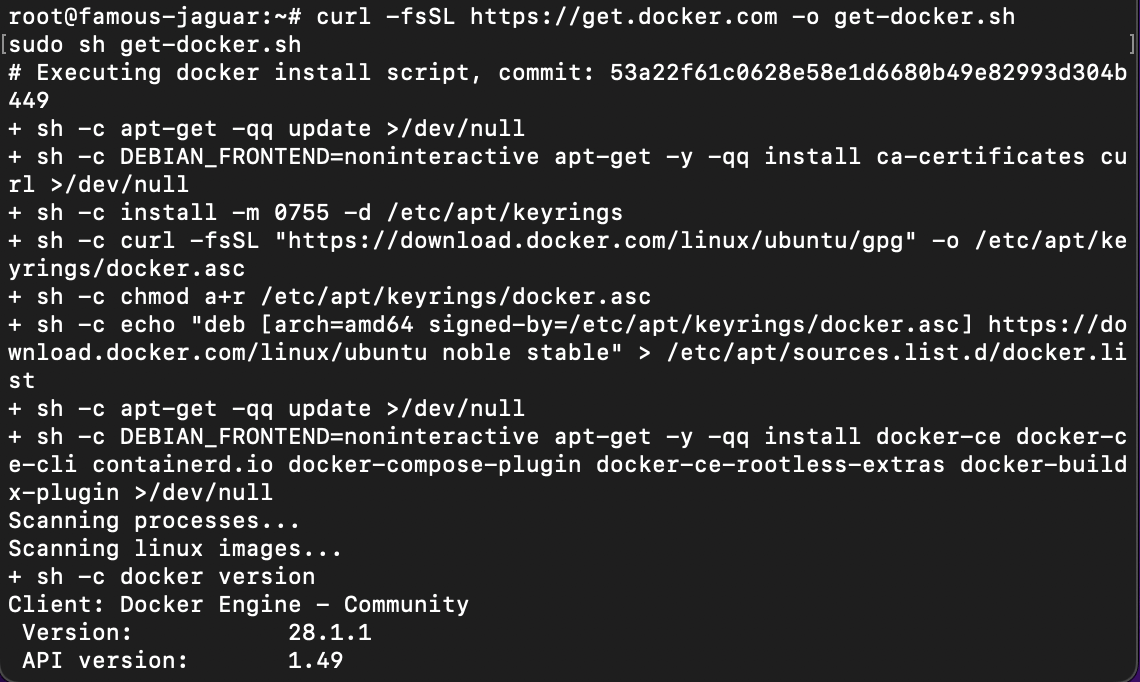
#Step 3: Install Docker
Docker is essential for containerizing the Chainlink node and its dependencies.
-
Install Docker:
curl -fsSL https://get.docker.com -o get-docker.sh
sudo sh get-docker.sh
-
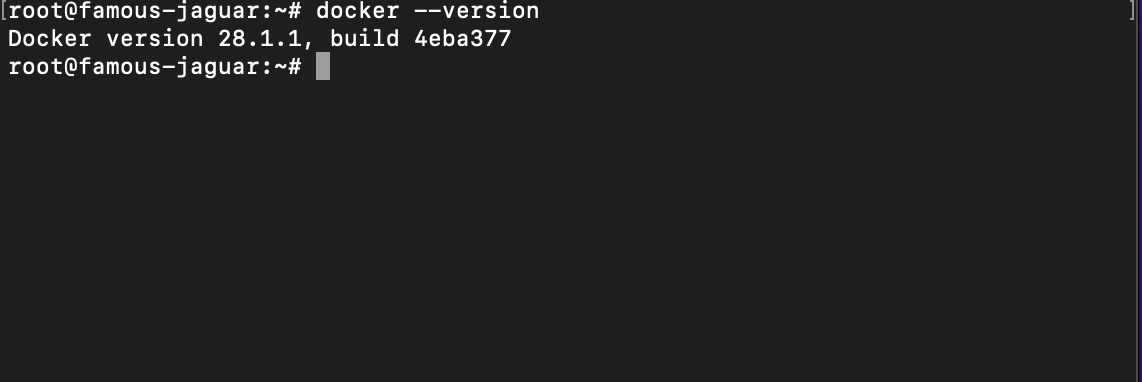
Add Your User to the Docker Group:
sudo usermod -aG docker $USER newgrp docker -
Verify Docker Installation:
docker --version
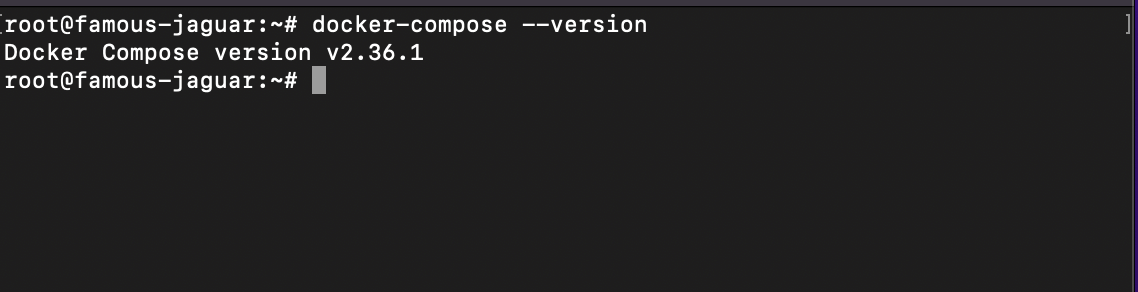
#Step 4: Install Docker Compose
Docker Compose simplifies the management of multi-container Docker applications.
-
Download Docker Compose:
sudo curl -L "https://github.com/docker/compose/releases/latest/download/docker-compose-$(uname -s)-$(uname -m)" -o /usr/local/bin/docker-compose -
Apply Executable Permissions:
sudo chmod +x /usr/local/bin/docker-compose -
Verify Docker Compose Installation:
docker-compose --version
#Step5: Setting Up PostgreSQL with Docker
PostgreSQL serves as the database for the Chainlink node.
docker run --name cl-postgres -e POSTGRES_PASSWORD=mysecretpassword -p 5432:5432 -d postgres
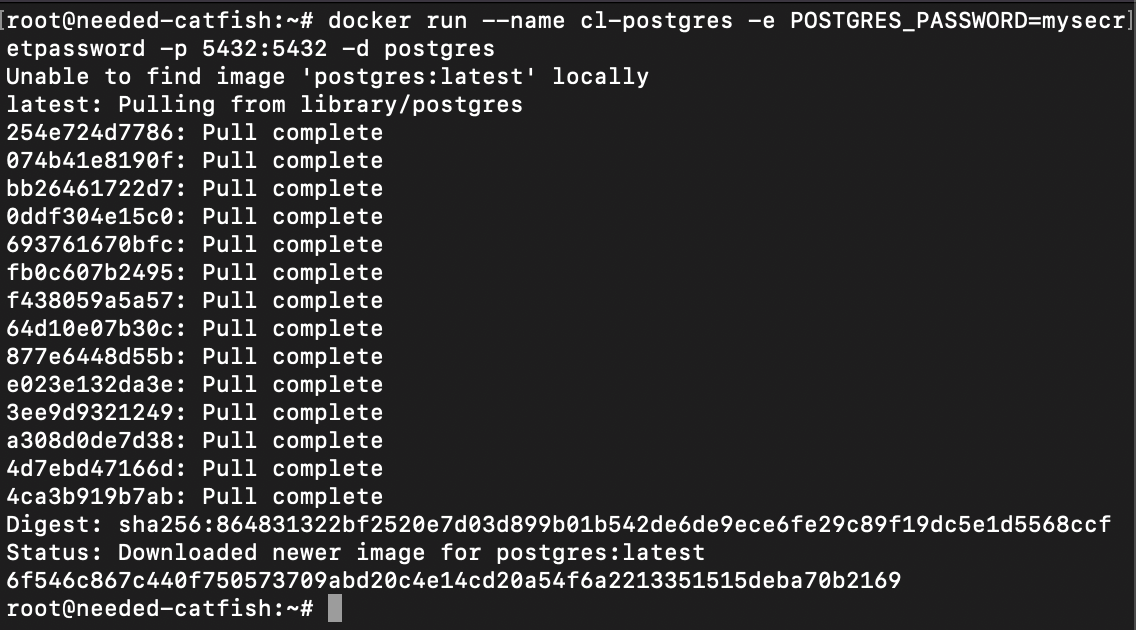
To confirm that the container is running:
docker ps -a -f name=cl-postgres
You should see an entry indicating that the container is up and running, with port 5432 exposed.
#How to Set up a Chainlink node: Configuring the Chainlink Node with Alchemy Integration
With your environment set up and all necessary software installed, the next step is to configure your Chainlink node to interact with the Ethereum blockchain via Alchemy. This involves setting up configuration files that define how your node operates and connects to external services.
#Step 1: Create the Configuration Directory
Begin by creating a dedicated directory to store your Chainlink node's configuration and data:
mkdir -p ~/.chainlink && cd ~/.chainlink
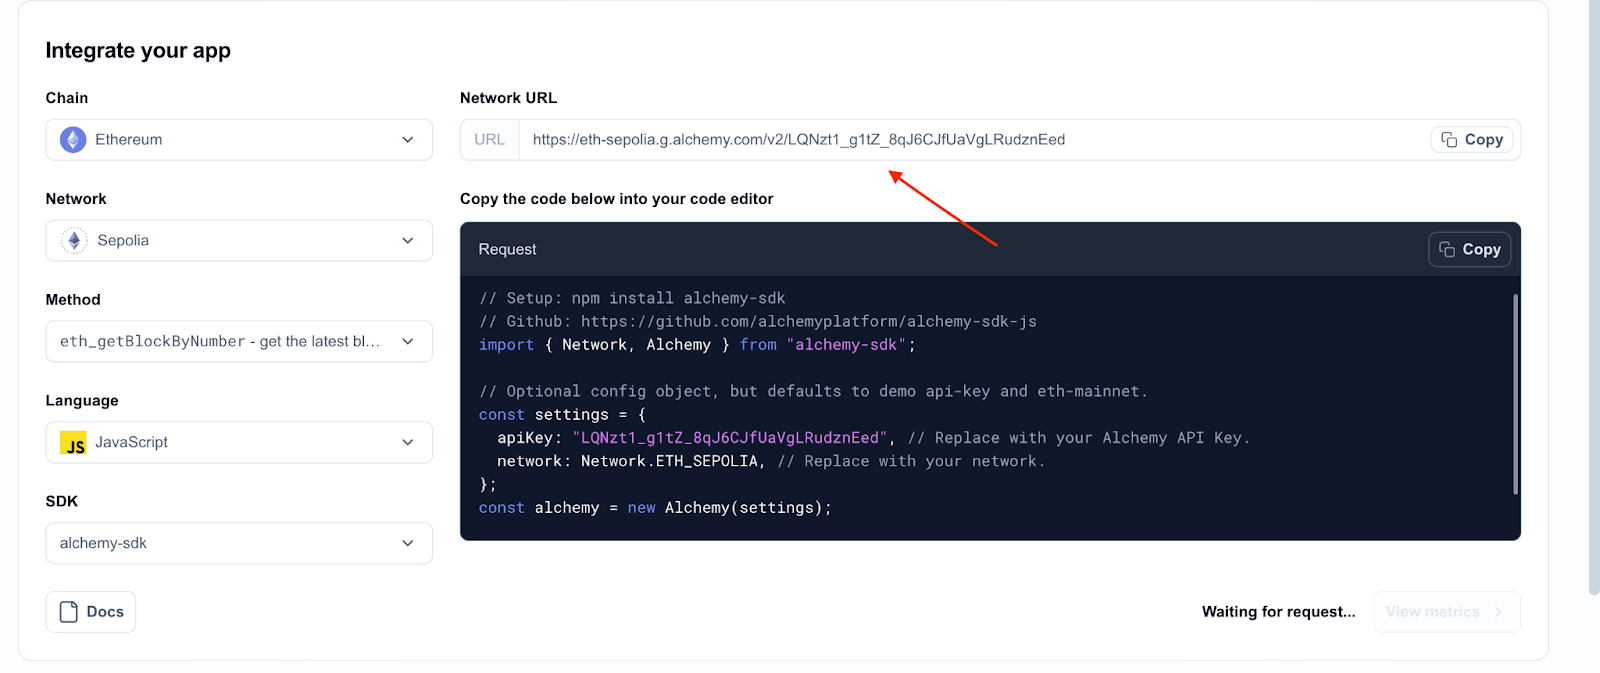
#Step 2: Obtain Your Alchemy WebSocket URL
Alchemy provides a reliable Ethereum node service that your Chainlink node can connect to. To obtain your WebSocket URL:
-
Log in to your Alchemy dashboard.
-
Create a new app or select an existing one.
-
Choose the Ethereum network you wish to connect to (e.g., Mainnet, Sepolia).
-
Navigate to the app's settings and copy the WebSocket URL and HTTP URL, which typically looks like:
wss://eth-sepolia.g.alchemy.com/v2/your-api-key
https://eth-sepolia.g.alchemy.com/v2/your-api-key


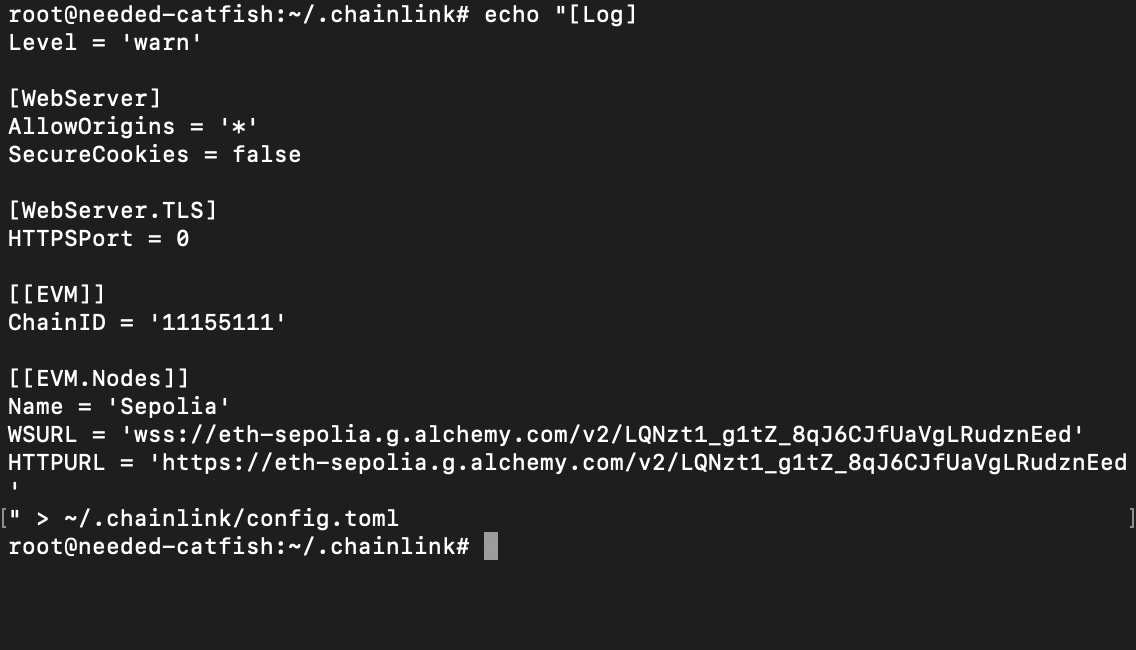
#Step 3: Create the config.toml File
This file contains your node's configuration settings. Replace CHANGE_ME with your actual Ethereum provider URLs:
echo "[Log]
Level = 'warn'

[WebServer]
AllowOrigins = '*'
SecureCookies = false

[WebServer.TLS]
HTTPSPort = 0

[[EVM]]
ChainID = '11155111'

[[EVM.Nodes]]
Name = 'Sepolia'
WSURL = 'wss://CHANGE_ME'
HTTPURL = 'https://CHANGE_ME'
" > ~/.chainlink/config.toml
#Explanation of Key Variables in config.toml
-
[Log]Level: Sets the verbosity of logs. Options includedebug,info,warn, anderror. For development,debugprovides detailed logs; for production,warnorerroris recommended.
-
[WebServer]-
AllowOrigins: Specifies allowed origins for CORS. Setting it to'*'allows all origins. -
SecureCookies: Determines if cookies should be secure. Set tofalseif not using HTTPS; set totruein production with HTTPS.
-
-
[WebServer.TLS]HTTPSPort: Port for HTTPS connections. Setting it to0disables TLS. Configure TLS separately if needed.
-
[[EVM]]ChainID: The chain ID for the Ethereum network. For Ethereum Mainnet, use1; for Sepolia testnet, use11155111.
-
[[EVM.Nodes]]-
Name: A descriptive name for the Ethereum node connection. -
WSURL: The WebSocket URL of your Ethereum client (e.g., Alchemy). -
HTTPURL: The HTTP URL of your Ethereum client.
-
These configurations are essential for your Chainlink node to connect to the Ethereum network and operate correctly.
#Step 4. Create the secrets.toml File
This file stores sensitive information like your keystore password and database URL. Replace mysecretkeystorepassword and mysecretpassword with your chosen passwords:
echo "[Password]
Keystore = 'mysecretkeystorepassword'

[Database]
URL = 'postgresql://postgres:mysecretpassword@host.docker.internal:5432/postgres?sslmode=disable'
" > ~/.chainlink/secrets.toml
Note: The
host.docker.internaladdress allows the Chainlink container to communicate with the PostgreSQL container running on the host machine.
#Step 5. (Optional) Create the .api File
This file sets your API credentials for the Chainlink Operator UI. Replace the placeholders with your desired email and password:
echo "your_email@example.com
your_secure_password" > ~/.chainlink/.api
Note: The password must be between 16 and 50 characters.
#Step 6. Start the Chainlink Node
Navigate to your configuration directory and run the Chainlink node Docker container:
cd ~/.chainlink && docker run --platform linux/x86_64/v8 --name chainlink -v ~/.chainlink:/chainlink -it -p 6688:6688 --add-host=host.docker.internal:host-gateway smartcontract/chainlink:2.23.0 node -config /chainlink/config.toml -secrets /chainlink/secrets.toml start -a /chainlink/.api
Note: Replace
2.23.0with the specific version of the Chainlink Docker image you wish to use.
To detach from the container without stopping it, press Ctrl + P followed by Ctrl + Q.
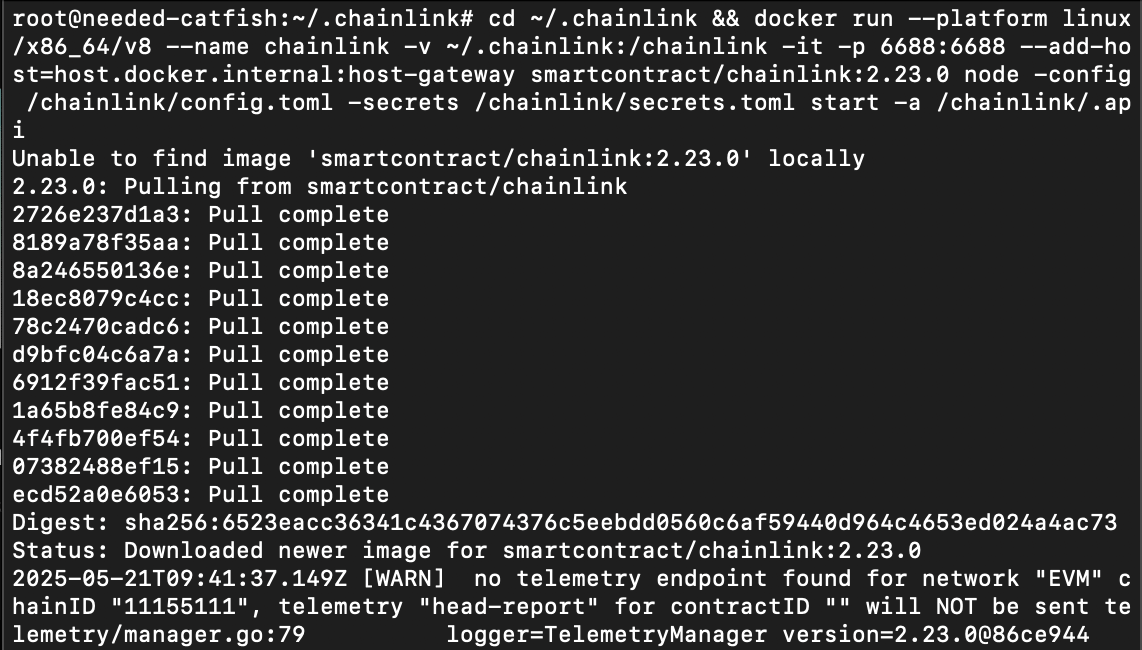
Verify that the container is running:
docker ps -a -f name=chainlink
You should see the Chainlink container listed as running.
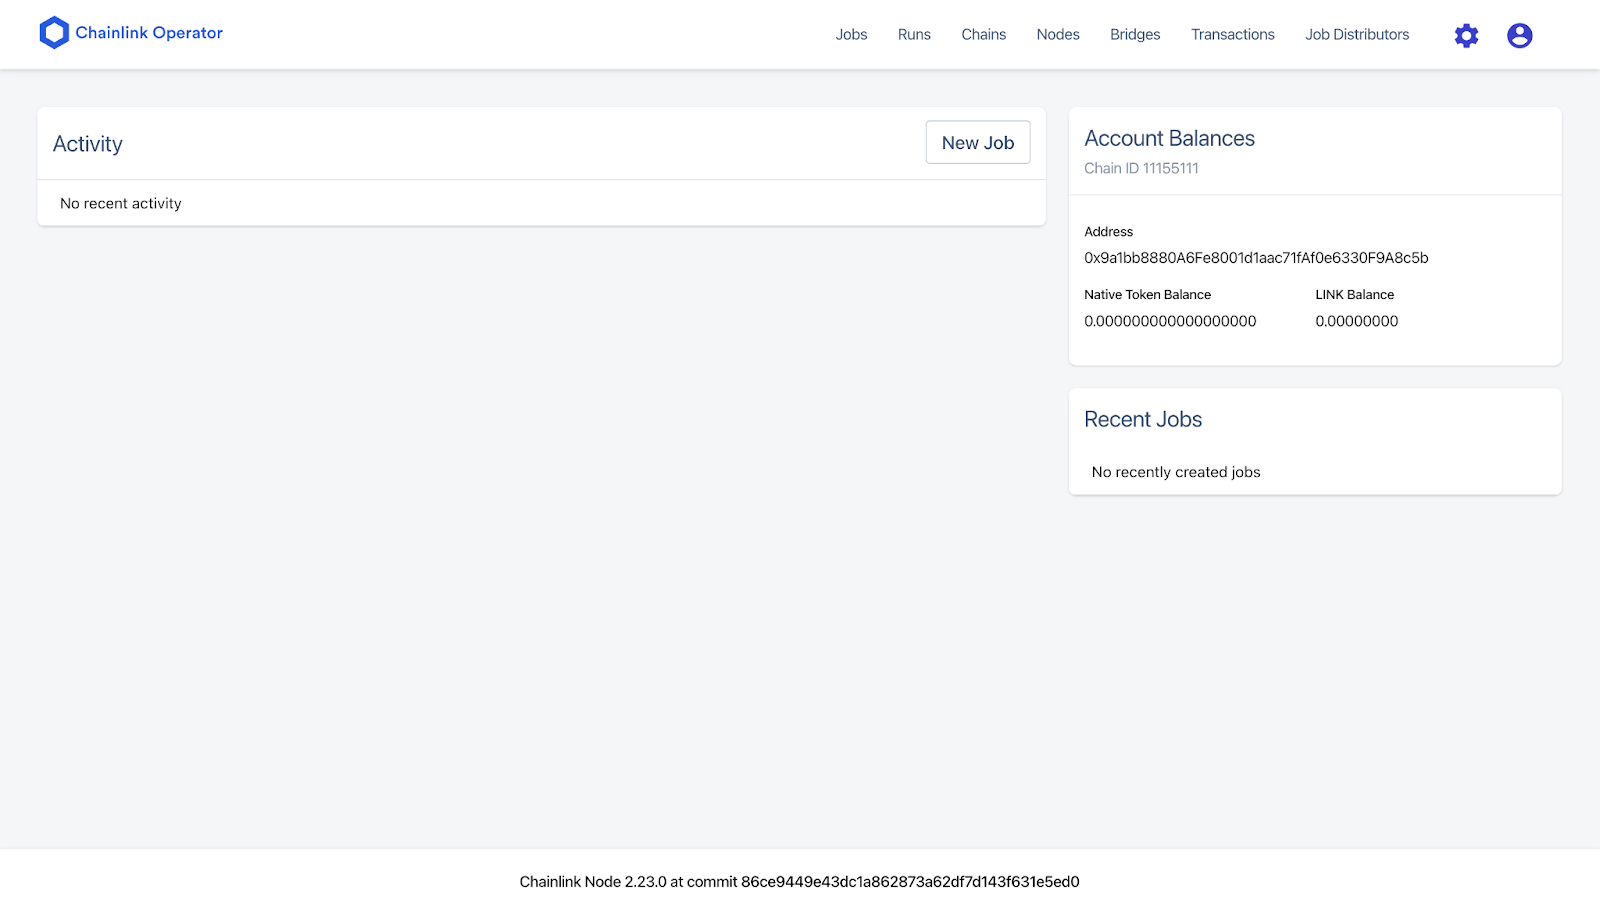
Once your Chainlink node is up and running, you can access the Operator UI to manage your node's operations. This interface allows you to monitor jobs, configure settings, and oversee the node's performance.
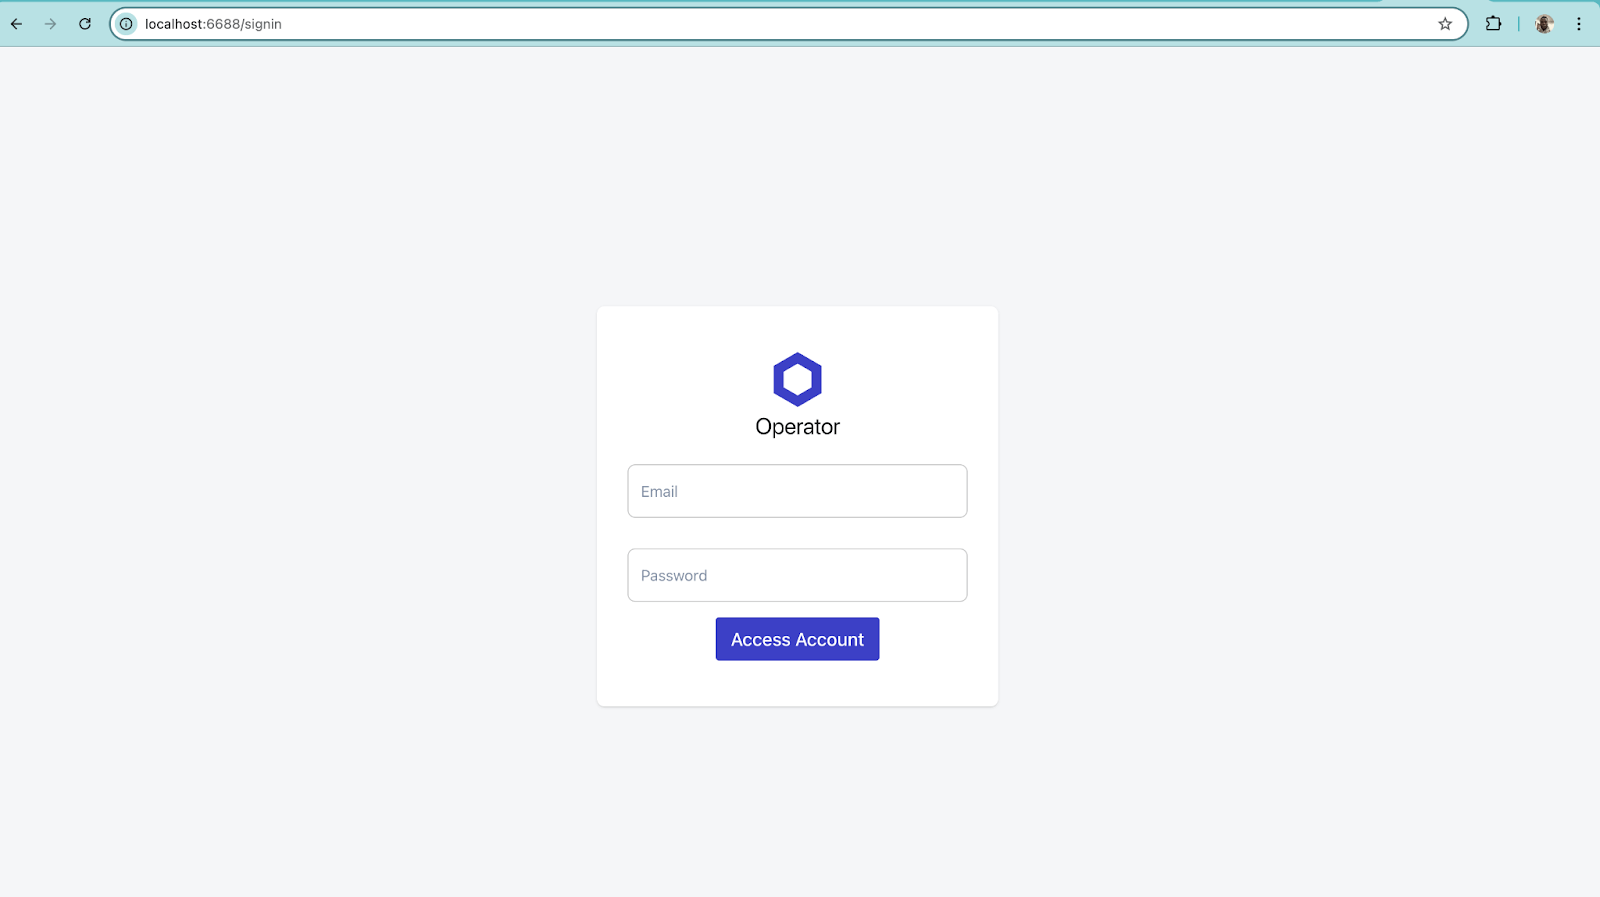
#Accessing the Operator UI
#Local Access
If you're operating the Chainlink node on your local machine, simply navigate to:
http://localhost:6688
Use the API credentials you set up earlier to log in.
#Remote Access via Public IP
For nodes hosted on a Virtual Private Server (VPS) or remote server, you can access the Operator UI using the server's public IP address. For example:
http://5.199.173.200:6688
Replace 5.199.173.200 with your server's actual IP address.
⚠️ Security Warning: Exposing port 6688 to the public internet is not recommended due to potential security vulnerabilities. It's advisable to restrict access to the Operator UI to trusted networks only.
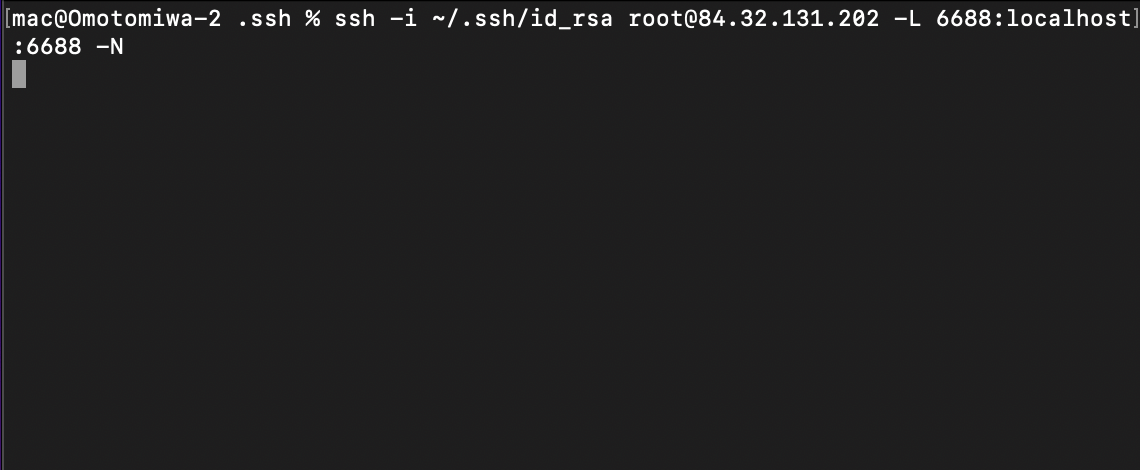
#Secure Access via SSH Tunnel
A more secure method to access the Operator UI is by establishing an SSH tunnel. This approach forwards the node's port to your local machine, allowing you to interact with the UI securely.
Run the following command on your local machine:
ssh -i /path/to/your/private_key.pem username@your_vps_ip -L 6688:localhost:6688 -N
-
Replace
/path/to/your/private_key.pemwith the path to your SSH private key. -
Replace
usernamewith your VPS username. -
Replace
your_vps_ipwith your VPS's IP address.
After establishing the SSH tunnel, access the Operator UI by navigating to:
http://localhost:6688
This method ensures that the Operator UI is not exposed to the public internet, enhancing the security of your Chainlink node.
#🧭 What's Next: Preparing Your Chainlink Node
#1. Fund Your Node's Wallet
To enable your Chainlink node to perform operations on the Sepolia testnet, you'll need to fund its wallet with Sepolia ETH and testnet LINK tokens.
-
Sepolia ETH: Required for transaction fees. You can obtain Sepolia ETH from the following faucets:
-
Nebulum Sepolia Faucet
-
Testnet LINK Tokens: Necessary for job executions. Acquire them from the Chainlink Sepolia Faucet.
After funding, verify that your wallet balances reflect in both your wallet interface and the Chainlink Operator UI under the "Keys" or "Wallet" section.

#2. Deploy the Operator Contract
The Operator contract acts as an intermediary between your Chainlink node and smart contracts requesting data. Deploying this contract is essential for your node to handle requests. For detailed instructions on deploying the Operator contract, refer to the Fulfilling Requests Guide.
#3. Create and Configure Jobs
Jobs define the tasks your Chainlink node performs in response to data requests. Setting up jobs involves specifying the type of data to fetch, the source, and how to process it. To learn more about creating and configuring jobs, consult the Fulfilling Requests Guide.
#🔚 Wrapping Up
In this guide, we've walked through the essential steps to get your Chainlink node up and running:
-
Node Setup: Configured the Chainlink node using Docker, ensuring it's connected to the Sepolia testnet.
-
Operator UI Access: Accessed the Operator UI to manage and monitor the node's operations.
-
Wallet Funding: Funded the node's wallet with Sepolia ETH and testnet LINK tokens using reliable faucets.
These steps have prepared the node to interact with smart contracts and fulfill data requests.
#🚀 Next Steps
To fully leverage your Chainlink node's capabilities, consider exploring the following:
-
Deploying the Operator Contract: This contract enables your node to process and fulfill data requests from smart contracts.
-
Creating and Configuring Jobs: Define tasks for your node to perform, such as fetching data from APIs or triggering smart contract functions.
For detailed guidance on these topics, refer to the official Chainlink documentation:
These resources provide comprehensive instructions to help you deploy the Operator contract, create jobs, and integrate your node with smart contracts effectively.