How to Configure SSL on PostgreSQL


Database security is usually one of the top-of-mind concerns for organizations. Out of the box, PostgreSQL does not provide sufficient safeguards to ensure data protection and privacy. As such, additional steps need to be taken to ensure data privacy and security.
Enabling SSL authentication for connections made to the server is one of the ways of ensuring data privacy. PostgreSQL provides support for SSL connections made to the database server, thus ensuring that all communications exchanged between the client and server are encrypted.
In this tutorial, we will demonstrate how to enable SSL connections for the PostgreSQL database server.
Run your PostgreSQL deployments in a high-performing and cost-effective open cloud infrastructure. Cherry Servers' bare metal cloud and virtual servers offer automatic scaling, pay-as-you-go pricing, and free 24/7 technical support.
#Step 1: Install PostgreSQL Server
First off, you need to install the PostgreSQL server on your Linux system. if PostgreSQL is already installed on your server, feel free to skip to the next step.
In this guide, we will start off by installing the latest version of PostgreSQL ( PostgreSQL 14 ) on Rocky Linux 8.
First, log into your server via SSH. Next, refresh the repositories and upgrade the packages to their latest versions.
sudo dnf update
The latest version of PostgreSQL is not provided by the AppStream repository. To verify this, list the available PostgreSQL modules.
dnf module list postgresql -y
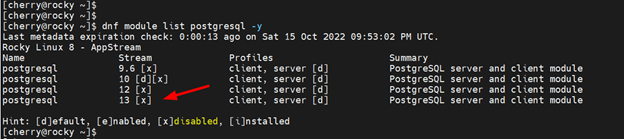
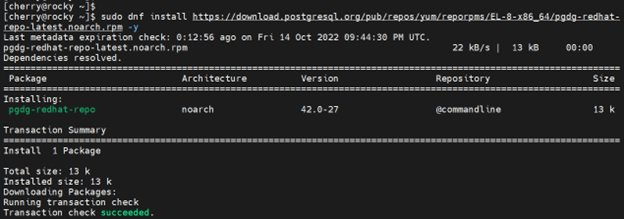
From the above output, the latest version of PostgreSQL provided by the repository is PostgreSQL 13.x. To install the very latest version of PostgreSQL, add the PostgreSQL repository to your system.
sudo dnf install https://download.postgresql.org/pub/repos/yum/reporpms/EL-8-x86_64/pgdg-redhat-repo-latest.noarch.rpm -y
Next, disable the default PostgreSQL repository:
sudo dnf module disable postgresql -qy
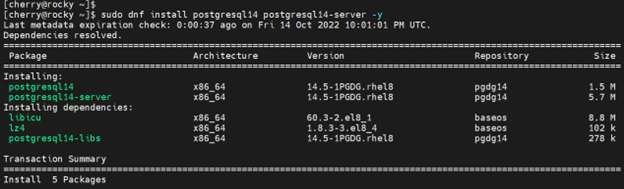
Next, install PostgreSQL 14 Server and client as follows.
sudo dnf install postgresql14 postgresql14-server -y
Thereafter, initialize the PostgreSQL database as follows.
sudo /usr/pgsql-14/bin/postgresql-14-setup initdb

By default, PostgreSQL does not start automatically when installed on Rocky Linux. Therefore, start the database service.
$ sudo systemctl start postgresql-14
Further, enable it to start on system startup.
$ sudo systemctl enable postgresql-14
To confirm that the PostgreSQL service is running, execute the command:
$ sudo systemctl status postgresql-14
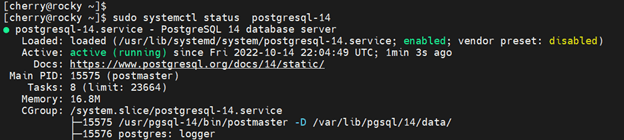
The output above confirms that the PostgreSQL server is up and running. By default, PostgreSQL listens on port 5432 and you can confirm this by running the following ss command.
$ ss -pnltu | grep 5432
You should get the following output which confirms that everything is working just fine.

#Step 2: Configure a Password For The Postgres User
When PostgreSQL is installed, a default user called postgres is created in the system. This is a super user and possesses access privileges to perform virtually any task including managing databases, tables, schema functions, and any other object in the PostgreSQL database.
The Postgres user uses the ident authentication method and no password is set. For security reasons, it is recommended that you set a password to prevent potential breaches.
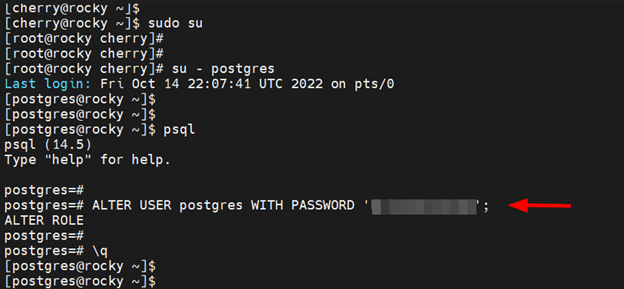
To do so, switch to the root user
$ sudo su
Next, switch to the postgres user.
$ su - postgres
Switch to the PostgreSQL shell
$ psql
Then set the postgres user’s password using the ALTER query as shown.
ALTER USER postgres WITH PASSWORD 'your-password'
#Step 3: Generate SSL Certificates For PostgreSQL Server
For SSL to work with PostgreSQL you need to generate three certificate files:
- server.key - This is the private key file
- server.crt - This is the server certificate file
- root.crt - This is the trusted root certificate
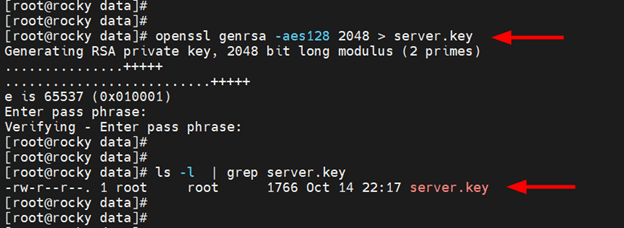
First, change the directory to PostgreSQL’s data directory as shown.
cd /var/lib/pgsql/14/data
Next, generate a 2048-bit RSA private key with AES encryption as follows.
openssl genrsa -aes128 2048 > server.key
During the creation of the private key, you will be prompted for a passphrase. Type and confirm it.
You can later confirm that the key exists by running the command:
ls -l | grep server.key
The private key has a passphrase associated with it. However, in order to use this key further, you need to remove the passphrase. To do so, run the following command:
openssl rsa -in server.key -out server.key

Once again, re-enter the passphrase and hit ENTER.
#Step 4: Apply Required Permissions and Ownership Rights
For enhanced security, you need to assign read-only permissions of the private key to the root user as shown.
chmod 400 server.key
In addition, set the ownership of the key to postgres user and group.
chown postgres.postgres server.key
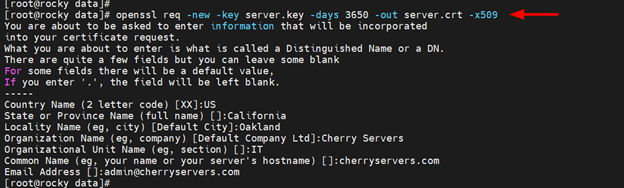
#Step 5: Create Server Certificate File
Now, generate a self-signed certificate file based on the private key. The following certificate file is valid for 365 days.
# openssl req -new -key server.key -days 365 -out server.crt -x509
The command will ask you to provide some information that will be incorporated into the certificate file. Therefore, fill in all the details accordingly.
Since you are using a self-signed certificate, you will use it as the trusted root certificate by making a copy of the server certificate file as shown.
# cp server.crt root.crt
#Step 6: Configure PostgreSQL to use SSL
The next step is to configure PostgreSQL to use SSL. Access the postgresql.conf configuration file which is located inside the data directory.
$ sudo vim /var/lib/pgsql/14/data/postgresql.conf
Under Connection Settings, locate the listen_addresses parameter and set it as follows to allow connections from all external hosts.
listen_addresses = '*'
In the SSL section, uncomment the following parameters and set the values as shown.
ssl = on
ssl_ca_file = 'root.crt'
ssl_cert_file = 'server.crt'
ssl_crl_file = ''
ssl_key_file = 'server.key'
ssl_ciphers = 'HIGH:MEDIUM:+3DES:!aNULL' # allowed SSL ciphers
ssl_prefer_server_ciphers = on
Save the changes and exit the file. Next, open the pg_hba.conf configuration file. This is the PostgreSQL client authentication configuration file that specifies which hosts are allowed to connect and how clients are authenticated.
$ sudo vim /var/lib/pgsql/14/data/pg_hba.conf
UnderIPv4 local connections, modify the line as follows to allow connection from all hosts.
host all all 0.0.0.0/0 md5
Next, add the following line at the end of the file to enable SSL and also allow connection from all hosts.
hostssl all all 0.0.0.0/0 md5
Save the changes and exit the configuration file. For the changes to come into effect, restart PostgreSQL.
$ sudo systemctl restart postgresql-14
If you have firewalld enabled, allow the Postgresql service as shown
$ sudo firewall-cmd --add-service=postgresql --permanent

$ sudo firewall-cmd --reload
#Step 7: Test SSL Connection
At this point, PostgreSQL is configured to use SSL for connections for remote connections. To do this, we will log in to the database server using the user postgres as shown
psql -U postgres -p 5432 -h 45.79.192.104
The -U flag indicates the login user we are using to access the database server
The -p flag specifies the port PostgreSQL is listening to ( 5432 by default )
The -h flag specifies the host’s IP address.
The output below confirms that SSL is enabled and that we are using a self-signed certificate.

#Conclusion
In this tutorial, we have demonstrated how to enable SSL support on PostgreSQL Server using a self-signed SSL certificate. We have enabled SSL connection for all the databases and users configured on the PostgreSQL server. The server will listen for all incoming connections on the default PostgreSQL port and require the clients to use SSL. For additional information on enabling SSL on PostgreSQL, check out the official documentation.


