How to install PostgreSQL on Ubuntu 24.04 LTS


PostgreSQL is an open-source relational database known for ACID compliance, extensibility, and strong performance under concurrent workloads. Ubuntu 24.04's default repositories ship PostgreSQL 16, but the official PostgreSQL APT repository provides the latest major release, which is currently PostgreSQL 18.
In this tutorial, you will add the official PostgreSQL repository, install PostgreSQL 18 on Ubuntu 24.04, configure users and remote access, back up and restore databases, and troubleshoot common issues.
#What is PostgreSQL?
PostgreSQL is a community-driven database management system with a strong reputation for its high customization and performance. As a developer, you can write your own custom PostgreSQL data types, plugins, and even functions in one of your favorite programming languages.
With support for relational and non-relational querying, PostgreSQL is the developer's primary choice when storing and analyzing complex data.
The fact that PostgreSQL is ACID compliant ensures the data's integrity.
PostgreSQL conforms to the SQL standard, which means that if you have experience with writing SQL, there will be no problems or hardships when implementing and deploying your databases.
Due to its support for major operating systems such as Windows, Linux, Mac OS, and a wide range of programming languages, PostgreSQL makes it easy for developers coming from different backgrounds.
#What is PostgreSQL used for?
Web developers use PostgreSQL as a database management system for their applications. Django developers prefer to use PostgreSQL as there are many third-party libraries available that are designed for PostgreSQL integration.
Offering scalability, support for JSON data types, and advanced text search, PostgreSQL fits perfectly with content management systems.
Due to its support for various geometrical data types out of the box, PostgreSQL is a cornerstone in the development of geospatial applications. Combined with PostGIS, PostgreSQL offers all the features and functionalities to anyone writing apps that deal with location data. Whether you are building a vehicle tracking mobile app or environmental monitoring systems, PostgreSQL is a key in your development technology stack.
PostgreSQL is also a good choice for social media applications because it can handle high traffic and concurrency.
According to stackshare, popular apps like Instagram, Pinterest, Spotify, and Twitch make use of PostgreSQL as their database management system.
#Installing PostgreSQL on Ubuntu 24.04 LTS
The steps below walk you through adding the official PostgreSQL APT repository, installing the server, logging in, configuring remote access, and running basic SQL operations.
You will also connect to your database from a remote client using pgAdmin and Python.
#Step 1: Add the official repository and install the dependencies
The PostgreSQL package is provided by default in Ubuntu. To stay updated with the latest package you can manually configure the repository.
First download curl, ca-certificates, pip, venv, and libpq-dev.
sudo apt-get install curl ca-certificates python3-pip python3-venv libpq-dev -y
Note: The above command downloads curl, the Python package installer, venv, and libpq-dev as a dependency for psycopg2. The psycopg2 is a driver that makes it possible to connect and interact with the PostgreSQL database management system through Python applications.
The curl command-line tool helps to download files over different protocols. We will use it to download the PostgreSQL repository key and save it in our Ubuntu 24.04 LTS host.
The pip tool helps to download Python packages required to run a project. As for venv, it helps to isolate your Python project inside an environment separate from the system-wide packages to avoid conflict resulting from the usage of different versions of Python packages.
Create the directory for the repository key to be saved.
sudo install -d /usr/share/postgresql-common/pgdg
The above command creates all directories and subdirectories as specified in the argument with the -d option. You can do the same thing with mkdir -p.
To use curl to retrieve the key from the PostgreSQL repository type:
sudo curl -o /usr/share/postgresql-common/pgdg/apt.postgresql.org.asc -fail https://www.postgresql.org/media/keys/ACCC4CF8.asc
The -o option specifies the path for the output.
To determine the codename of your Ubuntu release type:
lsb_release -cs
Create the sources list for the PostgreSQL package with the help of the nano editor.
sudo nano /etc/apt/sources.list.d/pgdg.list
Add the following lines of code as shown below.
deb [signed-by=/usr/share/postgresql-common/pgdg/apt.postgresql.org.asc] https://apt.postgresql.org/pub/repos/apt noble-pgdg main
Instead of noble, you should put the codename of your distribution, which you found out via the lsb_release command. Write to the file with the help of Control O. Type Enter, and then exit the nano text editor with Control X.
You can use ls to verify the pgdg.list has been added:
ls /etc/apt/sources.list.d/
Outputpgdg.list ubuntu.sources
#Step 2: Install PostgreSQL on Ubuntu 24.04 LTS
Before going any further with the installation you should update the software repository. To update the software repository on Ubuntu 24.04 LTS type:
sudo apt update
To install PostgreSQL on Ubuntu 24.04 LTS type:
sudo apt install postgresql -y
The option -y automatically answers Yes to the questions asked.
To find out if PostgreSQL is running on Ubuntu 24.04 LTS type:
systemctl status postgresql
Output● postgresql.service - PostgreSQL RDBMS
Loaded: loaded (/usr/lib/systemd/system/postgresql.service; enabled; preset: enabled)
Active: active (exited) since Fri 2026-04-17 15:49:54 UTC; 2s ago
Process: 9417 ExecStart=/bin/true (code=exited, status=0/SUCCESS)
Main PID: 9417 (code=exited, status=0/SUCCESS)
CPU: 1ms

Apr 17 15:49:54 ubuntuserver systemd[1]: Starting postgresql.service - PostgreSQL RDBMS...
Apr 17 15:49:54 ubuntuserver systemd[1]: Finished postgresql.service - PostgreSQL RDBMS.
The systemctl utility checks the status of a service. The output shown confirms that PostgreSQL is up and running.
If the service is not running, use the command below:
sudo systemctl start postgresql
#Step 3: Log into PostgreSQL
PostgreSQL creates a default user named postgres. The postgres user is a superuser, which means that this role has all the privileges one can have inside the PostgreSQL DBMS.
To log into the database server as the user postgres, type:
sudo -u postgres psql
The option -u specifies the user, while psql stands for the interactive shell used to interact with the database engine. Upon a successful login, you will have a PostgreSQL shell as below:
Outputpsql (18.3 (Ubuntu 18.3-1.pgdg24.04+1))
Type "help"  for  help.

postgres=#
The superuser postgres doesn't have a default password. Before going any further, you should create one, as without it, your PostgreSQL database server may become an easy target for cybercriminals once you expose the DBMS to accept remote connections.
To create a password for the postgres user type the following command on PostgreSQL's console.
\password postgres
Enter new password for user "postgres":
Enter it again:
postgres=#
The password is required when you try to connect and interact with PostgreSQL through a scripting language such as Python, Ruby, Perl, etc. It's very important to create a strong password for the administrator of the PostgreSQL database management system as a good security practice.
To update the password for the postgres user from the PostgreSQL console, type:
ALTER USER postgres WITH PASSWORD 'new_password_here';
To exit the PostgreSQL console, type:
\q
or
exit
Then hit Enter.
Next, access the /etc/postgresql/18/main/pg_hba.conf configuration file.
sudo nano /etc/postgresql/18/main/pg_hba.conf
Locate this line:
local all postgres peer
Change the authentication from peer to md5 or scram-sha-256. Save the changes and exit. Then restart PostgreSQL to effect the changes.
sudo systemctl restart postgresql
When you try to access the database again, you will be prompted for a password.
#Step 4: Configure PostgreSQL
The configuration file for PostgreSQL 18 on Ubuntu 24.04 LTS is stored inside the /etc/postgresql/18/main subdirectory. As you may have guessed, for another version of PostgreSQL, you just need to put the exact version in the path /etc/postgresql/exact-version-here/main to locate the configuration file.
To view the files present inside /etc/postgresql/18/main type:
ls /etc/postgresql/18/main
Outputconf.d environment pg_ctl.conf pg_hba.conf pg_ident.conf postgresql.conf start.conf
There are two files of interest in figure above, postgresql.conf, and pg_hba.conf. The postgresql.conf is the main configuration file and it defines settings such as the default port for the database server to listen to, the maximum amount of memory per operation, what IP addresses to listen on, and many other parameters required for the maintenance of a DBMS.
To view the contents of the postgresql.conf type:
cat /etc/postgresql/18/main/postgresql.conf | less
The less command helps to view the content of a large file step by step. As for the | it's an operator which passes the output of one command as input for another one. It's called piping.
By default, you can't connect to your PostgreSQL database server from a remote host. Since you will probably work remotely, it's a good idea to enable other machines to be able to connect to your database server.
Open the postgresql.conf configuration file with the help of nano or your favorite text editor:
sudo nano /etc/postgresql/18/main/postgresql.conf
Locate the following line.
#listen_addresses = 'localhost'
The listen_addresses line tells PostgreSQL the IP addresses the database server is listening on. The above configuration instructs PostgreSQL to listen on and accept connections only from the local loopback network interface.
When you try to connect to your PostgreSQL database from machines on your local network the connections are refused.
Change the above configuration parameter as shown below.
listen_addresses = '*'
...
# - Connection Settings -

listen_addresses = '*'  # what IP address(es) to listen on;
# comma-separated list of addresses;
# defaults to 'localhost'; use '*' for all

...
The asterisk in the above line tells the PostgreSQL server to listen on all network interfaces. In case the system administrator wants the database server to listen on specific network interfaces, the listen_addresses parameter can be configured to do so.
listen_addresses = 'xx.xx.xx.xx, localhost, yy.yy.yy.yy'
Make sure to separate the IP addresses for the PostgreSQL database server to listen on with a comma.
Type Control O on your keyboard to write the changes and then hit Enter. To exit the nano text editor type Control X.
The next configuration file you need to edit to connect to your PostgreSQL database server from the outside is /etc/postgresql/18/main/pg_hba.conf.
This configuration file specifies the IP addresses or IP ranges that are allowed to connect to the PostgreSQL database server. It also specifies the accounts, and authentication mechanisms to be used to authenticate users.
The following are the columns we need to update.
-
connection type
-
database
-
user
-
IP address or range of IPs
-
authentication mechanism
As for the connection type, the two main ones are host, which stands for TCP/IP connections and hostssl which is a TCP/IP socket that is encrypted. For this tutorial, we will use the option host.
For the database column, you can specify one or just leave it as all. The same thing can be applied to the user column.
The default client authentication mechanism in PostgreSQL 18 is scram-sha-256. You can switch to MD5 or leave it as it is by default. Both scram-sha-256 and MD5 send the passwords encrypted.
Open /etc/postgresql/18/main/pg_hba.conf with the nano text editor.
sudo nano /etc/postgresql/18/main/pg_hba.conf
To allow connections from the remote on your PostgreSQL database server you need to specify the ranges of IPs that are allowed to connect to the server, the user or users that are allowed to log into the database management system, and the databases that the users can access.
For example, if the IP address of the client machine is xx.xx.xx.xx, you can leave it as a single address or specify the entire range using the CIDR notation below. Add the following new line at the end of the pg_hba.conf file:
host all all xx.xx.xx.xx/24 scram-sha-256
To limit external connections to a specific user, change the above line as follows.
host all cherryservers xx.xx.xx.xx/24 scram-sha-256
To limit connection to a specific database, format the configuration as shown below.
host learning cherryservers xx.xx.xx.xx/24 scram-sha-256
If you prefer to authenticate PostgreSQL clients through the md5 mechanism instead of scram-sha-256 just change the last column as shown below.
host all cherryservers xx.xx.xx.xx/24 md5
We do not recommend opening access to all users and databases from any IP address due to security concerns. However, you can configure the PostgreSQL database server to accept such connections if needed for testing.
Just keep in mind that this increases the attack surface of your server infrastructure, as it exposes a service that can be exploited and/or brute-forced by cybercriminals.
Take the following configuration as an example and don't use it in a production scenario.
host all all 0.0.0.0/0 scram-sha-256
To avoid authentication failures for local socket connections, it is required to edit the following line.
# "local" is for Unix domain socket connections only
local all all peer
Change the authentication method from peer to md5 like shown below.
# "local" is for Unix domain socket connections only
local all all md5
After applying all the changes, the relevant lines in your pg_hba.conf file should look similar to the following:
# "local" is for Unix domain socket connections only
local all all md5

# IPv4 local connections:
host all all 127.0.0.1/32 scram-sha-256

# IPv6 local connections:
host all all ::1/128 scram-sha-256

# Allow remote connections from your client IP range:
host all all xx.xx.xx.xx/24 scram-sha-256
Replace xx.xx.xx.xx/24 with your actual client IP or subnet. Restart the PostgreSQL server for the changes to take place:
sudo systemctl restart postgresql
To check if PostgreSQL is listening for network connections type:
sudo ss -tunlp | grep 5432
The ss command displays active socket connections. The -t flag filters for TCP sockets, -l shows only listening sockets, -n displays port numbers instead of service names, and -p includes the process name. We pipe the output to grep to look for the specific service running on port 5432.
Note: PostgreSQL listens by default on port 5432, but that can be easily modified in the main configuration file.
There may be cases where the firewall blocks incoming connections. To allow connections on port 5432 type:
sudo ufw allow 5432/tcp
To find out if the PostgreSQL database server is reachable remotely, use telnet protocol from a remote host:
telnet your_server_ip 5432
#Step 5: Basic commands in PostgreSQL
Before learning how to operate your PostgreSQL database you should know the basic commands.
Log in to the PostgreSQL database with the following command.
sudo -u postgres psql
The above command asks for a password because you have already created one for the user postgres.
To find out the version of PostgreSQL type:
select version();
To list all databases type:
\l
To list all the users type:
\du
To find the current user type:
SELECT current_user;
You can also find information about the current connection with the following command.
\conninfo
To delete a database type:
DROP DATABASE database_name;
To delete a user type:
DROP USER username;
#Step 6: Create a new user in PostgreSQL
To create a new PostgreSQL user with a password through the psql interactive shell type:
CREATE USER cherry_servers WITH PASSWORD 'cherry_servers';
Upon success, you should see the following message:
CREATE ROLE
You can check if the user has been created with the help of the \du command.
                      List of roles
Role name        |              Attributes
---------------------+----------------------------------------------------------
cherry_servers  |
postgres        | Superuser, Create role, Create DB, Replication, Bypass RLS

postgres=#
#Step 7: Create a new database in PostgreSQL
To verify the current database user type:
select current_user;
postgres=# select current_user;
current_user
--------------
postgres
(1 row)
To create a new database in PostgreSQL type:
CREATE DATABASE learning;
CREATE DATABASE
postgres=#
To grant all the privileges to the database learning for the user cherry_servers type:
GRANT ALL PRIVILEGES ON DATABASE learning TO cherry_servers;
From PostgreSQL 15, it is required to grant permission for CREATE on the public schema or the default one. To do so, first connect to the database called ‘learning’ as user postgres.
\c learning postgres;
Then grant the CREATE privilege on the public schema to the user cherry_servers.
GRANT ALL ON SCHEMA public to cherry_servers;
postgres=# CREATE DATABASE learning;
CREATE DATABASE
postgres=# GRANT ALL PRIVILEGES ON DATABASE learning TO cherry_servers;
GRANT
postgres=# \c learning postgres;
You are now connected to database "learning" as user "postgres".
learning=# GRANT ALL ON SCHEMA public to cherry_servers;
GRANT
learning=#
Without setting the above permission, we can't create a table using the user cherry_servers inside the learning database.
To connect to the learning database as user cherry_servers type:
\c learning cherry_servers;
Type the password of the new user when asked.
Password for user cherry_servers:
You are now connected to database "learning" as user "cherry_servers".
learning=>
As shown above, the user is informed of a successful connection to the specified database. You can verify the information on the current connection with the help of the \conninfo command, which you learned in the basic PostgreSQL commands section.
To find the current database type:
SELECT current_database();
current_database
------------------
learning
(1 row)

learning=>
To create a new table in the current database type:
CREATE TABLE books (title varchar(50), author varchar(50));
The above SQL statement creates a table with two columns inside the database learning. Both of the columns are of the varchar type.
learning=> CREATE TABLE books (title varchar(50), author varchar(50));
CREATE TABLE
learning=>
To insert your first row in the table type:
INSERT INTO books (title, author) VALUES ('learning python', 'mark');
learning=> INSERT INTO books (title, author) VALUES ('learning python', 'mark');
INSERT 0 1
learning=>
To check the data has been inserted into the .books table type:
select * from books;
      title               | author
----------------------+--------
learning python `| mark
(1 row)

learning=>
Note: The current database name will appear on the left of the console reminding the user where their commands are being executed.
#Step 8: Connect to PostgreSQL from the remote host
Step 8.1 Connect to PostgreSQL via pgAdmin GUI client
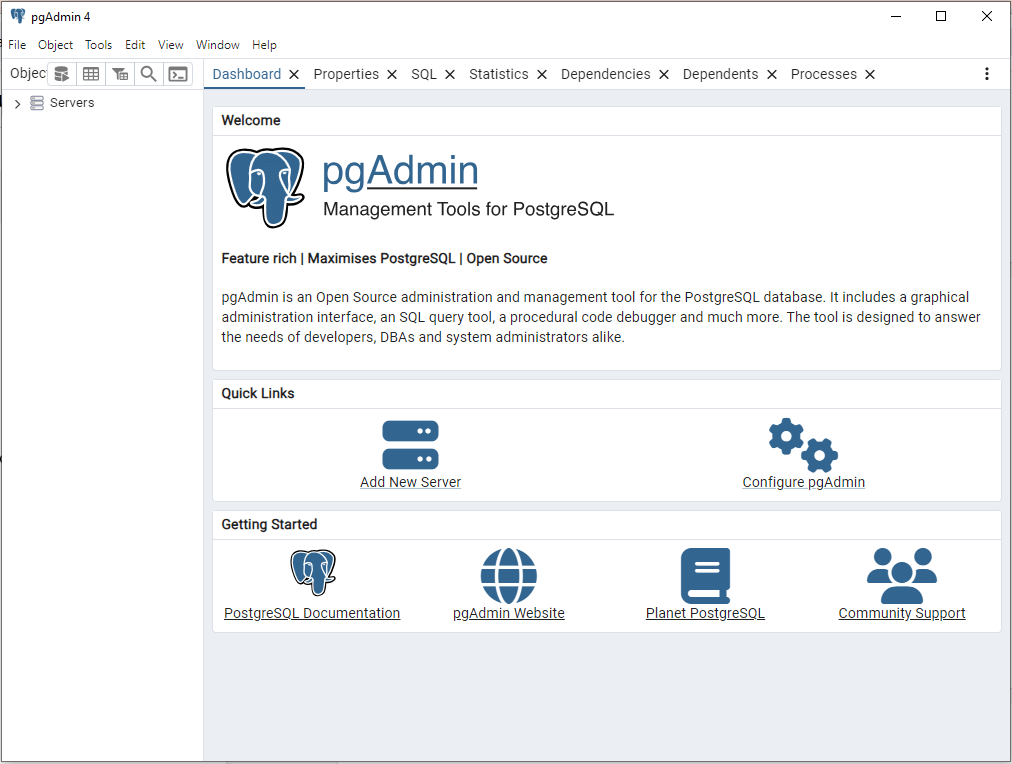
pgAdmin is a free tool designed to administer the PostgreSQL database server through a graphical user interface.
Once you have finished installing pgAdmin from the official release, you will be presented with the following.
Select Add New Server and continue. The General tab asks for information such as the name of the server. Specify one as you wish. The settings specified inside the Connection tab do matter.
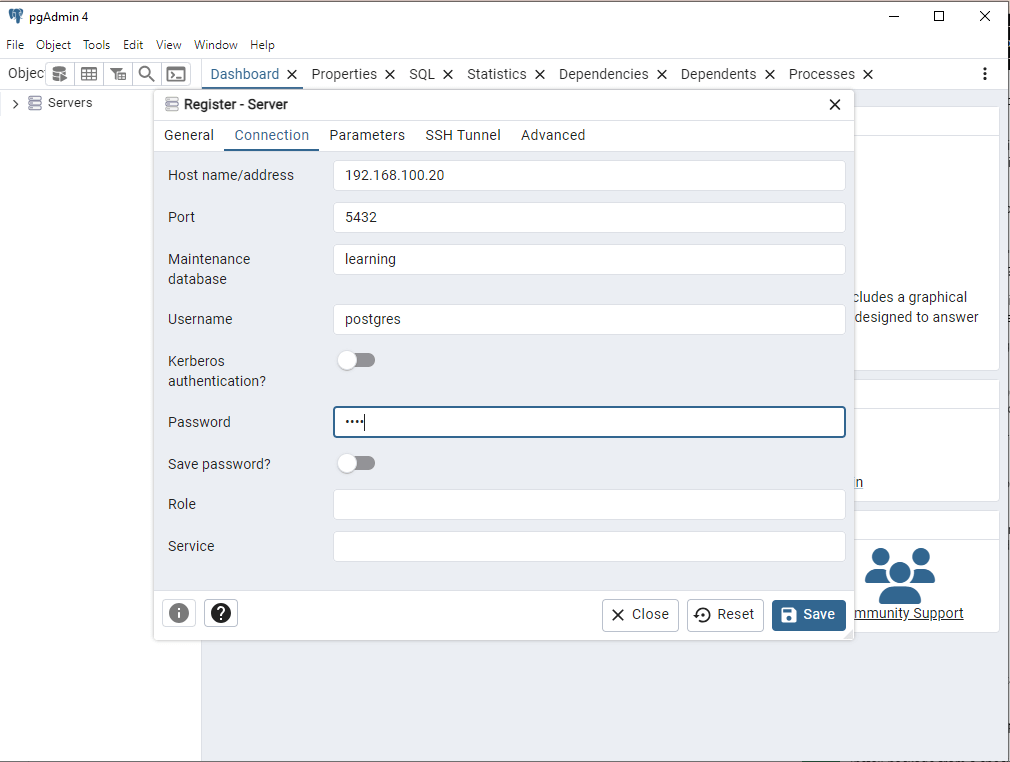
Once you have finished specifying the IP of the PostgreSQL server, username, database name, and the port as shown in the above figure click on Save. The connection happens automatically.
Note: If you see an error like FATAL: no pg_hba.conf entry for host, your client IP is not listed in the pg_hba.conf file. Open /etc/postgresql/18/main/pg_hba.conf, add a host entry for your client's IP address as shown in Step 4, and restart PostgreSQL with sudo systemctl restart postgresql.
Also, confirm that listen_addresses in postgresql.conf is set to '*' and that your firewall allows traffic on port 5432.
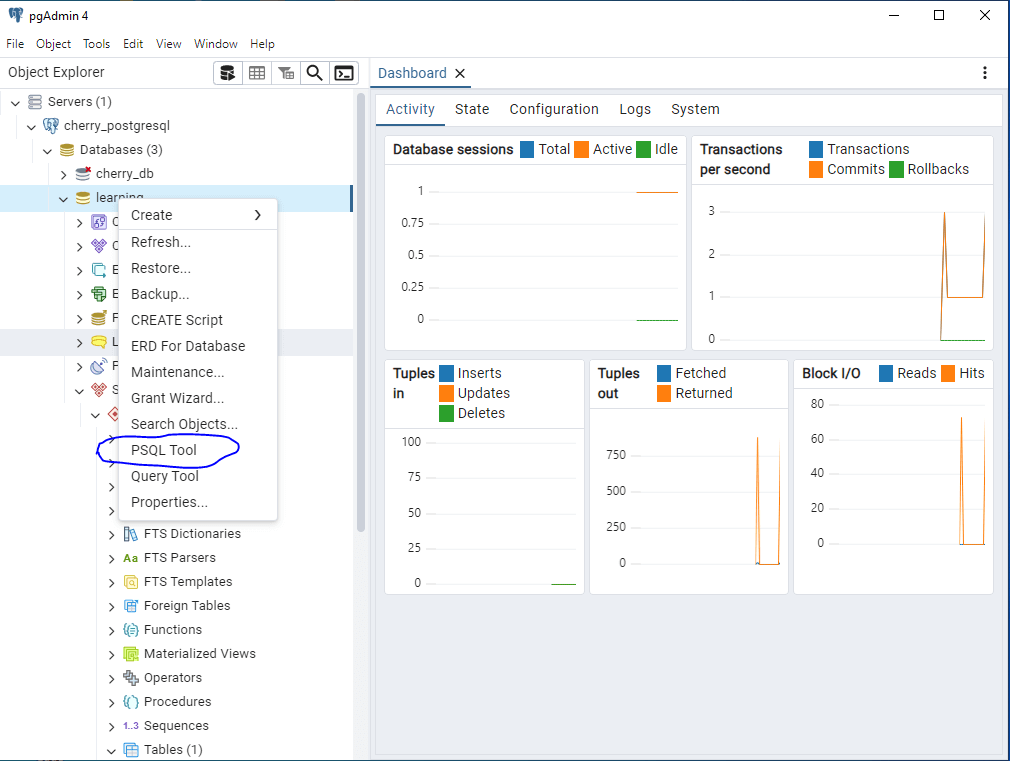
On a successful connection, pgAdmin lists the servers on the left panel. Find your server and click on it. A list of databases appears. You can write SQL queries by doing a right click on the database you want to operate on and then selecting the PSQL tool.
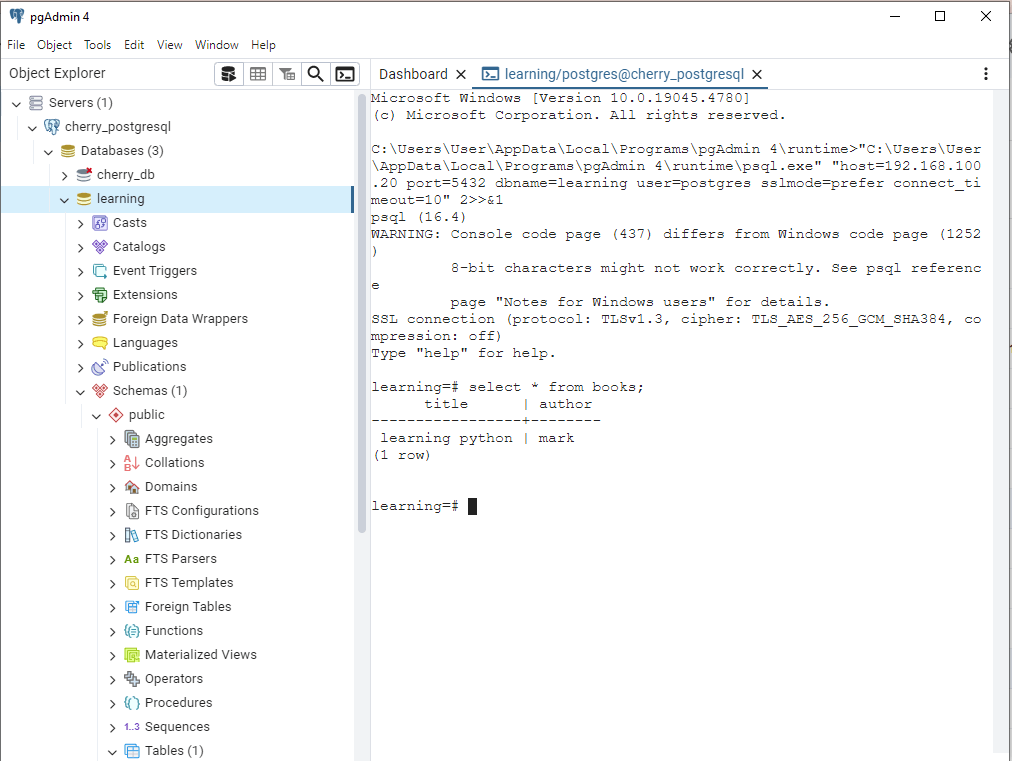
The following shows an SQL SELECT statement that was executed successfully.
Step 8.2 Connect to PostgreSQL via Python
There are many open-source libraries available to connect to and interact with the PostgreSQL database management system. As a system administrator, you can write your scripts to automate tasks while working on a PostgreSQL database server.
Python offers the psycopg2 package. It can be used to connect to the PostgreSQL database and also interact with it. You can read, insert, update, and delete data directly through your Python scripts.
First, we highly recommend that you create a virtual environment for your Python scripts.
To do so, start by running the command:
sudo apt install python3.12-venv
Next, create a new virtual environment.
python3 -m venv postgres
The command above uses the Python package venv to create a fresh virtual environment named postgres. Feel free to name yours as you like.
To activate the new virtual environment inside a Unix-based host type:
source postgres/bin/activate
To install psycopg2 on Ubuntu 24.04 LTS type:
pip install psycopg2-binary
Note: You can use the above command too if you decide to run your PostgreSQL's client script from a Windows machine.
Create a new script named sqlcon.py with the nano text editor.
nano sqlcon.py
Include the following Python code.
import os
from psycopg2 import connect, OperationalError, errors

db_ip = os.getenv("DB_HOST")
db_port = os.getenv("DB_PORT", "5432")
db_name = os.getenv("DB_NAME")
db_user = os.getenv("DB_USER")
db_password = os.getenv("DB_PASSWORD")

try:
    con = connect(host=db_ip, port=db_port, dbname=db_name, user=db_user,
                  password=db_password)
except OperationalError as e:
    con = None
    print(e)

if con is not None:
    try:
        cur = con.cursor()
        cur.execute("SELECT * FROM books")
        records = cur.fetchall()
        print(records)
    except errors.UndefinedTable:
        print("Table doesn't exist.")
    finally:
        cur.close()
        con.close()
Next, define the environment variables for the database connection:
Temporarily
export DB_HOST="server-ip"

export DB_PORT="5432"

export DB_NAME="database name"

export DB_USER="database user"

export DB_PASSWORD="database user password"
** Permanently **
Add the same lines to your ~/.bashrc file. Then run:
source ~/.bashrc
Finally, run the Python script to test the connection:
python sqlcon.py
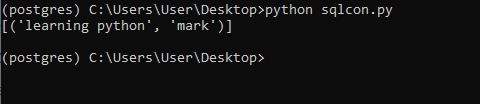
You can see from the above demonstration that each row of a PostgreSQL database table is represented as a tuple in Python.
#How to back up and restore a PostgreSQL database
Regular backups protect against data loss from hardware failures, accidental deletions, or corrupted upgrades. PostgreSQL includes pg_dump and pg_dumpall for this purpose.
#Back up a single database
Use pg_dump to export a database to a SQL file:
sudo -u postgres pg_dump learning > learning_backup.sql
For compressed backups that save disk space, use the custom format:
sudo -u postgres pg_dump -Fc learning > learning_backup.dump
The -Fc flag produces a compressed archive that pg_restore can read directly.
#Back up all databases
To export every database, role, and tablespace on the server, use pg_dumpall:
sudo -u postgres pg_dumpall > all_databases_backup.sql
#Restore a database
Restore a plain SQL backup into an existing database:
sudo -u postgres psql learning < learning_backup.sql
For custom-format backups, use pg_restore:
sudo -u postgres pg_restore -d learning learning_backup.dump
To drop existing objects before restoring and avoid duplicate errors during a full restore, add the --clean:
sudo -u postgres pg_restore --clean -d learning learning_backup.dump
#How to update PostgreSQL to a newer version
#Minor version updates
Minor updates (e.g., 16.12 to 16.13) contain bug fixes and security patches. Apply them with a standard package upgrade:
sudo apt-get update
sudo apt-get upgrade postgresql
Restart the service after the upgrade completes:
sudo systemctl restart postgresql
Minor updates do not require a data migration. The existing data directory remains compatible.
#Major version upgrades
Major upgrades (e.g., 16 to 17 or 18) require a data migration because the internal storage format changes between major releases. PostgreSQL provides pg_upgrade for in-place upgrades, but you should always back up your data first.
Install the new major version alongside the current one:
sudo apt-get install postgresql-19
Both versions will run on different ports. Stop both services, then run pg_upgrade:
sudo systemctl stop postgresql
sudo -u postgres /usr/lib/postgresql/19/bin/pg_upgrade \
  --old-datadir=/var/lib/postgresql/18/main \
  --new-datadir=/var/lib/postgresql/19/main \
  --old-bindir=/usr/lib/postgresql/18/bin \
  --new-bindir=/usr/lib/postgresql/19/bin
After a successful upgrade, start the new version and verify your data. You can then remove the old version with sudo apt-get remove postgresql-18.
Consult the official pg_upgrade documentation for detailed options and edge cases.
#How to uninstall PostgreSQL from Ubuntu
Stop the PostgreSQL service first:
sudo systemctl stop postgresql
Purge all PostgreSQL packages and their configuration files:
sudo apt-get remove --purge postgresql postgresql-*
sudo apt-get autoremove
Remove the data directory and configuration files manually if they were not cleaned up:
sudo rm -rf /var/lib/postgresql/
sudo rm -rf /etc/postgresql/
sudo rm -rf /var/log/postgresql/
Remove the PostgreSQL repository file you added during installation:
sudo rm /etc/apt/sources.list.d/pgdg.list
sudo rm /usr/share/postgresql-common/pgdg/apt.postgresql.org.asc
sudo apt-get update
#Troubleshooting common PostgreSQL issues
#PostgreSQL service fails to start
Check the service logs for error details:
sudo journalctl -u postgresql --no-pager -n 50
Common causes include port 5432 already in use by another process and incorrect file permissions on the data directory. Verify the port is free with ss -tlnp | grep 5432. If another PostgreSQL instance or service occupies the port, stop it or change the port in postgresql.conf.
#Authentication errors when connecting
If you see FATAL: Peer authentication failed, the pg_hba.conf file requires peer authentication for local connections, but you are trying to connect with a password. Change the authentication method from peer to md5 or scram-sha-256 for the relevant line in /etc/postgresql/18/main/pg_hba.conf, then restart PostgreSQL.
#Remote connections refused
Verify that listen_addresses in postgresql.conf is set to '*' or includes the server's IP address. Confirm that pg_hba.conf has a host entry for the client's IP range. Also, check that your firewall allows traffic on port 5432:
sudo ufw status | grep 5432
If no rule exists, add one with sudo ufw allow 5432/tcp.
#Role or database does not exist
Running psql -U someuser -d somedb fails with FATAL: role "someuser" does not exist when the user has not been created in PostgreSQL. Log in as the postgres superuser and create the missing role with CREATE USER someuser WITH PASSWORD 'password';. Similarly, create missing databases with CREATE DATABASE somedb;.
#Conclusion
You now have a working PostgreSQL 18 deployment on Ubuntu 24.04 with user authentication, remote access configuration, and backup procedures in place. You also learned how to upgrade between versions, uninstall cleanly, and resolve common startup and connection issues.
For production workloads, set up automated backups with pg_dump on a cron schedule and monitor your server's resource usage. To explore replication and high availability, check out our guide on PostgreSQL database replication. You can also learn more about creating and managing databases in our PostgreSQL create database tutorial.
FAQs
What version of PostgreSQL does Ubuntu 24.04 ship by default?
Ubuntu 24.04's default repositories include PostgreSQL 16. The official PostgreSQL APT repository (added in Step 1) provides PostgreSQL 18, the latest major release. Running `sudo apt-get install postgresql` after adding the official repo installs version 18.
How do I check which version of PostgreSQL is running?
Log into the psql shell with `sudo -u postgres psql` and run `SELECT version();`. You can also check from the command line with `psql --version` or `pg_config --version`.
Can I run multiple PostgreSQL versions on the same server?
Yes. Each major version uses its own data directory and port. Install additional versions with `sudo apt-get install postgresql-18` (or another version number). Manage them separately through their respective configuration files under `/etc/postgresql/<version>/main/`.
What is the default port for PostgreSQL?
PostgreSQL listens on TCP port 5432 by default. You can change it in the `port` setting inside `/etc/postgresql/18/main/postgresql.conf`.
How do I reset a forgotten PostgreSQL password?
Edit `/etc/postgresql/18/main/pg_hba.conf` and temporarily change the authentication method for the postgres user to `trust`. Restart PostgreSQL, log in without a password, set a new password with `ALTER USER postgres WITH PASSWORD 'new_password';`, then revert `pg_hba.conf` back to `scram-sha-256` or `md5` and restart again.
Is PostgreSQL better than MySQL?
Both are production-grade relational databases. PostgreSQL excels at complex queries, JSON handling, and extensibility. [MySQL](https://www.cherryservers.com/blog/install-mysql-ubuntu-2404) performs well for read-heavy, simpler query workloads. The right choice depends on your application requirements.


