How to Connect to a Remote Server Using SSH: Step-by-Step Guide

SSH lets you access your server from anywhere. It allows you to execute commands, copy files back and forth, and even control your system remotely.
This tutorial is going to help you understand how to connect to a remote server using SSH. You will learn how to generate SSH keys. The use of SSH keys saves time and adds an additional layer to secure your connection. You will go a little into some basic troubleshooting of issues you could possibly face while working with this utility.
#What is SSH?
SSH lets you securely connect to remote servers. It can even take place over an unsecured network. This is one of the reasons system administrators and developers use it to manage their servers and run commands remotely.
Unlike traditional methods such as Telnet, SSH encrypts your connection. This is great for handling sensitive data or managing an important server.
#What is SSH used for?
SSH is a secure way to access a server. Following are some of the things one can do with SSH:
- Remote server administration: One can connect to any server from anywhere across the world and work with it as if you are sitting next to it.
- File transfers: SSH thus provides functionality for safely copying and transferring files via SCP or SFTP from a local machine onto a remote server.
- Software installation: Installation or upgrade of any software over your server is feasible via SSH.
- System monitoring: SSH enables you to view logs and, hence would allow for monitoring of the running processes on your remote servers.
#Prerequisites
Before you use SSH to connect to a remote server, ensure that the following have been set up:
- A remote server that is powered on and connected to the network.
- Your server's IP address or Domain name.
- Ensure you have the necessary permissions to access the remote server.
- Ensure that your server's firewall allows SSH connections.
Deploy and scale your projects with Cherry Servers' cost-efficient dedicated or virtual servers. Get seamless scaling, hourly pricing, and premium 24/7 support.
#How to connect to a remote server via SSH
Now that everything is up and running, let's connect to your server remotely using SSH.
#Step 1: Ensure that SSH is installed on the local machine
Before being able to access your server you should have an SSH client installed on your computer. Before installing take a look at whether it is installed using the following command:
$ ssh -V
Otherwise, you can install SSH using your local package manager. For instance, on Debian/Ubuntu, you would install with:
$ sudo apt install openssh-client -y
Let it install, then proceed with the next step.
#Step 2: Connect to your remote server
Now run the following in order to SSH into your remote server:
$ ssh username@remote_host
Replace the above username with the actual username of your server and remote_host is the IP address or domain name of your server.
For example:
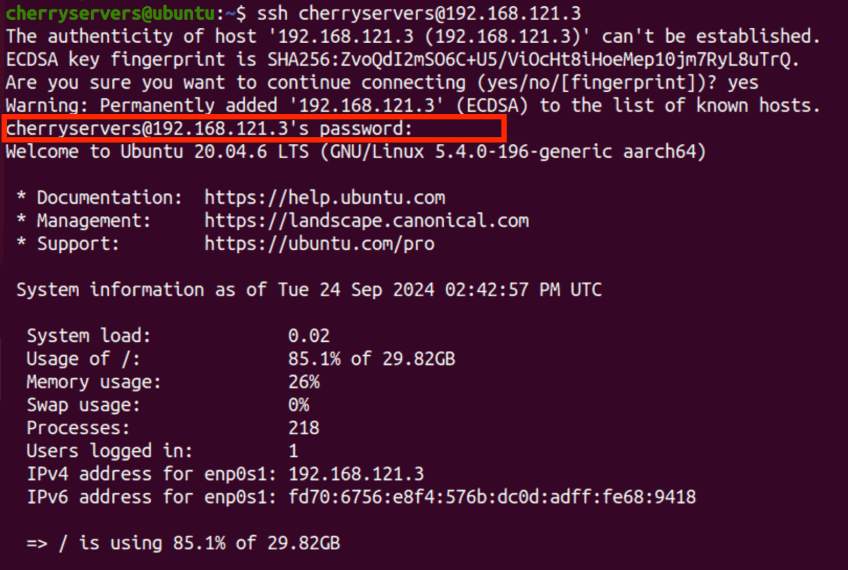
$ ssh cherryservers@192.168.121.3
The first time you connect to any server, it will always show you the fingerprint of the server and ask you whether you want to continue connecting to it.
Type yes to confirm and hit Enter to proceed.
#Step 3: Authenticating with a password
The server will prompt you for the password of the user’s account. Type your password and press Enter.
You will be logged in and may start to work with the server, provided the password is correct.
#Step 4: Exiting the SSH session
You can exit this SSH session anytime with the following command:
$ exit
The command will log you out from the server and bring you back to your local terminal.
#Using SSH keys for secure authentication on your server
Using SSH keys does not require you to continuously input your password every time you want to log in, it keeps your connection more secure and much faster. SSH keys also help to manage several servers or to automate tasks.
Now enable key-based authentication on your server with SSH by following these steps:
#Step 1: Generate SSH keys
We'll begin by generating a pair of SSH keys—one public and one private. You will retain the private key locally and transfer the public key to your server. With this pair, you can access your server without logging in with a password.
Below is how to generate the SSH keys:
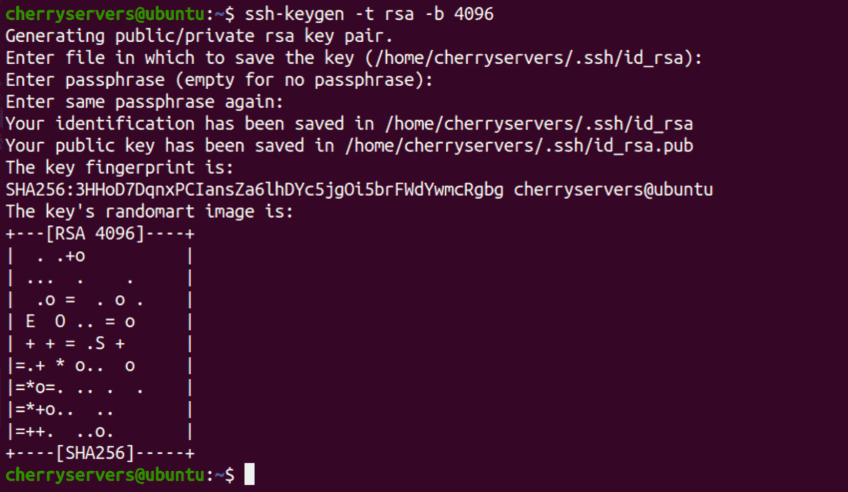
$ ssh-keygen -t rsa -b 4096
This will generate a 4096-bit RSA keypair which is good enough for most situations. Next, it is going to prompt you to input where to save this key. You can simply hit Enter to accept the default location (~/.ssh/id_rsa).
You would be prompted for a passphrase. You could hit enter to skip this stage, but it is highly recommended that you provide one for your private key to be encrypted should someone compromise it.
#Step 2: Copy the public key to the remote server
Next, you need to copy the public key onto your server so that the server knows and can trust your local machine when you connect to it.
Run the following command to copy the public key to your remote server:
$ ssh-copy-id username@remote_host
Remember to use your actual username for username and the IP address or domain name of your server for remote_host. For instance:
$ ssh-copy-id cherryservers@192.168.121.3
The above command will always ask you for your password. Then, after entering the password, it adds your public key to the server in the ~/.ssh/authorized_keys file. You now can log in into the server without a password.
However, you can copy the key manually, if ssh-copy-id is not available by running:
$ cat ~/.ssh/id_rsa.pub | ssh username@remote_host "mkdir -p ~/.ssh && cat >> ~/.ssh/authorized_keys"
#Step 3: Login using SSH keys
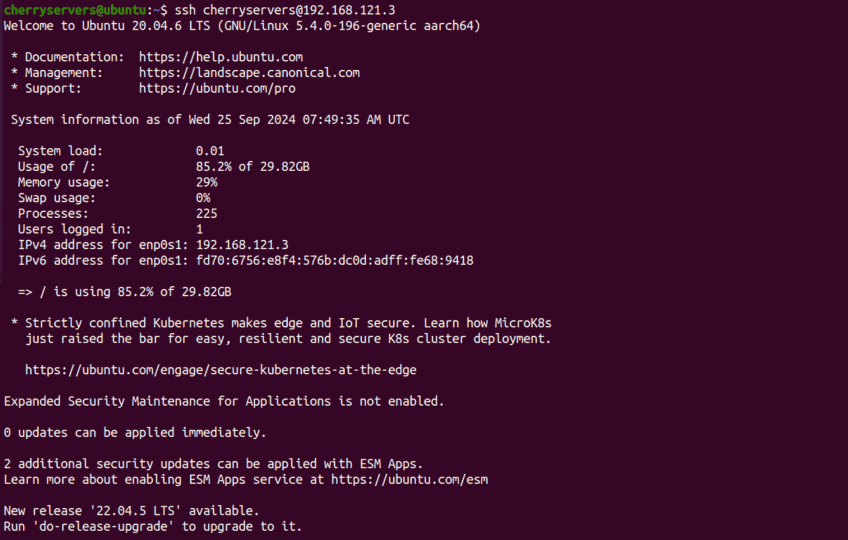
To log in using SSH keys, run the same ssh command as before:
$ ssh username@remote_host
This time it will not ask for your password. The connection is authenticated with your SSH key. If you had a passphrase during the key generation, you would now be asked to enter that. Enter the passphrase to log into the server.
#Step 4: Disable password authentication (optional)
By disabling password-based logins, you can take your server security a little further. That means only people with the proper SSH keys can access your server.
Follow the steps below to disable password authentication:
-
Log in to your server using SSH keys.
-
Open the SSH configuration file in your favorite editor, for example, nano:
$ sudo nano /etc/ssh/sshd_config -
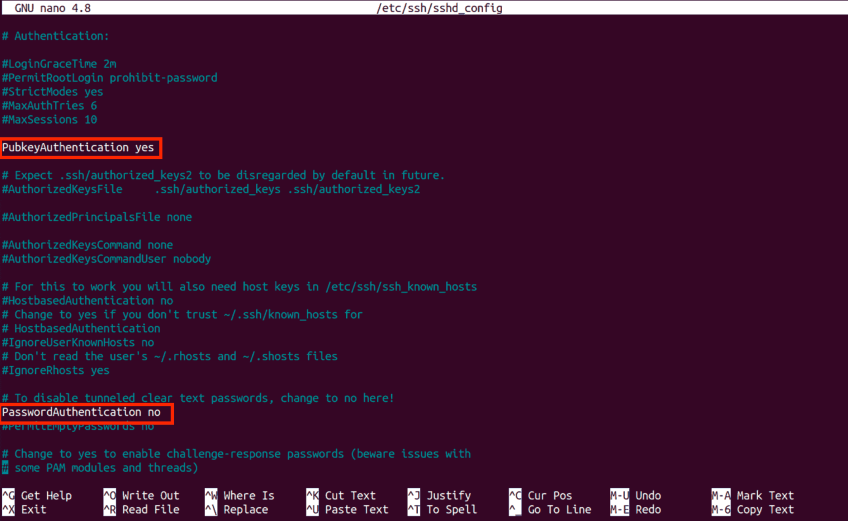
Look for the line that says
#PasswordAuthentication yes. Uncomment the line by removing the#, then changeyestono. -
Additionally, look for the
#PubkeyAuthentication yesline and uncomment it. This enables key-based authentication. This way, you will not be locked out of your server after disabling password authentication. The file should look like below:
-
Save the file and exit the editor by pressing
Ctrl + X, thenY, andEnter. -
Finally, restart the SSH service to apply the changes:
$ sudo systemctl restart sshd
From now on, only SSH keys will be able to log into your server. This is more secure for your server. However, ensure your SSH keys are set up before this change. Otherwise, you may lock yourself out.
#Common SSH options and flags
SSH also provides a lot of options and flags that allow you to connect to your server in a far more flexible manner. Let's review some of the most useful options available to customize your SSH connections.
#Using a custom port
By default, SSH will connect over port 22, but you can change it to whatever you'd like for extra security. You would then specify your port by adding the -p, immediately followed by the port number.
For example, if the server is using port 2222, you would run:
$ ssh -p 2222 username@remote_host
This blocks one of the possible avenues of attack using automation that rely on the default ports.
#Running a command on the remote server
To run a quick command on your server without opening an interactive session, add the command to the end of your SSH line. For instance:
$ ssh username@remote_host "uptime"
This runs the uptime command, displays the output, and logs you out immediately.
#Enabling X11 forwarding
SSH even allows you to forward running applications on a remote server to your local machine with X11 forwarding. For this to work, though, you have to make sure that xauth is installed on the remote server and also that your local machine actually runs an X server.
To enable X11 forwarding, add the -X option:
$ ssh -X username@remote_host
This will enable the capability to run graphical applications from the remote server onto your local system.
#Using SSH config file
If you regularly use several different servers, you can streamline your SSH usage by creating an SSH config file. The SSH config file holds your connection information, such as usernames, ports, and keys. You can create or edit the config file at ~/.ssh/config, and add entries like below:
Host myserver
    HostName 192.168.1.1
    User username
    Port 2222
Now, you can connect to the server using:
$ ssh myserver
#Specifying a private key file
For multiple SSH keys, you can specify which private key to use with the -i flag. This is helpful when managing a lot of servers with different keys.
For example, to use the key stored in ~/.ssh/id_rsa_work run the command:
$ ssh -i ~/.ssh/id_rsa_work username@remote_host
#SSH Connection Troubleshooting
You might experience one or two hiccups that could lead to failure in connecting to your server via SSH. Let's now explore some common SSH issues and how to fix them.
#Connection refused error
A "Connection refused" error would generally indicate that the SSH service is not running on the target server; it can also mean that a firewall rule is blocking the attempt to connect. First, verify SSH is installed and running:
$ sudo systemctl status ssh
If SSH is not running, start it with the command below:
$ sudo systemctl start ssh
Also, verify that your server’s firewall allows SSH traffic on the correct port.
#Permission denied error
This error usually means there is a problem with the user’s permission or the SSH key. You have to check if you are using the correct username and that your public key is properly set on the server. Also, double-check if you are using a password and ensure the user has SSH access.
#Host key verification failed
The error happens when your server’s SSH key changes and your local machine sees a mismatch. Fix this error by removing the old key from the ~/.ssh/known_hosts file using:
$ ssh-keygen -R remote_host
The remote_host directive above represents the IP address or domain name of your server.
After this, try connecting again. You will be prompted to verify the new key.
#Timeout during connection
This may be due to a problem with your network or due to the server you are targeting being poorly configured. First, troubleshoot your network connection. After that make sure the right port is open by running the following command:
$ nc -v remote_host 22
The -v option above enables verbose mode. However, if you still encounter timeouts, the server might be overloaded or misconfigured.
#Authentication method not supported
This is the error that usually occurs when a server does not allow the method you are trying to use to authenticate yourself. When using SSH keys, they need to be set up correctly on the server. Additionally, you must apply the right permissions to the ~/.ssh/authorized_keys file.
Moreover, you can adjust the SSH configuration of your server to enable you to authenticate using keys or passwords.
#Conclusion
In this guide, you learned how to connect to a remote server using SSH. You also learned how to use SSH keys for secure authentication and how to troubleshoot common issues. SSH is not only secure, it also makes managing servers a lot easier. This is true whether you are managing one server or many of them.
As you use SSH, always prioritize security. Be sure to use SSH keys, and for extra protection, disable password logins.
Starting at just $3.24 / month, get virtual servers with top-tier performance.


