How to Install and Configure Apache Web Server on Ubuntu 20.04

#What is Apache Web Server?
Apache is one of the most widely used web servers in the world. It is based on a process-driven architecture and works by creating a new thread every time a server request is received. Apache has a rich set of features that can be enabled dynamically by installing official modules for auto-indexing, ftp connections, load balancing, URL tracking and many other additional functionality.
The Apache foundation’s goal is to create a robust, commercial-grade, feature-full, and freely available source code implementation of an HTTP (Web) server. Apache is now a mature, yet still actively developed web server that is highly compatible with other popular software such as WordPress, Joomla, Drupal, and others.
#Install Apache Web Server
Before installing any new software, it is always a good idea to update your software package lists.
apt update
Now that your package list is up to date, we can proceed to installing Apache on your host machine.
apt install apache2
After the installation is complete Apache httpd daemon should be up and running. You may verify this yourself by using your service manager.
service apache2 status
You should see Apache service active and running. If not, enable it yourself with service apache2 start command.
#Adjust Firewall Security Configuration
After Apache is installed, you should make sure your firewall is properly configured. Ubuntu comes with ufw (Uncomplicated Firewall) pre-installed for managing iptables.
If you are using the default SSH port, you must allow it before enabling ufw service to not accidentally block yourself from connecting to your server, since ufw denies all incoming traffic by default.
ufw allow 22
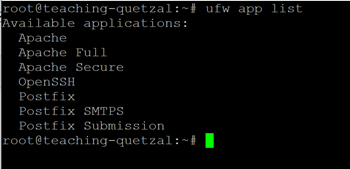
Next, you need to enable Apache service through ufw. You may list all application profiles that ufw service is aware off.
ufw app list
As you may see, ufw is aware of three Apache application profiles.
- Apache profile is associated with port 80 which is used for non-encrypted HTTP traffic.
- Apache Secure profile is associated with port 443 which is used for SSL encrypted HTTPS traffic.
- Apache Full profile opens both the non-encrypted HTTP port 80 and the encrypted HTTPS port 443.
Let’s enable the default HTTP port in the firewall by creating an allow rule for Apache application profile.
ufw allow Apache
You can now enable ufw service daemon.
service ufw start
And check your firewall status.
ufw status verbose
As you can see, all incoming traffic is now being denied, except to port 80 (Apache) and port 22 (SSH) which is what we want.
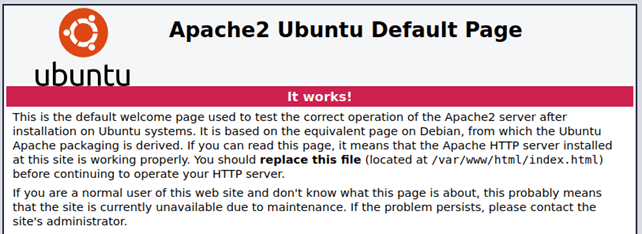
You may now test your Apache web server connection by accessing your IP address on port 80, which you may do by entering http://your_ip_address into your web browser. If all went well, you should see the default Apache landing page.
#Manage Apache System Service
When running an Apache web server, you may want to manipulate its system process one way or another. You can accomplish this with our previously used service command, which is a high-level utility tool that manages systemd processes on your Ubuntu machine. This is all part of optimizing Apache performance, a process that will make your server a lean hosting machine.
First, let’s make sure Apache is up and running by checking the status of our apache2 service.
service apache2 status
We can stop apache2 service and check its status again.
service apache2 stop && service apache2 status
Let’s now enable apache2 service daemon and check its status once again.
service apache2 start && service apache2 status
If the service is working but it is experiencing problems, instead of starting and stopping it, we can restart it.
service apache2 restart
As you can see, the apache2 service was started a few minutes ago.
In case you make some changes to your Apache configuration files and want to apply them without interrupting the active service, you can use reload command instead.
service apache2 reload
Apache web server service starts automatically on reboot by default, because usually that is exactly what we want in a web server. You may check if auto boot option is enabled through a systemctl utility directly.
systemctl is-enabled apache2
There may be situations when you need to take down your web server for maintenance for a prolonged time, and you don’t want Apache to start after a reboot. In such case you should disable the service with systemctl utility.
systemctl disable apache2
After completing your maintenance tasks you can re-enable the service to make Apache start automatically after a reboot.
systemctl enable apache2
The command creates a symbolic link for your system manager to run the executable upon system boot.
#Host Your First Website
Now that we have a running Apache web server, we can try putting some content on it. By default, Apache loads the index.html file, that is located in the /var/www/html directory, as the home page when someone tries to access the web server.
Let’s now access this directory and open the index.html file using vim text editor to make sure there is actual HTML code inside.
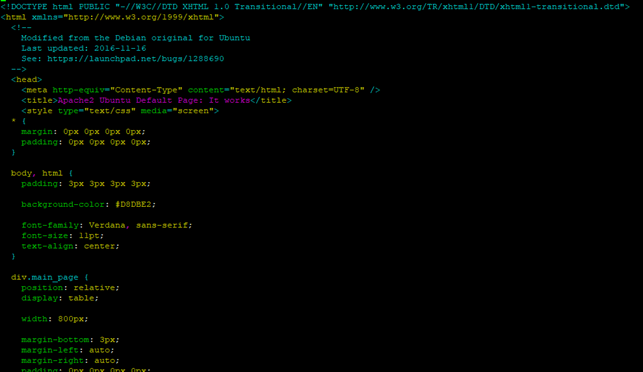
vim /var/www/html/index.html
This is the actual code of our previously seen Apache landing page. We can exit vim and delete this file.
rm index.html
Now create a new index.html file and add your own HTML code inside.
vim index.html
<html>
  <head></head>
  <body>
    <h1>This is gonna be the next BGI thing</h1>
  </body>
</html>
Access your web server again to see your custom page is being displayed.
#Host Multiple Websites (Virtual Hosts) on the Same Server
One of the great features of Apache is host virtualization. Virtual hosts give you the ability to run multiple websites on a single server. Let’s create a new virtual host for the withacherryontop.tk domain.
First, we need to create a new directory inside /var/www/ named withacherryontop.tk
mkdir withacherryontop.tk
Then access this newly created directory and create a new directory named public_html inside of it.
mkdir public_html
Yet again access this new directory and create a index.html file inside of it so that a final absolute path is as follows: /var/www/withacherryontop.tk/public_html/index.html
This time we will edit our new index.html file and add some new HTML code.
<html>
  <head></head>
  <body>
    <h1>Welcome to withacherryontop.tk</h1>
  </body>
</html>
For Apache to acknowledge our new setup we need to make a configuration file named withacherryontop.tk.conf in the directory /etc/apache2/sites-available/
Let’s access this directory and check its files.
ls -l
We have two default configuration files inside this configuration directory:
- 000-default.conf – the default website (virtual host) configuration template;
- default-ssl.conf – the default SSL certificate configuration template.
Let’s now create a withacherryontop.tk.conf file on behalf of the default 000-default.conf configuration template by copying it.
cp 000-default.conf withacherryontop.tk.conf
We can now modify this newly created file to set our website configuration.
vim withacherryontop.tk.conf
<VirtualHost *:80>
	ServerName withacherryontop.tk
    ServerAlias www.withacherryontop.tk
    ServerAdmin webmaster@withacherryontop.tk
    DocumnentRoot /var/www/withacherryontop.tk/public_html
    ErrorLog $(APACHE_LOG_DIR)/withacherryontop.tk-error.log
    CustomLog $(APACE_LOG_DIR)withacherryontop.tk-access.log combined
</VirtualHost>
- ServerName – domain name that should match the current virtual host configuration
- ServerAlias – all other domains that should also match for this virtual host (i.e. www subdomain)
- ServerAdmin – email address of the webmaster
- DocumentRoot – the directory from which Apache will serve the domain files
- ErrorLog, CustomLog – the location of log files
Save the file tand proceed to the next step.
To enable our newly created file we’ll be using a tool provided with Apache called a2ensite. a2ensite stands for “Apache 2 enable site” and in our case we are enabling the site withacherryontop.tk:
a2ensite withacherryontop.tk.conf
The output includes a helpful tip reminding us to reload apache2 for the new configuration to be applied. Let’s do that.
service apache2 reload
In case reloading the server doesn’t work, we can restart Apache.
service apache2 restart
If all is well, you should see a new hostname being added to the /etc/hosts file with your [ip_address] and [virtual_host_name]:
185.150.117.222 withachcerryontop.tk
You may now query your new hostname locally and check the response.
curl withacherryontop.tk
And by querying your IP address you should see the same website as before.
curl 185.150.117.222
We now have the default virtual host running on ‘localhost’ and the new virtual host running on “withacherryontop.tk”. If you only want to leave the new virtual host running on Apache, feel free to disable the default configuration file and restart apache2.
a2dissiste 000-default.conf
service apache2 restart
After the changes we see that our IP points to the only remaining virtual host configuration on the server which is withacherryontop.tk.conf and displays its contents.
curl 185.150.117.222
#To Wrap up
After completing this guide, you should have a fully working Apache web server on your machine and be able to configure and use it according to your needs. By following the previous instructions, you may keep adding more websites (virtual hosts) to the server, if you like.
For more advanced functionality you can always refer to the official documentation at: http://httpd.apache.org/docs/
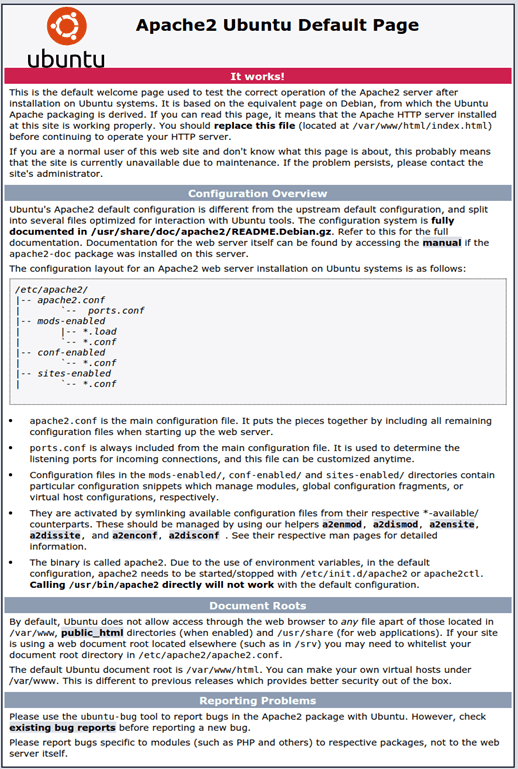
It is also handy to review the default Apache landing page as a short and quick refresher:
Starting at just $3.24 / month, get virtual servers with top-tier performance.


