How to Install Proxmox on Bare Metal [Step-by-Step]

![How to Install Proxmox on Bare Metal [Step-by-Step]](/v3/img/containers/blog_main/cloud_computing.jpg/5982b1adf933064618994915989c8491/cloud_computing.jpg?id=1739046670)


Proxmox gives you direct access to manage virtual machines and containers on a bare-metal server. You control what runs and how it runs, without dealing with a cloud panel or preconfigured stack.
We will install Proxmox remotely using a mounted ISO and a web-based console in this article. But before that, let us quickly explore more about Proxmox.
#What is Proxmox?
Proxmox Virtual Environment (Proxmox VE) is an open-source platform for managing virtual machines and containers through a single web-based interface. It runs on Debian Linux and gives you a central place to spin up, monitor, and maintain your infrastructure.
What makes it stand out is how it brings KVM and LXC together in the same environment. KVM handles full virtualization, which is what you want when you are running something big like a Windows server. LXC, on the other hand, is great when you just need lightweight containers fast and efficient, no full OS overhead. And they can both run side by side without any strange conflicts. You get isolation where it matters.
Proxmox also includes a handful of features that would normally require extra setup. Live migration works out of the box. ZFS is also available without additional installation.
#Prerequisites
Before proceeding, ensure you have these requirements in place. Preparing these ahead of time will help prevent unnecessary delays during the installation process.
- A bare metal server with support for virtualization.
- Proxmox VE ISO image. You can download this from the official site.
- Remote access to the server using Java-based iKVM or a similar remote console.
- Access to virtual media for mounting the ISO from your local machine.
- A static IP address and related network details (subnet, gateway, DNS) from your hosting provider.
With these in place, we can proceed.
#How to install Proxmox on bare metal
You can install Proxmox VE on a bare metal server without touching any physical machine. All you need is remote access and some time to walk through the installer.
#Step 1: Prepare the server
First, you need a bare metal server with IPMI/iKVM access. That way, you can mount the ISO and handle the installation remotely..
For this guide, we are using a dedicated server from Cherry Servers, which includes everything needed to access and manage the setup remotely.
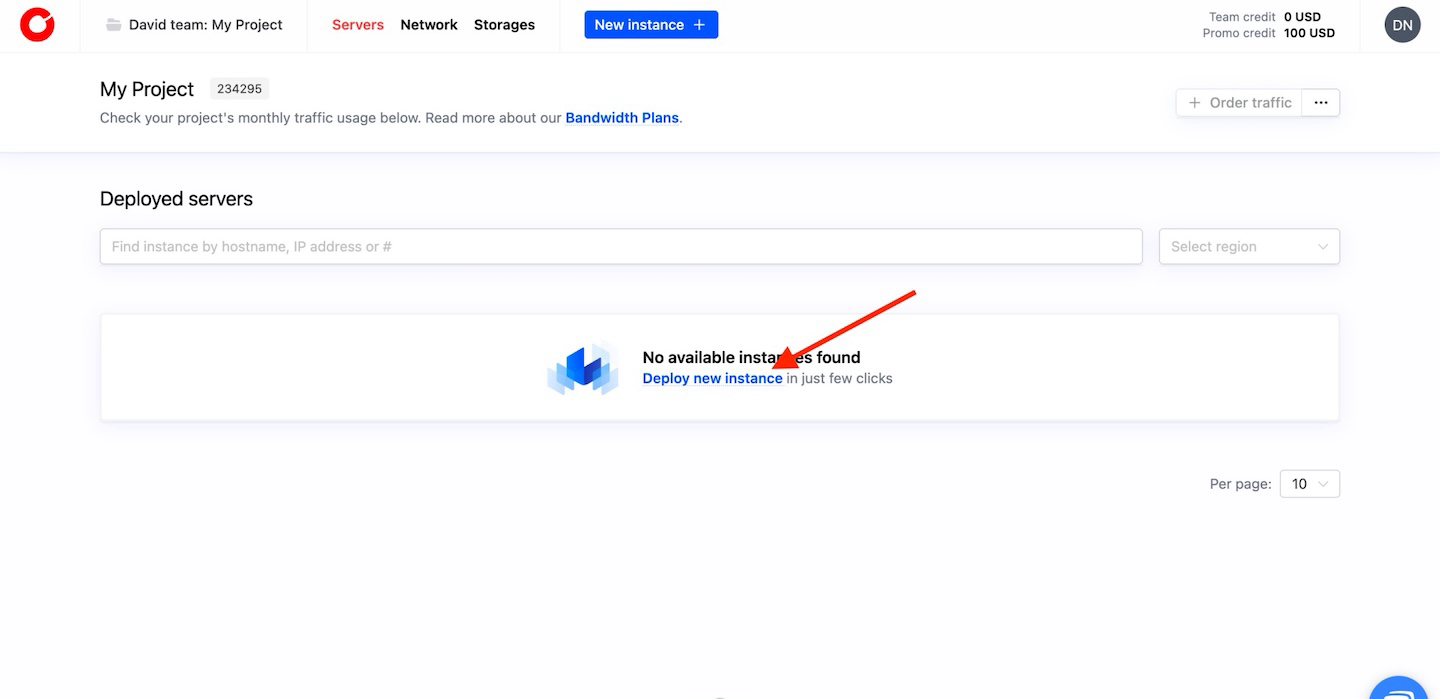
Now, log in to your Cherry Servers dashboard, select and deploy a dedicated server.
From the dashboard, click on Deploy new instance:
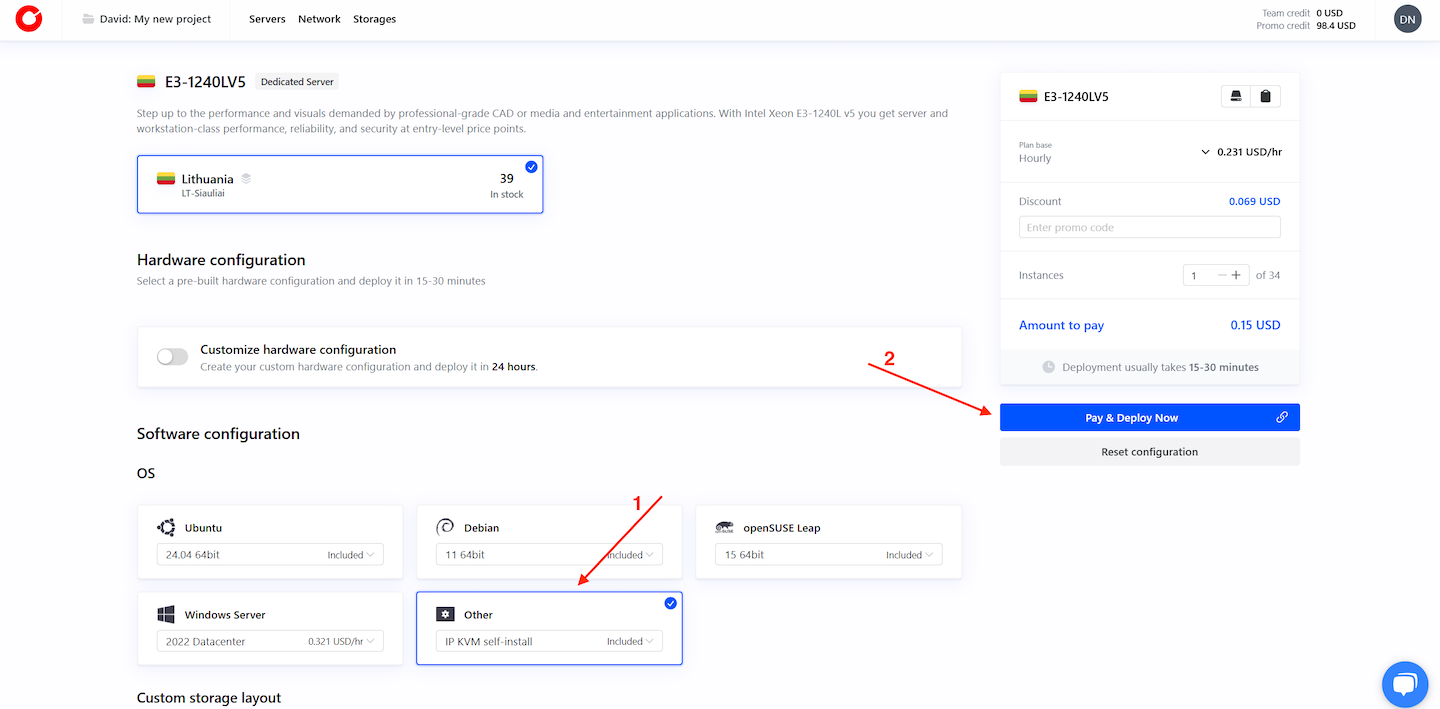
This will take you to a configuration page where you can choose the server specs and settings. Here, choose a dedicated server and a location closest to you. Then, in the Software configuration section, select Other (IP KVM self-install). This means the server will be delivered without an OS, allowing us to install Proxmox from scratch using the IPMI console.
With these, click the Pay & Deploy Now button.
After a few minutes, your server will be fully ready. Once it is ready, Cherry Servers will display the access details, including your login credentials, right on the dashboard.
#Step 2: Launch the remote console
With your server deployed, the next step is to access the remote console.
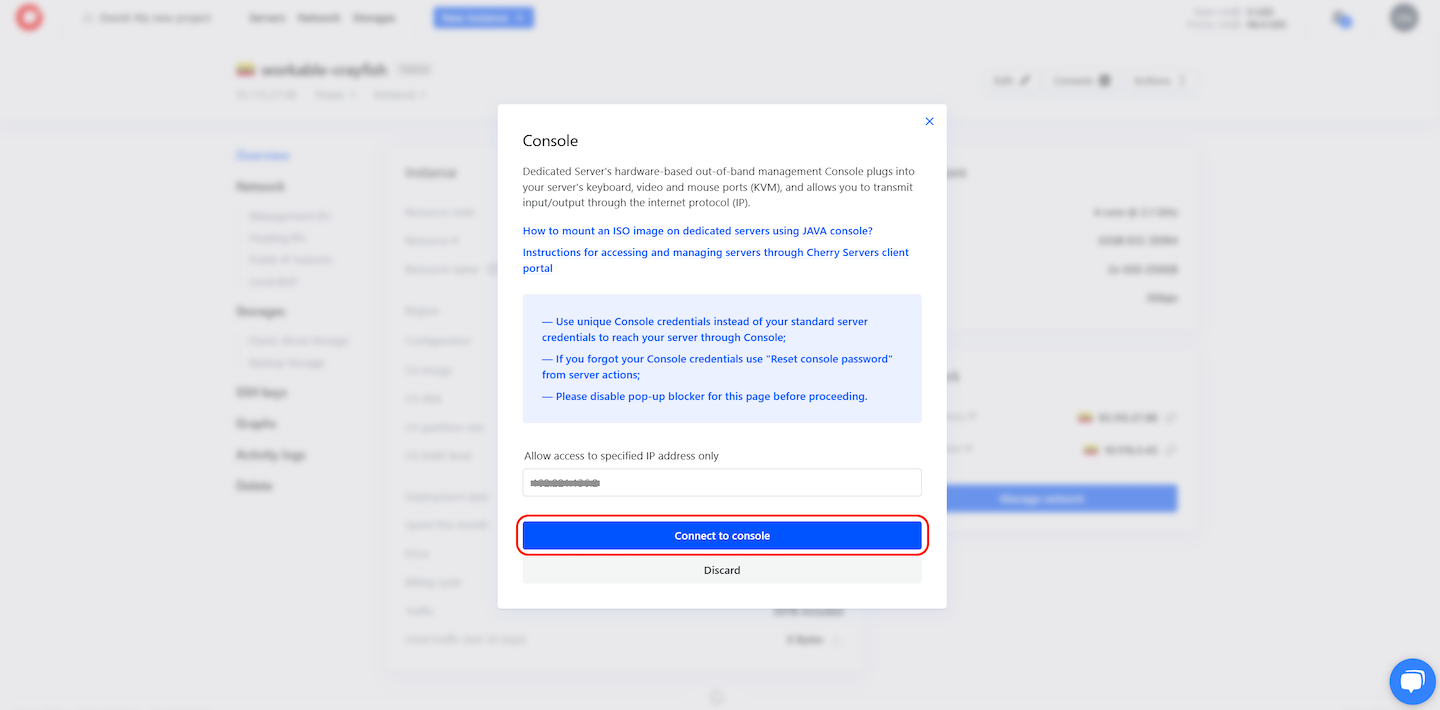
From your Cherry Servers dashboard, locate your newly created instance. Click the Console button to open the remote KVM viewer.

You should see a pop-up like the one below:
If nothing shows up, verify your browser is not blocking pop-ups. Some browsers stop the viewer from opening unless that is turned off.
When ready, click the Connect to console button to launch the KVM session.
#Step 3: Access the IPMI console
After you hit the Connect to console button, a new tab should open and take you to your server’s IPMI login screen.
You might get a browser warning about the connection not being secure. That is normal, just continue.
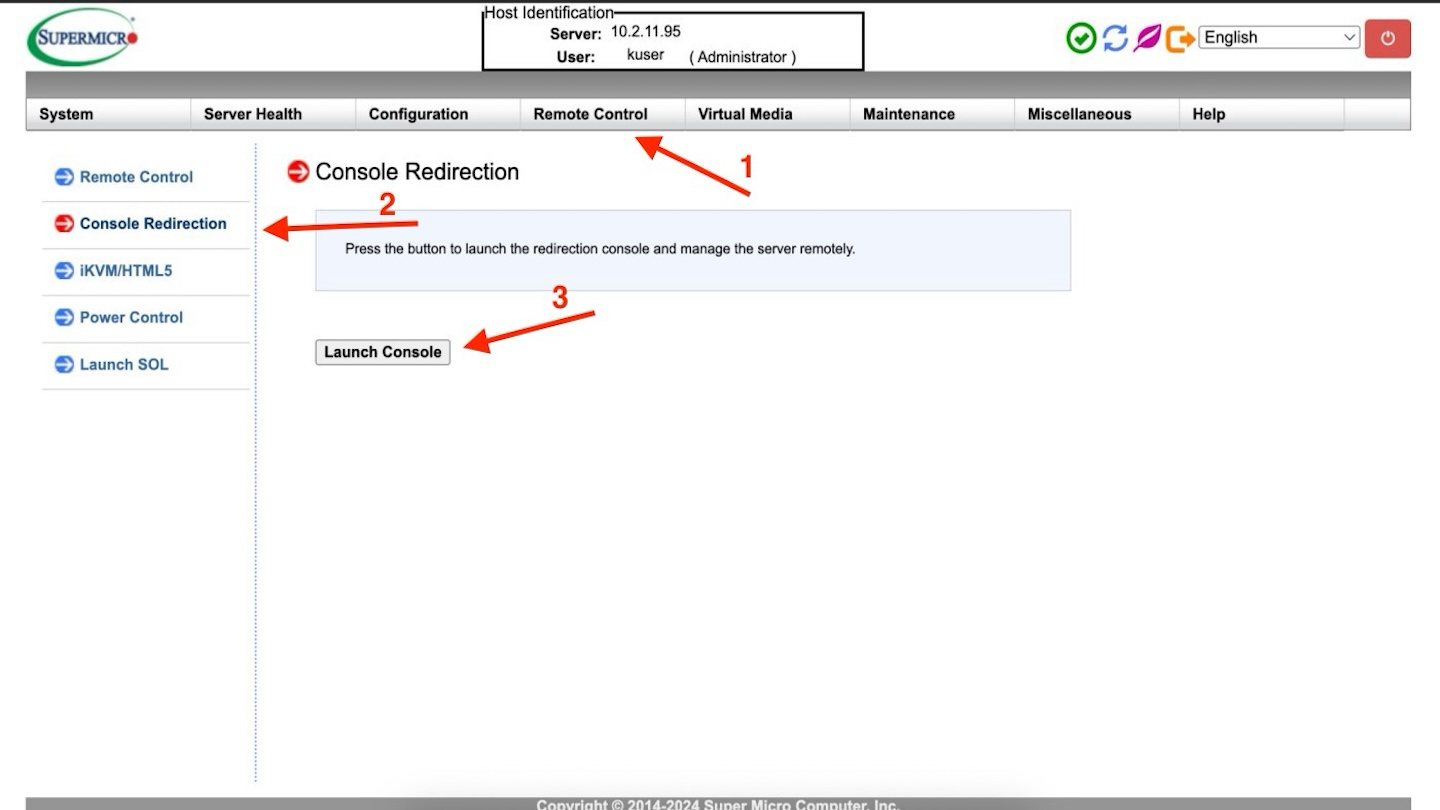
Next, you will see the Supermicro login screen. Use the IPMI credentials provided in your Cherry Servers dashboard. These are different from your Cherry Servers login details.

Once you are logged in to the Supermicro management interface, look at the top menu and select Remote Control. On the left sidebar, click Console Redirection. This section has a Launch Console click it to download the .jnlp file.
#Step 4: Open the Java iKVM viewer and mount the Proxmox ISO
With the launch.jnlp file downloaded, open it to launch the Java iKVM Viewer on your local computer.
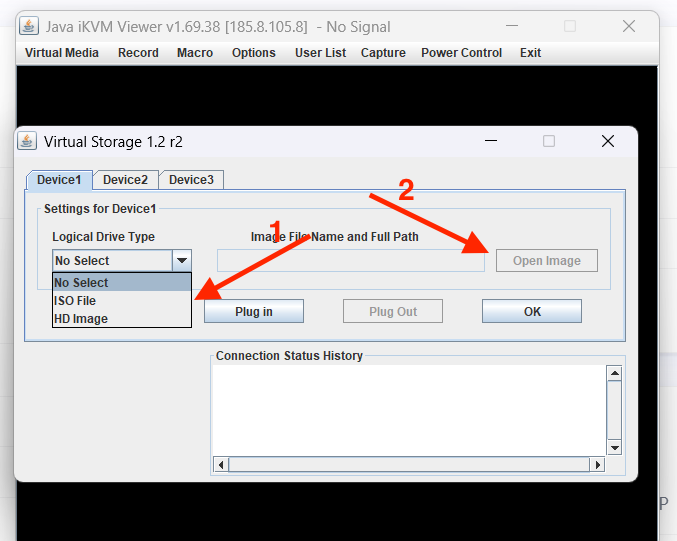
Once the viewer opens, go to the top menu and click on Virtual Media, then select Virtual Storage from the dropdown. This will open a new window. From the Logical Drive Type dropdown, choose ISO File. After that, click on the Open Image button, then browse your local files and select the Proxmox ISO image you downloaded earlier.
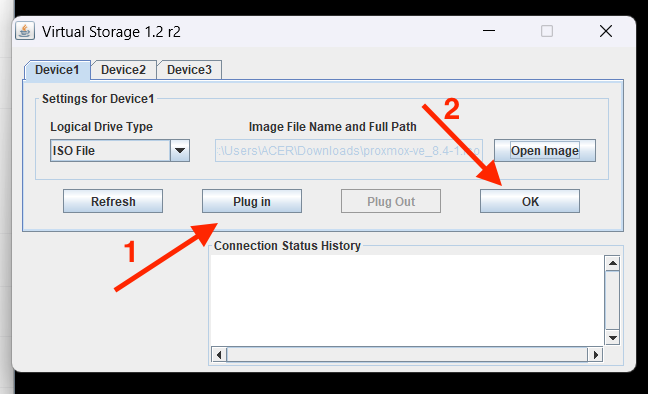
Once the ISO is loaded into the field, press Plug in. Follow it up by clicking OK to proceed.
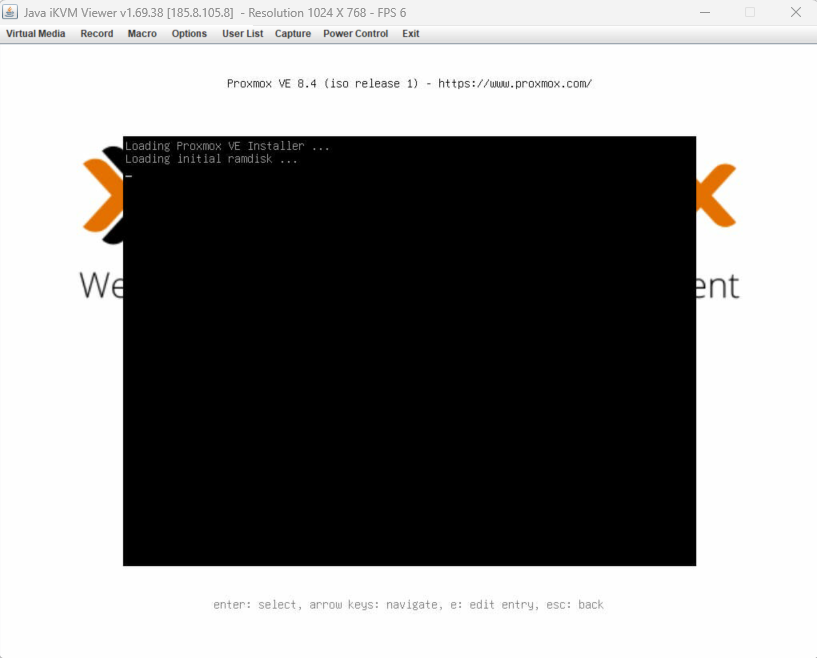
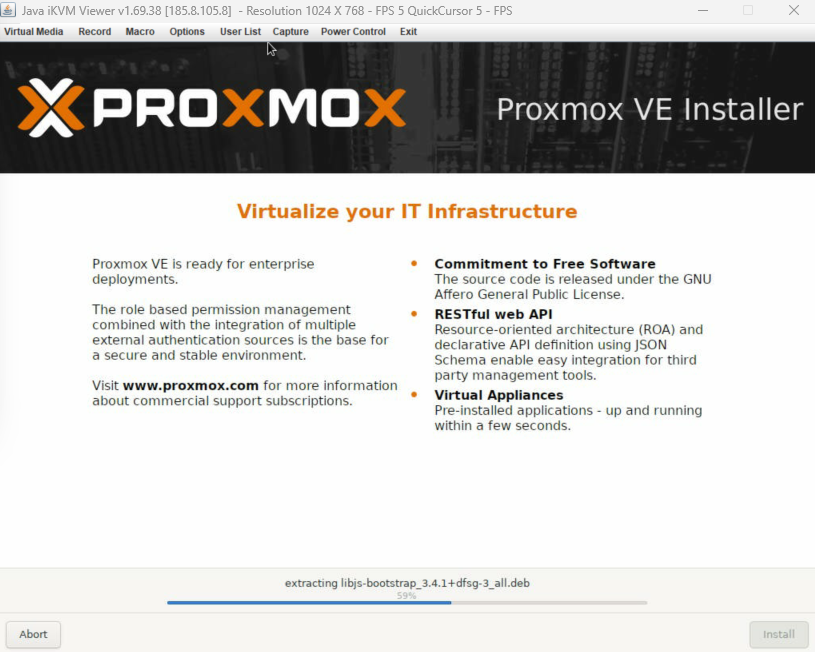
As soon as the ISO mounts properly, the server should pick it up and start loading the Proxmox installer on its own. You will see a series of logs and loading messages as the environment prepares to launch. This process may take a few moments. As long as you eventually reach the graphical installer, everything is progressing correctly. You should see a similar output to this:
Outputtesting again in 1 seconds
testing again in 2 seconds
testing again in 3 seconds
testing device '/dev/sr0' for ISO
found Proxmox VE ISO
preparing installer mount points and working environment
switching root from s1initrd to actual installation system
Starting Proxmox installation
Installing additional hardware drivers
…
done
Starting chrony for opportunistic time-sync...
Starting a root shell on tty3.
Setting console loglevel to warn.
kernel.printk = 4 4 1 7
trying to detect country...
trying to detect country...
unable to detect country -- timed out!

Starting the Installer GUI - see tty2 (CTRL+ALT+F2) for any errors...
#Step 5: Complete the Proxmox VE Installation
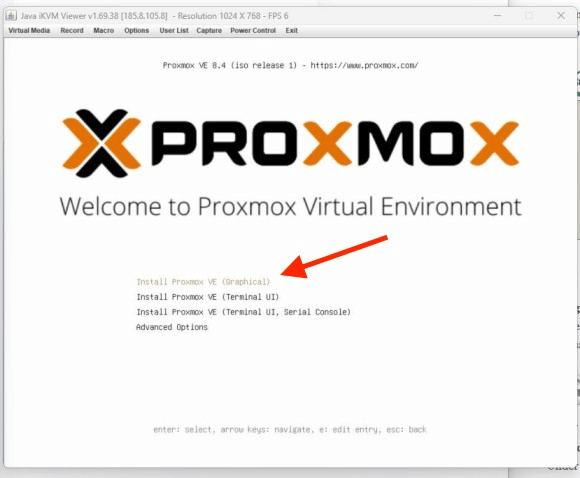
When the installer loads, it brings up a simple boot screen with a few options. Select the first one, Install Proxmox VE (Graphical), and press Enter.
This will load the installation environment and bring up a boot loader prompt showing the system initializing various components.
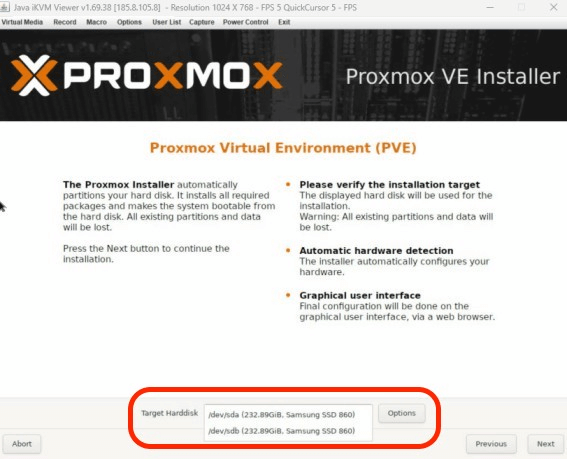
When the graphical interface fully loads, the first screen prompts you to select the target hard disk for the installation. You can proceed with the default disk or choose a different one from the dropdown.
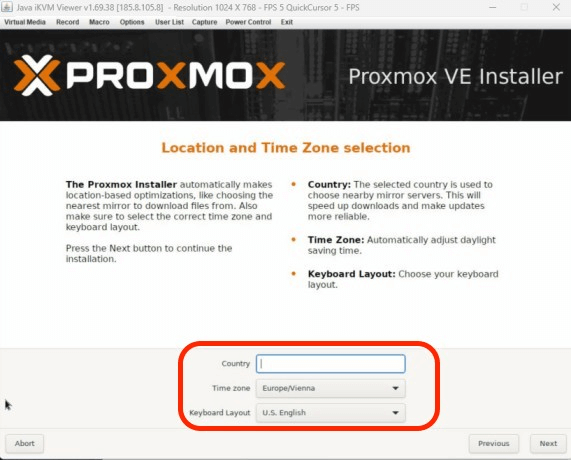
The setup will now prompt you to pick your region. Use the dropdowns to choose your location, time zone, and keyboard preference.
Afterward, set the administrator password and email address. You will need this to log into your dashboard later, so use something secure that you can remember.

On the next screen, set your network details. Enter a hostname, along with the server’s IP, gateway, and DNS. A static IP is recommended to keep things stable after rebooting.

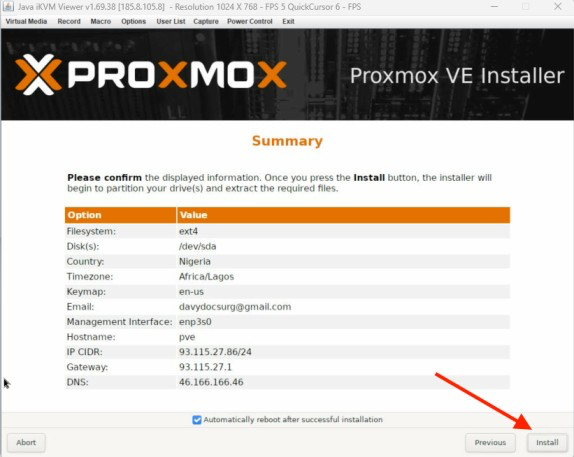
After filling in the network details, you will land on a summary page. Review your selected configuration options carefully. By default, the option Automatically reboot after successful installation is checked; this is fine to leave enabled. If all looks good, click Install to begin the installation.
From here, the system starts writing files and installing everything in the background. You will see real-time progress until the process completes.
#Step 6: Finalize installation and access the web interface
Once the installation is done, the server restarts automatically. This is because we left the Automatically reboot after successful installation option checked earlier.
When it restarts, you will see a message asking you to remove the ISO boot media. This step is important, as it ensures the server no longer boots from the installer ISO. Instead, it starts from the newly installed Proxmox system. The console message should be similar to the following:
OutputInstallation done, rebooting...
Stopping hotplug events dispatcher: systemd-udevd.
Terminate all remaining processes
Kill any remaining processes
unmounting ISO
/sys                  : ignored
/proc                 : ignored
/dev                  : ignored
/cdrom                : successfully unmounted
/                     : ignored
eject: cannot open /dev/sr0: Device or resource busy
rebooting - please remove the ISO boot media
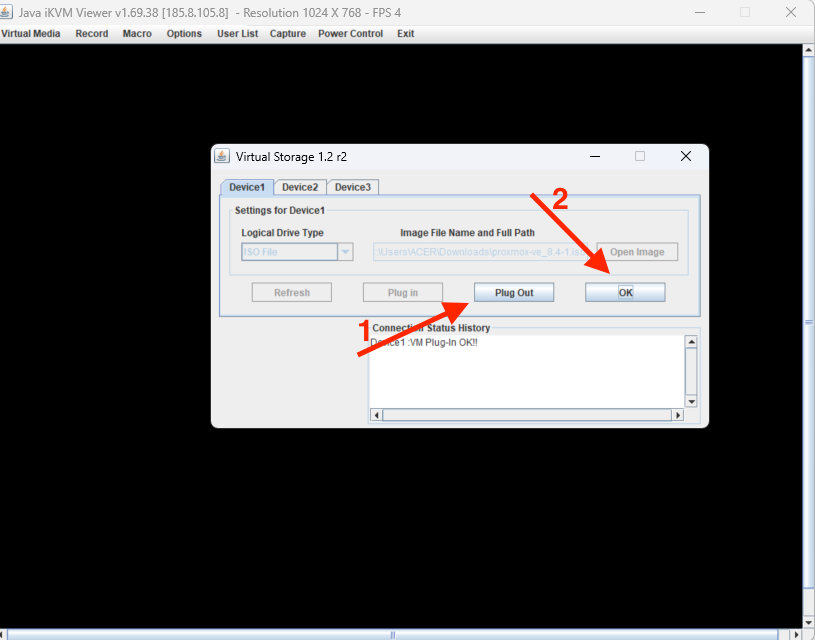
Head into the Virtual Media section of the iKVM console, then click on Virtual Storage. Then, in the pop-up window, click Plug Out next to the loaded ISO and hit OK.
Now, go back to the iKVM viewer and restart the server manually. Use the Power Control tab to do this.
When the server powers back on, it will display a short welcome message. This means Proxmox is now live. Right on the console screen, you should see a local IP address. This is what you will use to access the Proxmox dashboard from your browser.
Take note of the IP address displayed. Open a browser and enter the address in the format https://your-ip:8006. This will take you to the Proxmox login page.
Output-------------------------------------------------------------------------------

Welcome to the Proxmox Virtual Environment. Please use your web browser to
configure this server - connect to:

    https://93.115.27.88:8006/

-------------------------------------------------------------------------------

pve login:
Again, most browsers will warn you about the connection. That is normal, it uses a self-signed certificate. You can ignore the warning and move forward.
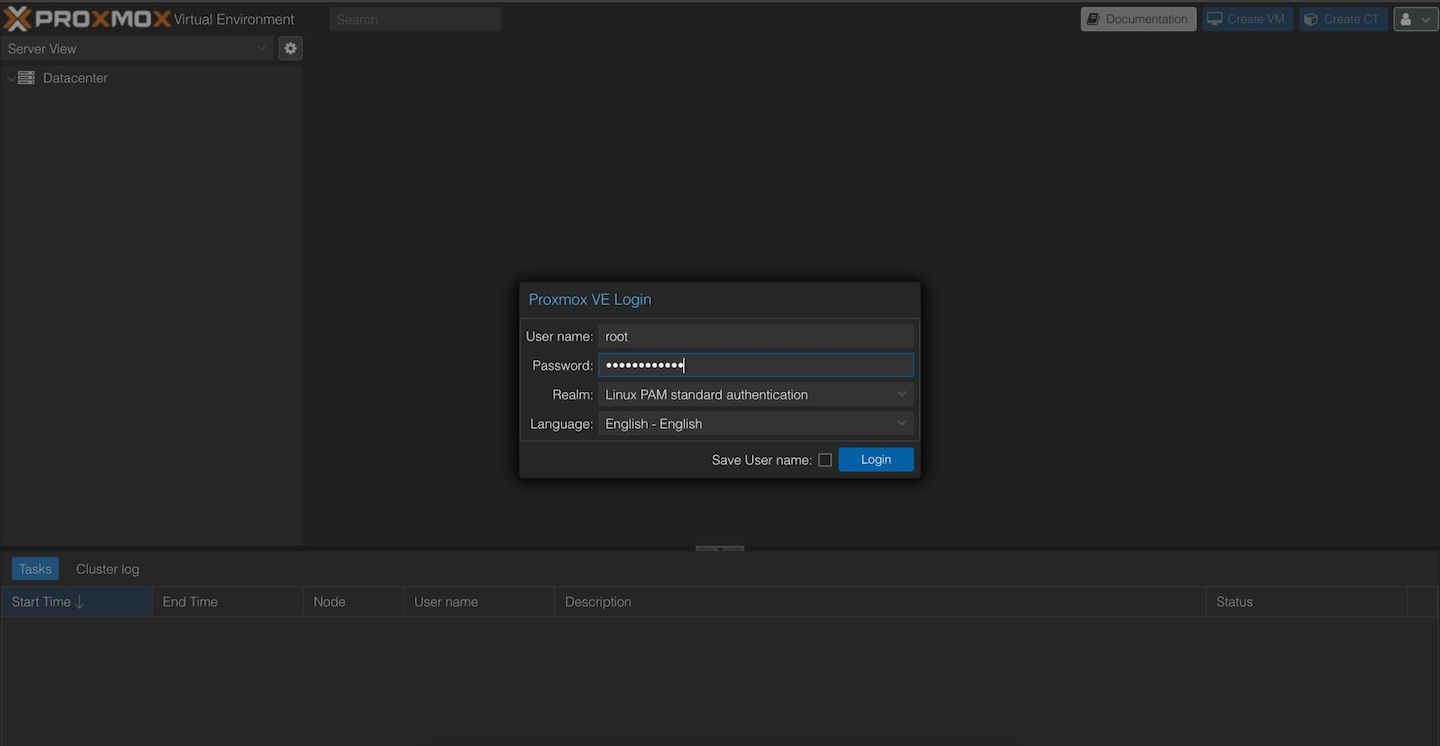
Once the page loads, you will see the Proxmox VE login screen. For the username, type root. Then, enter the password you created during the installation process. Leave the Realm field as Linux PAM standard authentication, and select your language.
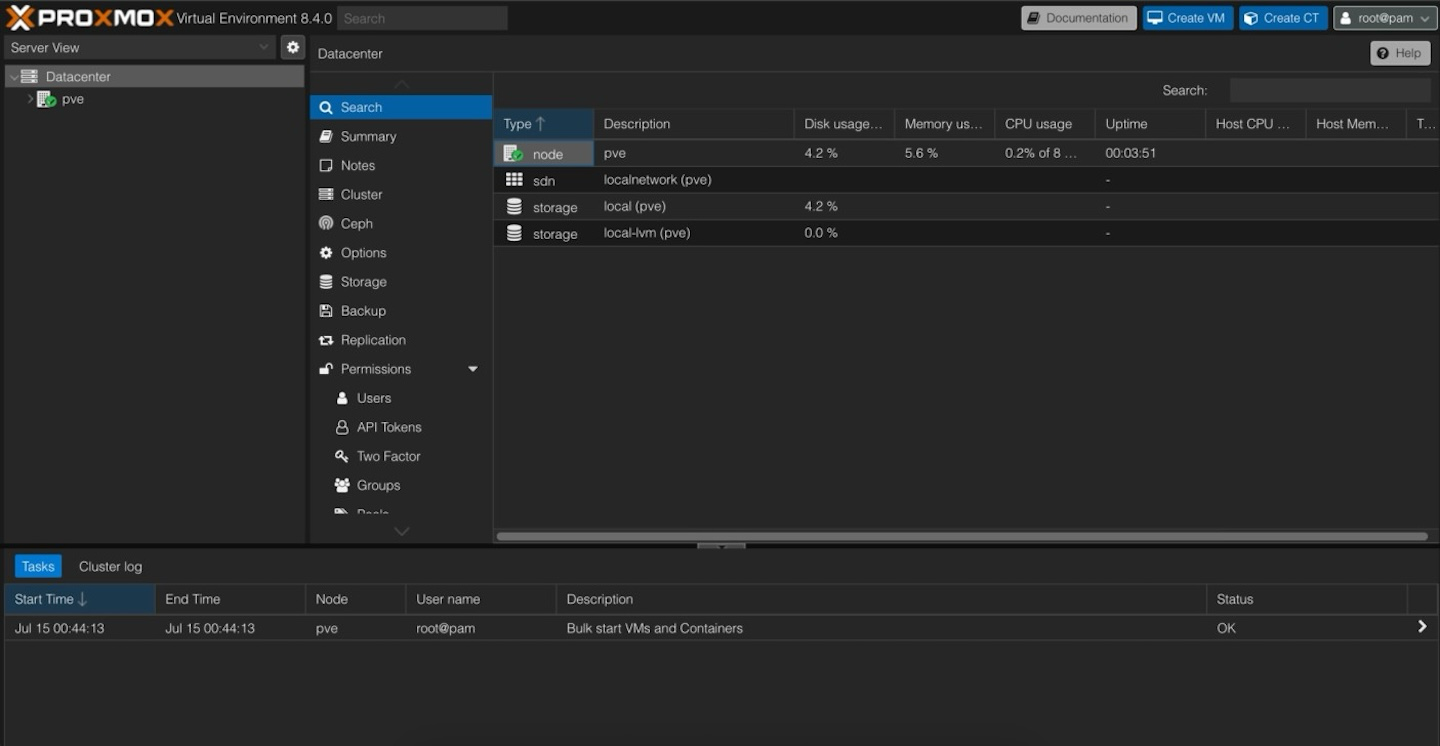
After logging in, you will be taken to the Proxmox dashboard. You should now see your node, along with basic system information like CPU usage, memory stats, storage volumes, and other key details.
That is it. Proxmox is now installed and ready. You can start setting up virtual machines, managing containers, scheduling backups, or linking multiple servers together if needed.
#Conclusion
Proxmox offers great control over your server. Every component is visible, every step is yours. Whether you are building a test lab or planning production workloads, this foundation will hold steady.
The same approach will work on most servers that give you remote ISO access and an IPMI console. We used Cherry Servers for this guide, but the process stays nearly the same with other providers using Supermicro or similar hardware.
From here, you can explore more of what Proxmox offers. You can test snapshots, set up backups, or add more storage. It is a flexible environment that grows with your needs, with no unnecessary layers or restrictions in the way.
Also read:


