Managing Docker Volumes: How to Use Volumes in Docker?


Docker volumes are import components of containerized applications that enable data shareability across containers and portability across platforms. Managing Docker volumes involves handling the lifecycle of the Docker volume from creation to deletion. Docker provides simple commands to manage them.
This article provides you with a complete guide on how to use Docker volumes. It describes how you can create and mount a volume, inspect a volume, and delete Docker volumes. The article also guides on performing other useful Docker volume management tasks, including volume backup and restore.
#What are Docker volumes?
Docker volumes are storage blocks where data related to containers can be stored separately outside the containers’ file system and portable across various platforms. Therefore, it enables users to share the containers with other containers. This shareability allows developers to create shared volumes to store dependencies used by different containers.
The volume data persists even if the container gets restarted, updated, or deleted. Also, you can take volume backups of snapshots independent of the container. Therefore, Docker volumes enable persisting important data in case of any failure to the Docker containers. Since you can directly access data from the host's storage or other outside systems, it reduces the extra work tied to containerized file actions. As a result, those features help increase the performance of containerized applications.
#Docker volume types
There are three different Docker volume types, and it is important to know their differences.
- Anonymous volumes - The volumes the Docker generates when creating a container are not persistent. Hence, anonymous volumes that cannot be shared will be destroyed upon container termination.
- Named volumes - Named volumes are created using the dockers’
volume createcommand, which will be stored in a folder in the host machine. These are allied named volumes as the user specifies a specific name to the volume at their creation. Docker handles the creation and management of named volumes. - Host volumes or Bind mounts - A directory or file on the host system mounted directly into the container are called host volumes. Host volumes are useful when you need a container to tap into certain data or files on your computer directly. However, be careful because when you remove a file or folder from the host, it disappears. Similarly, any alterations made within the container to a host volume will reflect on the host.
Docker provides several useful commands for managing the lifecycle of the Docker volumes, which we discuss below.
Ready to supercharge your Docker infrastructure? Scale effortlessly and enjoy flexible storage with Cherry Servers bare metal or virtual servers. Eliminate infrastructure headaches with free 24/7 technical support, pay-as-you-go pricing, and global availability.
#Where are Docker volumes stored?
In Linux, Docker volumes are stored in the host system file path /var/lib/docker/volumes/. Each volume is stored in its own folder within this directory, and the data for each volume can be found in a subfolder named _data.
If you are using Docker Desktop for Windows, Docker volumes are stored within the virtual machine that Docker Desktop uses, not on the Windows host machine itself. Therefore, the file path for Docker volumes in Docker Desktop for Windows is the same as it is on a Linux machine.
#How to use Docker volumes: Commands for managing volumes in Docker
Docker provides a set of commands for managing docker volumes. In this section, we will learn how to use Docker commands for creating Docker volumes, mounting Docker volumes, and checking various information about Docker volumes.
#1. How to create a Docker volume?
You can create a Docker volume using the following CLI command.
docker volume create

There are specific options you can apply with this command. If you do not specify any name, Docker will create a random name and assign it to the volume in the local driver, as in the above example.
The options include -d or --driver, which specifies the volume driver name, --label from which you can set a list of metadata for the volume, and -o, or --opt for setting driver-specific options as a map.
With all the options, let’s create a sample volume called ‘myVolume11’.

#2. How to mount a Docker volume?
Mounting a Docker volume is like plugging it into a Docker container. This allows the container to access a special folder, which could be on your computer (the host) or a separate storage space managed by Docker (a named volume).
1) Mounting a Docker volume using the -v command
Using the -v or --volume command, you can attack previously created named volumes to a container.
docker run -v <volume_name>:/<path_to_mount> <imageName>
In the above command, you must include the volume name, the path to mount it, and the image or container name. The following is an example.
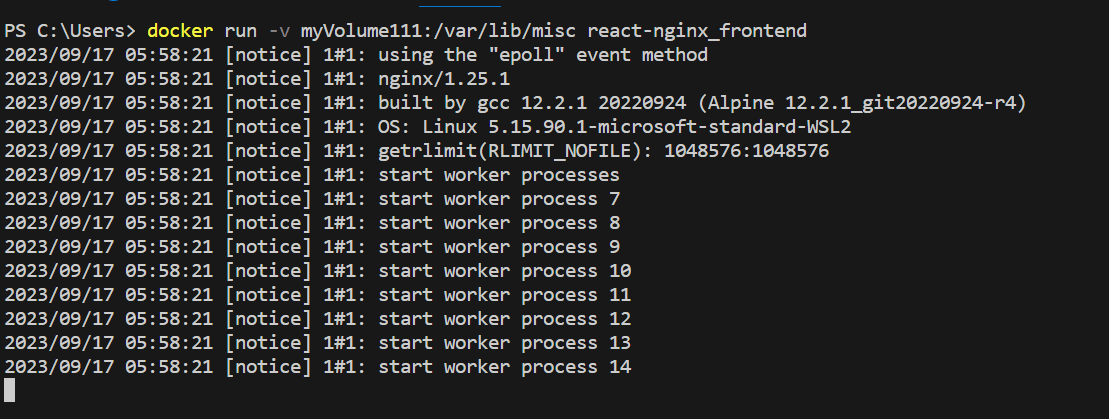
When you mount the named volume, it will begin to use the volume specified in the target path. Therefore, the data will remain even if you terminate or delete the container. Also, you can mount the same volume to multiple containers.
2) Mounting a Docker volume using the - -mount command
Alternatively, you can use the --mount command to mount host or named volumes to a container.
Using the --mount flag gives you a better way to perform volume mounting than the -v or --volume options. You can specify your target volume and the destination container to which you want to place it.
Docker run --mount type=<volumeType>,source=<volumeName>, target=<path_to_mount> <imageName>
For named volumes, you can use the type volume, and for host volumes, you can specify the type and bind.
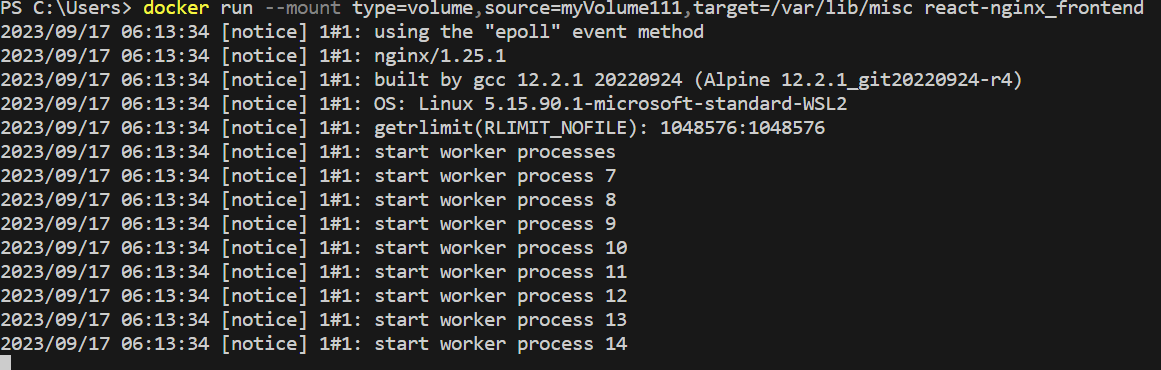
In addition, you can use the option readonly so that the volume will be mounted as a read-only volume.
Following is an example of Docker volume being used by multiple containers.

#3. Creating and mounting with docker-compose
Think Docker Compose** **is a tool that lets you create Docker containers with volumes. Instead of using multiple commands and configurations in CLI, you can specify the configurations for your container application in ‘docker-compose.yml.’
The following is an example content of a docker-compose.yml.
services:
  frontend:
    image: nginx:latest
    volumes:
      - myVolume222:/var/lib/misc

volumes:
  myVolume222:
In the above example, a named volume called myVolume222 is specified to be attached to the nginx: latest at /var/lib/misc. When you run the docker-compose up command, it will create this volume at the initial run. For preceding executions, it will re-use the same volume. In addition to the above specifications, you can also specify the backup paths to backup and restore the backups.
#4. How to check Docker volumes?
After you have created the volume, you can inspect and check information about a Docker volume using the following Docker command.
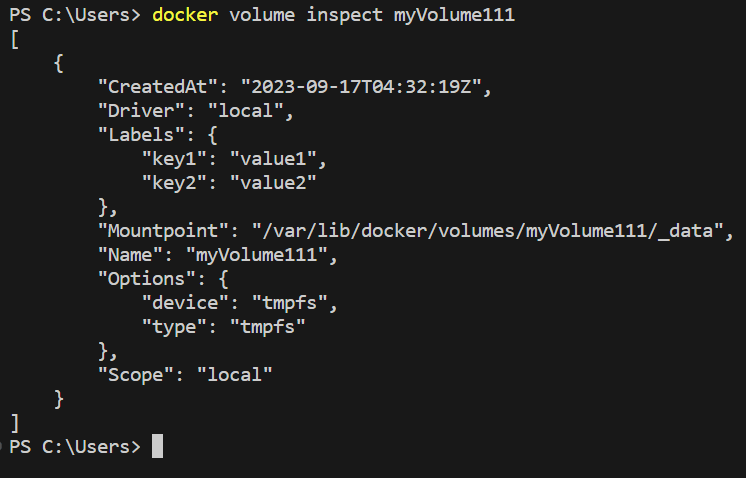
1) Inspect a specific volume
docker volume inspect <volume_name>
The following shows the information returned by Docker for the above-created Docker volume myVolume111. As you can see, it shows information like when you created it, the options and labels you have specified, name, and driver. Additionally, it shows the mount point or the location at the host where it stores the data.
2) Inspect specific volume information
If you want to see only specific information, you can use the following commands.
In Windows
docker volume inspect <volumeName> | ConvertFrom-Json | ForEach-Object { $_.<speciafc_data_you_want> }
Following is an example of getting only the label information

You can do the same in a Linux machine with grep or jq command-line JSON processing tools.
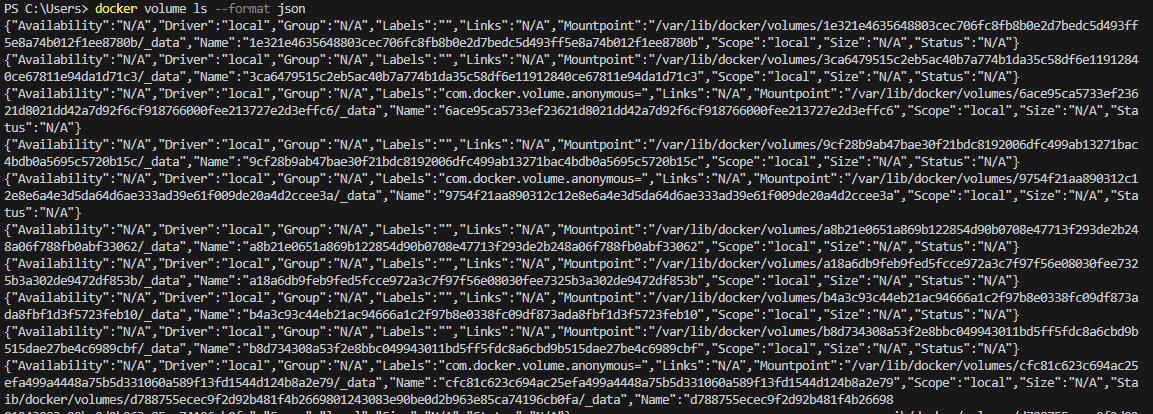
3) Check all available volumes
Use the following command to see all the available volumes in your host machine.
docker volume ls
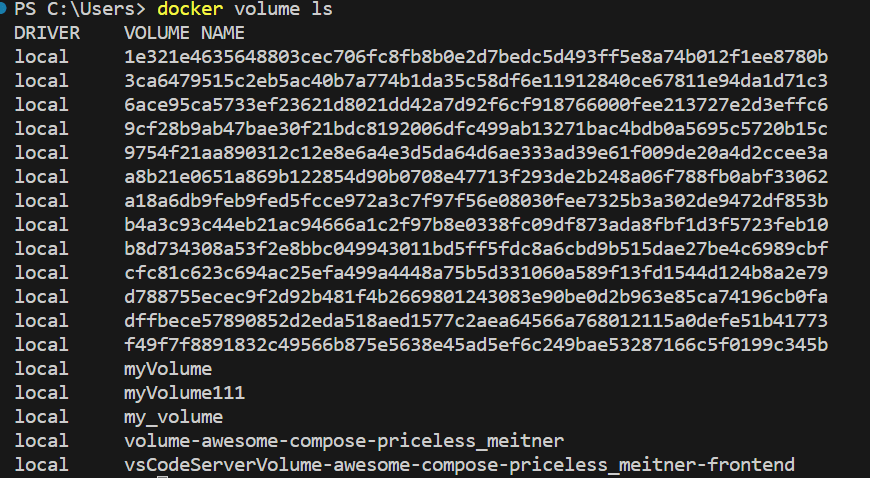
This will only give you the driver and the name of the volume. If you want to view all the information about each volume, set the option --format as json
#5. How to delete Docker volumes?
When managing Docker volumes, it is also important to know what commands you can use to delete them which we will discuss in this section.
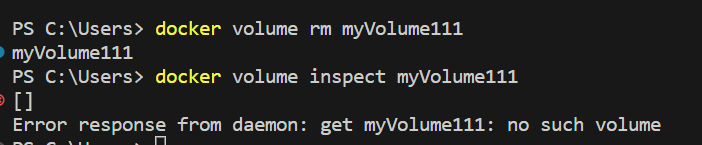
1) Delete a single Docker volume
You can use the following command to delete a Docker volume.
docker volume rm <volumeName>
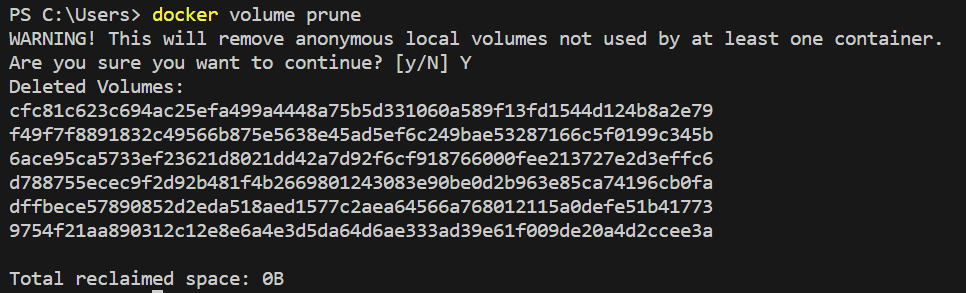
2) Delete all Docker volumes
When managing Docker volumes, checking and deleting unused volumes is important to avoid wasting container and host machine storage space. Especially when creating and removing containers frequently for testing or learning purposes, you might accumulate several old and unused Docker volumes, which can eat up disk space.
You can use the Docker volume prune command to search for and remove all Docker volumes not attached to any containers. It offers a quick way to clean your created volumes for testing or development purposes.
docker volume prune
When you run this command, Docker will ask to confirm if it is okay to proceed with the removal to prevent accidental deletions.
#6. How to back up and restore the Docker volumes?
Backing up Docker volumes is critical when managing Docker volumes to restore them in case of any disaster to the container. The backup commands vary according to the platform you run the containers.
You can use the following command to back up the volume data into your local machine.
docker run --rm -v <volumeName>:/volume_data -v <path_to_store_the_backup>:/backup <imageName> tar cvzf /backup/backup.tar /volume_data
The following shows an example of its usage.
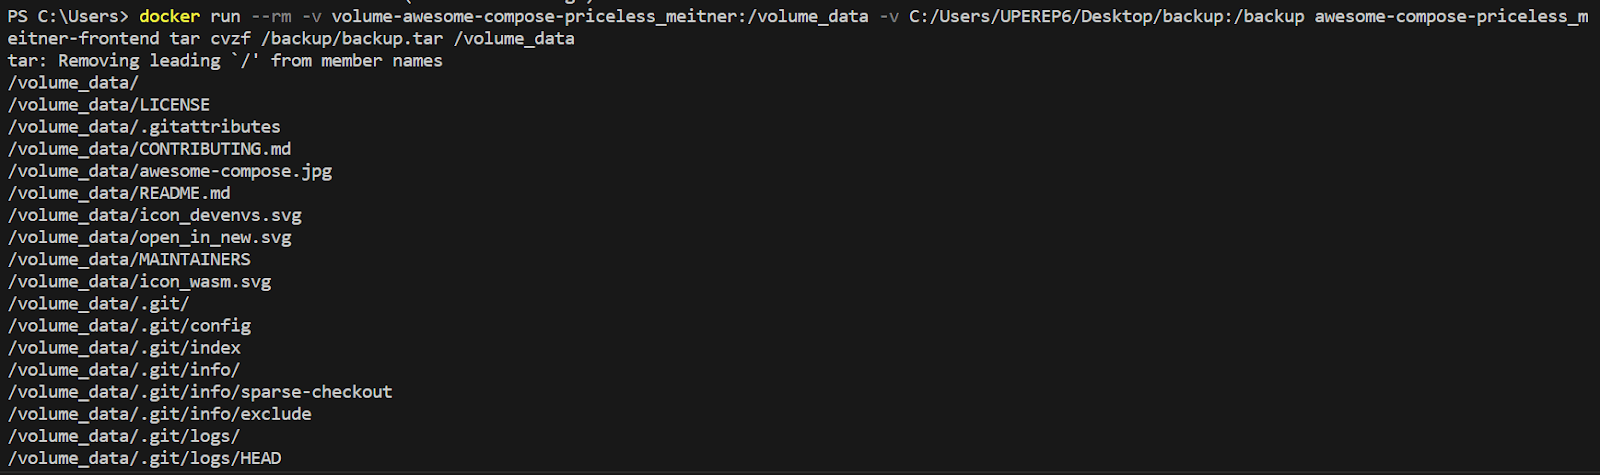
You want to run the tar cvzf /backup/backup.tar /volume_data command inside the container and attempt to create a tarball of the /volume_data directory.
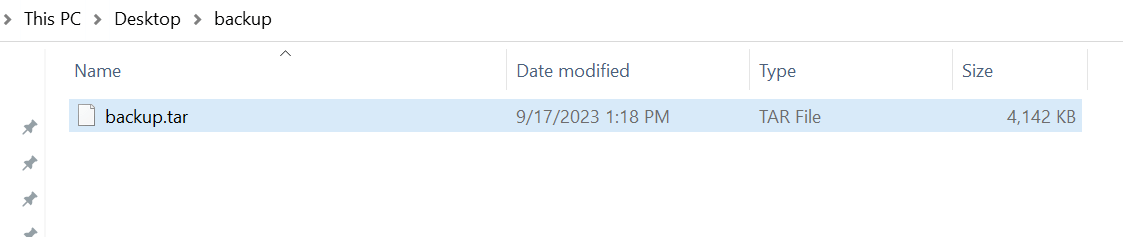
If you extract the backup, you can see the backup data.

If you want to restore the docker volume from the backup on your local machine, use the following command.
docker run --rm -v <volumeName>:/volume_data -v <path_to_store_the_backup>:/backup <imageName> tar xvz /backup/backup.tar /volume_data
#Conclusion
In this guide, we discussed how to manage Docker volumes using various ways, including creating and mounting Docker volumes through simple CLI commands and Docker compose. Docker provides commands for volume management tasks, including deleting, pruning, and inspecting to view required information. What’s more, Docker allows the backup and restore of Docker volumes using simple CLI commands so that you can preserve what is stored in Docker volumes in case of any container failure.
Thanks for learning with Cherry Servers!
Our open cloud infrastructure offers developers affordable dedicated servers and VPS providing the robust hardware required for Docker deployments with full control, stable workloads, and free technical support 24/7.


