How to Install MongoDB on Ubuntu 22.04 | 7 Steps


Not using Ubuntu 22.04? Check our previous guide on How to Install MongoDB on Ubuntu 20.04.
Developers use MongoDB for its flexibility, scalability, performance, and ecosystem - key capabilities needed to build and power modern applications. In a few configuration steps, you can install MongoDB on your Ubuntu 22.04 LTS machine, the latest long-term support release of the Ubuntu Linux distribution.
This step-by-step tutorial will cover the entire process, from how to install MongoDB on Ubuntu 22.04 to how to use it, with necessary commands and code examples. We will focus on installing the MongoDB Community Edition on Ubuntu 22.04, code-named Jammy JellyFish.
Not using Ubuntu 22.04? Check our guide on how to install MongoDB on Ubuntu 24.04.
#Contents
- Introduction to MongoDB
- Installing MongoDB on Ubuntu 22.04
- Starting and enabling the MongoDB service
- Creating a database and user in MongoDB
- Securing MongoDB on Ubuntu
- Configuring MongoDB for remote access
- Working with MongoDB database
#What is MongoDB?
MongoDB is an open-source, cross-platform database that has become widely used for developing high-performance, scalable applications. It differs from traditional SQL databases in how it models and organizes data.
Instead of rigid, tabular relations, MongoDB is built on a flexible, document-oriented data model. Each entity is stored as a BSON document – a binary representation of JSON-like field-value pairs. Documents contain hierarchical structures with arrays and sub-documents, mirroring complex real-world data.
The declarative document model, dynamic schemas, and native scaling capabilities make MongoDB popular for agile development with fewer data restrictions.
#What is mongodb used for?
MongoDB is used for building any applications, such as web applications or mobile apps, that involve large volumes of rapidly changing, semi-structured, or unstructured data. Because of its flexible data structure, MongoDB is a logical option for developers seeking to quickly build applications that can scale while managing large amounts of data processing requirements.
The Current stable release is MongoDB 7.0. This is a major release that was released in August 2013 and is supported both by on-premise deployments and MongoDB Atlas, a multi-cloud database service.
MongoDB 7.0 packs the following key improvements to enhance developer experience.
- Enhanced security with Queryable Encryption that helps with encryption of data from the client side and running expressive queries on randomized data.
- Performance enhancements which include compound wildcard indexing, and improved sharding diagnostics for metadata, cluster, database, and collection levels. In addition, working with time-series data and large datasets has been streamlined.
- Efficient and smoother data migration thanks to cluster-to-cluster sync that provides more flexibility when syncing data across database clusters.
- Smoother developer experience with the implementation of user role variables, support for fine-grained updates and deletes in time-series collections, improved cache refresh time fields, and much more.
Check out the MongoDB 7.0 release notes for a more in-depth look at the latest features and improvements with the current release of MongoDB.
#Prerequisites
To follow along this tutorial and install MongoDB on Ubuntu 22.04, you need the following set of requirements:
- An instance of Ubuntu 22.04 LTS with SSH access;
- A regular login user with sudo privileges configured on the instance.
#How to Install MongoDB on Ubuntu 22.04: Step-by-step
After completing the following seven steps, you can install and configure MongoDB on your Ubuntu 22.04 system. The first two steps walk you through the installation process. The remaining steps detail how to create a database and database users, secure the database server, configure remote access, and work with the MongoDB database.
#Step 1: Install MongoDB on Ubuntu 22.04
The first step is to install the prerequisite packages needed during the installation. To do so, run the following command.
sudo apt install software-properties-common gnupg apt-transport-https ca-certificates -y
To install the most recent MongoDB package, you need to add the MongoDB package repository to your sources list file on Ubuntu. Before that, you need to import the public key for MongoDB on your system using the wget command as follows:
curl -fsSL https://pgp.mongodb.com/server-7.0.asc | sudo gpg -o /usr/share/keyrings/mongodb-server-7.0.gpg --dearmor
Next, add MongoDB 7.0 APT repository to the /etc/apt/sources.list.d directory.
echo "deb [ arch=amd64,arm64 signed-by=/usr/share/keyrings/mongodb-server-7.0.gpg ] https://repo.mongodb.org/apt/ubuntu jammy/mongodb-org/7.0 multiverse" | sudo tee /etc/apt/sources.list.d/mongodb-org-7.0.list
The command adds the MongoDB 7.0 sources list file to the /etc/apt/sources.list.d/ directory. This file contains a single line that reads:
echo "deb [ arch=amd64,arm64 signed-by=/usr/share/keyrings/mongodb-server-7.0.gpg ] https://repo.mongodb.org/apt/ubuntu jammy/mongodb-org/7.0 multiverse"

Once the repository is added, reload the local package index.
sudo apt update
The command refreshes the local repositories and makes Ubuntu aware of the newly added MongoDB 7.0 repository.
With that out of the way, install the mongodb-org meta-package that provides MongoDB.
sudo apt install mongodb-org -y
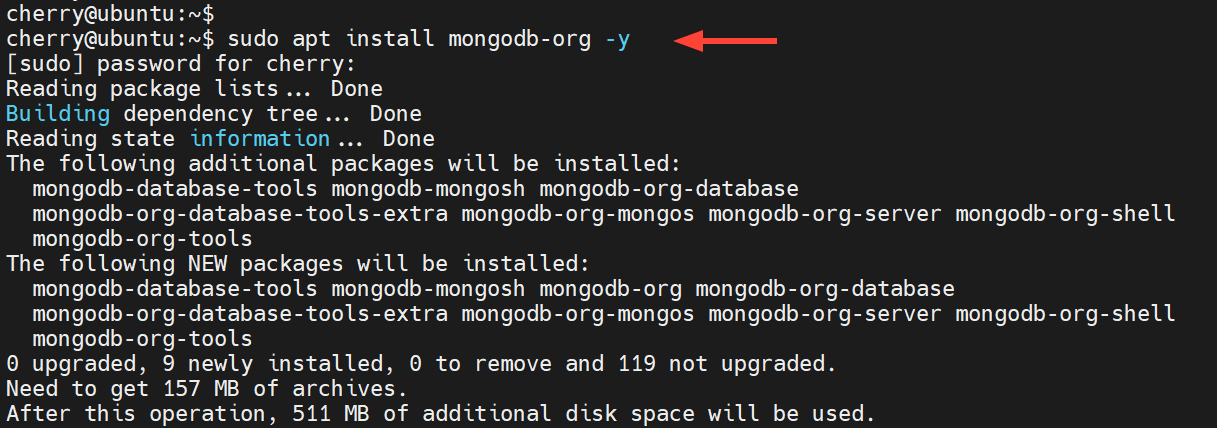
The command installs the MongoDB database server along with the database core components including the shell tools. Once the installation is complete, verify the version of MongoDB installed:
mongod --version
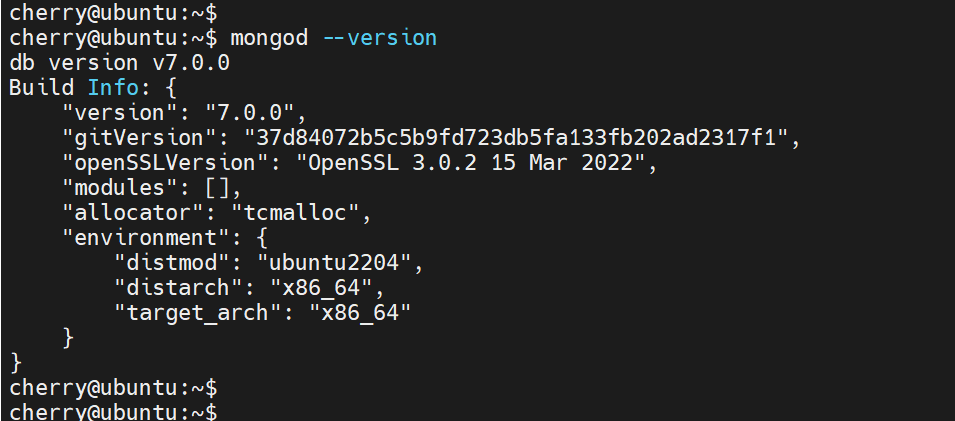
This lists a bunch of information including the version, Git, and OPenSSL version among other details.
#Step 2: Start MongoDB service
The MongoDB service is disabled upon installation by default, and you can verify this by running the below command:
sudo systemctl status mongod

To start the MongoDB service, execute the command:
sudo systemctl start mongod
Once again, confirm if the service is running:
sudo systemctl status mongod
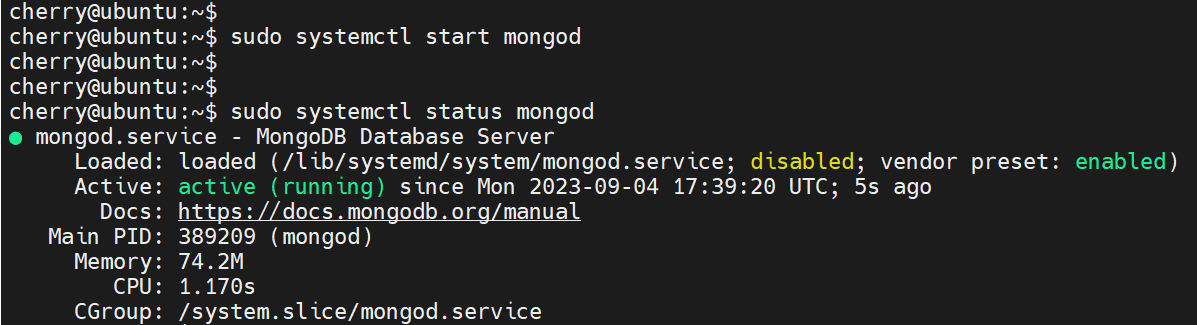
From the above output, you can see that MongoDB is up and running. Additionally, you can confirm that the database is up and running by checking if the server is listening on its default port which is port 27017.
To do so, run the following ss command:
$ sudo ss -pnltu | grep 27017
You should see the following output on your terminal.

After you have verified the service is running as expected, you can now enable MongoDB to start on boot as shown.
sudo systemctl enable mongod

So far, MongoDB has successfully been installed and configured to start on boot.
#Step 3: Create MongoDB database and user
By now, your MongoDB instance should be running and configured for remote access. Let’s shift gears and explore how to create a database and a user in MongoDB.
To access MongoDB, run the command:
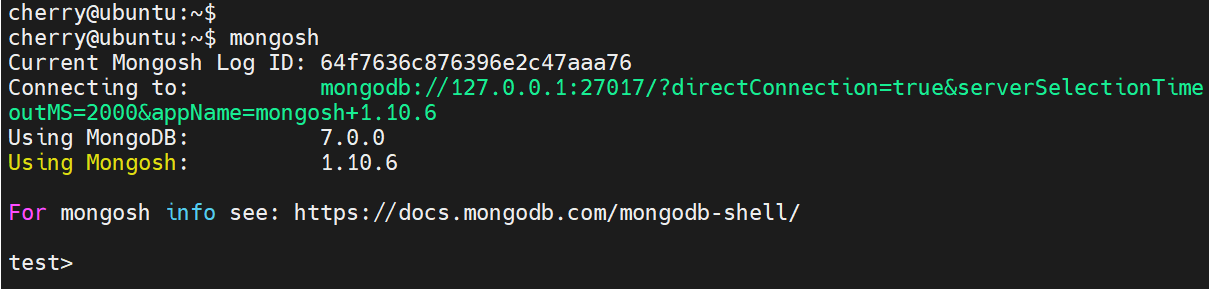
mongosh
Before you drop to the MongoDB shell, you will see some details about MongoDB, like the version of MongoDB and MongoDB shell and the URL for the Mongosh documentation.
Above the Mongo shell prompt, you will also see a warning suggesting that access control hasn't been enabled for the database and that read and write access to data and configuration is restricted. This warning is displayed because authentication hasn't been enabled yet - it will disappear after authentication to the database is enabled.

Three databases are created upon installation by default. These are admin, config, and local. To list the existing databases, run the command:
show dbs

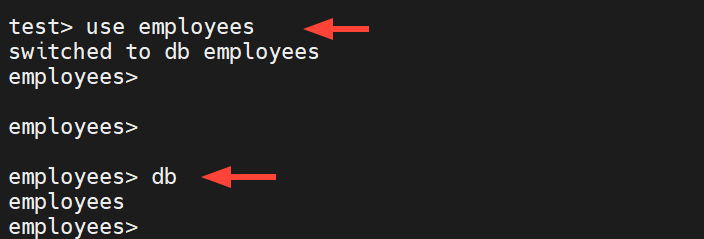
To create a database, invoke the use command followed by the database name. For instance, to create a database called employees run the command:
use employees
To confirm the database you are currently in, run the db command. In this case, you will get employees as the output.
db
MongoDB provides several shell methods for managing your database. The db.createUser method allows you to create a new user in a database.
This method requires you to define the username and password of the user and any roles you wish to grant the user. This information is presented in JSON format.
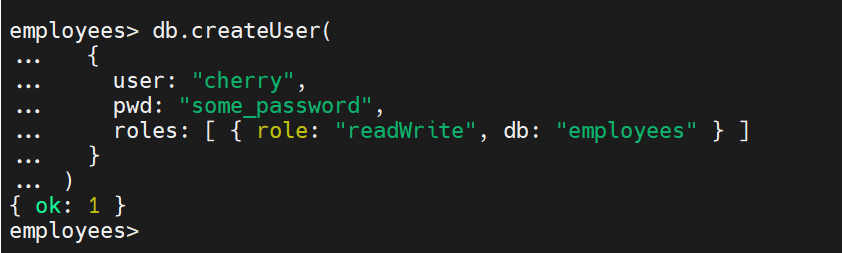
Here is the syntax of creating a user called cherry with read and write roles on the employees database.
db.createUser(
  {
    user: "cherry",
    pwd: "some_password",
    roles: [ { role: "readWrite", db: "employees" } ]
  }
)
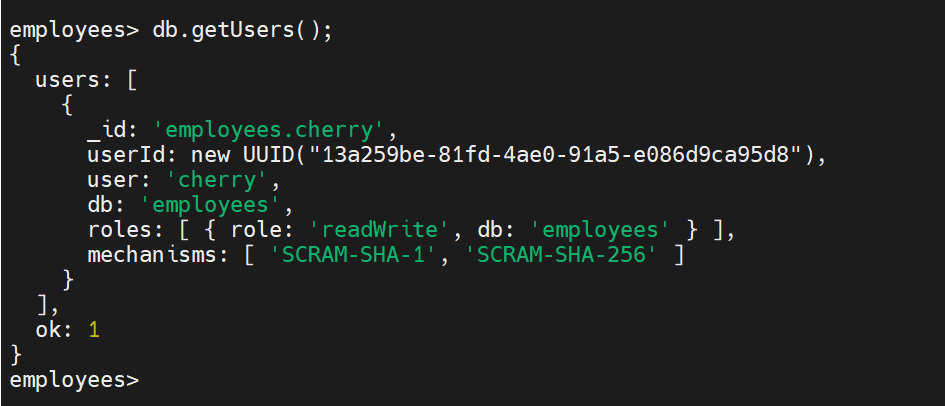
You can list the users created using the db.getUsers() method.
db.getUsers();
Output:
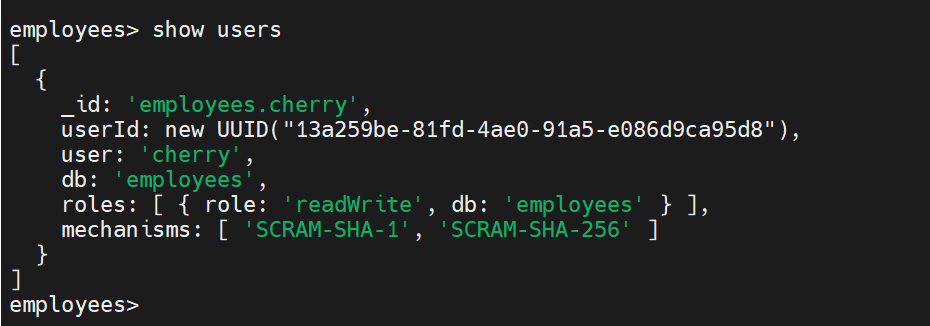
Alternatively, run the command:
show users
Output:
To delete the user, use the db.dropUser method as shown.
db.dropUser("cherry", {w: "majority", wtimeout: 4000})
Output:
{ ok: 1 }

#Step 4: Secure MongoDB on Ubuntu
Authentication is not enabled by default in MongoDB, implying that any user with access to the database server can view, add, and delete data. This vulnerability can cause a serious breach of your data, which is why it is important to secure MongoDB. In this section, we will demonstrate how you can secure MongoDB on Ubuntu 22.04.
As the first step, you need to create an administrative user and to do so, first access the Mongo Shell.
mongosh
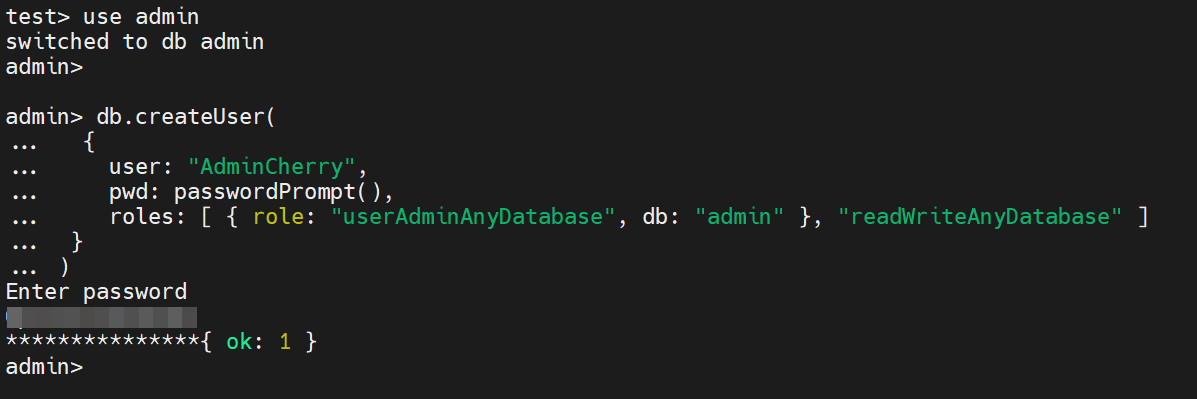
As the next step, connect or switch to the admin database.
use admin
Then, create the database user by pasting these lines and hitting ENTER on the keyboard.
db.createUser(
  {
    user: "AdminCherry",
    pwd: passwordPrompt(),
    roles: [ { role: "userAdminAnyDatabase", db: "admin" }, "readWriteAnyDatabase" ]
 }
)
Let’s break down this code.
The user: "AdminCherry" line creates an Administrative user called AdminCherry.
The pwd: passwordPrompt() method prompts you for the administrative user’s password. It is a safer alternative to the pwd: field, which requires you to type the password in cleartext.
The roles: [ { role: "userAdminAnyDatabase", db: "admin" }, "readWriteAnyDatabase" ] line defines the roles granted to the administrative user. Here, the Administrative user is granted read and write permissions to the admin database. Since this role is defined in the admin database, the administrative user, as a result, can read and modify all the databases in the cluster.
Here is the output after running the command.
Run the exit command or press CTRL + C to exit from the Mongo Shell.
With the Admin user in place, the next step is to enable authentication. For this, exit the MongoDB shell and open the mongod.conf file.
sudo nano /etc/mongod.conf
Scroll down and find the security section. Uncomment it, add the authorization directive, and set it to enabled.
security:
    authorization: enabled
Note that the authorization parameter is indented while security has no space at the beginning.
Next, save the changes and exit from the configuration file. To apply the changes, restart MongoDB as shown.
sudo systemctl restart mongod
Furthermore, check if the service is running as expected.
sudo systemctl status mongod
Now login to Mongo Shell.
mongosh
This time, you will see that the startup warnings have disappeared.
However, if you try to perform any database-related task, like viewing databases, you will get some output suggesting that authentication is required.
show dbs

To authenticate, first, log out of the Mongo Shell by running the exit command. Then log in using the administrative user as follows.
mongosh -u AdminCherry -p --authenticationDatabase admin
Enter the administrative user's password, and this time, the authentication warnings you encountered before will have disappeared.

From here on, only the administrative user can view, create, and modify the data in the database. To exit the shell, run the exit command.
#Step 5: Configure MongoDB for remote access
MongoDB is set to be accessed locally on the same server it was installed on by default, and to enable remote access, you must edit the /etc/mongod.conf file, the main configuration file for MongoDB.
This file contains settings for the database storage location, logging, networking, and process management.
You can access the configuration file using your text editor.
sudo nano /etc/mongod.conf
Locate the network interfaces section and pay attention to the bindIP value.
# network interfaces
net:
  port: 27017
  bindIp: 127.0.0.1
By default, MongoDB is bound to 127.0.0.1, the loopback address interface, which implies that MongoDB can only accept connections from the same server where it was installed.
Add a comma followed by the Mongo server’s IP address to allow remote access.
bindIp: 127.0.0.1, mongo-server-ip
Next, save the changes and exit the configuration file. To apply these changes, restart MongoDB.
sudo systemctl restart mongod
If UFW is enabled, run the following command to allow incoming connections from a remote machine.
sudo ufw allow from remote_machine_ip to any port 27017
To effect the changes, reload the firewall.
sudo ufw reload
#Step 6: Access MongoDB remotely
There are a couple of ways to access the MongoDB shell remotely. You can use the Netcat utility to initiate a TCP connection to port 27017, the default port that MongoDB listens to.
If it still needs to be installed on the client machine, install Netcat as follows.
sudo apt install netcat
Next, to establish a connection to the MongoDB server via port 27017, run the following command:
nc -zv mongodb_server_ip 27017
The following output indicates that the connection was successful.
Output:
Connection to mongodb_server_ip 27017 port [tcp/*] succeeded!

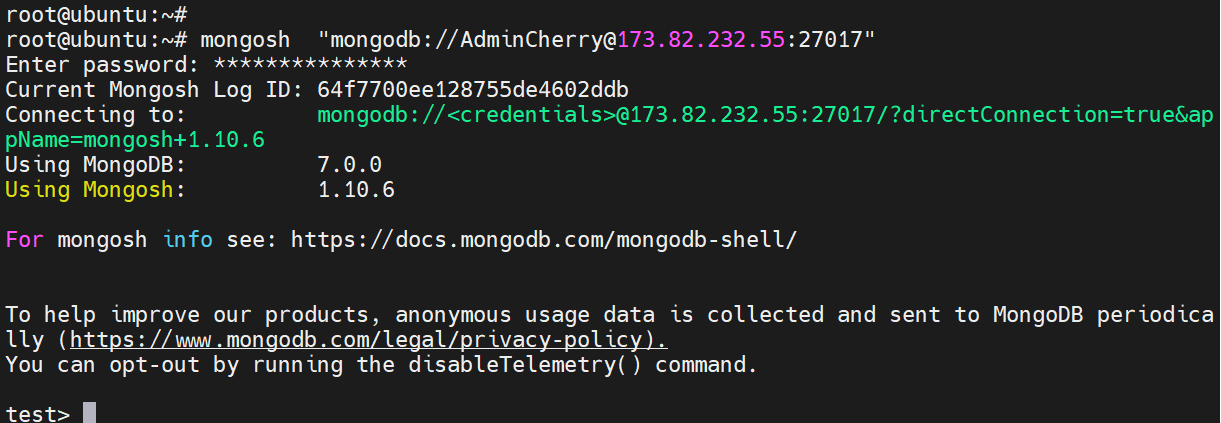
Alternatively, you can log in using Mongo Shell as follows.
mongosh "mongodb://username@mongo_server_ip:27017"
The shell automatically prompts you for the admin user’s password.
NOTE: for this to work, ensure that the version of Mongo shell is the same both on the client and remote MongoDB server.
#Step 7: How to use MongoDB - working with the MongoDB database
There are a number of database operations that you can carry out in MongoDB. For example, you can create, retrieve, update, and delete records from a database.
1. Inserting data
To create a document in a collection, use the .insertOne() method. This method supports several data types, like strings, integers, boolean values, and arrays.
In the previous step, we created a test database called employees. Now, we will create a collection and add a few documents - a collection contains one or more documents.
So, once again, log in to the MongoDB server with authentication:
mongosh -u AdminCherry -p --authenticationDatabase admin
Switch to the employees database.
use employees
Run the following command which creates a collection called staff and adds a document with employee user data.
db.staff.insertOne({ name: "Alice", age: 25, city: "London", married: true, hobbies: ["Travelling", "Swimming", "Cooking"] })
The command displays the following output, acknowledging the insertion of data.
Output:
{
  acknowledged: true,
  insertedId: ObjectId("64f799b4a974192c06cdce9f")
}

2. Retrieving data
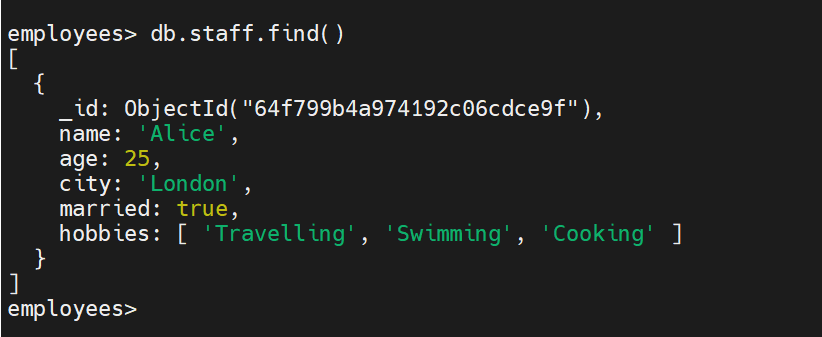
With a document already created in the staff collection, you can retrieve it and filter the results using the .find() method.
For example, to retrieve all the documents in the staff collection, run the following command:
db.staff.find()
Output:
[
  {
    _id: ObjectId("62647ff866c1f054568a11b5"),
    name: 'Alice',
    age: 25,
    city: 'London',
    married: true,
    hobbies: [ 'Travelling', 'Swimming', 'Cooking' ]
  }
]
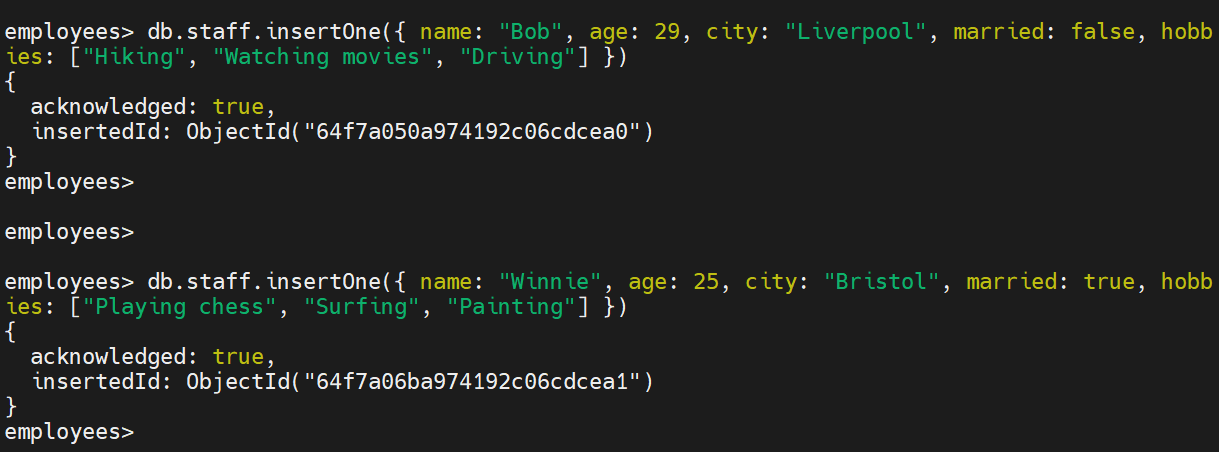
Now, let’s try adding a few more documents and run a few queries on the collection.
db.staff.insertOne({ name: "Bob", age: 29, city: "Liverpool", married: false, hobbies: ["Hiking", "Watching movies", "Driving"] })
db.staff.insertOne({ name: "Winnie", age: 25, city: "Bristol", married: true, hobbies: ["Playing chess", "Surfing", "Painting"] })
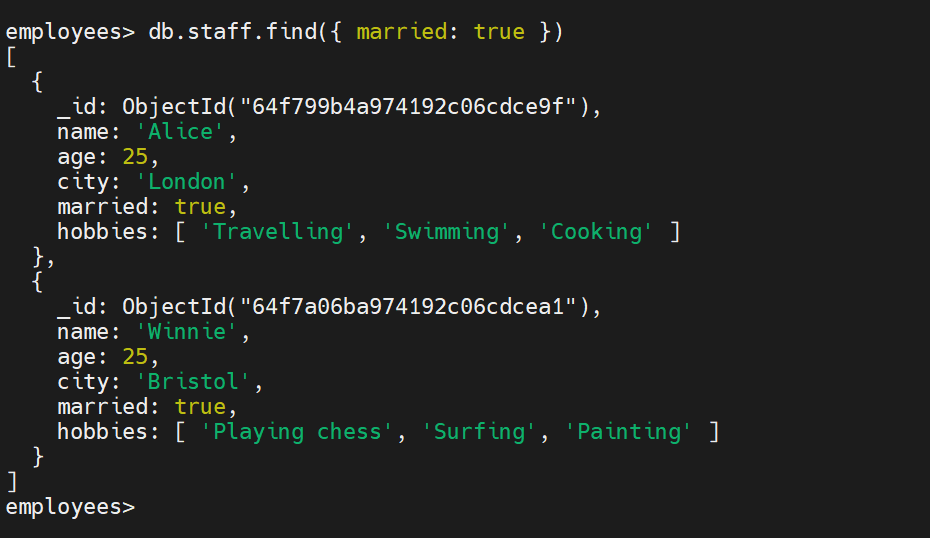
To query records of employees who are married, run the command.
db.staff.find({ married: true })
The output provides records of married employees only.
Output:
[
  {
    _id: ObjectId("62647ff866c1f054568a11b5"),
    name: 'Alice',
    age: 25,
    city: 'London',
    married: true,
    hobbies: [ 'Travelling', 'Swimming', 'Cooking' ]
  },
  {
    _id: ObjectId("626483d6b490694bc675b767"),
    name: 'Winnie',
    age: 25,
    city: 'Bristol',
    married: true,
    hobbies: [ 'Playing chess', 'Surfing', 'Painting' ]
  }
]
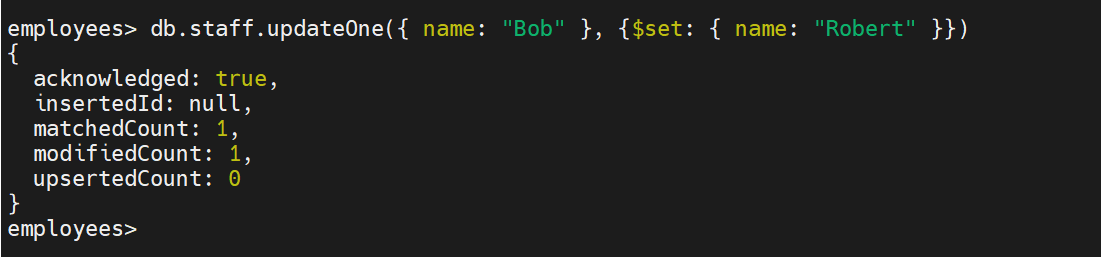
3. Updating data
To update or modify records, use the .update() method. In this example, we demonstrate how you can change the name value of the second record from Bob to Robert.
db.staff.update({ name: "Bob" }, {$set: { name: "Robert" }})
The output shown confirms that the update of the record was successful.
Output:
{
  acknowledged: true,
  insertedId: null,
  matchedCount: 1,
  modifiedCount: 1,
  upsertedCount: 0
}
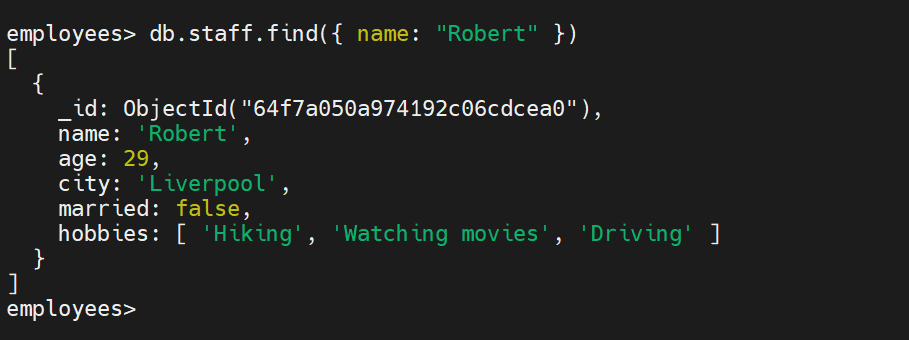
You can now query to see if you can find a record that matches the name Robert as follows.
db.staff.find({ name: "Robert" })
Output:
[
  {
    _id: ObjectId("64f7a050a974192c06cdcea0"),
    name: 'Robert',
    age: 29,
    city: 'Liverpool',
    married: false,
    hobbies: [ 'Hiking', 'Watching movies', 'Driving' ]
  }
]
4. Deleting data
MongoDB shell provides two methods for deleting records:
.deleteOne()
.deleteMany()
The .deleteOne() method is used to delete a single record or document from a collection. For example, to delete Robert’s record, run the following query.
db.staff.deleteOne({ name: "Robert"})
The .deleteMany() method deletes multiple documents from a collection.
NOTE The recommended way to remove a single record is by using the record’s
_idvalue. This is a unique value given to each record and is preferred over defining individual entries such asname:'Robert', which would result in the deletion of all records bearing the nameRobert.
To safely delete Robert’s record without unintentionally deleting other records with the same entry, specify the _id value instead.
db.staff.deleteOne({ _id: ObjectId("64f7a050a974192c06cdcea0")})
Output:
{ acknowledged: true, deletedCount: 1 }
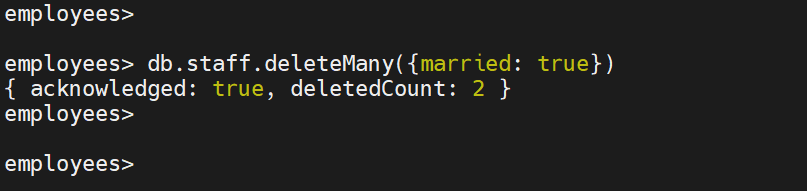
Additionally, you can delete documents based on a certain criterion. In this case, use the .deleteMany() method for deleting multiple records.
For example, to delete all documents in the staff collection where employees are married, run the command:
db.staff.deleteMany({married: true})
Output:
{ acknowledged: true, deletedCount: 1 }
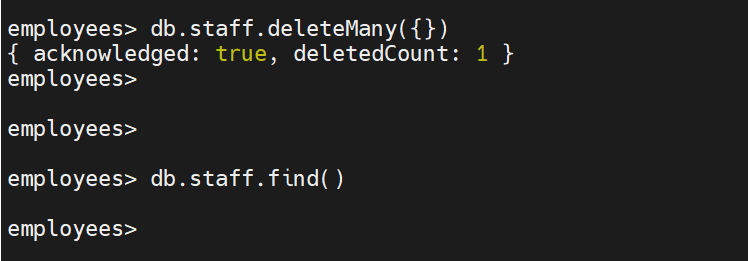
To delete all the documents in the collection, use the deleteMany() method without arguments:
db.staff.deleteMany({ })
If you try querying the collection, you will see that the output will be blank, which is a clear indication that all the documents have been deleted and that the collection is now empty.
#Summing up
This tutorial covered how to install MongoDB on Ubuntu 22.04 and start using this powerful open-source database. On their official website, you can find further documentation on MongoDB's advanced features and use cases.
To run your MongoDB deployments in a scalable and high-performing cloud environment, Cherry Servers bare metal and virtual servers offer automatic scaling, pay-as-you-go pricing, and free 24/7 technical support for complete control and flexibility.
Get started in 5 Minutes here!


