How to Install MySQL on Ubuntu 22.04 | 7 Steps


MySQL is one of the most widely used databases favored by developers due to the balance of features, performance, and ease of use, delivering high performance, scalability, security, flexibility, and low costs. In this tutorial, we will show you how to install MySQL on Ubuntu 22.04 in seven steps. We include installation, configuration, securing MySQL, and creating a new user.
#What is MySQL?
MySQL is one of the most popular open-source database management systems. It is a component of the famous LAMP (Linux, Apache, MySQL, PHP) stack and has supported major web applications and platforms for nearly two decades.
This open-source database management system comes with several storage engines, including InnoDB, the transaction-safe (ACID compliant) engine, and MyISAM, with a smaller footprint, often used for read-only situations. MySQL also supports replication, which can be used for long-distance data distribution, data security, and scaling out your architecture.
#Prerequisites
To follow this tutorial, you will need the following:
- The latest Ubuntu server installed;
- An account with sudo privileges.
Not using Ubuntu 22.04? Check out our tutorial on how to install MySQL on Ubuntu 24.04
#How to install MySQL on Ubuntu 22.04: Step-by-step
Follow the below seven steps to install MySQL on Ubuntu 22.04. We will first upgrade all the system packages and then install, configure, and secure MySQL, after which we will create a new user and privileges on a newly created database. Lastly, we will also cover MySQL basic service management. Let’s dive right in.
#Step 1: Install MySQL server on Ubuntu
First, let’s update the list of packages and upgrade them:
sudo apt update
sudo apt upgrade
As the system is upgraded, we can install the latest MySQL proposed by Ubuntu.
sudo apt install mysql-server -y
Note that the package installed is mysql-server. This will install both the MySQL server and the client. The -y at the end of the command allows us to proceed to the installation by automatically answering the installation procedure by answering yes.
#Step 2: Start MySQL server
Now that we have installed MySQL, we will start the service using the following command:
sudo service mysql start
We now check the status of the service:
sudo service mysql status

As we can see, MySQL is now up and running.
#Step 3: Set initial MySQL root password
By default, MySQL does not come with a password for the root account. We will now set one. This is a good security practice, which is also needed before using the MySQL secure installation script.
Let’s first connect to the database using the MySQL client:
sudo mysql

Now that we are connected, we can set a password for the root account using the following command:
ALTER USER 'root'@'localhost' IDENTIFIED WITH mysql_native_password BY 'mypassword';
Once you set the password, the MySQL client can no longer connect using only the sudo mysql command.
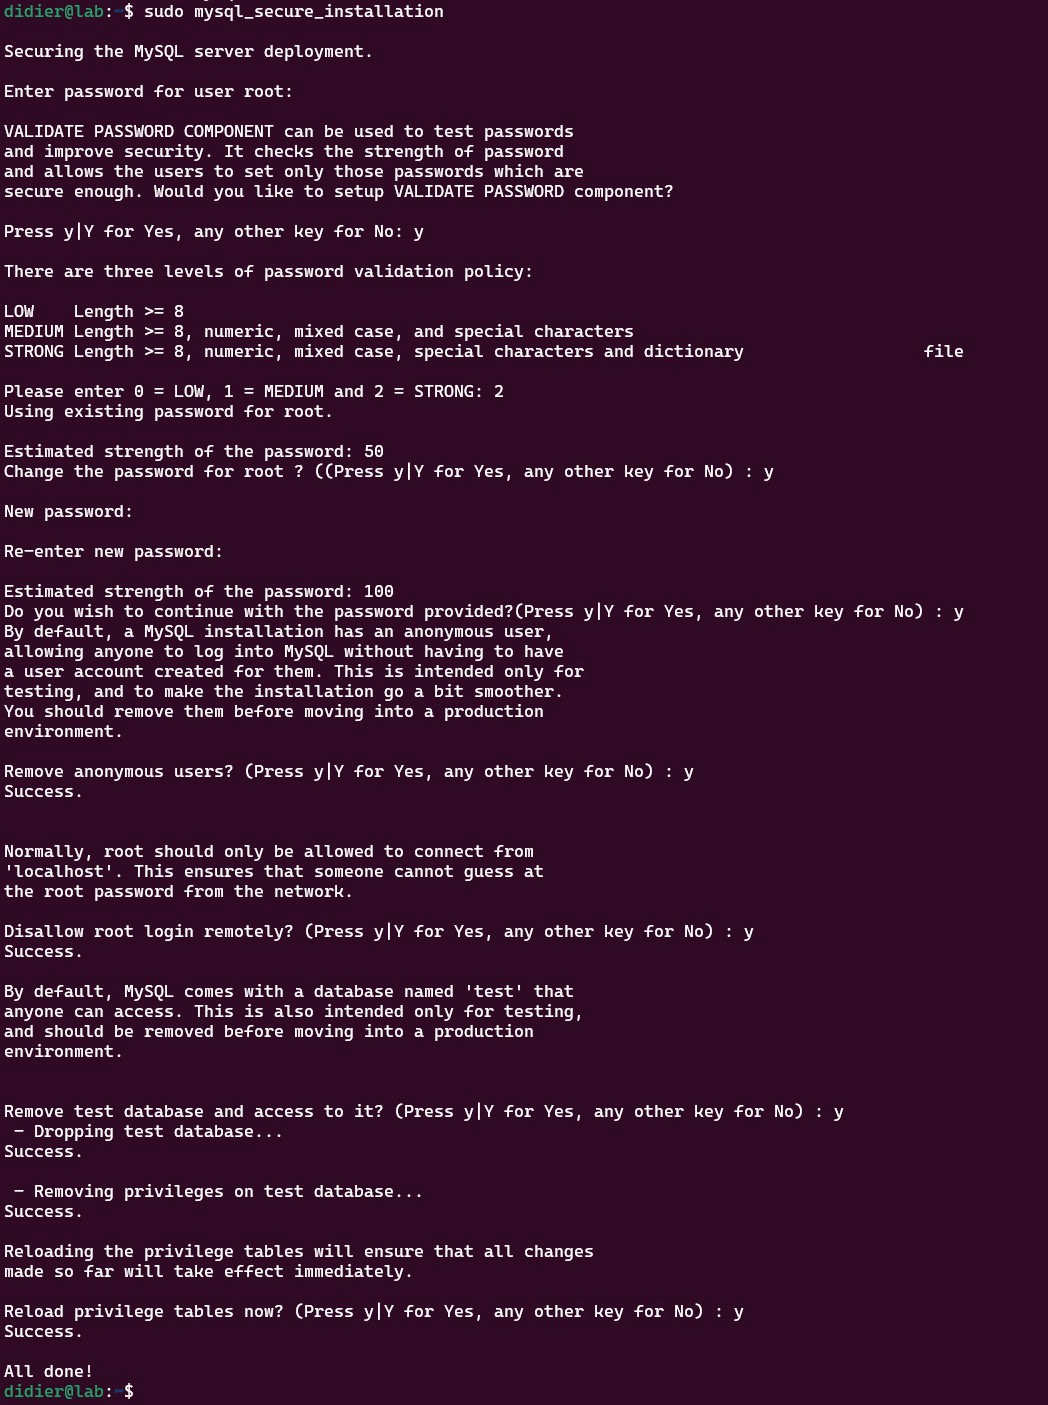
#Step 4: Secure MySQL server
As the database is a crucial part of an application, you need to secure it. MySQL helps you do that by providing the mysql_secure_installation command.
We will now launch the secure installation script:
sudo mysql_secure_installation
The screenshot below shows the different questions asked by MySQL. Fill in and adjust based on your needs:
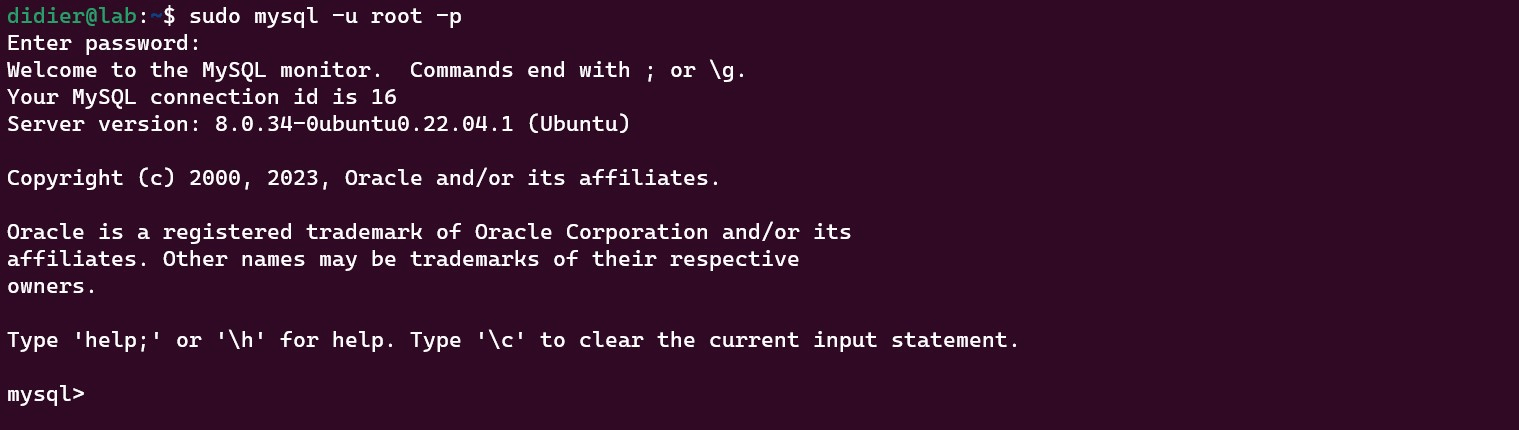
Let’s reconnect to the server using the new root password set during the secure installation procedure.
sudo mysql -u root -p
You should now see the MySQL prompt:
#Step 5: Add a new user
The installation is now complete. In order to connect any application to your database, it is recommended to create a database and a specific user and grant that user access to this database. This allows us to manage our data better.
We will create the user first:
CREATE USER 'didier'@'localhost' IDENTIFIED WITH mysql_native_password BY '%$HmbKe#XeVtn8i%mX$Ha&v2on%crUWc';
Please note that the user can only connect to the database via 'localhost'. If you want the user to be able to connect from anywhere, use % instead of localhost. Be aware that this is insecure as there is no restriction based on where clients can connect.
We then flush all the privileges. This will refresh MySQL and allow us to use that user immediately.
flush privileges;

#Step 6: Create MySQL database and grant privileges
We now proceed to create a MySQL database myapp with the following command:
create database myapp;
We then grant the previously created user all the privileges on this database:
grant all privileges on myapp.* to 'didier'@'localhost';

You can now do any operation on the database.
#Step 7: Stop and restart MySQL
While managing your application, you will need to stop or restart your MySQL database.
Use the following command to stop MySQL:
sudo service mysql stop
To restart MySQL, use this command:
sudo service mysql restart
#Conclusion
In this comprehensive seven-step tutorial, we've covered how to install MySQL on Ubuntu 22.04. MySQL is a fundamental component of the LAMP stack and an integral part of many web applications and platforms. You can get further information about MySQL in the official MySQL documentation.


