How to Install Wireshark on Ubuntu 22.04 | Step-by-Step


Wireshark is a highly beneficial tool for network administrators, researchers, developers, testers, security professionals, and people in jobs related to networking or DevOps engineering. This step-by-step tutorial will show you how to install Wireshark on Ubuntu 22.04 and use this tool to your advantage.
After reading this guide, you will be knowledgeable in installation, updating packages, Wireshark installation methods, and post-installation steps.
#What is Wireshark?
Wireshark is a free and open-source tool designed for real-time network traffic analysis. It was created by Gerald Combs in 1998. Wireshark enables you to monitor and diagnose common network issues by giving you the tools to:
- Capture live traffic packets
- Filter network data
- Track traffic based on different criteria
Wireshark is one of the top network traffic analyzers available on the market these days. Many individuals use it for various network-related tasks.
#What is Wireshark used for?
Wireshark is a great tool that converts network traffic into a human-readable format. If we look at the key features of Wireshark, it can capture live traffic packets, analyze real-time network traffic, and filter traffic based on different criteria.
- Researchers use Wireshark to analyze the content of the packets and create various statistics;
- Security teams use Wireshark to examine suspicious network traffic content, identify traffic spikes, etc.;
- Troubleshoot network issues;
- Identifying and learning about network traffic protocols;
- Debugging protocol implementation;
- Verifying network applications.
#How to use Wireshark?
Since Wireshark is open source, you can download and use any version of Wireshark for free from wireshark.org. It's available for Linux, Windows, and Mac. It also has a user-friendly graphical user interface (GUI) to simplify the analysis process. While Wireshark initially supported only Solaris and Linux, now it runs on all the major operating systems. Keep reading for detailed instructions on how to install and start using Wireshark.
#Prerequisites
Before you install Wireshark on Ubuntu, ensure your Ubuntu machine meets the following requirements:
- Sudo privileges to install software on the system;
- A reliable internet connection to download Wireshark and its dependencies;
- Adequate disk space for the Wireshark installation. Note that Wireshark doesn't need much space. However, ensure that your system has enough space to avoid any issues during the installation.
#How to install Wireshark on Ubuntu 22.04: Step-by-step
After fulfilling the above prerequisites, you can proceed with the Wireshark installation. Now, let's proceed with the below steps to learn how to install Wireshark on Ubuntu 22.04.
#Step 1. Update packages and repositories
As a best practice, you must first update the existing packages and repositories. It will help you maintain the latest versions of the packages. Using the latest version of Ubuntu will also ensure that you get the latest version of Wireshark.
Open the Ubuntu terminal and run the following sudo apt update command:
sudo apt update
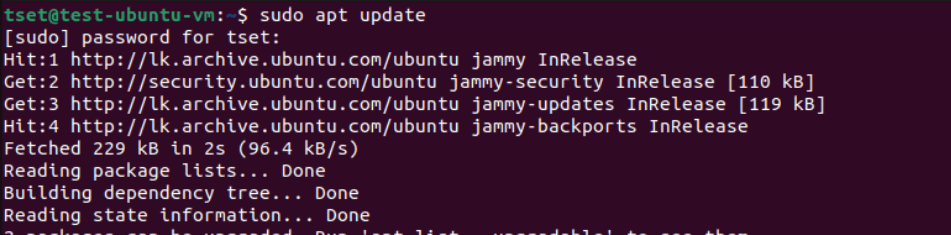
You must proceed with this update command to upgrade the installed packages of your systems. Then, enter the following command:
sudo apt full-upgrade
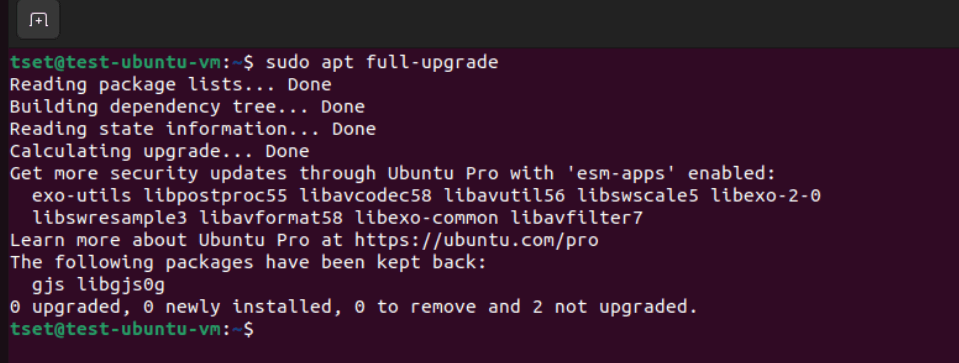
This command will perform a more thorough upgrade than just upgrading through apt upgrade.
Sometimes, you will be asked for authorization to continue with the upgrade. In that case, type ‘Y’ and press Enter to continue with the upgrade.
You can even combine and run both commands simultaneously, as mentioned below.
sudo apt update && sudo apt upgrade
#Step 2. Install Wireshark on Ubuntu
There are several methods to install Wireshark on Ubuntu. The most common installation methods include the following:
- Installation using the APT (Advanced Package Tool).
- Installation using the Personal Package Archive (PPA)
Method 1: Installation using the APT
The software repository of Ubuntu includes Wireshark by default, which enables you to install the package using the APT. It is the easiest and most straightforward method. It ensures you have the latest version of Wireshark when the Ubuntu system is updated. Execute the following command in the Ubuntu terminal.
sudo apt install wireshark
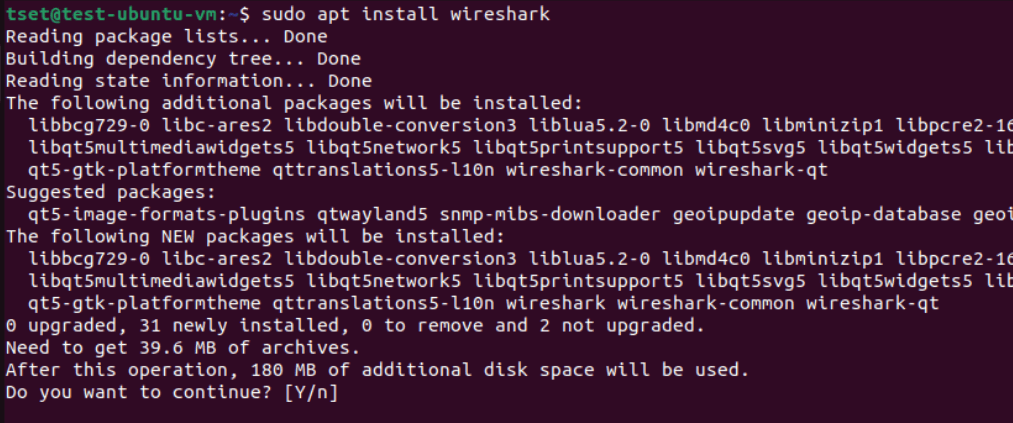
You will be asked for authorization to continue during this installation. Type ‘Y’ and press Enter to continue with the installation.
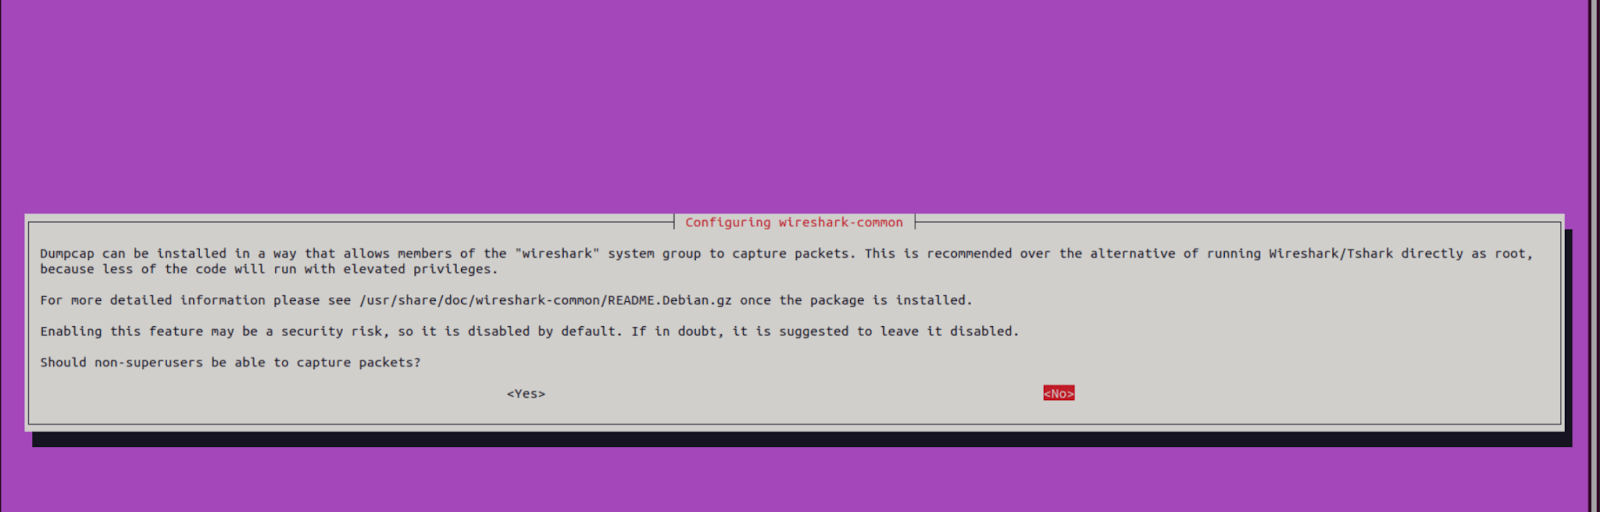
During the installation, the following prompt window will appear for configuring wireshark-common in package configuration. This prompt provides you with two options to choose from. One is to allow using non-superusers. The second is to disable using non-superusers and only allow root users to access and use it. You can select ‘Yes’ or ‘No’ based on your choice.
Here, Dumpcap is the tool that enables network traffic packet capture and file saving. By default, the packets are captured in pcapng format.
If you selected ‘Yes,’ you must add each user to the ‘wireshark’ user group using the following command. There, add the username of your user after the wireshark part.
sudo usermod -aG wireshark "username"
For example,
sudo usermod -aG sudo ugehan

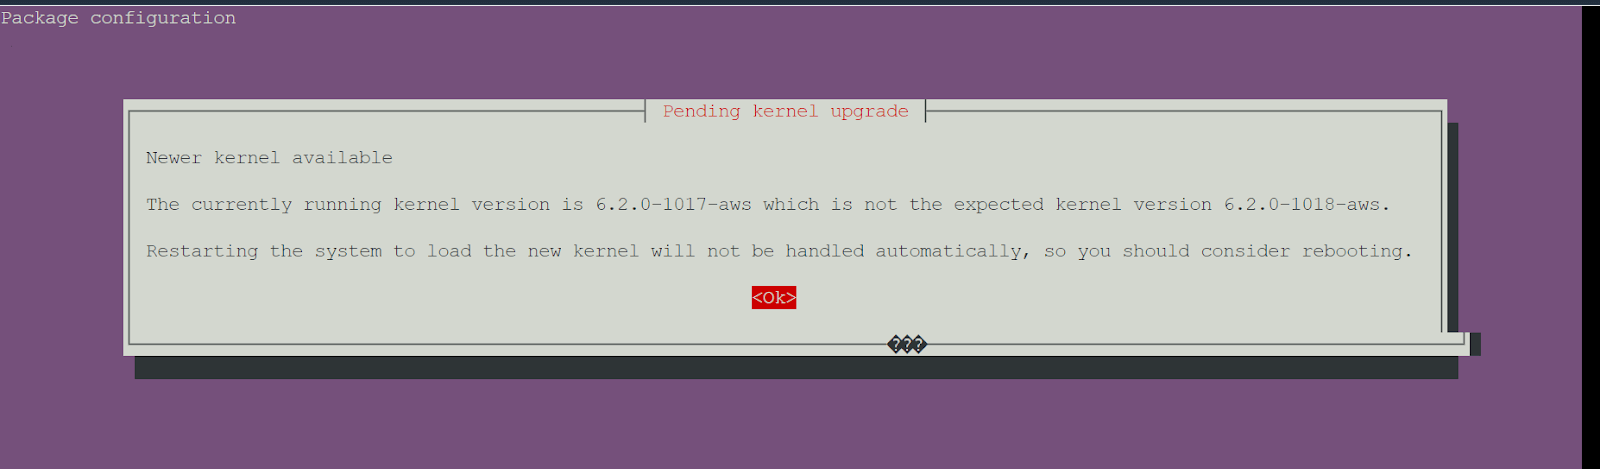
During the installation, you might devise another prompt to update kernels. Hit 'Yes' and continue with the installation.
Method 2: Installation using the PPA
If the Ubuntu version of your computer is older, you can use the PPA maintained by the Wireshark developers. Use the following command to install it:
sudo add-apt-repository ppa:wireshark-dev/stable -y

Executing the above command will add the official Wireshark PPA to your list of repositories. Then, update the package list of your system and proceed with the Wireshark installation by executing the following commands:
sudo apt update
sudo apt install wireshark
Also read: How to install MongoDB on Ubuntu 24.04
#Step 3. Check the Wireshark version
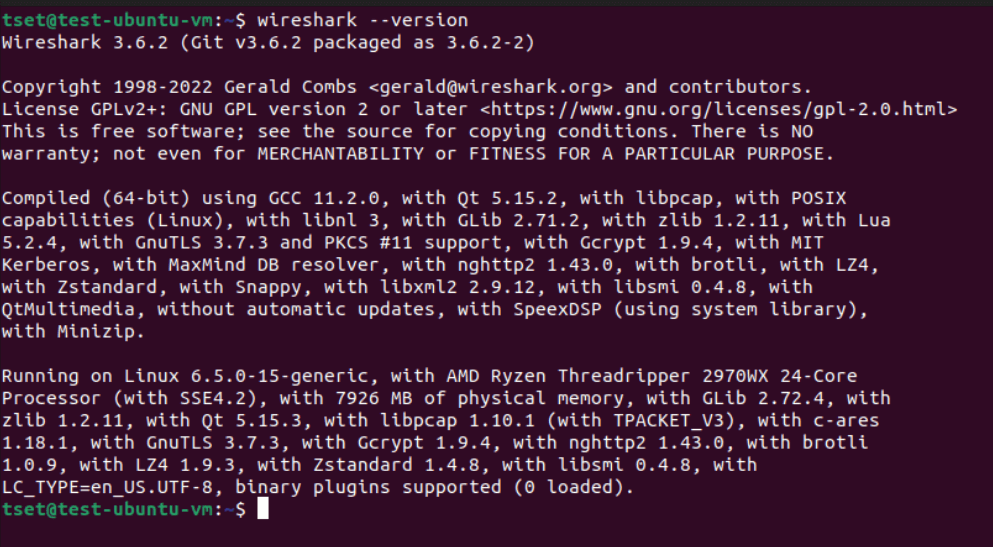
You can use any of the above methods to install Wireshark. Then, you can verify the version of Wireshark using the following command:
wireshark --version
#Step 4. Launch Wireshark
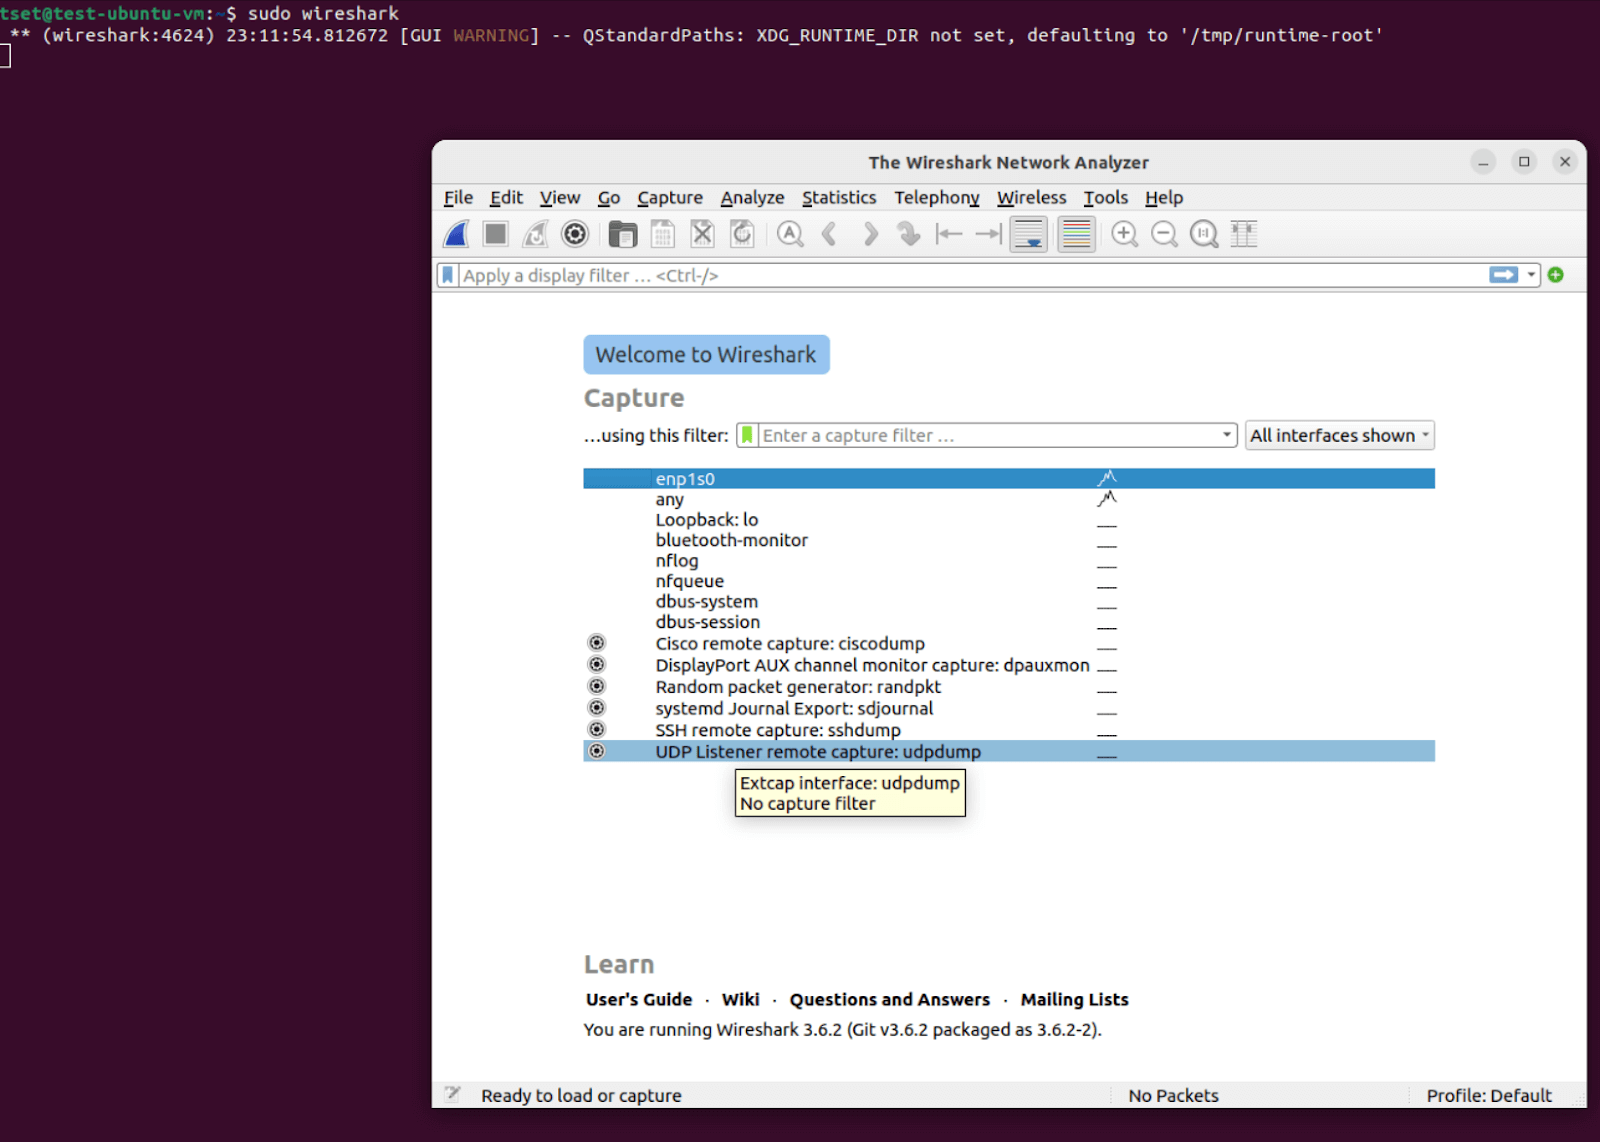
You can start Wireshark by typing the sudo wireshark command in the terminal. It will open the Wireshark Graphical User Interface (GUI), where you can analyze the network traffic.
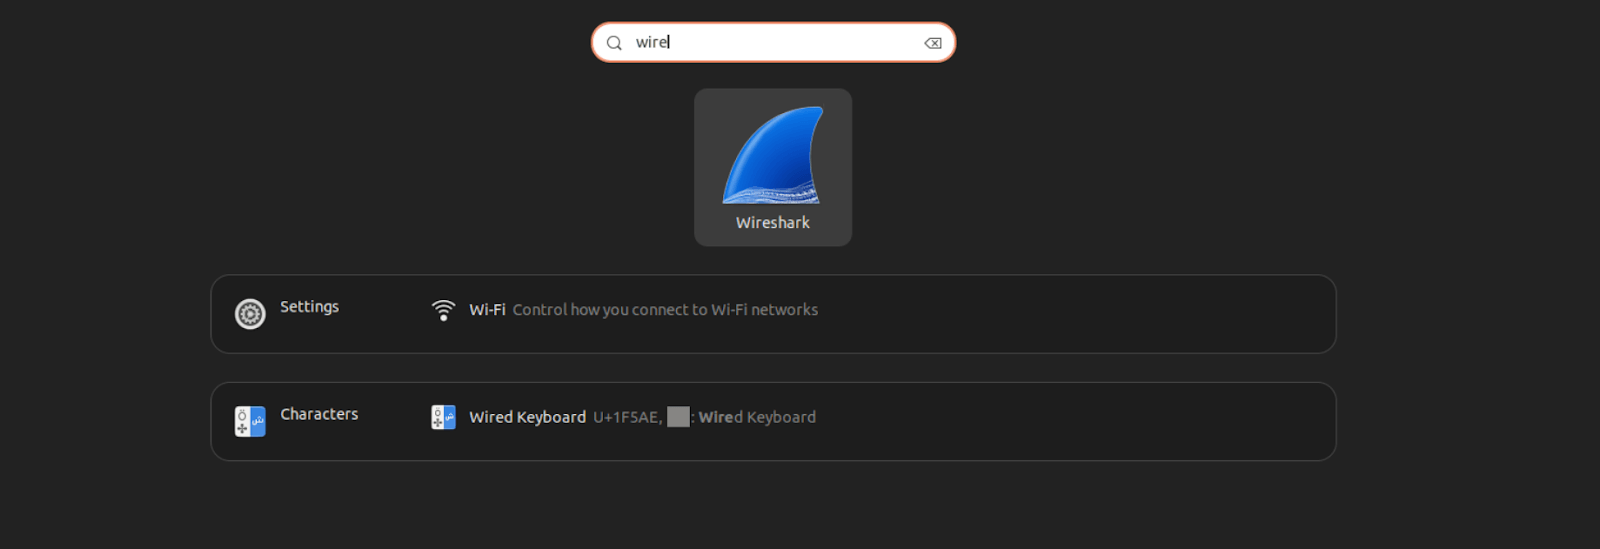
You can also open the Wireshark application tool directly from the Ubuntu desktop. For that, open the activities, type ‘Wireshark’ in the search bar, and hit enter. Then, click on the Wireshark icon to run the Wireshark application.
#How to uninstall Wireshark?
Sometimes, you may need to uninstall Wireshark from Ubuntu. Assume you used the sudo apt install command to install Wireshark. Then, you can use the following command to uninstall Wireshark:
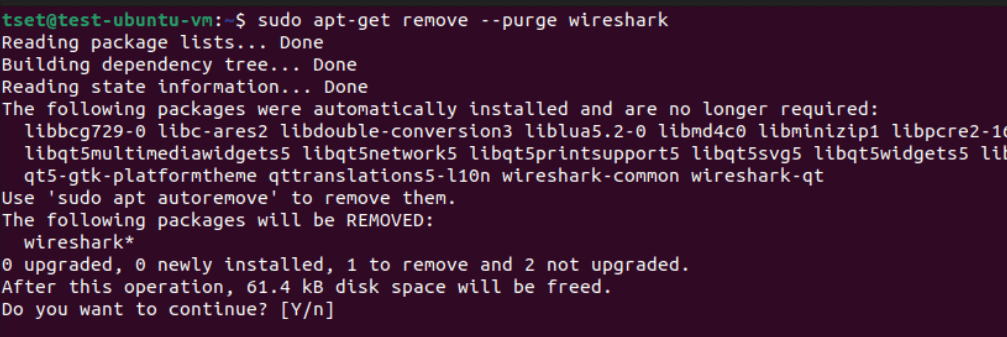
sudo apt-get remove --purge wireshark
The above --purge option will also delete the configuration files associated with the Wireshark installation. So, you can use that option if you want to completely remove the software without leaving any modified configuration data.
If you used the PPA to install Wireshark, use the following command to uninstall Wireshark.
sudo apt-get-repository –remove ppa:wireshark-dev/stable -y
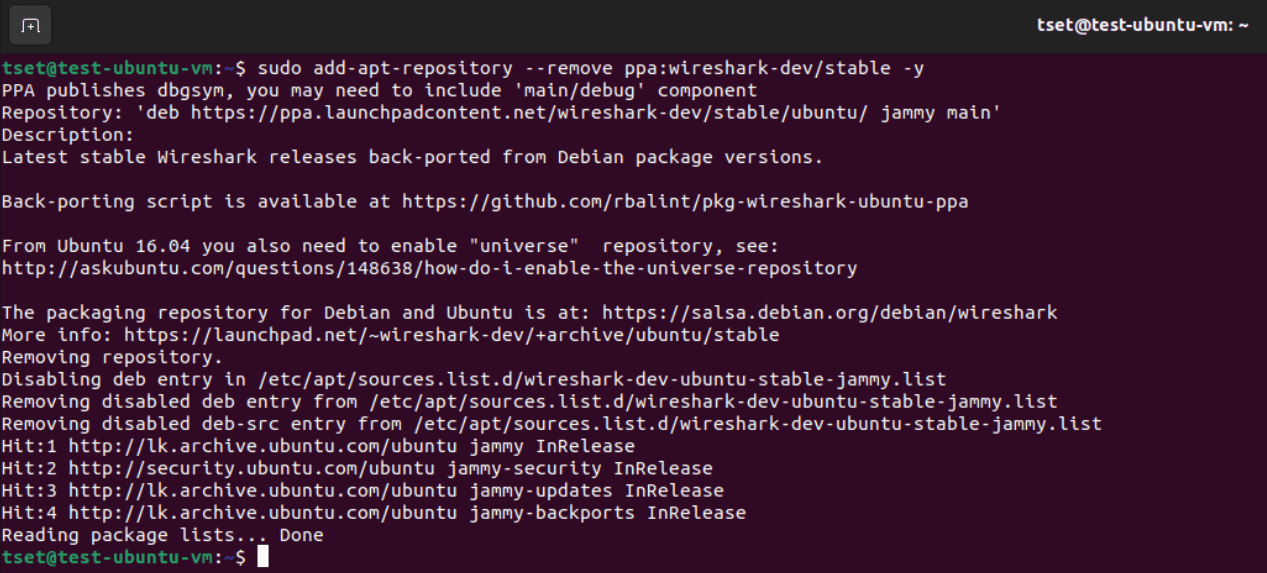
It is best practice to update your package list using the sudo apt update command. It will ensure the system does not consider packages removed from the PPA.
Also read: How to install Wine on Ubuntu 24.04
#Wireshark Use Cases
-
Network troubleshooting: Wireshark is a powerful diagnostic tool used extensively by network administrators to pinpoint the exact causes of network problems. Using Wireshark's built-in analysis features, such as TCP Stream Graphs and Time-Sequence graphs, network professionals can detect unusually high delays, jitter, or inconsistent packet timings, enabling them to determine whether issues originate from routing loops, congested network interfaces, or poorly performing devices.
Misconfiguration issues, such as incorrect DNS settings, DHCP issues, or improper VLAN tagging, can be rapidly identified by examining detailed packet headers, payload data, and network traffic patterns.
-
Security vulnerability analysis: Wireshark enables you to detect unusual behavior such as repeated connection attempts (possible brute-force attacks), unauthorized port scanning, or communication with known malicious IP addresses or domains. Detailed inspection of captured packets allows analysts to spot signs of advanced persistent threats (APTs), data exfiltration attempts, malware command-and-control communications, and network reconnaissance activities.
-
Performance analysis: By analyzing application-layer protocols such as HTTP and FTP, Wireshark can expose underlying performance problems such as slow server responses, excessive retransmissions, or inefficient data transfer patterns that impact overall user experience.
-
Benchmark and test protocol efficiency: Wireshark can be used alongside performance testing tools to measure protocol efficiency and responsiveness, identify inefficiencies in packet sizes, or session management, and guide optimization efforts.
#Conclusion
This guide gave you a step-by-step tutorial on how to install Wireshark on Ubuntu 22.04. We also covered the prerequisites for the installation, updating packages, Wireshark installation methods, post-installation steps, and how to uninstall Wireshark completely. Following these steps will enable you to install Wireshark on Ubuntu successfully and use it for your specific requirements.


