Postgres Show Tables: How to Create a Table in PostgreSQL


PostgreSQL is widely used in a myriad of domains such as in supporting web applications, microservices, geospatial, and data analytics applications. Its robustness, scalability, enhanced security, and advanced features make it a popular choice among developers and enterprises. In this tutorial, you will learn how to create and show a table in PostgreSQL.
#What is PostgreSQL?
Commonly abbreviated as "Postgres", PostgreSQL is a popular open-source relational database management system (RDBMS) known for its high performance, extensibility, and support for a myriad of advanced features including asynchronous replication, table inheritance, complex SQL queries, and many more.
#Prerequisites
To follow along in this tutorial, ensure you have the following set of requirements:
- PostgreSQL server installed on your Linux instance. Check out our comprehensive guide on how to install PostgreSQL on Ubuntu.
- SSH access to the server with a sudo user configured.
Run your PostgreSQL deployments in a high-performing and cost-effective open cloud infrastructure. Cherry Servers' bare metal cloud and virtual servers offer automatic scaling, pay-as-you-go pricing, and free 24/7 technical support.
#How to show tables in Postgres: Various ways
The below steps will demonstrate how to create a database. We will also focus on how to create a table in Postgres, insert records, and make queries to retrieve information from a table.
#1. Create a database in the PostgreSQL server
With the PostgreSQL server already installed, the first thing is to create a database.
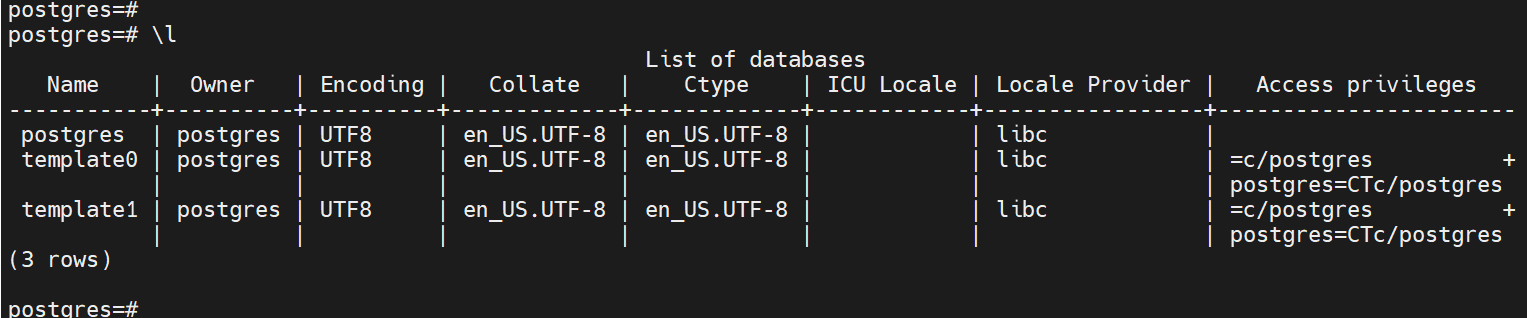
PostgreSQL provides some default databases out of the box. To list them, run the command:
\l
To create a database, use the syntax:
CREATE DATABASE database_name;
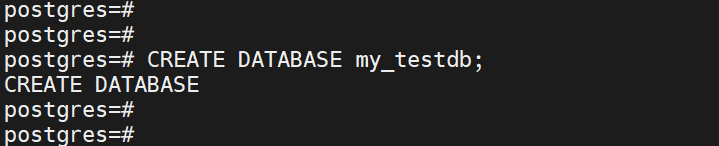
In this case, we will create a database called my_testdb.
CREATE DATABASE my_testdb;
To verify that the database was created, once again, run the command:
\l
From the output below, you can see that our database has already been created.

#2. Postgres: Show tables in a database
The next step is to create a table inside the database. To do this, connect to the database using the \c command as shown.
\c my_testdb

Next, we are going to create a table. The syntax for creating a table takes the following format:
CREATE TABLE [IF NOT EXISTS] table_name (
   column_name1 datatype(length) column_contraint,
   column_name2 datatype(length) column_contraint,
   column_name3 datatype(length) column_contraint,

);
Let’s dissect the syntax above:
- The
IF NOT EXISTSdirective checks to see if there’s a table with the same name as the one being created. If one already exists, PostgreSQL will issue a warning and not allow you to proceed with creating the table. - Column names are specified alongside specific data types for the values that they will hold. This is followed by the maximum character number of the values and column constraints.
- The
column_constraintoperator specifies the rules for storing data. For example, a column with aNOT NULLconstraint implies that a column does not accept a null or empty value. This means you cannot insert or update a new record without specifying a value for that field.
For demonstration purposes, we are going to create a table called employee_details with six columns containing employee details.
CREATE TABLE employee_details (
	user_id serial PRIMARY KEY,
	first_name VARCHAR (50) NOT NULL,
	last_name VARCHAR (50) NOT NULL,
	email VARCHAR (255) UNIQUE NOT NULL,
	department VARCHAR (50) NOT NULL,
           birth_date DATE
);
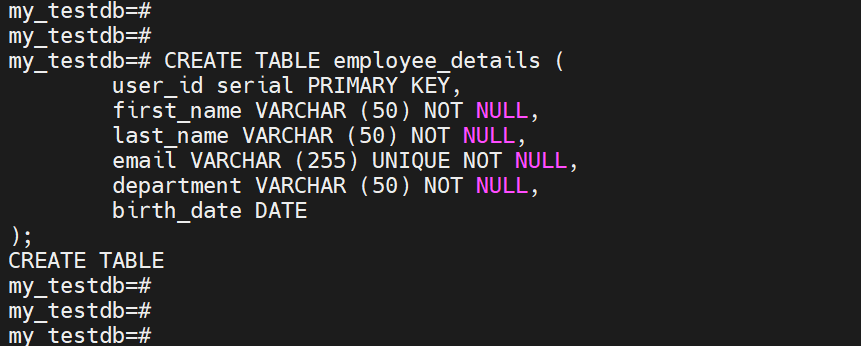
Upon pressing ENTER, you will get the output CREATE TABLE acknowledging that the table has successfully been created.
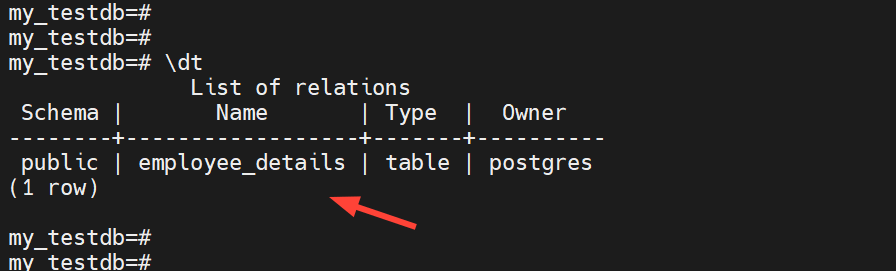
To show or display the table, run the command:
\dt
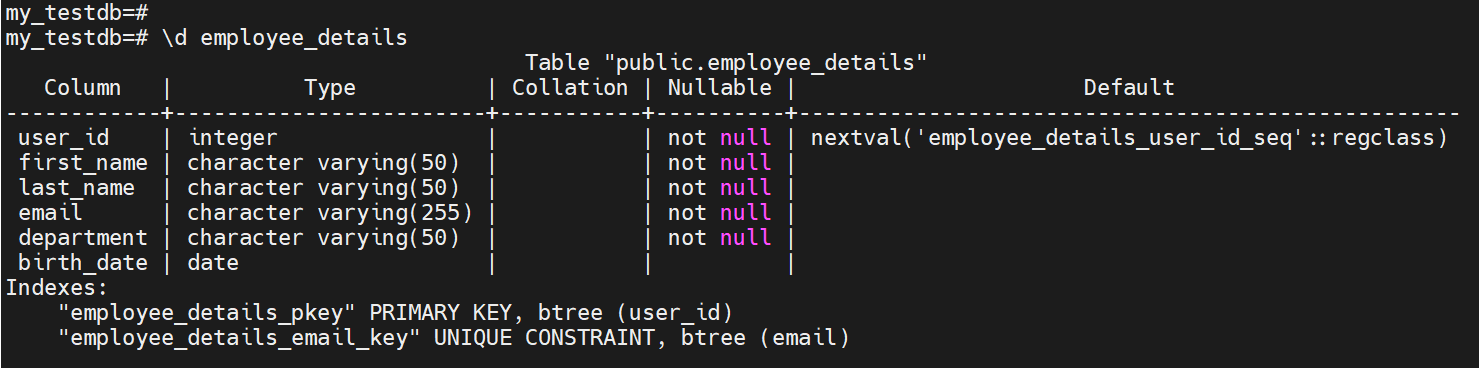
In addition, you can use the \d table_name syntax to view the table structure or show tables in schema.
\d employee_details
#3. PostgreSQL: Create a table using the ‘LIKE’ option
PostgreSQL allows you to create an empty table based on the schema of another table using the LIKE clause. Expectedly, the new table inherits the column attributes and indexes of the original table.
Creating a new table using the LIKE clause takes the following syntax:
CREATE TABLE new_table_name (LIKE old_table_name INCLUDING ALL);
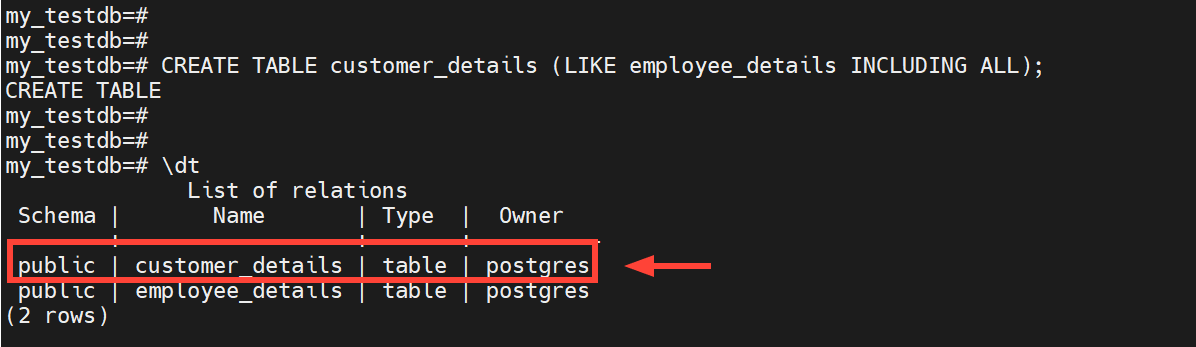
For example, to create a new table called customer_details based on the employee_details table, we will run the following command:
CREATE TABLE customer_details (LIKE employee_details INCLUDING ALL);
To verify that the table was created, once again, run the following command:
\dt
#4. PostgreSQL: create a temporary table
You can also create temporary tables as well. A temporary table in PostgreSQL, as the name infers, is a table that is short-lived and does not outlast a database session. Once the session ends, the table is automatically dropped and ceases to exist.
To create a temporary table, invoke the TEMPORARY TABLE clause as illustrated below.
CREATE TEMPORARY TABLE temp_table_name(
   column_list
);
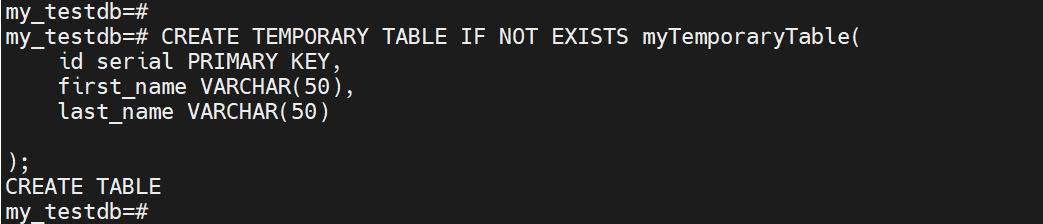
Let’s create a temporary table called myTemporaryTable with three columns as shown.
CREATE TEMPORARY TABLE IF NOT EXISTS myTemporaryTable(
    id serial PRIMARY KEY,
    first_name VARCHAR(50),
    last_name VARCHAR(50)

);
As previously mentioned, when you exit the database or close the session, the temporary table ceases to exist, and all the stored data disappears with it.
#5. Insert data and view a table
In this step, we will add a record to the employees_details table as follows and later query the table.
INSERT INTO employee_details VALUES ( 1001, 'Alice', 'Smith', 'alicesmith@outlook.com', 'Developer', '1988-05-10');

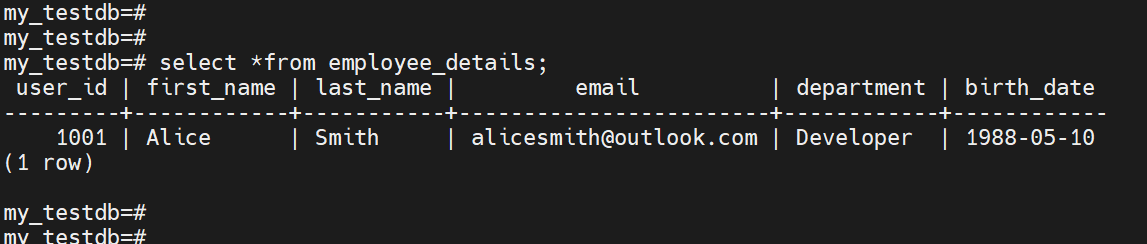
Run the following select command to list all the records/fields of the table that you have just saved.
SELECT * FROM employee_details;
#Conclusion
In this tutorial, we explored how to show tables in PostgreSQL. We went through various ways of creating a table in PostgreSQL and how to list or show records and the information schema of a table. Check out PostgreSQL’s official documentation for more information.
If you're a software developer who needs complete control of your cloud environment, look no further. With Cherry Servers, you’ll get high-quality dedicated bare metal, virtual servers and instant servers with an SLA uptime guarantee of 99.97% and free 24/7 technical support.


