How to Install OpenStack on Bare Metal




Three bare-metal servers. No virtual machines, no shared storage. Reaching a working OpenStack cluster from there takes careful preparation at each stage. Networking is where most installs fail before the deploy even runs.
This guide covers how to install OpenStack on bare metal using Kolla-Ansible on three Cherry Servers bare-metal nodes. Every step from the system setup onward works on any bare-metal provider running Ubuntu. The steps were run on real hardware and produced a working cluster. You will set up the bonded network interfaces OpenStack needs, work around NVMe RAID storage that leaves no spare disk, and clear the version-specific settings that block a default deploy without telling you why.
By the end, you will have a three-node cluster with a working Horizon dashboard, the OpenStack command-line client, and a virtual machine running on your own hardware.
#Prerequisites
This tutorial is a hands-on demonstration. To follow along, be sure you have the following:
-
Three bare metal servers running Ubuntu 24.04 LTS (64-bit). These must be physical machines, not VPS instances, each with at least:
-
CPU: 64-bit processor with at least 8 cores
-
RAM: 16 GB (OpenStack runs the control plane, storage, and VMs together on each node).
-
Storage: 100 GB or more for the host. A spare disk for block storage is ideal. If your provider leaves none free, Step 9 covers a loopback workaround.
-
At least two network interfaces or VLAN sub-interfaces on a bond.
-
-
A CPU with hardware virtualization support (Intel VT-x or AMD-V), enabled in BIOS/UEFI. Most providers enable this by default, and you can verify it in a later step.
-
Root or sudo access to each server
-
All three servers in the same provider location and project, so they share a private network. On Cherry Servers, order them in a single batch. Cherry's private VLANs are tied to a physical switch and do not span switches, so ordering together keeps the nodes on the same switch and lets them talk over the private network.
#What Is OpenStack?
OpenStack is an open source platform for building private and public clouds. It is not one program. It is a set of services, each handling one job, tied together by a shared identity service and a common API. You run the services you need and add others later.
You'll work with seven core services in this guide:
-
Keystone handles identity: users, projects, tokens, and access control.
-
Nova is the compute service that creates and runs virtual machines on KVM.
-
Neutron handles networking, including software-defined networks, routers, and floating IPs.
-
Glance stores the boot images for your VMs.
-
Cinder gives you block storage, the persistent volumes you attach to VMs.
-
Placement tracks resource inventory so the scheduler knows where a VM fits.
-
Horizon is the web interface for the cloud.
OpenStack also includes Swift for object storage and Ironic for bare metal provisioning.o This build leaves them out to keep the first install focused.
#How OpenStack Services Communicate
Knowing how these services talk to each other turns a failed deploy into a quick fix. Two pieces tie everything together. Keystone issues tokens, and every service verifies a request's token with Keystone before acting. When Keystone is down, every command fails on authentication. RabbitMQ is the message queue. Services pass work to each other via the queue rather than calling directly.
This is why hostnames matter during the install: RabbitMQ clusters by hostname, and a name it fails to resolve breaks the queue and stalls the deploy. Behind those two, MariaDB holds the state, and HAProxy with Keepalived routes the APIs to a single shared address.
Tracing a single request shows where to look when something breaks. Your CLI sends the request with a Keystone token. nova-api verifies the token and then drops a message into the queue. The scheduler reads the queue, picks a compute host, and replies. nova-compute on that host pulls the image from Glance, asks Neutron for a network port, attaches a Cinder volume if you asked for one, and tells libvirt to boot the VM on KVM.
Neutron wires the port to the Open vSwitch bridge, and a floating IP routes traffic in. A VM stuck in scheduling points to the scheduler or the queue. An authentication error points to Keystone, and a VM that builds with no network points to Neutron or the external bridge.
#OpenStack Deployment Methods for Bare Metal
Several tools install OpenStack, and the right one depends on your goal. Here are the main options:
-
Kolla-Ansible: runs every OpenStack service in its own Docker container and deploys them with Ansible. Containers keep upgrades and rollbacks clean, and the same playbooks work on one node or fifty. This guide uses it, and so do several hosted OpenStack products.
-
OpenStack-Ansible: also uses Ansible, but it installs services into LXC containers or straight onto the host. It gives you more control with a steeper learning curve.
-
Canonical Sunbeam: is Canonical's current path, built on snaps, Juju and Kubernetes. It runs in production, though it pulls in Kubernetes and Juju as hard dependencies. It replaced the older MicroStack, so
microstack initcommands from old tutorials no longer work. -
DevStack: runs shell scripts to build an all-in-one node in minutes. It suits learning and testing, but it does not survive a reboot and is not meant for production.
-
Manual install: teaches you the internals but is slow and error-prone for a real cloud.
For a production install of OpenStack on bare metal, Kolla-Ansible is the practical middle ground, so that is what you use here.
#How to Install OpenStack on Bare Metal
In this section, you'll go through OpenStack installation on a bare-metal server.
#Step 1: Provision three bare metal servers
The first step is to provision three servers running Ubuntu 24.04. On Cherry Servers, log in to the portal, click Deploy new instance and pick a dedicated server plan. Order all three in the same project and location so they share a private network.
Choose Ubuntu 24.04 LTS, set hostnames like node1, node2, and node3, then deploy. The server details arrive via email once provisioning finishes, usually within 12 minutes, and you should also see them on the portal.
Pick one of the three servers as your deploy node. It will run Kolla-Ansible and connect over SSH to all three hosts, including itself. This guide uses node1 as the deploy node.
#Step 2: Connect via SSH and verify virtualization
With the servers provisioned, connect to each one and confirm the CPU supports hardware virtualization.
Connect using the IP address and root password from your provider:
ssh root@SERVER_IP
Replace SERVER_IP with the server's actual IP address. On first login, type yes to accept the host key.
Confirm the CPU supports hardware virtualization:
grep -Eoc '(vmx|svm)' /proc/cpuinfo
Output16
Any number above 0 means the CPU supports hardware virtualization. If it returns 0, open your provider's IPMI or remote console, enable Intel VT-x or AMD-V in the BIOS, reboot, and check again.
Repeat this on all three servers before going further.
#Step 3: Create a deploy user
Running everything as root works, but a dedicated user with sudo rights is the safer habit. Create the same user on all three nodes while still logged in as root.
sudo adduser deploy
sudo usermod -aG sudo deploy
Give the user passwordless sudo, which Ansible needs for an unattended run:
echo "deploy ALL=(ALL) NOPASSWD:ALL" | sudo tee /etc/sudoers.d/deploy
sudo chmod 440 /etc/sudoers.d/deploy
Outputdeploy ALL=(ALL) NOPASSWD:ALL
Switch to the new user and confirm sudo works with no prompt:
su - deploy
sudo whoami
It should print root with no password prompt. Do this on all three nodes. Run the rest of the install as the deploy user on node1.
#Step 4: Set up hostnames and SSH keys across the nodes
Kolla-Ansible drives the install from one node over SSH, and OpenStack's message queue clusters by hostname. So before anything else, make sure every node has a name, every node can resolve the others, and the deploy node can SSH into all three without a password.
If your provider lets you set the hostnames at deploy time, your prompt already reads deploy@node1 and you can skip this command. Confirm with hostnamectl status. Otherwise, set the hostname on each node:
sudo hostnamectl set-hostname node1
Use node2 and node3 on the other servers.
On every node, add all three hostnames and their private IP addresses to /etc/hosts:
sudo nano /etc/hosts
Add these lines, using the private IPs your provider assigned:
<NODE1_PRIVATE_IP> node1
<NODE2_PRIVATE_IP> node2
<NODE3_PRIVATE_IP> node3
Now, from the deploy node (node1), generate an SSH key:
ssh-keygen -t ed25519
The output confirms the key location:
OutputGenerating public/private ed25519 key pair.
Enter file in which to save the key (/home/deploy/.ssh/id_ed25519):
Created directory '/home/deploy/.ssh'.
Enter passphrase (empty for no passphrase):
Enter same passphrase again:
Your identification has been saved in /home/deploy/.ssh/id_ed25519
Your public key has been saved in /home/deploy/.ssh/id_ed25519.pub
The key fingerprint is:
SHA256:lGeMeUVYRHf4EXeuSgI/rCTheWARmsy2KilPqIehQsc deploy@node1
Copy the key to all three nodes, including node1 itself. Enter the deploy user's password when prompted. The same interaction repeats for each address:
ssh-copy-id deploy@<NODE1_PRIVATE_IP>
ssh-copy-id deploy@<NODE2_PRIVATE_IP>
ssh-copy-id deploy@<NODE3_PRIVATE_IP>
Output/usr/bin/ssh-copy-id: INFO: Source of key(s) to be installed: "/home/deploy/.ssh/id_ed25519.pub"
The authenticity of host '10.191.48.7 (10.191.48.7)' can't be established.
ED25519 key fingerprint is SHA256:EUeMsMZgbTvYdwyXX68KiMIll0E6rdF7teKDb8cjcZI.
This key is not known by any other names.
Are you sure you want to continue connecting (yes/no/[fingerprint])? yes
/usr/bin/ssh-copy-id: INFO: attempting to log in with the new key(s), to filter out any that are already installed
/usr/bin/ssh-copy-id: INFO: 1 key(s) remain to be installed -- if you are prompted now it is to install the new keys
deploy@10.191.48.7's password:

Number of key(s) added: 1
Confirm the deploy node reaches each host without a password:
ssh deploy@<NODE1_PRIVATE_IP> hostname
ssh deploy@<NODE2_PRIVATE_IP> hostname
ssh deploy@<NODE3_PRIVATE_IP> hostname
Outputnode1
node2
node3
Each command prints the hostname without prompting for a password. With name resolution and SSH in place, the next step is networking.
#Step 5: Configure the network interfaces
Kolla-Ansible needs at least two network interfaces. The first carries management traffic between services and holds an IP. The second carries external traffic for floating IPs and holds no IP on the host, because Neutron takes it over, attaches it to an Open vSwitch bridge, and manages the addressing itself. Assigning an IP to the second interface is the most common networking mistake in a Kolla install.
How this maps to your hardware depends on your provider. Check the layout on each node:
ip addr
Output1: lo: <LOOPBACK,UP,LOWER_UP> mtu 65536 qdisc noqueue state UNKNOWN group default qlen 1000
    link/loopback 00:00:00:00:00:00 brd 00:00:00:00:00:00
    inet 127.0.0.1/8 scope host lo
       valid_lft forever preferred_lft forever
    inet6 ::1/128 scope host noprefixroute
       valid_lft forever preferred_lft forever
2: enp1s0f0: <BROADCAST,MULTICAST,SLAVE,UP,LOWER_UP> mtu 1500 qdisc mq master bond0 state UP group default qlen 1000
    link/ether 90:5a:08:3d:ba:b8 brd ff:ff:ff:ff:ff:ff
3: enp1s0f1: <BROADCAST,MULTICAST,SLAVE,UP,LOWER_UP> mtu 1500 qdisc mq master bond0 state UP group default qlen 1000
    link/ether 90:5a:08:3d:ba:b8 brd ff:ff:ff:ff:ff:ff permaddr 90:5a:08:3d:ba:b9
4: bond0: <BROADCAST,MULTICAST,MASTER,UP,LOWER_UP> mtu 1500 qdisc noqueue state UP group default qlen 1000
    link/ether 90:5a:08:3d:ba:b8 brd ff:ff:ff:ff:ff:ff
    inet 84.32.48.3/25 brd 84.32.48.127 scope global bond0
       valid_lft forever preferred_lft forever
    inet6 fe80::925a:8ff:fe3d:bab8/64 scope link
       valid_lft forever preferred_lft forever
5: bond0.2738@bond0: <BROADCAST,MULTICAST,UP,LOWER_UP> mtu 1500 qdisc noqueue state UP group default qlen 1000
    link/ether 90:5a:08:3d:ba:b8 brd ff:ff:ff:ff:ff:ff
    inet 10.191.48.7/24 brd 10.191.48.255 scope global bond0.2738
       valid_lft forever preferred_lft forever
    inet6 fe80::925a:8ff:fe3d:bab8/64 scope link
       valid_lft forever preferred_lft forever
You see one of two setups. On a single-NIC server, the public IP address is on one physical interface, such as enp3s0, and a second NIC is free; use the primary interface for management and the second, unconfigured NIC for Neutron. On a bonded server, which is what Cherry Servers uses, two physical NICs (such as enp1s0f0 and enp1s0f1) are bonded into bond0. The public IP sits on bond0, and the private network arrives as a tagged VLAN sub-interface such as bond0.2738.
On the bonded Cherry setup, use the private VLAN sub-interface, for example, bond0.2738, as the management interface. It already holds a private IP on the inter-node network. For the Neutron external interface, add a separate VLAN sub-interface on the bond, carrying your routed public block, with no IP.
The routed block and its VLAN ID depend on your order, so confirm both with support before you continue.
Open your provider's BMC or IPMI console and confirm access before you touch the network config. A bad change drops SSH, and the console is your only way back in.
Then back up the existing Netplan file:
sudo cp /etc/netplan/50-cloud-init.yaml /etc/netplan/50-cloud-init.yaml.bak
sudo chmod 600 /etc/netplan/*.yaml
Add a vlans block to /etc/netplan/50-cloud-init.yaml at the same indentation level as the bonds block, as a sibling under network. This interface gives Neutron something to bind for external traffic. Set no IP on it; Neutron manages the addressing itself. Pick any VLAN ID that does not already appear in your netplan files, since no traffic routes over this interface until your provider trunks a public block onto it:
vlans:
  bond0.4000:
    id: 4000
    link: bond0
    dhcp4: no
    dhcp6: no
Apply it:
sudo netplan apply
Confirm the interface is up with no IP:
ip addr show bond0.4000
Output6: bond0.4000@bond0: <BROADCAST,MULTICAST,UP,LOWER_UP> mtu 1500 qdisc noqueue state UP group default qlen 1000
    link/ether 90:5a:08:3d:ba:b8 brd ff:ff:ff:ff:ff:ff
    inet6 fe80::925a:8ff:fe3d:bab8/64 scope link
       valid_lft forever preferred_lft forever
The interface is UP with no inet line. That is the correct state. Repeat this on node2 and node3 before moving on.
#Step 6: Install Kolla-Ansible on the deploy node
Work on the deploy node (node1) for the rest of the install. First, install the build dependencies:
sudo apt update
sudo apt install -y git python3-dev libffi-dev gcc libssl-dev libdbus-glib-1-dev python3-venv
OutputHit:1 http://repo.cherryservers.com/ubuntu noble InRelease
Hit:2 http://repo.cherryservers.com/ubuntu noble-updates InRelease
Hit:3 http://repo.cherryservers.com/ubuntu noble-backports InRelease
Hit:4 http://repo.cherryservers.com/ubuntu noble-security InRelease
Reading package lists... Done
Building dependency tree... Done
Reading state information... Done
72 packages can be upgraded. Run 'apt list --upgradable' to see them.
OutputReading package lists... Done
Building dependency tree... Done
Reading state information... Done
The following NEW packages will be installed:
  python3-dev python3-venv python3.12-dev python3.12-venv
  libssl-dev libffi-dev gcc binutils [...]
2 upgraded, 64 newly installed, 0 to remove and 70 not upgraded.
Need to get 70.6 MB of archives.
After this operation, 239 MB of additional disk space will be used.
Get:1 http://repo.cherryservers.com/ubuntu noble-updates/main amd64 libssl3t64 amd64 3.0.13-0ubuntu3.11 [1,942 kB]
Get:2 http://repo.cherryservers.com/ubuntu noble-updates/main amd64 openssl amd64 3.0.13-0ubuntu3.11 [1,003 kB]
[...]
Fetched 70.6 MB in 6s (11.0 MB/s)
[...]
Setting up python3-venv (3.12.3-0ubuntu2.1) ...
Setting up gcc (4:13.2.0-7ubuntu1) ...
[...]
Restarting services...
  systemctl restart ssh.service systemd-networkd.service
  systemd-journald.service systemd-networkd.service [...]
No containers need to be restarted.
No VM guests are running outdated hypervisor (qemu) binaries on this host.
Create a Python virtual environment and activate it. This keeps Kolla-Ansible and its libraries separate from the system Python:
python3 -m venv ~/kolla-venv
source ~/kolla-venv/bin/activate
pip install -U pip
OutputRequirement already satisfied: pip in ./kolla-venv/lib/python3.12/site-packages (24.0)
Collecting pip
  Downloading pip-26.1.2-py3-none-any.whl.metadata (4.6 kB)
Downloading pip-26.1.2-py3-none-any.whl (1.8 MB)
   ━━━━━━━━━━━━━━━━━━━━━━━━━━━━━━━━━━━━━━━━ 1.8/1.8 MB 125.5 MB/s eta 0:00:00
Installing collected packages: pip
  Attempting uninstall: pip
    Found existing installation: pip 24.0
    Uninstalling pip-24.0:
      Successfully uninstalled pip-24.0
Successfully installed pip-26.1.2
Install Kolla-Ansible from the 2026.1 stable branch:
pip install git+https://opendev.org/openstack/kolla-ansible@stable/2026.1
OutputCollecting git+https://opendev.org/openstack/kolla-ansible@stable/2026.1
  Cloning https://opendev.org/openstack/kolla-ansible (to revision stable/2026.1) to /tmp/pip-req-build-9b3xwh6n
  Running command git checkout -b stable/2026.1 --track origin/stable/2026.1
  Switched to a new branch 'stable/2026.1'
  branch 'stable/2026.1' set up to track 'origin/stable/2026.1'.
  Resolved https://opendev.org/openstack/kolla-ansible to commit 75a9dcd132b0a5aab69bf234dd621c9035208174
  Installing build dependencies ... done
  Preparing metadata (pyproject.toml) ... done
Collecting bcrypt>=4.3.0 (from kolla-ansible==22.0.1.dev15)
Collecting cryptography>=2.1 (from kolla-ansible==22.0.1.dev15)
Collecting ansible-core!=2.19.0,<2.21,>=2.19 (from kolla-ansible==22.0.1.dev15)
Collecting oslo.config>=5.2.0 (from kolla-ansible==22.0.1.dev15)
Collecting oslo.utils>=3.33.0 (from kolla-ansible==22.0.1.dev15)
[...]
Building wheels for collected packages: kolla-ansible
  Building wheel for kolla-ansible (pyproject.toml) ... done
  Created wheel for kolla-ansible: filename=kolla_ansible-22.0.1.dev15-py3-none-any.whl
Successfully built kolla-ansible
Successfully installed ansible-core-2.20.7 bcrypt-5.0.0 cliff-4.14.0
cryptography-49.0.0 hvac-2.4.0 jinja2-3.1.6 jmespath-1.1.0 kolla-ansible-22.0.1.dev15
oslo.config-10.5.0 oslo.utils-10.1.1 [...]
Pinning to a release branch ties your tooling to one version, so a rebuild weeks later runs the same playbooks instead of the latest commit. This guide uses the 2026.1 release. Check the Kolla-Ansible releases page for the current stable branch.
Next, create the config directory and copy in the example files:
sudo mkdir -p /etc/kolla
sudo chown $USER:$USER /etc/kolla
cp -r ~/kolla-venv/share/kolla-ansible/etc_examples/kolla/* /etc/kolla
cp ~/kolla-venv/share/kolla-ansible/ansible/inventory/multinode .
Install the Ansible Galaxy roles, then generate the service passwords:
kolla-ansible install-deps
kolla-genpwd
OutputInstalling Ansible Galaxy dependencies
Starting galaxy collection install process
Installing 'openstack.kolla:1.0.0' to '/home/deploy/.ansible/collections/ansible_collections/openstack/kolla'
openstack.kolla:1.0.0 was installed successfully
[...]
Installing 'ansible.netcommon:8.5.3' to '/home/deploy/.ansible/collections/ansible_collections/ansible/netcommon'
ansible.netcommon:8.5.3 was installed successfully
Installing 'ansible.posix:2.2.0' to '/home/deploy/.ansible/collections/ansible_collections/ansible/posix'
ansible.posix:2.2.0 was installed successfully
Installing 'ansible.utils:6.0.3' to '/home/deploy/.ansible/collections/ansible_collections/ansible/utils'
ansible.utils:6.0.3 was installed successfully
Installing 'community.crypto:3.2.2' to '/home/deploy/.ansible/collections/ansible_collections/community/crypto'
community.crypto:3.2.2 was installed successfully
Installing 'community.general:11.4.9' to '/home/deploy/.ansible/collections/ansible_collections/community/general'
community.general:11.4.9 was installed successfully
Installing 'community.docker:4.8.7' to '/home/deploy/.ansible/collections/ansible_collections/community/docker'
community.docker:4.8.7 was installed successfully
Installing 'community.library_inventory_filtering_v1:1.1.5' to '/home/deploy/.ansible/collections/ansible_collections/community/library_inventory_filtering_v1'
community.library_inventory_filtering_v1:1.1.5 was installed successfully
OutputWARNING: Passwords file "/etc/kolla/passwords.yml" is world-readable. The permissions will be changed.
kolla-genpwd fills /etc/kolla/passwords.yml with strong random values for every service. You never edit these by hand. With Kolla-Ansible installed, the next step is to tell it which services run on which nodes.
#Step 7: Build the Ansible inventory
The inventory file maps OpenStack roles to hosts. Open the multinode file:
nano multinode
Add the three hostnames to the control, network, compute, storage, and monitoring groups. Ansible attaches these variables to the host, so node1 carries the same connection details in every group it appears in:
[control]
node1 ansible_host=<NODE1_PRIVATE_IP> ansible_user=deploy ansible_become=true ansible_private_key_file=/home/deploy/.ssh/id_ed25519
node2 ansible_host=<NODE2_PRIVATE_IP> ansible_user=deploy ansible_become=true ansible_private_key_file=/home/deploy/.ssh/id_ed25519
node3 ansible_host=<NODE3_PRIVATE_IP> ansible_user=deploy ansible_become=true ansible_private_key_file=/home/deploy/.ssh/id_ed25519

[network]
node1
node2
node3

[compute]
node1
node2
node3

[storage]
node1
node2
node3

[monitoring]
node1
node2
node3
Listing the same three hosts in every role group is what makes the cluster hyperconverged: each node runs everything. For a single-node test instead, the all-in-one inventory points every role at localhost. With the layout set, configure the deployment.
#Step 8: Configure globals.yml
globals.yml is the main control file for the deployment. Open it:
nano /etc/kolla/globals.yml
Add the following, replacing the interface names with the ones you identified in Step 5 and the virtual IP address (VIP) with a free IP on your management subnet confirmed in Step 5. The values shown are from the cluster used in this guide:
kolla_base_distro: "ubuntu"
kolla_test_images: "yes"

network_interface: "bond0.2738"
neutron_external_interface: "bond0.4000"
kolla_internal_vip_address: "10.191.48.250"

enable_cinder: "yes"
enable_cinder_backend_lvm: "yes"
cinder_cluster_name: "cinder-cluster"

keepalived_virtual_router_id: "51"
network_interface is the private VLAN sub-interface that holds an IP and carries management traffic between services. neutron_external_interface is the external VLAN sub-interface with no IP, which Neutron claims for floating IPs. kolla_internal_vip_address is a single unused IP on the management subnet.
Keepalived floats it across the three controllers to give one stable address for the APIs. keepalived_virtual_router_id takes a number from 0 to 255. Set it to a unique value if another Keepalived cluster shares the same layer-2 network.
Substitute your own: the sub-interface names your provider assigned, and a free IP on your management subnet for the VIP. Keep the VIP on the management subnet, not the tenant network that the demo instances use later, so the two never overlap.
kolla_test_images tells Kolla you accept the published quay.io/openstack.kolla images. They are the standard images but are marked for testing, so prechecks halt without this setting. Set it in globals.yml rather than passing the --use-test-images flag, because the flag works on prechecks but the deploy command rejects it.
The variable name is version-specific. This guide uses kolla_test_images, but an older release used kolla_use_test_images. Setting the wrong name fails silently, and the check keeps blocking. Confirm the name your version reads:
grep -n test_images ~/kolla-venv/share/kolla-ansible/ansible/roles/prechecks/tasks/registry_checks.yml
The variable in the when: line is the one to set.
cinder_cluster_name names the Cinder cluster. Kolla requires it when more than one node runs cinder-volume. Every node runs it in this hyperconverged layout, so prechecks fail without a cluster name. Any non-empty string works.
One thing to know about globals.yml: it has the highest precedence in Kolla, so any value that must differ between nodes does not belong here. This build assumes the three servers report the same interface names, which holds for a single batch order from one provider. If your nodes show different names, set network_interface per host in host_vars or group_vars instead. A single globals.yml value forces one name onto every node, and the deploy fails on the odd one out.
Save and exit.
#Step 9: Set up block storage with LVM
Next, set up the storage backend Cinder will use. Cinder gives users persistent volumes they can attach, detach, and snapshot. Without it, Nova only hands out temporary local disk that vanishes when a VM is deleted. This build uses LVM, which is the simplest backend for a first cloud.
On each node, find the disk layout first:
lsblk -o NAME,SIZE,TYPE,MOUNTPOINTS,FSTYPE
OutputNAME          SIZE TYPE  MOUNTPOINTS       FSTYPE
nvme0n1     894.3G disk
├─nvme0n1p1   488M part  /boot/efi         vfat
└─nvme0n1p2 893.8G part                    linux_raid_member
  └─md0     893.6G raid1 /                 ext4
nvme1n1     894.3G disk
├─nvme1n1p1   488M part  /boot/efi/ubuntu2 vfat
└─nvme1n1p2 893.8G part                    linux_raid_member
  └─md0     893.6G raid1 /                 ext4
Look for a disk with no partitions, no filesystem and nothing mounted. If you have a free second drive, point LVM at it and create the volume group. Cinder expects the name cinder-volumes:
sudo pvcreate /dev/sdb
sudo vgcreate cinder-volumes /dev/sdb
Replace /dev/sdb with your spare disk. On NVMe hardware the name looks like /dev/nvme1n1.
Cherry's default layout mirrors both NVMe drives into a single RAID-1 root, as shown in the lsblk output above. Both disks are consumed by the array mounted at /, leaving no spare device. In that case, back up the volume group with a loopback file. On each node run:
sudo truncate -s 100G /var/lib/cinder-volumes.img
sudo losetup -f --show /var/lib/cinder-volumes.img
sudo pvcreate /dev/loop0
sudo vgcreate cinder-volumes /dev/loop0
The second command prints the device it assigned, usually /dev/loop0. Use that name in the two commands that follow.
Then confirm the group is ready:
sudo vgs cinder-volumes
Output VG             #PV #LV #SN Attr   VSize    VFree
  cinder-volumes   1   0   0 wz--n- <100.00g <100.00g
The loopback device does not survive a reboot on its own. For a lasting setup, add a systemd unit that reattaches the file at boot. The loopback is fine for proving Cinder and running volumes. For production, move to a real disk or Ceph.
For a production cloud, Ceph is the stronger choice. It pools disks across all three nodes, replicates data, and recovers after a failure. Kolla-Ansible does not deploy Ceph for you, so set it up separately with cephadm and connect it as an external backend. Start with LVM here, then move to Ceph once the cloud carries real workloads.
With storage ready on all three nodes, run the deployment.
#Step 10: Deploy OpenStack
Run the deployment from the deploy node, pointing each command at your multinode inventory.
First, prepare the three nodes from the deploy node:
kolla-ansible bootstrap-servers -i ./multinode
OutputBootstrapping servers
[...]

PLAY RECAP ****************************************************************************************************************
localhost                  : ok=2    changed=0    unreachable=0    failed=0    skipped=0    rescued=0    ignored=0
node1                      : ok=46   changed=15   unreachable=0    failed=0    skipped=27   rescued=0    ignored=0
node2                      : ok=46   changed=16   unreachable=0    failed=0    skipped=27   rescued=0    ignored=0
node3                      : ok=46   changed=16   unreachable=0    failed=0    skipped=27   rescued=0    ignored=0
Zero failed tasks means the hosts are ready. A failure here means something foundational is wrong, so fix it before moving on.
Next, run the pre-deployment checks:
kolla-ansible prechecks -i ./multinode
OutputPre-deployment checking
[...]

PLAY [Apply role prechecks]

TASK [prechecks : Checking host OS distribution]
ok: [node1]
ok: [node2]
ok: [node3]
ok: [localhost]

TASK [prechecks : Check for a running host NTP daemon]
ok: [node1]
ok: [node2]
ok: [node3]

TASK [prechecks : Checking the api_interface is present]
ok: [node1]
ok: [node2]
ok: [node3]

TASK [prechecks : Checking Docker version]
ok: [node1]
ok: [node2]
ok: [node3]

[...]

PLAY [Apply role loadbalancer]

TASK [loadbalancer : Checking if kolla_internal_vip_address and kolla_external_vip_address are not pingable]
ok: [node1] => (item=10.191.48.250)
ok: [node2] => (item=10.191.48.250)
ok: [node3] => (item=10.191.48.250)

[...]

PLAY [Apply role cinder]

TASK [cinder : Checking LVM volume group exists for Cinder]
ok: [node1]
ok: [node2]
ok: [node3]

[...]

PLAY [Apply role neutron]

TASK [neutron : Checking tenant network types]
ok: [node1] => (item=vxlan)

[...]

PLAY RECAP

localhost : ok=13  changed=0  unreachable=0  failed=0  skipped=13
node1     : ok=123 changed=0  unreachable=0  failed=0  skipped=157
node2     : ok=115 changed=0  unreachable=0  failed=0  skipped=141
node3     : ok=115 changed=0  unreachable=0  failed=0  skipped=141
Prechecks verify SSH access, packages, memory, disk, network interfaces, port availability and name resolution before any image is pulled. A failure here is far cheaper to fix than one mid-deploy.
Now run the deployment:
kolla-ansible deploy -i ./multinode
OutputDeploying Playbooks
[...]

PLAY [Apply role kolla_toolbox]

TASK [kolla_toolbox : Include tasks for action deploy]
included: .../roles/kolla_toolbox/tasks/deploy.yml for node1, node2, node3

TASK [kolla_toolbox : Ensuring config directories exist]
ok: [node1]
ok: [node2]
ok: [node3]

TASK [kolla_toolbox : Copying over config.json files for services]
ok: [node1]
ok: [node2]
ok: [node3]

[...]

PLAY [Apply role horizon]

TASK [horizon : Copying over config.json files for services]
changed: [node1]
changed: [node2]
changed: [node3]

TASK [service-check-containers : Check containers for horizon]
changed: [node1]
changed: [node2]
changed: [node3]

TASK [service-check-containers : Notify handlers to restart containers for horizon]
changed: [node1] => {"msg": "Notifying handlers: Restart horizon container"}
changed: [node2] => {"msg": "Notifying handlers: Restart horizon container"}
changed: [node3] => {"msg": "Notifying handlers: Restart horizon container"}

RUNNING HANDLER [horizon : Restart horizon container]
changed: [node1]
changed: [node2]
changed: [node3]

[...]

PLAY RECAP

localhost : ok=4   changed=0   unreachable=0   failed=0   skipped=0
node1     : ok=427 changed=128 unreachable=0   failed=0   skipped=278
node2     : ok=309 changed=84  unreachable=0   failed=0   skipped=264
node3     : ok=314 changed=84  unreachable=0   failed=0   skipped=263
This pulls the container images, creates one container per service, generates each config, initializes the databases and Keystone endpoints in order, and starts everything. The first run takes a while because it downloads several gigabytes of images.
If the deploy stops at the openvswitch role with the openvswitch_db container stuck restarting, a previous run left a stale pidfile in /run/openvswitch. Clear the runtime files on all three nodes and rerun:
sudo docker stop openvswitch_db openvswitch_vswitchd 2>/dev/null
sudo docker rm openvswitch_db openvswitch_vswitchd 2>/dev/null
sudo rm -rf /run/openvswitch/*
kolla-ansible deploy -i ./multinode
Kolla is idempotent, so rerunning picks up where it stopped.
Once the deploy finishes, confirm the generated service configs are valid:
kolla-ansible validate-config -i ./multinode
OutputValidate configuration files for enabled OpenStack services
[...]

PLAY [Apply role loadbalancer]

TASK [loadbalancer : Assert haproxy config is valid]
ok: [node1] => {"msg": "haproxy config is valid"}
ok: [node2] => {"msg": "haproxy config is valid"}
ok: [node3] => {"msg": "haproxy config is valid"}

[...]

PLAY RECAP

localhost   : ok=4    changed=0    unreachable=0   failed=0   skipped=0
node1       : ok=141  changed=36   unreachable=0   failed=0   skipped=71
node2       : ok=135  changed=34   unreachable=0   failed=0   skipped=71
node3       : ok=135  changed=34   unreachable=0   failed=0   skipped=71
This reads the running containers, so it only works after a completed deploy. The changed tasks are expected because validate-config writes configs into the running containers to check them. A clean recap with zero failed tasks means the enabled services hold valid configuration.
Now generate the admin credentials:
kolla-ansible post-deploy -i ./multinode
OutputPost-Deploying Playbooks
[...]

TASK [Template out clouds.yaml]
changed: [localhost]

[...]

TASK [Template out admin-openrc.sh]
changed: [localhost]

[...]

PLAY RECAP

localhost                  : ok=9    changed=5    unreachable=0    failed=0    skipped=1    rescued=0    ignored=0
This writes /etc/kolla/clouds.yaml, which holds the connection details the CLI needs.
#Step 11: Install OpenStack CLI and access Horizon
Now install the OpenStack command-line client:
pip install python-openstackclient -c https://releases.openstack.org/constraints/upper/2026.1
Output[...]

Successfully installed PrettyTable-3.17.0 charset_normalizer-3.4.4 cliff-4.13.3 cmd2-3.2.0 cryptography-43.0.3 debtcollector-3.0.0 decorator-5.2.1 dogpile.cache-1.5.0 idna-3.11 jsonpatch-1.33 jsonpointer-3.0.0 keystoneauth1-5.13.1 markdown-it-py-4.0.0 msgpack-1.1.2 openstacksdk-4.10.0 os-service-types-1.8.2 osc-lib-4.4.0 oslo.config-10.3.0 oslo.i18n-6.7.2 oslo.serialization-5.9.1 oslo.utils-10.0.1 packaging-26.0 platformdirs-4.9.2 pygments-2.19.2 python-cinderclient-9.9.0 python-keystoneclient-5.8.0 python-openstackclient-9.0.0 requests-2.32.5 requestsexceptions-1.4.0 rich-14.3.3 rich-argparse-1.7.2 stevedore-5.7.0 typing-extensions-4.15.0 urllib3-2.6.3 wcwidth-0.6.0 wrapt-2.1.1
...

Installing collected packages:
requestsexceptions, wrapt, wcwidth, urllib3, typing-extensions,
stevedore, pygments, platformdirs, packaging, msgpack,
markdown-it-py, jsonpointer, idna, decorator,
charset_normalizer, rich, requests, PrettyTable,
oslo.i18n, os-service-types, jsonpatch, dogpile.cache,
debtcollector, cryptography, rich-argparse, oslo.utils,
oslo.config, keystoneauth1, python-cinderclient,
oslo.serialization, openstacksdk, cmd2,
python-keystoneclient, cliff, osc-lib,
python-openstackclient

...

Successfully installed
PrettyTable-3.17.0
charset_normalizer-3.4.4
cliff-4.13.3
cmd2-3.2.0
cryptography-43.0.3
dogpile.cache-1.5.0
keystoneauth1-5.13.1
openstacksdk-4.10.0
osc-lib-4.4.0
oslo.config-10.3.0
oslo.serialization-5.9.1
oslo.utils-10.0.1
python-cinderclient-9.9.0
python-keystoneclient-5.8.0
python-openstackclient-9.0.0
requests-2.32.5
rich-14.3.3
stevedore-5.7.0
typing-extensions-4.15.0
urllib3-2.6.3
...
Check the current stable release if you are deploying a newer version than this guide uses.
Point the client at the generated credentials. post-deploy writes clouds.yaml to /etc/kolla, which is not a path the client searches. Copy it to your user config:
mkdir -p ~/.config/openstack
cp /etc/kolla/clouds.yaml ~/.config/openstack/
export OS_CLOUD=kolla-admin
The export does not persist across sessions. Re-run it after opening a new terminal, or source /etc/kolla/admin-openrc.sh instead, which sets the same credentials as environment variables, and sourcing it sets all credentials in one command for the current session.
Confirm the services are up:
openstack service list
openstack compute service list
openstack network agent list
Output+----------------------------------+-----------+----------------+
| ID                               | Name      | Type           |
+----------------------------------+-----------+----------------+
| 066ab4b7962a47f9a7fec71626232627 | neutron   | network        |
| 0f514a788ac94253a1096214658dfa22 | glance    | image          |
| 56e9845ff3c44f26aeec869c111a86fc | cinder    | block-storage  |
| 9639c3fba14649aa8379a8cfd597259a | nova      | compute        |
| 9c20980fcfb9469cbef5a8643acbdd34 | placement | placement      |
| cd4e7be47da8482f8f8501621aefdb98 | heat      | orchestration  |
| d6bafc2c2aba4a40a375703ab4bd0c05 | keystone  | identity       |
| fa61408e57524b09ad5e3ad9c1ec2a62 | heat-cfn  | cloudformation |
+----------------------------------+-----------+----------------+
Output+--------------------------------------+----------------+-------+----------+---------+-------+----------------------------+
| ID                                   | Binary         | Host  | Zone     | Status  | State | Updated At                 |
+--------------------------------------+----------------+-------+----------+---------+-------+----------------------------+
| e5d05a6d-9460-4164-98fe-4b4628f0b31b | nova-scheduler | node1 | internal | enabled | up    | 2026-07-01T02:48:24.000000 |
| 4bb20912-2aea-4e3e-9e5e-9b7579aa9c27 | nova-scheduler | node3 | internal | enabled | up    | 2026-07-01T02:48:26.000000 |
| bb591906-9a54-410b-8135-6efa4fd20a8e | nova-scheduler | node2 | internal | enabled | up    | 2026-07-01T02:48:26.000000 |
| fa0516fc-4d58-418a-b169-4f85cf5c0092 | nova-conductor | node1 | internal | enabled | up    | 2026-07-01T02:48:26.000000 |
| 9e6035a6-304f-4f7a-a818-de02de23803b | nova-conductor | node2 | internal | enabled | up    | 2026-07-01T02:48:26.000000 |
| 22e8e11a-a6fc-4956-a304-9c12548c1638 | nova-conductor | node3 | internal | enabled | up    | 2026-07-01T02:48:27.000000 |
| 1fa8af07-1fb4-4f1b-8ee5-1a5be1dbe8d5 | nova-compute   | node1 | nova     | enabled | up    | 2026-07-01T02:48:21.000000 |
| 605378d8-cb01-4d72-835b-d218ad8615d9 | nova-compute   | node3 | nova     | enabled | up    | 2026-07-01T02:48:23.000000 |
| c6fd883b-aa45-437a-bffb-65d29e9ebc0c | nova-compute   | node2 | nova     | enabled | up    | 2026-07-01T02:48:25.000000 |
+--------------------------------------+----------------+-------+----------+---------+-------+----------------------------+
Output+--------------------------------------+--------------------+-------+-------------------+-------+-------+---------------------------+
| ID                                   | Agent Type         | Host  | Availability Zone | Alive | State | Binary                    |
+--------------------------------------+--------------------+-------+-------------------+-------+-------+---------------------------+
| 2b47195e-ff0d-44b6-888b-a3953b3297ba | Metadata agent     | node3 | None              | :-)   | UP    | neutron-metadata-agent    |
| 3ab2c6ee-023f-4ded-9c79-f1035873b6e3 | L3 agent           | node3 | nova              | :-)   | UP    | neutron-l3-agent          |
| 3d4b4a89-0e9d-486e-85f6-d19518ee63ea | Open vSwitch agent | node3 | None              | :-)   | UP    | neutron-openvswitch-agent |
| 533bfac7-60c6-4d9f-b467-00b04ec8381b | DHCP agent         | node1 | nova              | :-)   | UP    | neutron-dhcp-agent        |
| 6e1bc55f-d445-4863-8757-a83245c5f52b | DHCP agent         | node2 | nova              | :-)   | UP    | neutron-dhcp-agent        |
| 79fe6f6c-3c33-4444-99ba-08c652c7f228 | L3 agent           | node2 | nova              | :-)   | UP    | neutron-l3-agent          |
| c12c0a18-b911-4c24-aa3a-4e1c93b6679c | Metadata agent     | node2 | None              | :-)   | UP    | neutron-metadata-agent    |
| c83c1b7b-e9a1-408f-a939-795825622afa | DHCP agent         | node3 | nova              | :-)   | UP    | neutron-dhcp-agent        |
| c91cc672-4b63-4fda-ab30-3aea5d5eb32a | L3 agent           | node1 | nova              | :-)   | UP    | neutron-l3-agent          |
| d3fab796-a5b4-4f16-b887-cee9e20b9c34 | Open vSwitch agent | node2 | None              | :-)   | UP    | neutron-openvswitch-agent |
| d71c7919-e6b3-4cd7-b1af-9e8888eaa573 | Metadata agent     | node1 | None              | :-)   | UP    | neutron-metadata-agent    |
| f29f58f4-bc21-47e6-92f6-31248197f53f | Open vSwitch agent | node1 | None              | :-)   | UP    | neutron-openvswitch-agent |
+--------------------------------------+--------------------+-------+-------------------+-------+-------+---------------------------+
Each command should list its services in an UP state. The cluster is healthy.
For the dashboard, open a browser on your VIP at http://<KOLLA_INTERNAL_VIP_ADDRESS> and log in as admin. The password is in the keystone field of the passwords file:
grep keystone_admin_password /etc/kolla/passwords.yml
The VIP sits on the management network, so a browser on a separate workstation cannot reach it directly. The same applies to the noVNC instance console, which Nova also serves on the VIP. Forward the ports through a node you can reach over SSH, then open the address as localhost:
ssh -L 8080:<KOLLA_INTERNAL_VIP_ADDRESS>:80 -L 6080:<KOLLA_INTERNAL_VIP_ADDRESS>:6080 deploy@<NODE1_PUBLIC_IP>
With the tunnel open, http://localhost:8080 reaches Horizon, and the console URL works with localhost in place of the VIP. One caveat, once you enable API TLS later: the console websocket does not connect cleanly through a localhost tunnel because it follows the external scheme. After TLS is enabled, access the console from a workstation on the management network by browsing to the VIP directly.
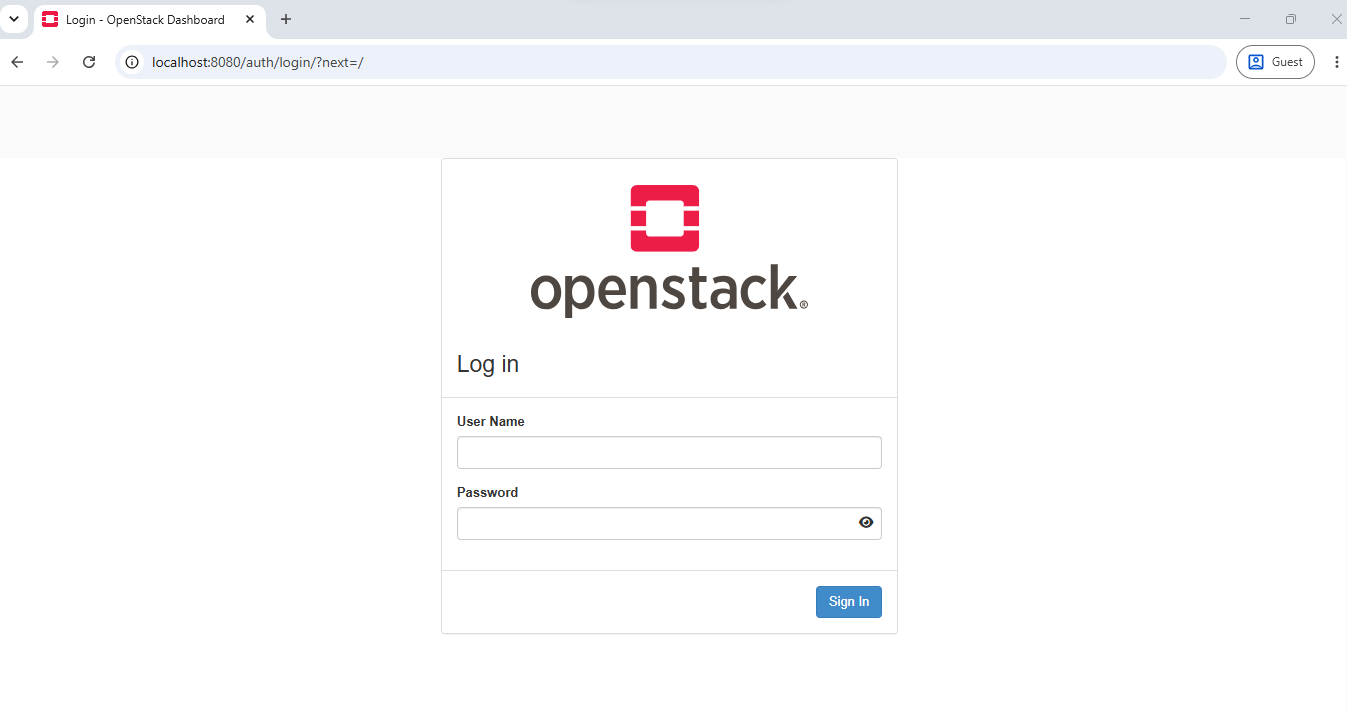
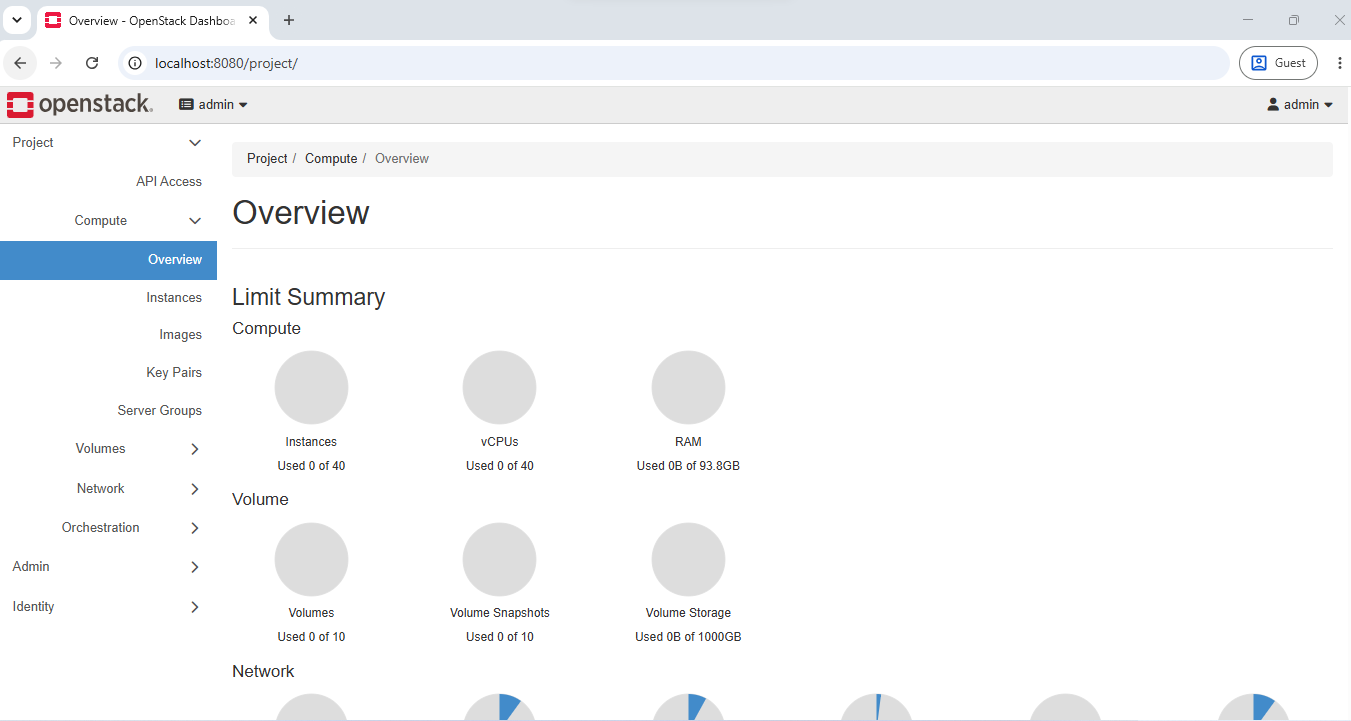
You should land on the Horizon dashboard overview.
#Step 12: Launch your first instance
Kolla-Ansible ships a demo script that creates a network, router, flavors, a CirrOS image, security group rules, and a key pair in one pass. Run it with admin credentials loaded:
source /etc/kolla/admin-openrc.sh
~/kolla-venv/share/kolla-ansible/init-runonce
Output+----------------------------+---------+
| Field                      | Value   |
+----------------------------+---------+
| OS-FLV-DISABLED:disabled   | False   |
| OS-FLV-EXT-DATA:ephemeral  | 0       |
| description                | None    |
| disk                       | 1       |
| id                         | 6       |
| name                       | m2.tiny |
| os-flavor-access:is_public | True    |
| properties                 |         |
| ram                        | 512     |
| rxtx_factor                | 1.0     |
| swap                       | 0       |
| vcpus                      | 2       |
+----------------------------+---------+

Done.

To deploy a demo instance, run:

openstack --os-cloud=kolla-admin server create \
    --image cirros \
    --flavor m1.tiny \
    --key-name mykey \
    --network demo-net \
    demo1
The script is for demonstration. In production, you create your own projects, networks, flavors, and security groups.
Launch the instance. The --wait flag holds until the VM reaches ACTIVE or fails:
openstack server create \
  --image cirros \
  --flavor m1.tiny \
  --key-name mykey \
  --network demo-net \
  --wait demo1
Confirm it booted and got an address:
openstack server list
Output(kolla-venv) deploy@node1:~$ openstack server list
+--------------------------------------+-------+--------+---------------------+--------+---------+
| ID                                   | Name  | Status | Networks            | Image  | Flavor  |
+--------------------------------------+-------+--------+---------------------+--------+---------+
| 6a371897-6ea9-458d-ba5a-4d4dcde73454 | demo1 | ACTIVE | demo-net=10.0.0.141 | cirros | m1.tiny |
+--------------------------------------+-------+--------+---------------------+--------+---------+
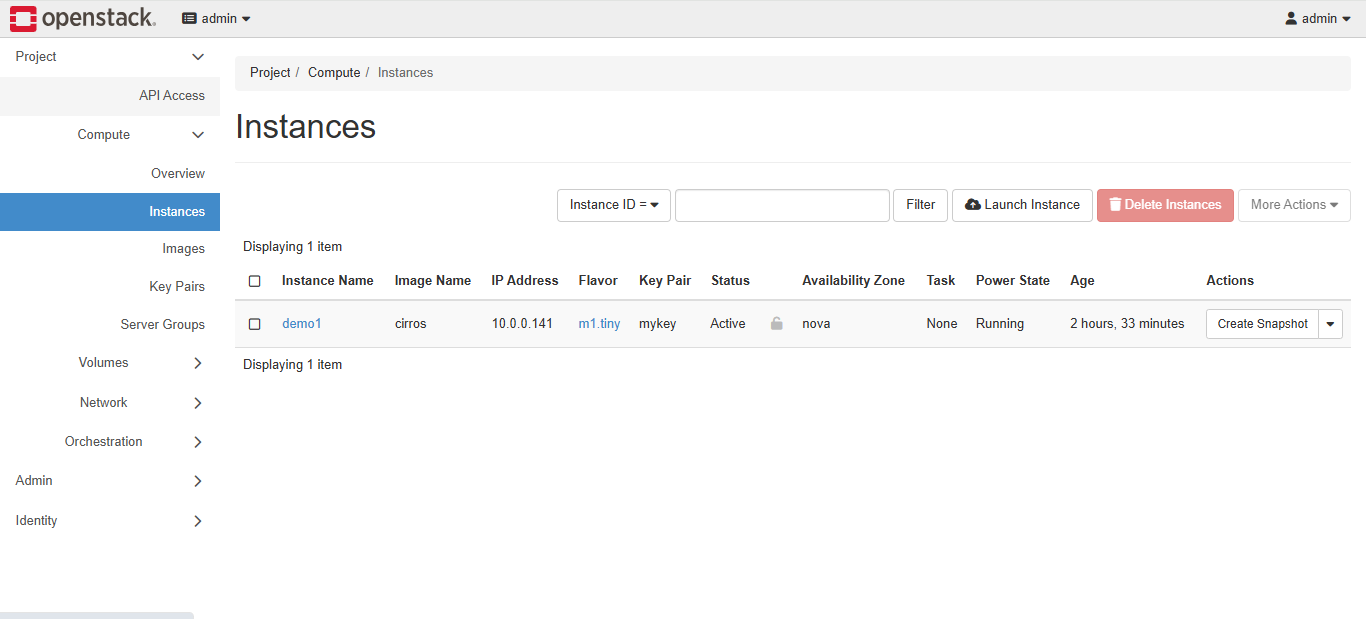
STATUS ACTIVE and an address on demo-net confirms the scheduler placed the VM on a hypervisor, Glance served the image, and Neutron created the port and assigned the address.
Get the console URL and open it in your browser. Replace the VIP with localhost if you are connecting through the SSH tunnel:
openstack console url show demo1
Output+----------+----------------------------------------------------------------------------------------------+
| Field    | Value                                                                                        |
+----------+----------------------------------------------------------------------------------------------+
| protocol | vnc                                                                                          |
| type     | novnc                                                                                        |
| url      | http://10.191.48.250:6080/vnc_lite.html?path=%3Ftoken%3Db0b94936-1c9e-491c-9df0-caeb846e1476 |
+----------+----------------------------------------------------------------------------------------------+
The token expires in a few minutes. Open the URL with localhost in place of the VIP while the tunnel is active. Log in as cirros with the password gocubsgo and confirm the instance reaches its network:
ping -c 3 10.0.0.1
Output3 packets transmitted, 3 packets received, 0% packet loss
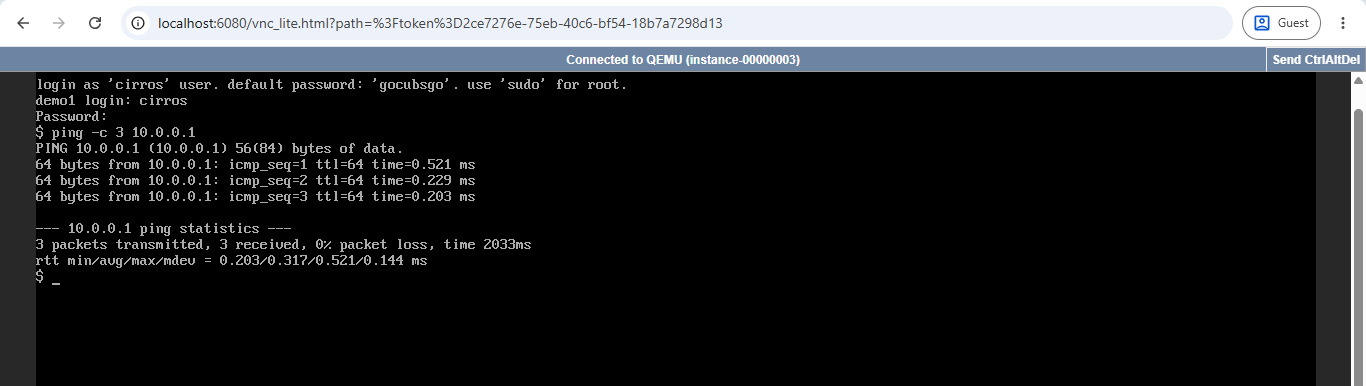
Zero packet loss to the demo-net gateway means DHCP, the network, and the Neutron router all work. Your cluster is running a real virtual machine on hardware you built from scratch.
#Conclusion
This tutorial walked through how to install OpenStack on bare metal, using Kolla-Ansible to drive the deployment from a small set of configuration files. You provisioned three bare metal servers, configured hostnames and SSH, built the two-interface network on a bonded setup, installed Kolla-Ansible, wrote the inventory and globals.yml, set up LVM storage, deployed a full OpenStack control plane, and launched a virtual machine that reaches its network.
From here, the next three steps are worth taking. Setting up floating IPs gives instances a public address; ask your provider to route a public IP block on a dedicated VLAN trunked across all three nodes. Enabling TLS encrypts the dashboard and APIs. Adding compute nodes scales the cluster without touching the existing three.
FAQs
How many servers do you need to install OpenStack?
One server runs a full install for testing with the all-in-one inventory, but it gives no redundancy. For a production cloud with high availability, use at least three nodes so that the control services form a cluster that survives a single-node failure.
Is one bare metal server enough for OpenStack?
For learning and testing, yes. A single node hosts all services and launches real VMs. It has no fault tolerance, so a hardware failure takes the whole cloud offline. Production needs three or more nodes.
Which operating system is best for OpenStack?
The Kolla-Ansible 2026.1 guide recommends Ubuntu 24.04 LTS or Rocky Linux 10 for new deployments. Both work well on bare metal. This guide uses Ubuntu 24.04.
What is the difference between OpenStack and OpenShift?
OpenStack is a cloud platform that provisions virtual machines, networks, and storage, similar in scope to AWS or Azure. OpenShift is a Kubernetes platform for running containers. You run OpenShift on top of infrastructure, and that infrastructure is sometimes an OpenStack cloud.
Do you need Ceph to run OpenStack?
No. A first build runs fine with LVM-backed Cinder. Ceph adds replicated, self-healing storage across nodes, which matters for production but adds setup work. Start with LVM and adopt Ceph when you scale out.