How to Install WordPress on Ubuntu 24.04: Step-by-Step Guide


WordPress serves as a CMS tool for website building. No payment is needed since it's open source software. Themes and plugins help customize the site without deep coding knowledge.
Running WordPress on Ubuntu 24.04 works well because stability is good in this version. Ubuntu 24.04.3 (Noble Numbat) is an LTS release available now. Updates keep coming for several years ahead. Sites hosted on this version perform well, as security stays tight when things are configured properly.
Setting up WordPress on Ubuntu 24.04 gives full control. The site is yours. The server is yours. A fast and secure presence online becomes possible.
#Prerequisites
Let's check what's needed before starting.
-
You need an instance of Ubuntu 24.04 server or a VPS. Cherry Servers has options that work for this. Hardware requires a minimum of 1GB RAM. Storage needs 10GB at a minimum. More resources help when traffic increases.
-
Create a non-root user with sudo privileges. Administrative commands run safely this way.
-
For the software stack, pick a web server first. Nginx works great. Apache is another solid option.
-
PHP is required to run WordPress.
-
MySQL/MariaDB for the database.
-
The domain name's A record must point to the server IP address. SSL/TLS certificate setup needed for HTTPS. Let's Encrypt works well and costs nothing. Email or SMTP configuration allows WordPress to send notifications and password resets.
#LEMP vs LAMP
With prerequisites ready, the next step is choosing a software stack for running WordPress. The two most common options are LAMP and LEMP. LAMP stands for Linux, Apache, MySQL or MariaDB, and PHP. Linux is the operating system that manages the server. Apache handles website requests as the web server. MySQL or MariaDB stores all WordPress content in the database. PHP is the programming language WordPress uses. It processes dynamic components of the website.
LEMP is similar but uses Nginx instead of Apache. Nginx handles many users at the same time. Resource usage is lower compared to Apache. LEMP gets preferred over LAMP for better speed.
#Installing WordPress on Ubuntu 24.04
This is a quick overview of the installation process.
- Update the system to have the latest packages.
- Install the Nginx web server.
- Install PHP and the required extensions for WordPress.
- Configure the firewall to allow web traffic.
- Install the database (MySQL or MariaDB, both work)
- Create a database and a user for WordPress specifically
- Download and install WordPress.
- The WordPress configuration file needs to be updated after that.
- Set up the Nginx server block for the site at the end.
- Complete the WordPress installation through the UI.
So let’s get started.
#Step 1: Update the System
Before anything else, updates. Always start there.
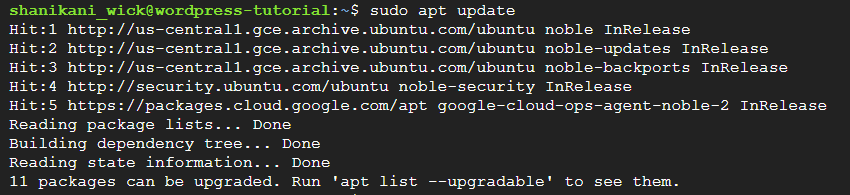
Your server needs to be current, not outdated, not halfway patched. When the system is up to date, fewer errors appear during installation. The package list can be updated and existing packages upgraded with the following command.
sudo apt update
sudo apt-get upgrade
#Step 2: Install Nginx web server
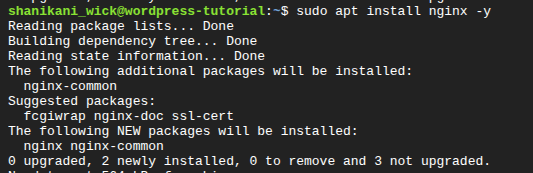
The next step needs a web server. Nginx is a popular choice because it handles speed well. Many visitors at the same time can be managed without issues.
sudo apt install nginx -y
Once installed, you have to start and enable it.
sudo systemctl start nginx
sudo systemctl enable nginx
Once the command runs, check the server status next.
sudo systemctl status nginx
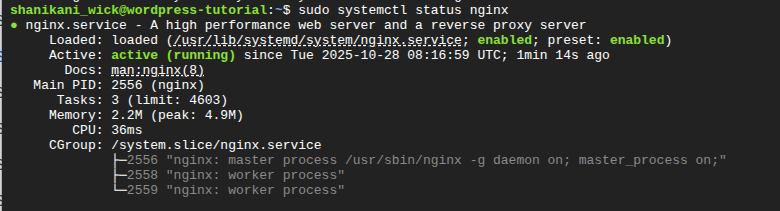
This web server will later serve your WordPress site to visitors.
#Step 3: Install PHP and required extensions
PHP is important. WordPress cannot function without it. But not just plain PHP. A few extra extensions are needed, too. These keep everything running behind the scenes quietly.
sudo apt install php php-cli php-common php-imap php-fpm php-snmp php-xml php-zip php-mbstring php-curl php-mysqli php-gd php-intl -y
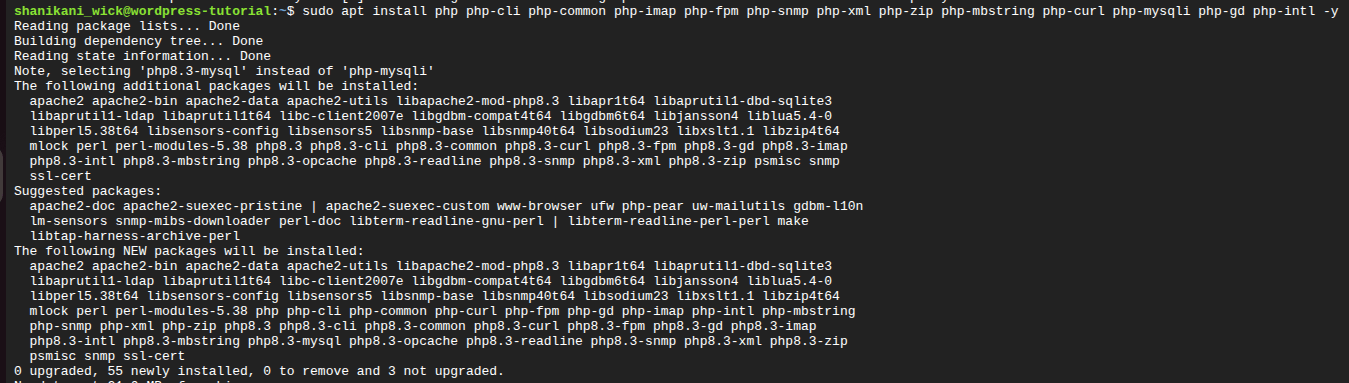
Installation will take some time to complete. Afterwards, you can check the PHP version to confirm it’s installed.
php -v

Some PHP settings just do not cut it, especially for WordPress. The default PHP settings work fine at first, maybe for a small site or a simple theme, but then things start slowing down. You upload a big image, and it fails. You try a complex plugin, and the page hangs forever. That is when you realize the limits are too low.
Memory, upload size, post size, execution time, all of them matter more than you think. A higher memory limit helps it run smoothly, especially when handling large files or heavier themes. Bigger upload and post sizes let you add media without frustration. And a longer execution time keeps scripts from timing out mid-process.
To find the active php.ini file, run the command below.
php --ini
Look for a line like:
OutputLoaded Configuration File: /etc/php/8.3/cli/php.ini
Open php.ini for editing using a text editor like vim.
sudo apt install vim -y
sudo vim /etc/php/8.3/fpm/php.ini
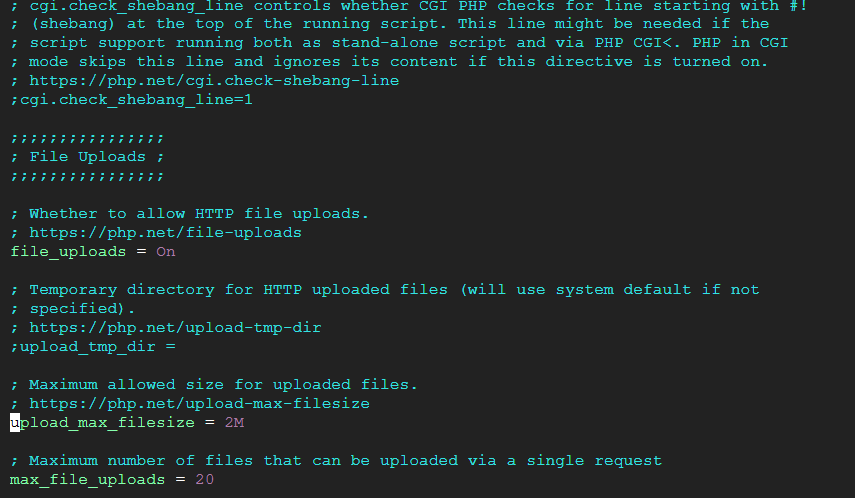
Look for the following lines.
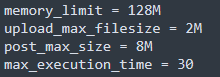
These are the default values that come with the PHP installation. While they are sufficient for a basic WordPress installation, if your WordPress site needs to handle large media files, use heavy plugins, or run memory-intensive tasks, you will need to increase these values.
Press “i” to enter insert mode. Change the above values as needed and press “Esc” to leave insert mode.
Save your changes. Return to the terminal by typing “:wq”.
Restart PHP-FPM and Nginx.
sudo systemctl restart php8.3-fpm
sudo systemctl restart nginx
#Step 4: Configure the firewall
Ubuntu comes with a firewall that blocks unwanted connections. To let visitors access the website, allow HTTP and HTTPS traffic using UFW.
If UFW isn’t installed in your Ubuntu system yet, install it using the command below.
sudo apt install ufw -y

Allow HTTP and HTTPS through the firewall. This opens the ports needed for Nginx to serve websites.
sudo ufw allow "Nginx Full"

Enable the firewall.
sudo ufw enable
Reload UFW to apply the changes. This makes sure the new rules take effect immediately.
sudo ufw reload
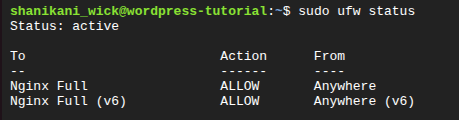
Verify the rule
sudo ufw status
#Step 5: Install the database
WordPress keeps everything in a database. Content, user data, settings, all of it. When choosing a database, there are a couple of suitable options, MySQL and MariaDB, both capable, but for this tutorial, we are going with MariaDB.
With MariaDB, every user detail gets stored safely. Data can be pulled up instantly when someone visits pages or fills out a form. To set up the MariaDB database server, run the following command.
sudo apt install mariadb-server -y

This may take some time. After the installation is complete, start the MariaDB service and make it start automatically on boot.
sudo systemctl start mariadb
sudo systemctl enable mariadb
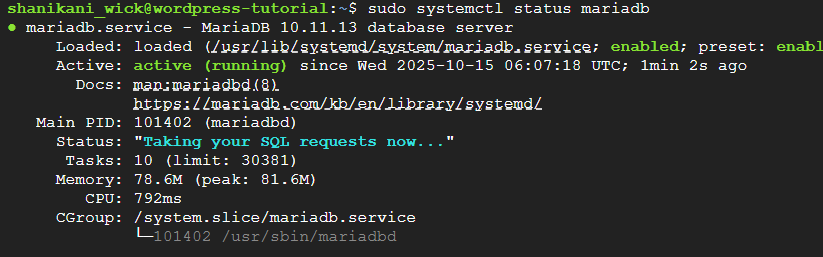
Finally, check if the MariaDB service is running properly:
sudo systemctl status mariadb
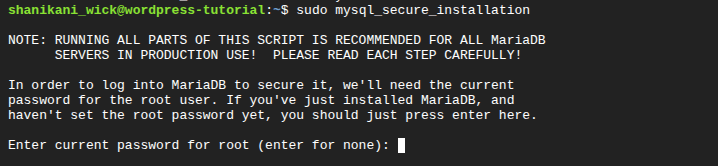
Next, you need to secure the mariadb installation, as MariaDB allows some insecure settings like anonymous users and remote root access.
Run the following command and set a root password.
sudo mysql_secure_installation
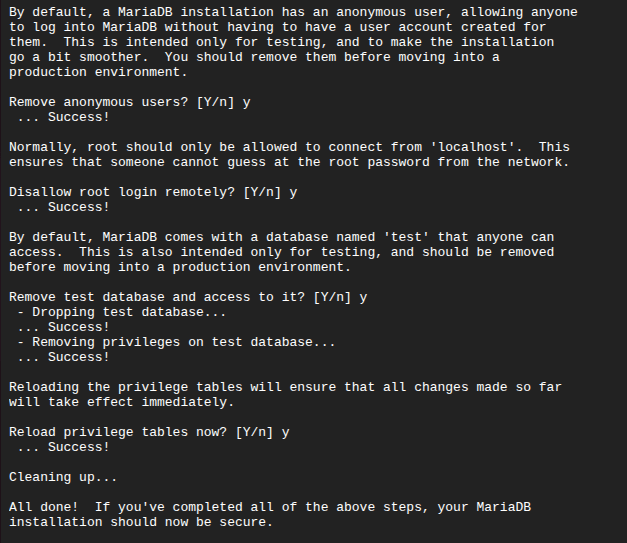
It will also allow you to
- Remove anonymous users.
- Disallow remote root login.
- Remove the test database.
#Step 6: Create a WordPress database and user
Once the database is ready, create a separate database and user for WordPress. Keeping WordPress in its own database improves security. Management becomes easier this way, too.
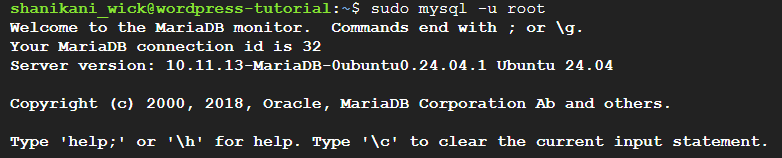
Log in to MariaDB as root
mysql -u root
Create a new database user
CREATE USER 'YourUsername'@'localhost' IDENTIFIED BY 'YourPassword';
Create a new database
CREATE DATABASE wordpress;
Give the user permissions on the database
GRANT ALL PRIVILEGES ON wordpress.* TO 'YourUsername'@'localhost';
Apply the changes
FLUSH PRIVILEGES;
EXIT;
#Step 7: Download and install WordPress
With the server and database ready, you can download the latest version of WordPress.
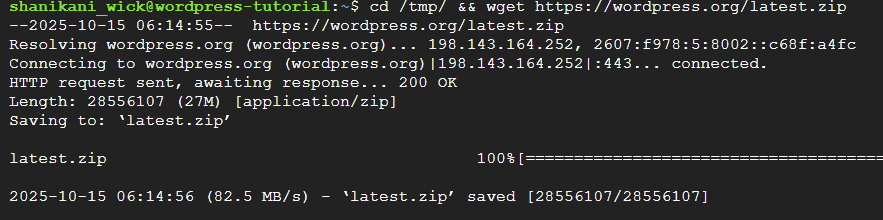
Get the newest version of WordPress using this command.
cd /tmp/ && wget https://wordpress.org/latest.zip
sudo unzip latest.zip -d /var/www
Adjust permissions so the web server can access the files
sudo chown -R www-data:www-data /var/www/wordpress/
#Step 8: Configure the WordPress wp-config.php file
Next, set up WordPress to connect to your database. Start by renaming the sample configuration file.
sudo mv /var/www/wordpress/wp-config-sample.php
/var/www/wordpress/wp-config.php
Then open the file to enter your database details.
sudo vim /var/www/wordpress/wp-config.php
Inside the file, update the database settings to match the credentials you created earlier. It should look like this.

#Step 9: Configure an Nginx server block
Server blocks in Nginx inform the web server how to serve your site. You need to create a server block for your WordPress site.
sudo vim /etc/nginx/conf.d/wordpress.conf
Then add the following configuration.
server {
   listen 80;
   server_name example.com;
   root /var/www/wordpress;
   index index.php index.html index.htm;

   access_log /var/log/nginx/wordpress_access.log;
   error_log /var/log/nginx/wordpress_error.log;


   location / {
       try_files $uri $uri/ /index.php?$args;
   }


   location ~ \.php$ {
       include snippets/fastcgi-php.conf;
       fastcgi_pass unix:/run/php/php8.3-fpm.sock;
       fastcgi_param SCRIPT_FILENAME $document_root$fastcgi_script_name;
       include fastcgi_params;
   }
}
Replace “example.com” with your actual domain name.
If you don’t have a domain, you can still run WordPress on your server using your public IP address.
In that case, use this configuration.
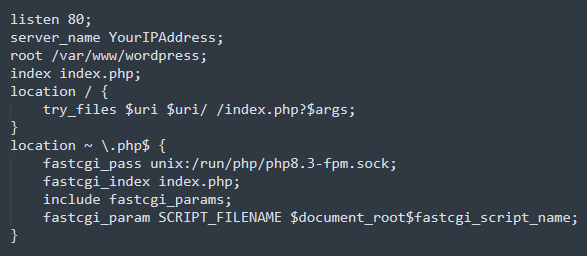
Replace “YourIPAddress” with your actual server IP.
Check the Nginx configuration for errors.
sudo nginx -t
You should see the following.

If everything looks good, restart Nginx to apply the changes.
sudo systemctl restart nginx
#Step 10: Complete WordPress installation
Open your web browser and go to your WordPress site at http://example.com. If you used your public IP address, go to http://YOUR_PUBLIC_IP.
You will be taken to the WordPress setup page.
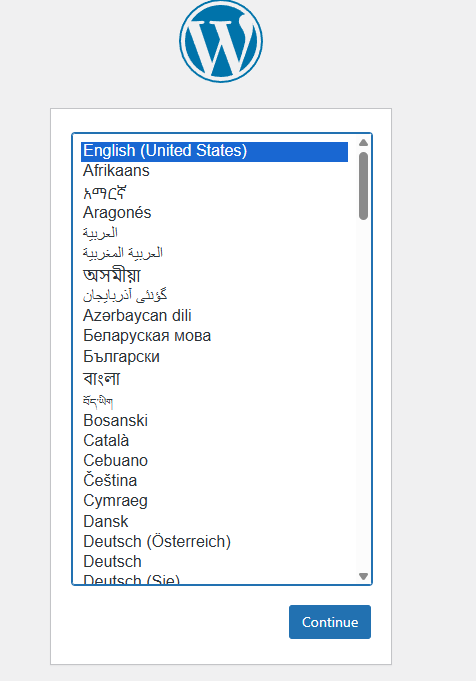
First, pick your language, whatever feels right, and hit Continue.
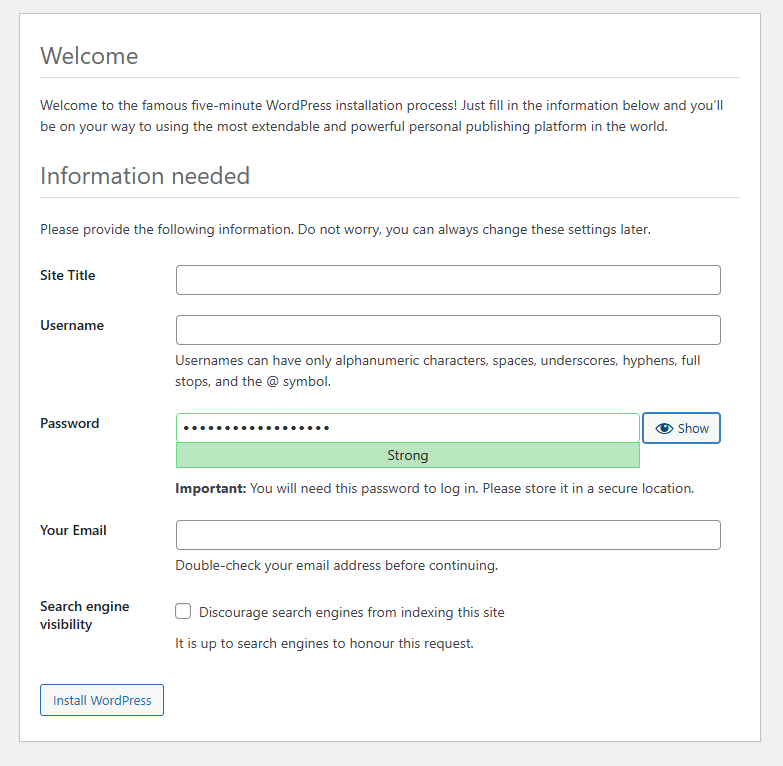
Next, all the required information, type it in, double-check if you want, then go ahead and click Install WordPress.
Once the installation completes, click Log In.
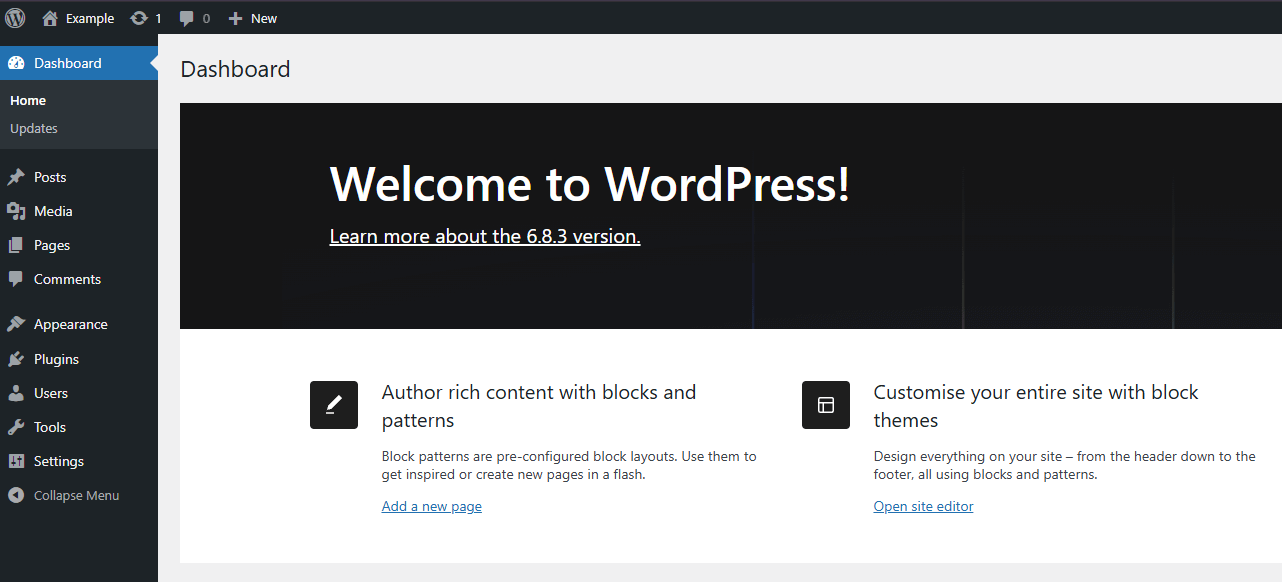
Next, you need to enter your username and password, yes, the same ones you just created, and click Log In again.
You will be automatically taken to your WordPress dashboard.
#Verify your WordPress installation
After WordPress has been installed, check whether everything is working correctly. Look at the server logs. Nginx keeps a record of errors in its log file. View this file to see if the web server has any issues. PHP logs show any problems with the PHP setup. MySQL logs indicate whether the database is running as it should. These logs can help you detect small issues.
Suppose the logs are clear, perfect. Now, open a web browser. Type in your domain or the server IP address and visit your WordPress site. If everything went right, you should see the setup completion screen. Log in to the dashboard using the username and password you created. Click around, check the themes, load a few pages, and make sure nothing is broken, nothing missing.
#Securing WordPress after installation
Hackers are always lurking. WordPress is popular, which unfortunately makes it a target. A few simple precautions can save you a lot of headaches.
Here are the key steps to secure WordPress:
- Disable XML-RPC if you are not using it. It is useful for remote access, but it is also an entry point for attacks. Turn it off unless you absolutely need it.
- Fail2ban is an intrusion prevention software. It blocks repeated failed login attempts, slows down brute-force attacks, and sometimes prevents them altogether. You don’t even notice it working.
- SSL, HTTPS, get it set up. Encrypts everything between your server and visitors. Login info, form submissions, everything stays safe.
- Directory listing in Nginx? Turn it off. There should be no reason for strangers to peek at your server files.
- Limit login attempts. Just a few tries and you are locked out. Makes life harder for anyone trying to sneak in.
- Database passwords. Strong ones. Not “password123” or “admin.” Make it something attackers cannot guess. Protect your WordPress database like a critical asset.
#Using managed panels for easy installation
Don’t want to go through all the server setup steps yourself? That’s completely fine. Managed panels take care of most of the work for you. Plesk is a great example. It’s a commercial panel that lets you install WordPress, update security settings, and manage your site through a friendly dashboard.
CyberPanel is a free alternative that also allows quick WordPress installation and comes with basic tools for managing websites and emails. Using a managed panel can save time and reduce mistakes.
#Where can you find a good server with Ubuntu OS?
A good Ubuntu server makes setting up WordPress simple and fast. Cherry Servers has a range of options to choose from. Their cloud and virtual servers can be ready in just a few minutes.
Root access. SSH, VNC, take your pick. Shared resources, dedicated resources, whatever your site needs, really. And if you are thinking big, their dedicated servers have high-end CPUs, fast storage, and basically everything you would need to run a heavy site without much effort.
DDoS attacks? Handled. Premium protection is always on while you are busy tweaking plugins or layouts. No one wants to deal with downtime.
And support? It’s available 24/7, with human support ready to help. Billing can be confusing sometimes, but here it is flexible; you can go hour by hour or lock in a fixed-term plan if you like saving a few bucks. In short, Cherry Servers simplifies Ubuntu server deployment. It gets your WordPress installation up and running quickly. You can focus on your site instead of spending time on server infrastructure management.
#Conclusion
Installing WordPress on Ubuntu 24.04 gives you everything you need to create a fast and secure website. By following the steps above, you can have a site that runs reliably. Taking the extra steps to check logs and verify the installation helps catch any issues early. Security measures keep your site protected. Using managed panels can make the process faster for those who prefer a simpler approach. Most importantly, choosing a dependable server provider like Cherry Servers gives you full control over your website. WordPress on Ubuntu 24.04, if configured right, can scale with your site while visitors enjoy a smooth, reliable experience.
FAQs
What is WordPress used for?
People use WordPress for building websites. It's also popular for blogs and online stores. You can get a site running without writing code from scratch.
Is WordPress 100% free?
The core WordPress software won't cost you anything, though you'll pay for hosting. Premium themes and plugins have price tags, too.
What are the benefits of using Cherry Servers?
Cherry Servers gets your deployment up fast, gives you root access to configure everything, and their support team answers tickets around the clock.
Is Ubuntu or Windows better for WordPress hosting?
Most people run Ubuntu on servers because it's secure and doesn't waste resources. Windows makes more sense for desktops.


