How to Deploy a Bare Metal Server in Under 15 Minutes


Bare metal servers give you direct access to the hardware. No virtualization. You get full root control and consistent performance, which is essential for high-demand workloads, custom operating systems, or applications that require maximum compute power.
Getting one online fast might sound like a job for a sysadmin with hours to spend. On Cherry Servers, the steps are short enough that you can go from picking a plan to logging in on the console without waiting long.
This guide shows the exact steps to deploy a bare metal server on Cherry Servers in under 15 minutes.
#Step 1: Log in to your Cherry Servers account
Go to Cherry Servers login page with any browser of your choice. If you already have an account, you can proceed to log in.
If you have linked a social account, you can sign in through Google, GitHub, or Facebook instead.
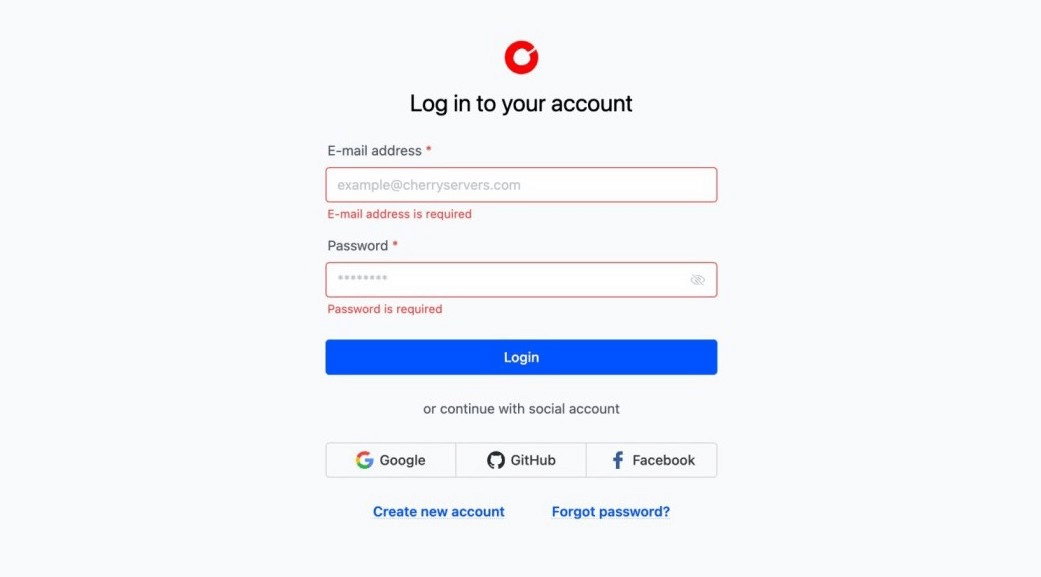
But, if you do not have an account, click Create new account at the bottom of the page. This will take you to the registration form, where you can create one.
#Step 2: Create a new bare metal instance
This step covers how to configure your server before deployment. You will select the hardware, location, operating system, networking, and other options required to provision your bare metal instance.
#Open the instance configuration page
On your project dashboard, you should see a blue New instance button in the nav bar. Click on it to proceed to the server deployment page.
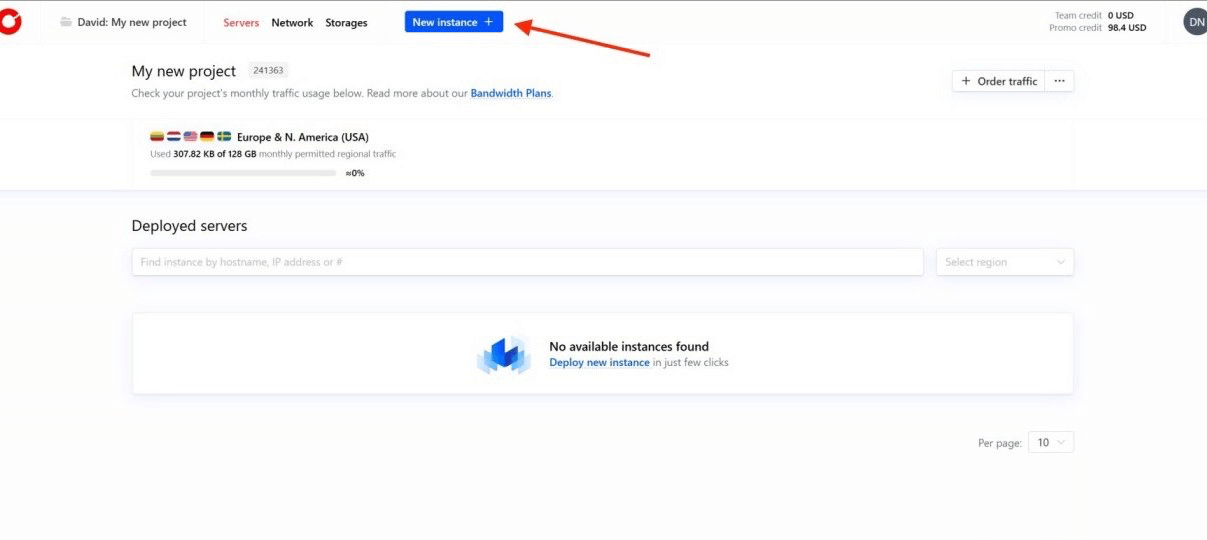
This is where you select your server type, location, operating system, and other details. We will walk through each of these in the next steps.
#Choose a server type
The first section of the server deployment page shows two server types: Virtual Servers and Dedicated Servers.
Virtual Servers run on shared resources, which makes them suitable for lightweight workloads. Dedicated Servers, on the other hand, give you exclusive access to a physical machine. You get consistent speed, complete isolation, and full control over the system’s hardware.
We will be working within the Dedicated Servers tab.
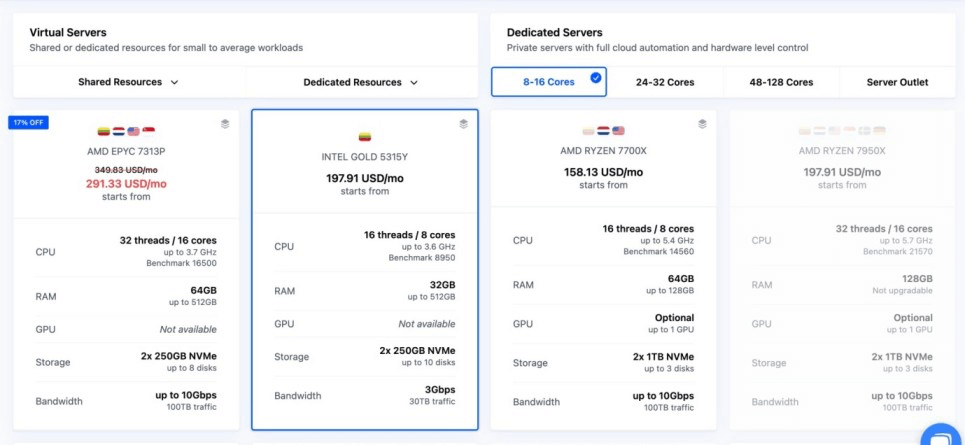
Inside the Dedicated Servers tab, you will see the plans arranged by performance tier: 8–16 Cores, 24–32 Cores, 48–128 Cores, and the Server Outlet section.
8–16 Cores is generally used for smaller applications or services that do not need extreme compute power. 24–32 Cores is a great fit for heavier workloads like production databases or analytics pipelines. 48–128 Cores is designed for highly parallel, compute-intensive tasks such as large-scale simulations or machine learning.
The Server Outlet section lists budget-friendly hardware that may be based on older components. It can be a cost-effective choice for non-critical workloads or testing environments.
Each server shows the key specs worth checking before you choose:
- CPU threads and cores: Shows how many threads and physical cores the processor has and its maximum clock speed.
- RAM: The installed memory and the highest capacity you can upgrade to later.
- GPU: Indicates if the server has or supports a dedicated GPU.
- Storage: The number and size of NVMe drives, along with how many slots are available.
- Bandwidth: The maximum network throughput and the monthly traffic allowance.
- Benchmark score: A relative performance measure to compare CPU options.
For this guide, we will select the highlighted Intel Gold 5315Y server in the 8–16 Cores tier. It comes with 8 cores (16 threads), 32 GB of RAM, 2x250 GB NVMe drives, and 3 Gbps bandwidth with a 30 TB monthly limit. This is enough for a wide range of small to medium workloads.
#Select a location and hardware
After choosing the server type, the next step is to decide where it will be physically hosted. Choose a location from the selector just below the server name. If there is more than one option, select the region closest to your users to help reduce latency.
Here, we are using Lithuania – LT-Siauliai. Some servers only have one location; others may give you several locations to choose from.

Below the location selector, the Hardware section lists several pre-built configurations. Each option shows:
- Installed RAM
- Number and size of NVMe drives
- GPU availability
- Price in monthly and hourly rates
- Stock count
We are going with 32GB RAM and 2x250GB NVMe. It is a balanced starting point that works for most general workloads. If you need a different setup, you can select another preset or enable Customize hardware configuration, but it extends deployment to about 24 hours.
#Operating system, storage layout, and control panel
With your server location and hardware configured, you can now select your operating system. Cherry Servers provides a range of operating systems to choose from.
The OS section lists six main choices. Click an option to select it. Some, like Windows Server 2022, have an hourly surcharge while others, like Ubuntu, are included at no extra cost.
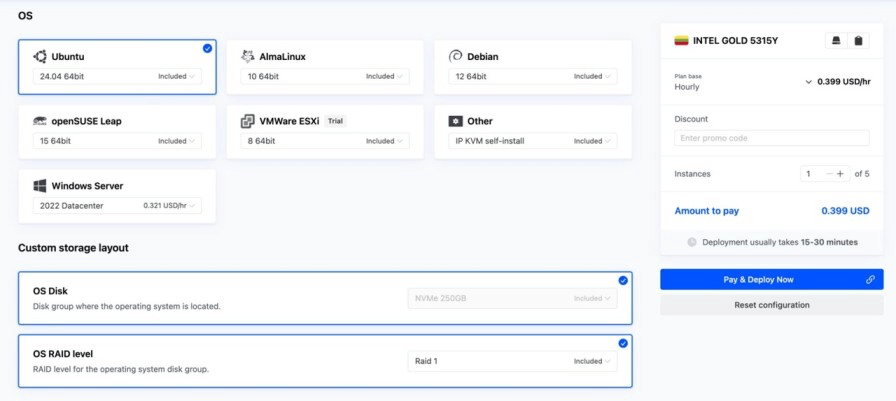
Use what fits your stack:
- Ubuntu or Debian for general Linux servers and common packages.
- AlmaLinux when you need RHEL‑compatible environments.
- openSUSE Leap for SUSE tooling or preference.
- Windows Server 2022 for .NET apps, Active Directory, or Windows‑only stacks.
- VMware ESXi to run a hypervisor and host VMs.
- Other (IP KVM) if you plan to install your own image manually.
Next, scroll to the Custom storage layout section. The OS Disk displays the system drive group while the OS RAID level controls redundancy for that system drive group.
RAID 1 offers protection against single-drive failure but reduces available capacity. Leave it enabled if uptime matters more than capacity. Change it only if you need more usable space or speed and accept the risk. For simple setups, keep Max Usable Size. Use Custom Partition Size only if you know you need separate volumes.
Below that is the Control panel section. Here you can choose whether to install a management interface. Selecting None deploys the server without a control panel, leaving all setup to be handled manually. cPanel Fixed 100 is a popular choice for hosting environments, but it is not available with hourly billing. DirectAdmin is a lighter alternative to cPanel, though it is also unavailable with hourly billing.

For this guide, we will use Ubuntu 24.04 64-bit, leaving others at their defaults.
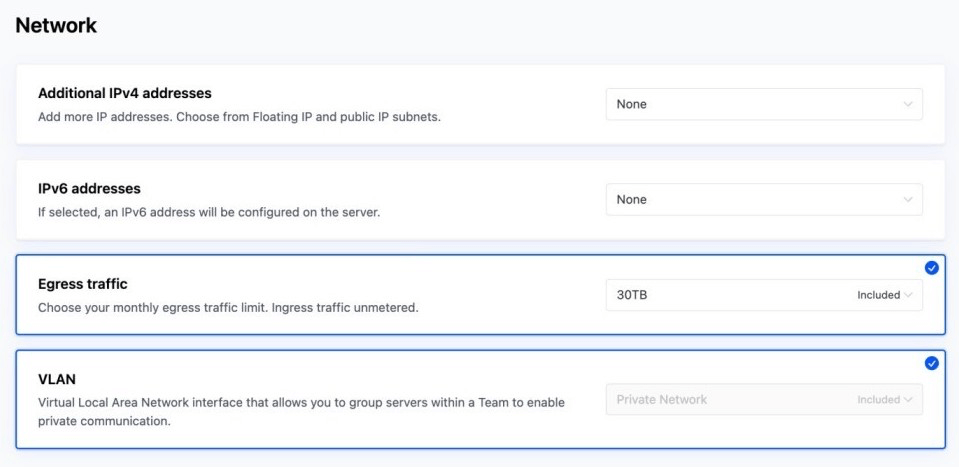
#Network settings
Here, you can choose extra IPs, turn on IPv6, set the monthly egress cap, and decide whether to place the server on a private VLAN. Each option changes how the server will behave once it is online.
The panel lists 4 key settings:
- Additional IPv4 addresses: You can add one or more extra public IPs.
- IPv6 addresses: You can enable this to configure an IPv6 address on the server.
- Egress traffic: You can set the monthly outbound traffic allowance. Inbound traffic is not limited. For example, this plan includes 30 TB. Higher limits cost more, but going over the default avoids mid-month throttling.
- VLAN: This creates a virtual local area network for private communication between servers in your team.
Here, we will go with the defaults.
#Extra storage options
Extra storage lets you attach space that is separate from the main OS drive. It is useful for keeping backups, storing large datasets, or offloading files that do not need to sit on the system disk.
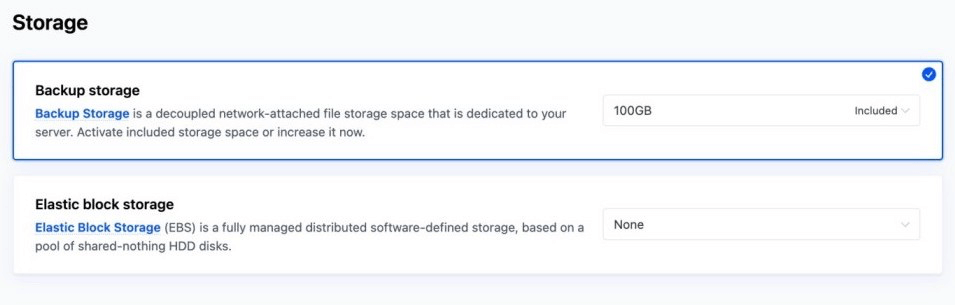
Backup storage is network-attached space dedicated to your server. Cherry Servers includes 100 GB by default, which is enough for small backup jobs or a few configuration archives. You can increase it if your workflow calls for more room.
Below that is Elastic Block Storage (EBS). This is a managed pool of HDD-based storage you can mount as additional block devices. It is handy for workloads that need a lot of space without touching the main drive, like logs, datasets, or media libraries.
For this setup, we will leave the backup storage at 100 GB and keep EBS turned off.
#Instances configuration
You can set the identity and access rules for your server here.
Cherry Servers gives each new server a random, readable name, such as rapid-mole. You can keep it, enter your preferred hostname, or click the Generate button to get another server name.
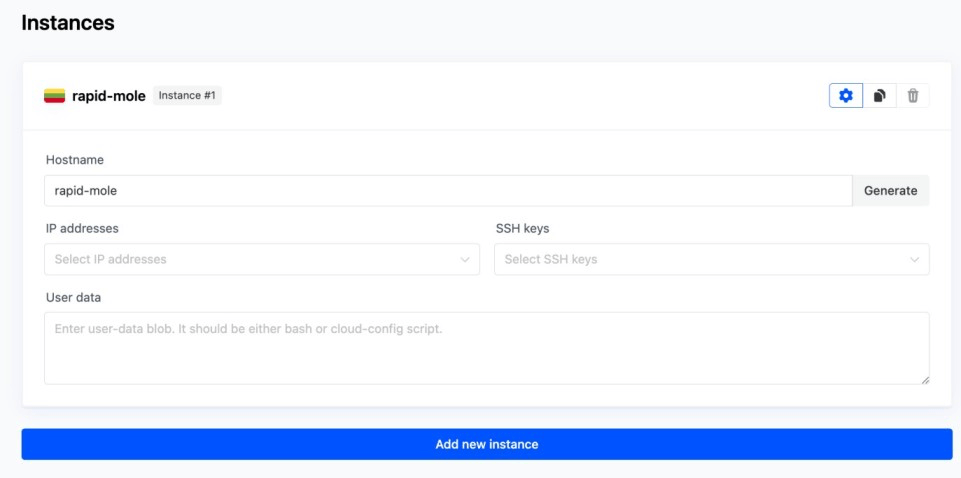
The IP addresses dropdown lets you bind a specific address from your pool. Leave it empty to use the default public IP assigned at deployment. Pick a specific address if you are replacing an existing server.
If you have not uploaded any to your account, the dropdown will be empty. You can proceed without one, but your only access method will be the console.
The User data box is optional. It can run a bash script or cloud-config at first boot. Use it to install packages, create users, or set environment values automatically. You can leave it empty if you plan to configure the server manually.
Also, if you need more than one server, click the Add new instance button to duplicate the card. Adjust names, keys, or settings for each. The Instances count in the sidebar updates as you add or remove them.
For this guide, we will leave everything as it is. With this, we can now deploy our server.
#Step 3: Deploy the server
On the right side of the screen, the panel lets you choose how you want to pay, with options for hourly, monthly, or annual billing.
Below that is the instance count. By default, it is set to one. But you can adjust it if you want multiple identical servers deployed at the same time. You can also see the total cost and an estimated deployment time, usually between 15 and 30 minutes.
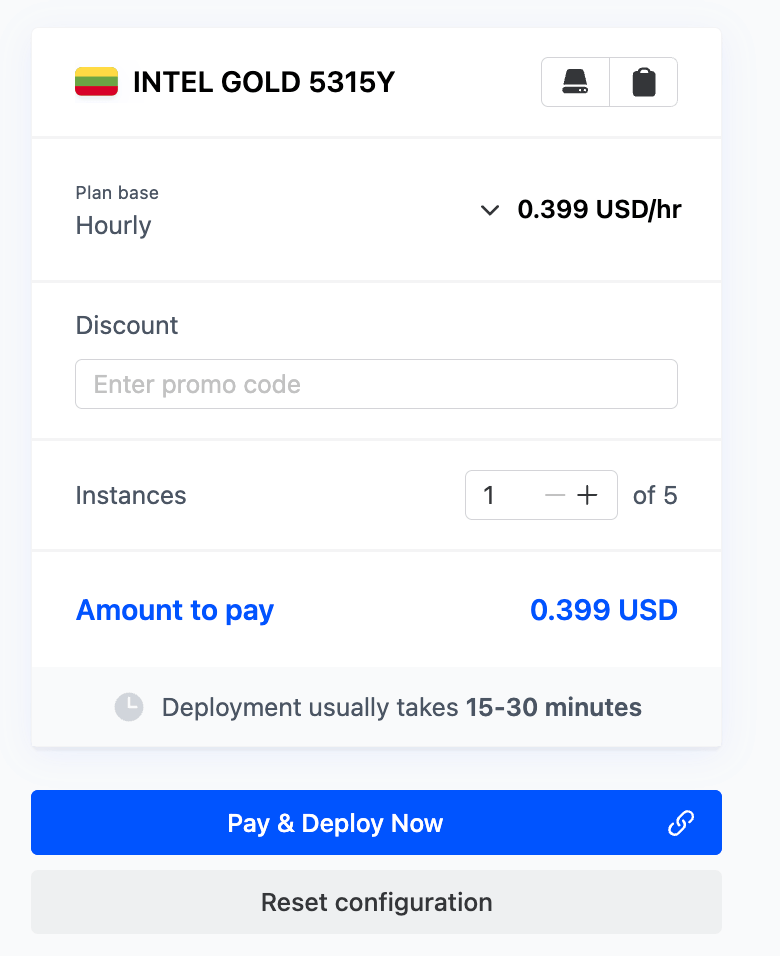
Once you have confirmed that all settings match your requirements, click the Pay & Deploy Now button. This will start the deployment process.
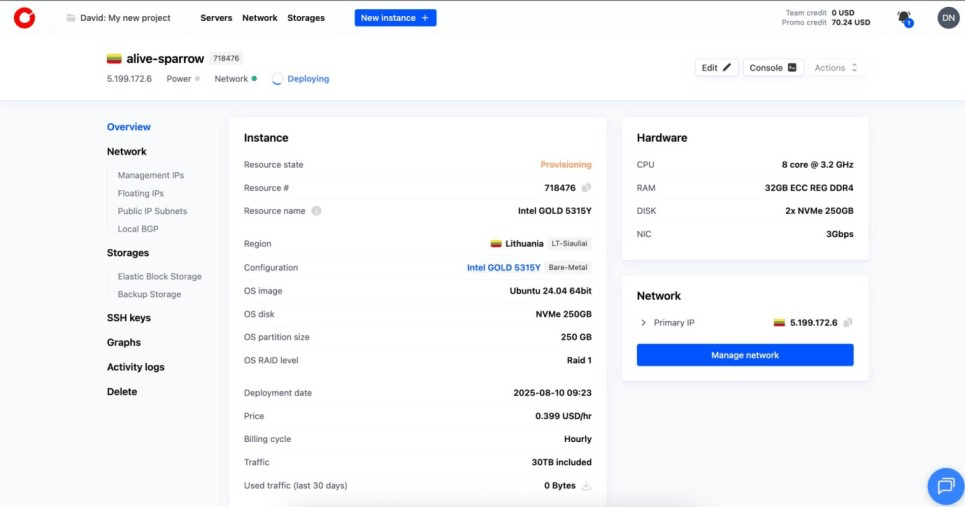
After the deployment is complete, the server status will change to Active, indicating it is ready for use. With that, you have successfully deployed a bare metal server in under 15 minutes.
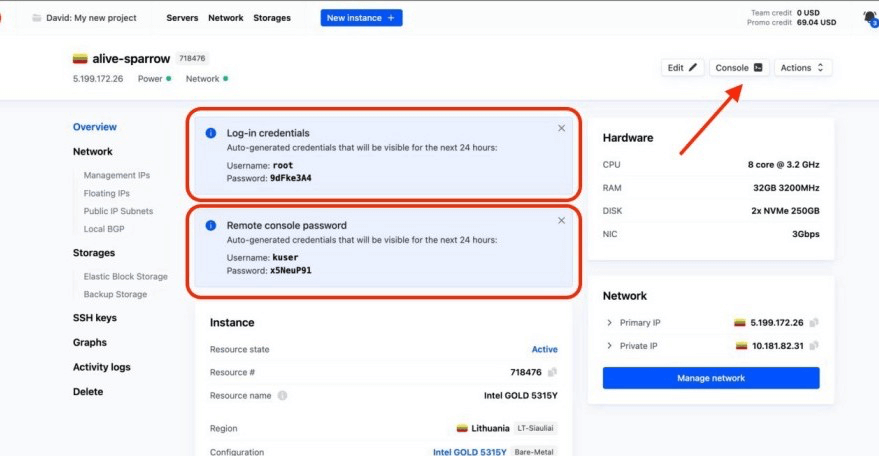
#Step 4: Access the server via the Supermicro console
With the server active, you will see two sets of credentials: Log‑in credentials (for SSH in a terminal) and Remote console password (for the Supermicro console).
Copy both now; they are visible for 24 hours.
To open the remote console, click Console, then Connect to console in the pop‑up.
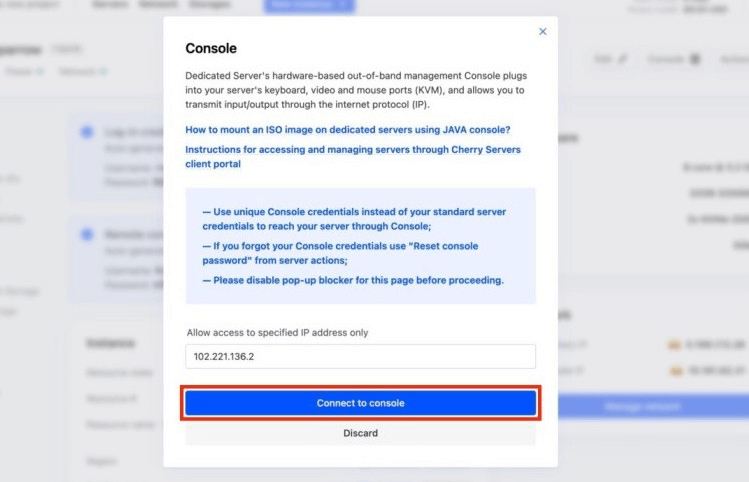
This opens the Supermicro login page in a pop-up window. If the pop-up is blocked or a certificate warning appears, allow it and continue.
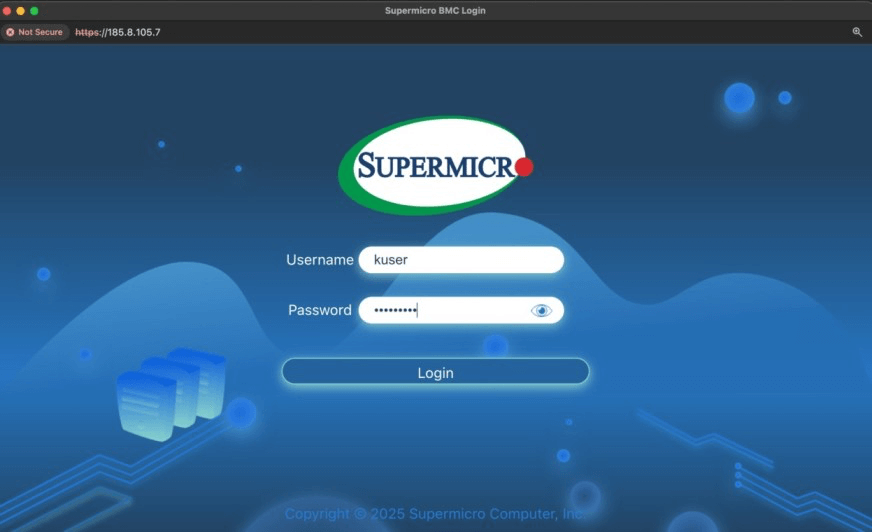
Sign in as kuser with the Remote console password.
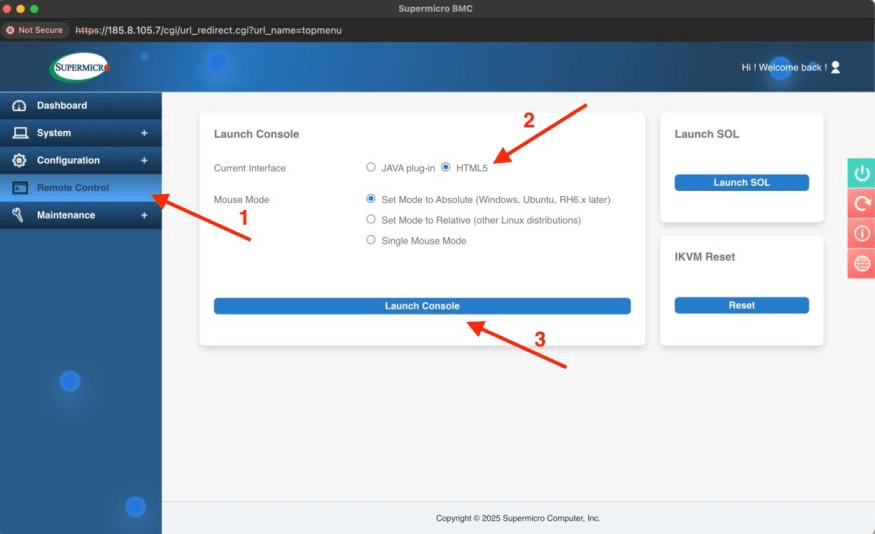
After login, you will be redirected to Supermicro’s dashboard. Open Remote Control from the left menu. Select HTML5 as the interface, then click Launch Console to start the KVM session.
Once the console opens, log in using the Log-in credentials shown earlier. Enter the username root, followed by the corresponding password, to access your server.
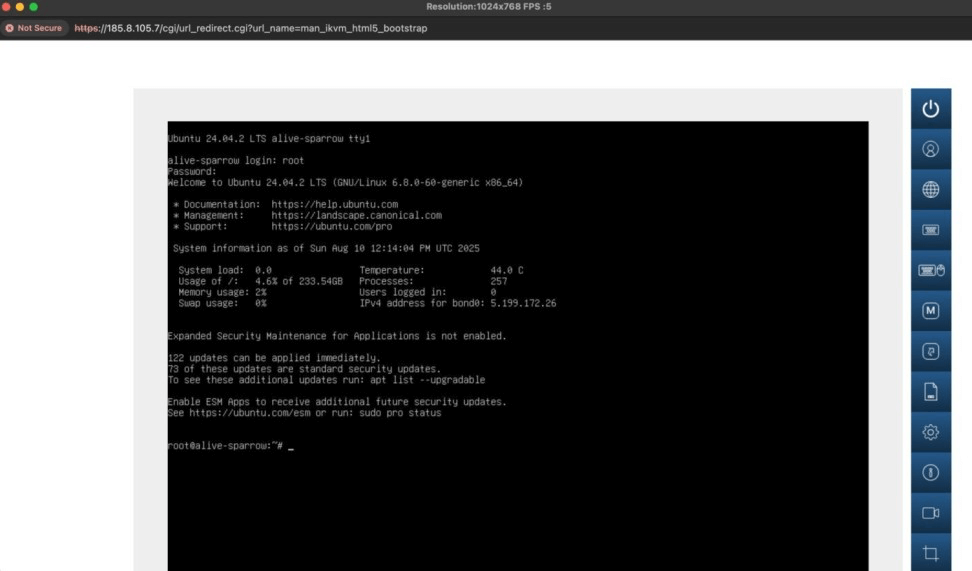
You are now connected to your bare metal server and ready to begin configuration.
#Conclusion
You now have a bare metal server online and ready to run your workload. In under 15 minutes, the setup went from login to a fully active machine with direct hardware control and root access.
With the server active, you can move straight into installing applications, configuring services, and tuning it for your specific needs. From here, it is all about putting the hardware to work.
FAQs
Which version of Linux is best for servers?
Ubuntu Server LTS, Debian, Rocky Linux, and AlmaLinux are all great choices. Ubuntu is easy to set up, and Debian is very stable. AlmaLinux or Rocky are ideal if you want an RHEL-compatible server.
What is bare metal deployment?
Bare metal deployment is the process of setting up a physical server directly, without a virtualization layer. It involves installing the operating system and configuring hardware for your workload.
Why do bare metal servers take longer to provision than virtual servers?
Bare metal servers require full hardware setup and OS installation, so provisioning takes more time. Virtual servers run on pre-configured infrastructure, making deployment faster.
How long does bare metal deployment take?
With Cherry Servers, most bare metal machines are ready in about 15 to 30 minutes, depending on the configuration.


