How to Install Java on Ubuntu 22.04 | Step-by-Step Tutorial chatbots


In this step-by-step Java tutorial, you will learn how to install Java on Ubuntu 22.04 server in multiple ways, including how to configure the default Java version on Ubuntu, and configure JAVA_HOME Environment Variable.
#What is Java?
First released in 1995, Java is now one of the world's most well-known and widely adopted programming languages, used to create robust, scalable and high-performance applications. Java is commonly used in the development of desktop and Android apps, games, big data and web applications to mention a few.
Java is a high-level, general-purpose, and object-oriented programming language (OOP) that is popular among developers. Despite the emergence of other popular programming languages such as Python, Java is still a relevant and powerful language especially in the development of enterprise-grade applications.
#What is java used for?
Java is a fast and reliable language used in a variety of domains, including game development, building web and mobile applications, chatbots like WhatsApp chatbot, and enterprise-level software development.
One of the main benefits of Java is that it is platform-agnostic, and hence can be run on any operating system. This makes it an ideal pick for organizations that want to develop high-performance cross-platform applications.
#Prerequisites
Before you set sail, ensure that you have the following set of requirements:
- A running instance of Ubuntu 22.04 server.
- SSH access to the server with a sudo user configured. 3 steps to install and configure Java on Ubuntu 22.04
To start and install Java and on Ubuntu 22.04, follow the below steps.
#Step 1: Install Java on Ubuntu 22.04
There are two main options for installing Java. You can install OpenJDK which is the open-source implementation of Java. This is available on the default Ubuntu repository. Optionally, you can install Oracle JDK which is fully maintained by Oracle.
Both options are developed by Oracle. The difference between the two is that OpenJDK is free and opensource and enjoys support from the community. However, Oracle JDK 17 and future versions are free of charge for commercial use according to Oracle No-Fee Terms and Conditions (NFTC) license.
Right off the bat, log into your server instance via SSH. To verify if Java is installed, run the following command:
$ java -version
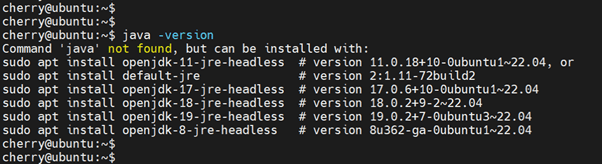
The output clearly indicates that Java is not installed. In addition, you get a few suggestions on how to install Java.
As you have seen, there are multiple ways of installing Java. However, we recommend the installation of OpenJDK (Open Java Development Kit).
#Option 1: Install JAVA using OpenJDK
OpenJDK provides all the tools you need to develop Java-based applications and microservices, including the Java compiler, Java Runtime Environment (JRE), and Java class library.
Ubuntu repositories provide the OpenJDK package by default, and you can search for its availability as shown.
$ sudo apt-cache search openjdk
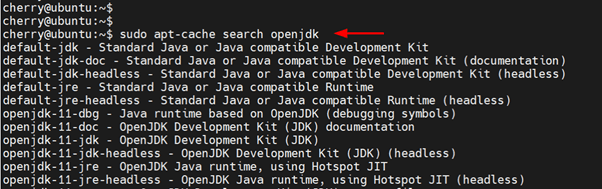
At the time of writing, the most recent release is OpenJDK 20. The latest LTS ( Long Term Support ) release is OpenJDK 17 and will be supported until 30 September 2026.
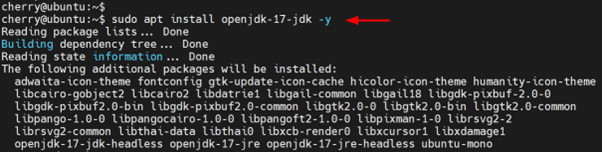
To install OpenJDK 11 using the APT package manager, execute the command:
$ sudo apt install openjdk-17-jdk -y
Once the installation is complete, verify the version of Java installed by running the command:
$ java -version

The output shows that we have successfully installed OpenJDK 17.0.6.
That’s one way of installing Java on Ubuntu.
#Option 2: Install Oracle Java 17 From PPA
Alternatively, you can install Oracle JDK, which provides Oracle Java instead of OpenJDK. Both are technically similar in terms of their code. However, the licensing is different.
OpenJDK is a free and open-source project under the GNU / GPL License, while Oracle JDK is a commercially supported version of JDK under the Oracle Binary Code License Agreement.
According to Oracle's No-Fee Terms and Conditions (NFTC), Oracle JDK 17 and later releases will be free for all users, including for commercial and production use.
With that in mind, you can comfortably install Oracle Java 17 for free without worrying about purchasing a license.
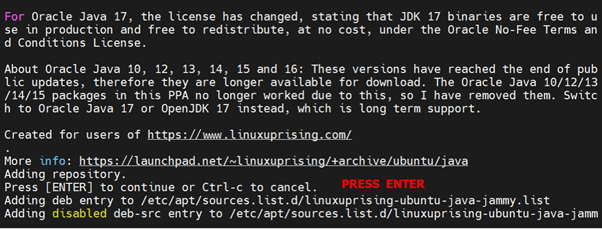
To get the ball rolling, add the Linux Uprising Oracle Java PPA as shown.
$ sudo add-apt-repository ppa:linuxuprising/java
Along the way, press ‘ENTER’ when prompted to proceed.
Once the PPA has been added, update the local package index
$ sudo apt update
Next, install Oracle Java 17 by running the following commands.
$ sudo apt install oracle-java17-installer oracle-java17-set-default
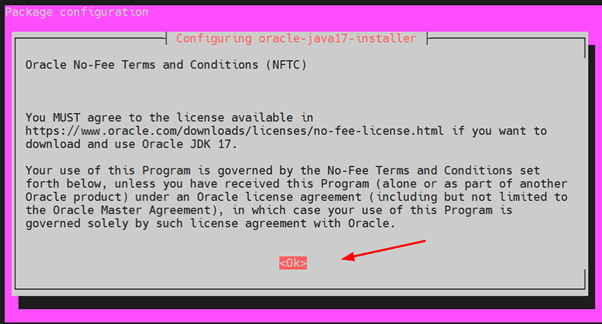
During the installation, you will be prompted to agree to the Oracle No-Fee Terms and Conditions license. First, press the TAB key to select the ‘Ok’ option and then hit ENTER.
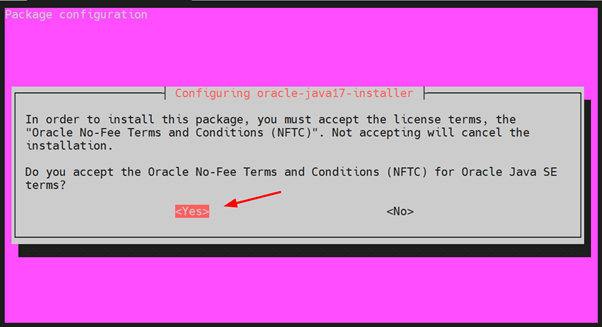
In the next step, once again, press the TAB key to select the ‘Yes’ option and hit ENTER to accept the NFTC for Oracle Java SE license terms.
Once the installation is complete, verify that you have installed Java 17 as shown.
$ java -version

#Step 2: Configure Default Java Version on Ubuntu
You can have multiple installations of Java on your system without much of an issue. However, you might be required to set a certain installation of Java as the default version based on your project’s requirements.
You can accomplish this with the update-alternatives command-line utility, which allows you to list and set the default version of Java on your system.
To configure the default Java version, run the command:
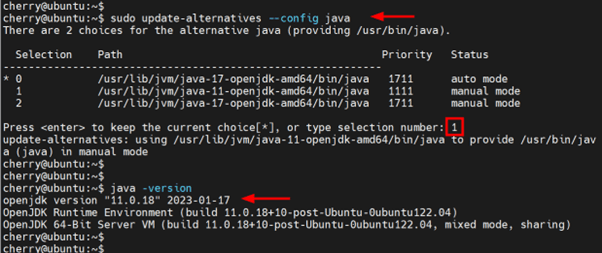
$ sudo update-alternatives --config java
The command lists all the currently installed versions of Java and their installation paths. The default version is prefixed with an asterisk ( * ) in the ‘Selection’ column. You can choose to keep the current selection as the default version by pressing ‘ENTER’ or change the default version by typing a selection number of your preferred Java installation and pressing ‘ENTER’.
In the example below, we have selected to configure OpenJDK 11 as the default Java version.
You can later verify this by checking the version of Java.
$ java -version
#Step 3: Configure JAVA_HOME Environment Variable (Recommended)
The JAVA_HOME environment variable points to the installation location of the Java runtime environment (JRE). Although not mandatory, it is recommended to configure this variable since a good number of Java-based programs reference this variable to determine the location of Java.
To determine the path of Java, once again, run the command:
$ sudo update-alternatives --config java
From the output, we saw that the path to Java 17 provided by OpenJDK 17 is /usr/lib/jvm/java-17-openjdk-amd64/bin/java.
To set the JAVA_HOME environment variable, open the /etc/environment file.
$ sudo nano /etc/environment
Paste the following line and omit the /bin/java section.
JAVA_HOME="/usr/lib/jvm/java-17-openjdk-amd64"
This will apply to all the users on your Linux server. Save the changes and exit. Next, reload the file for the changes to come into effect.
$ source /etc/environment
To confirm that the variable has been set, run the following command.
$ echo $JAVA_HOME

#Conclusion
There you have it. In this guide, we have demonstrated how to install Java on Ubuntu 22.04. From here, you can install Java applications and seamlessly run Java code.
If you found this guide helpful, check out our comprehensive tutorials on how to install PostgreSQL on Ubuntu, how to install MongoDB on Ubuntu, and how to install Docker on Ubuntu 20.04.


