How to Set Up a VPS Server from Scratch: Step-by-Step Guide


Thinking about launching a website and need more power and flexibility than shared hosting can offer? Or maybe you want a private, isolated environment to run custom applications without the high cost of a dedicated server. If so, setting up a VPS (Virtual Private Server) is the perfect solution, and this guide will walk you through the process step by step.
In this article, we outline the steps to take to create a VPS server from the ground up. Additionally, we will cover some essential post-installation tasks to consider, which will help fortify your VPS and ensure it runs optimally.
#What is a VPS?
A VPS (Virtual Private Server) is a slice of the underlying physical server. It provides a dedicated virtual environment for your workloads with isolated resources. In doing so, it offers enhanced security, more privacy, and greater control than shared hosting.
Let's check out how to set up a VPS step-by-step on Cherry Servers.
#Prerequisites
Ensure you have the following ready to follow along.
-
A client account with Cherry Servers. You can register an account here if you don’t have one yet.
-
Ensure your account is amply funded. Here is our diverse range of payment options.
#Step 1: Create a VPS step-by-step
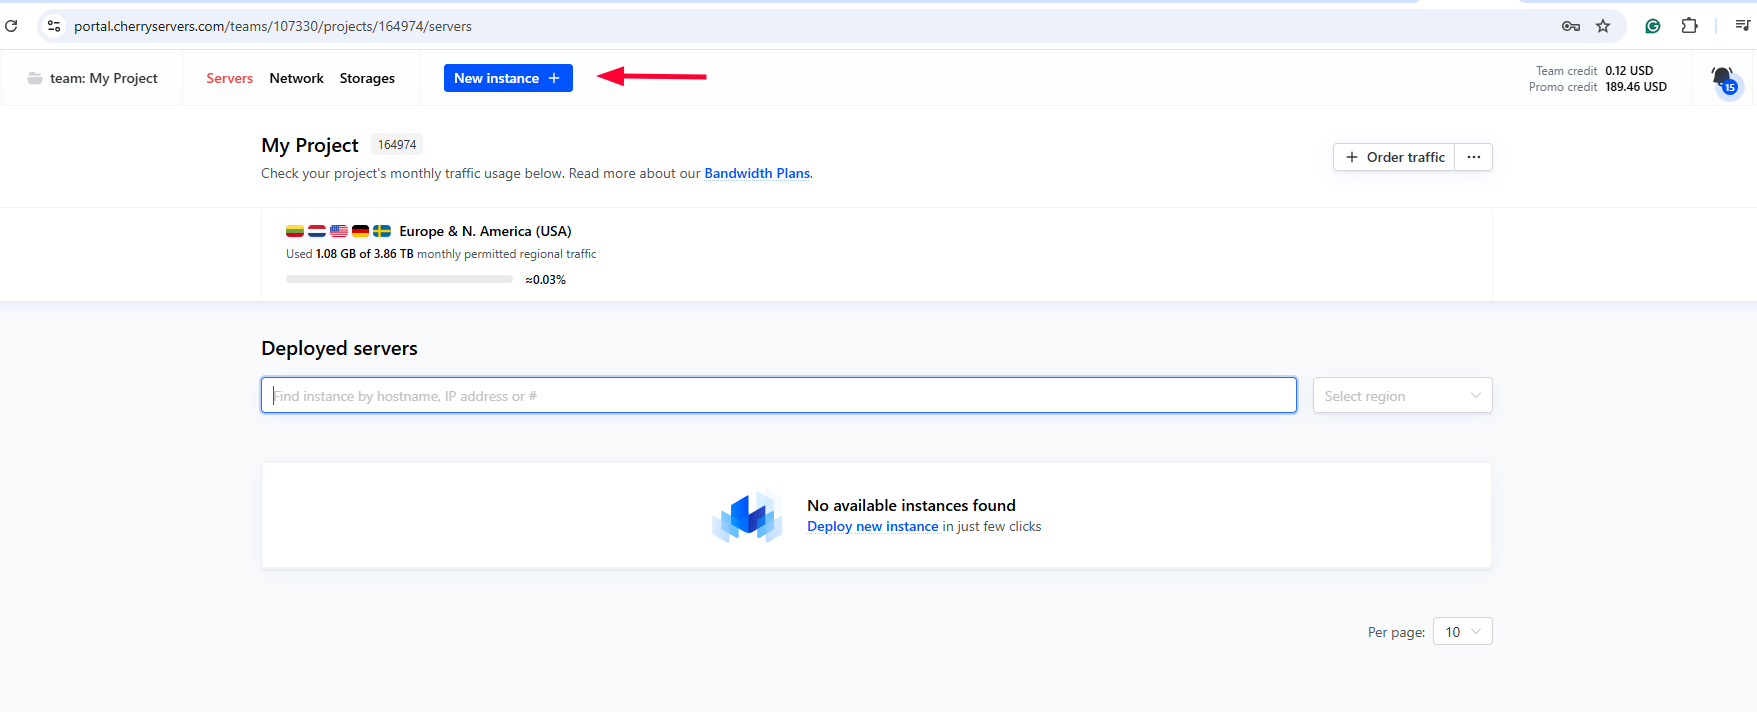
Log in and access the client portal with your Cherry Servers account. To create a VPS, click the New Instance button.
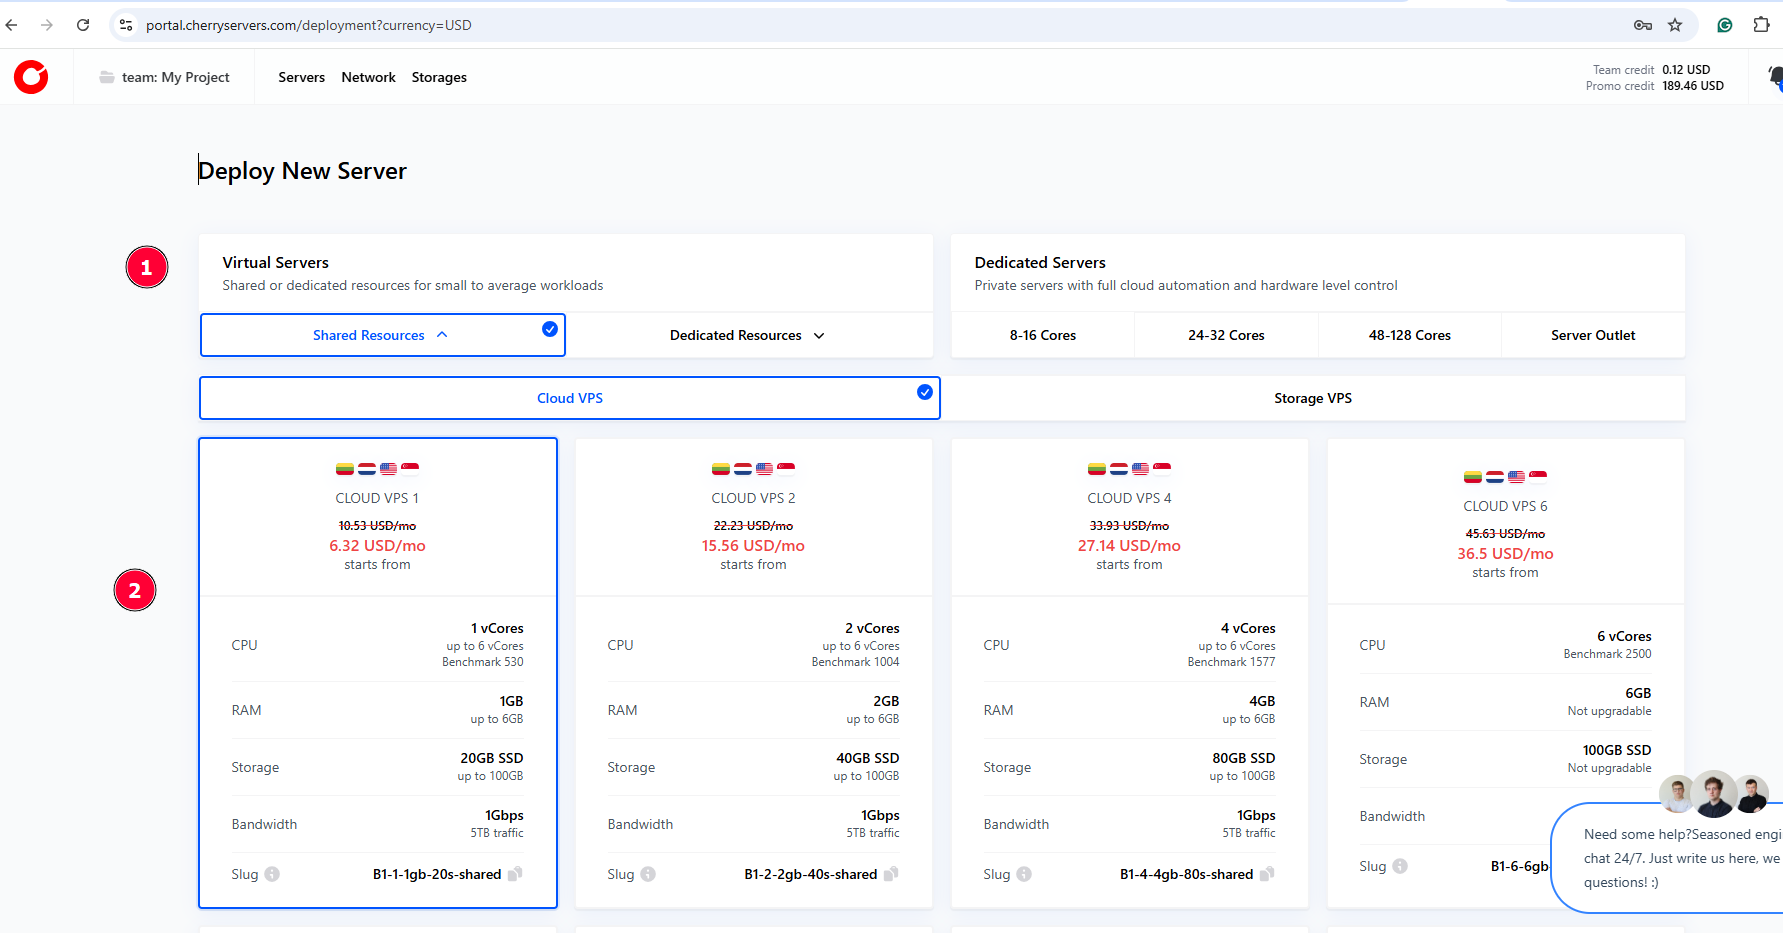
The first section presents a wide range of cloud VPS and storage VPS plans. The lowest plan starts at $3.51 per month, as of the time of publication. Select your preferred VPS instance depending on the nature of your workload.
For example, a $7/month VPS plan (2 vCPUs, 2 GB RAM, 40 GB SSD, 1 Gbps) can comfortably support a testing environment or a WordPress blog with 100k to 1M monthly site visitors.
For higher workloads, like high-performance SQL/NoSQL databases, a $36.5/month VPS plan (6 vCPUs, 6 GB RAM, 100 GB SSD, and 1 Gbps bandwidth) will be sufficient.
For demonstration, our chosen plan is a $6.32/month VPS with 1 vCPU, 1GB RAM, 20GB SSD, and 1 Gbps bandwidth.
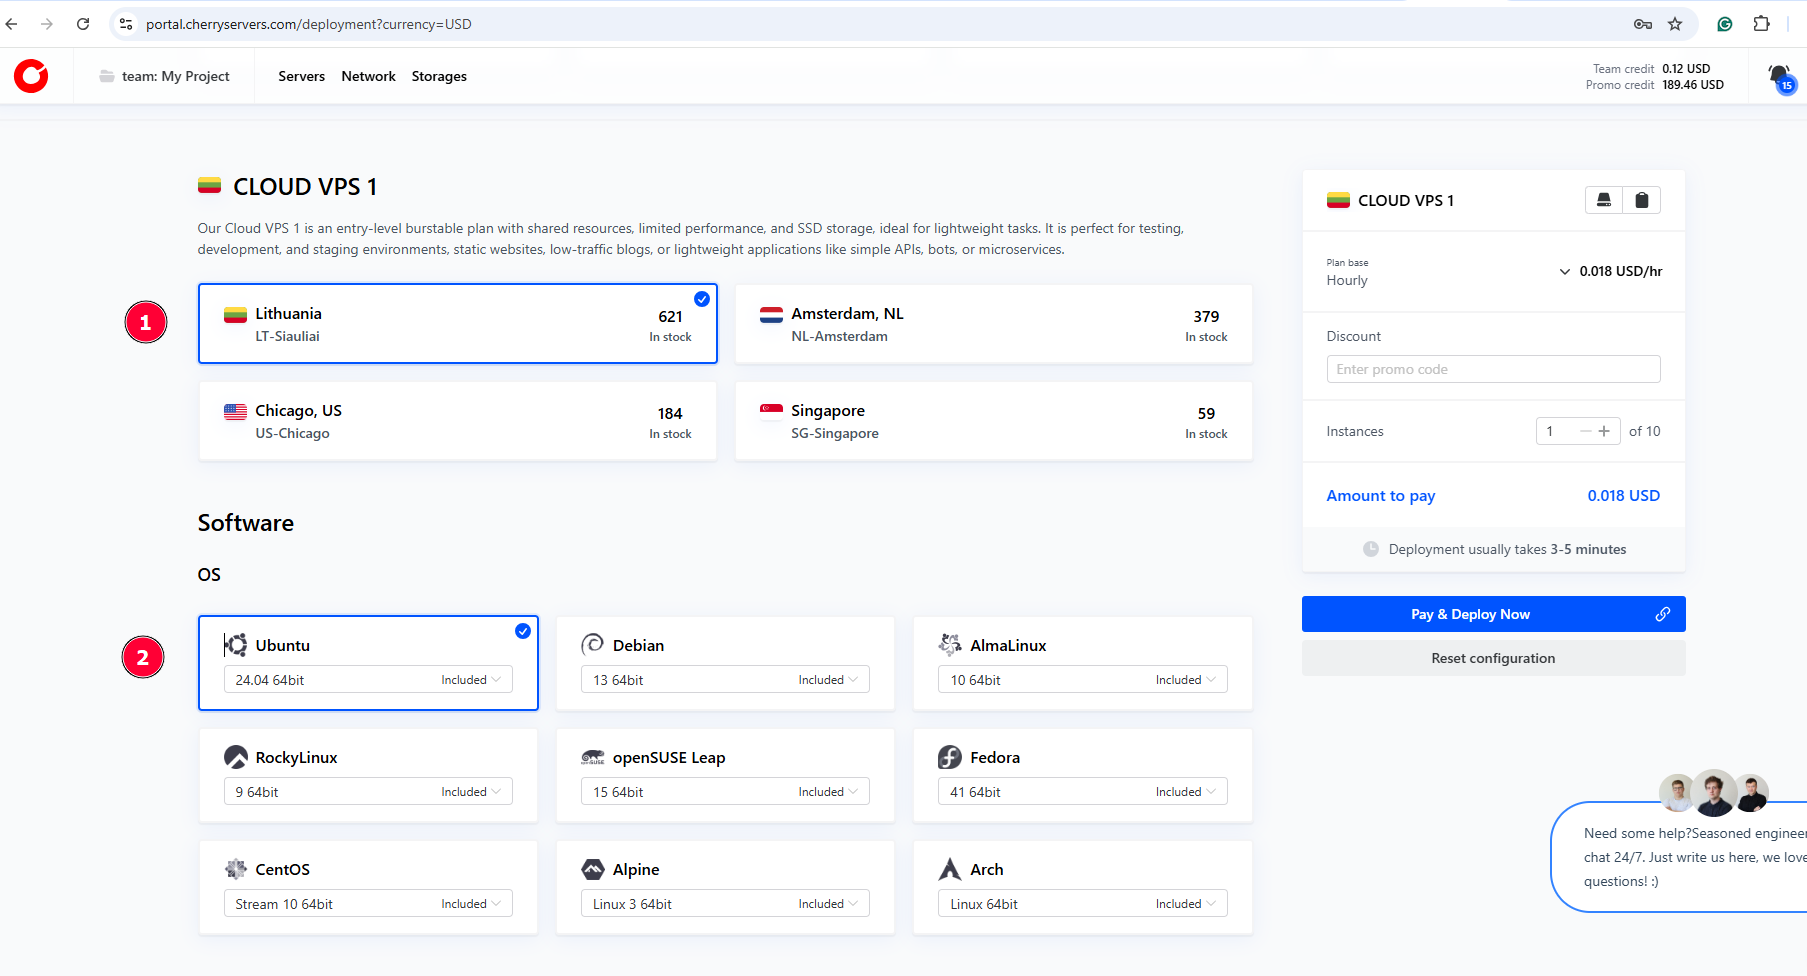
In the next section, select the preferred geographical location for the VPS and the operating system. Cherry Servers provides cloud servers in six primary regions: Lithuania, the Netherlands, Sweden, Germany (Frankfurt), the USA (specifically Chicago), and Singapore.
NOTE
The choice of server location impacts aspects like performance, compliance, and data regulations. Be sure to select a region close to your target audience or market. The shorter the distance between your VPS and your target market, the lower the latency and the faster the browsing experience. If your target market is in the United Kingdom, a VPS in Germany or the Netherlands will offer better speeds than one in the USA.
Crucially, familiarize yourself with compliance and data protection laws. For instance, if your business intends to process personal data within the EU/European Economic Area, it must be GDPR compliant. You will, therefore, need to implement sufficient security measures to guarantee the security and integrity of customer data.
Next, select your preferred OS from eight popular options: Ubuntu, Debian, AlmaLinux, Rocky Linux, Fedora, openSUSE Leap, CentOS Stream, and Arch Linux.
Here, we have selected the Lithuania region and Ubuntu as the preferred operating system.
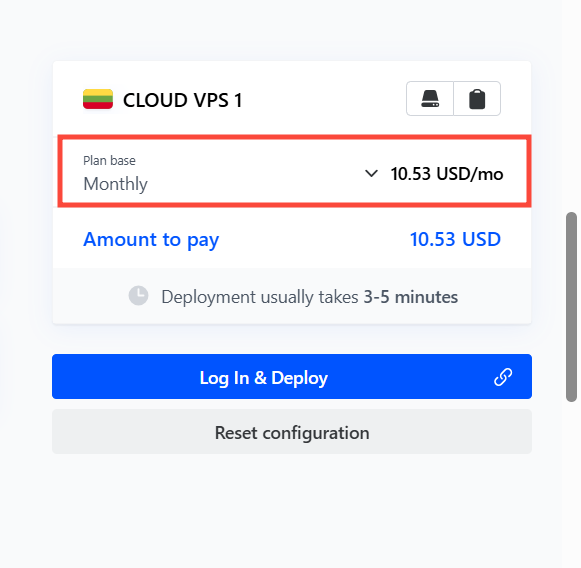
Next, select your preferred billing cycle. There are three billing options: annually, monthly, and hourly.
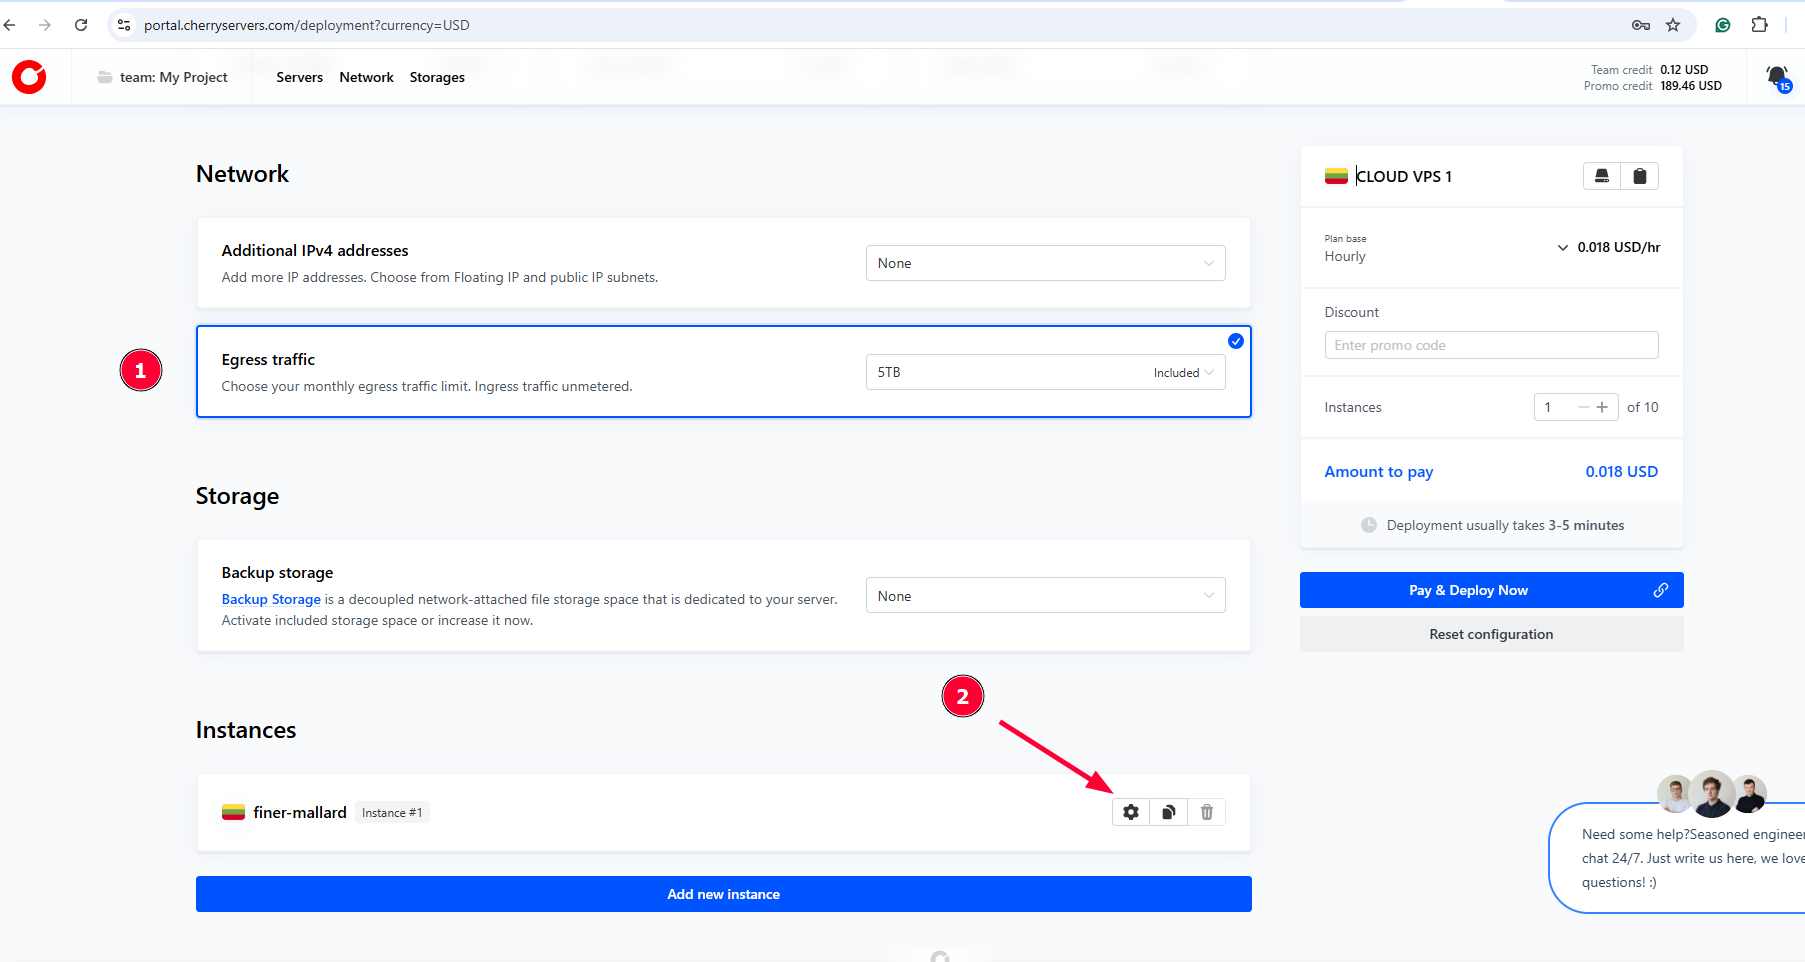
In the Network section, you can choose to include an additional IPv4 address. The starting plan does not include this by default. However, higher-tier plans include one by default. You can choose to include a floating IP for high availability, disaster recovery, and seamless maintenance.
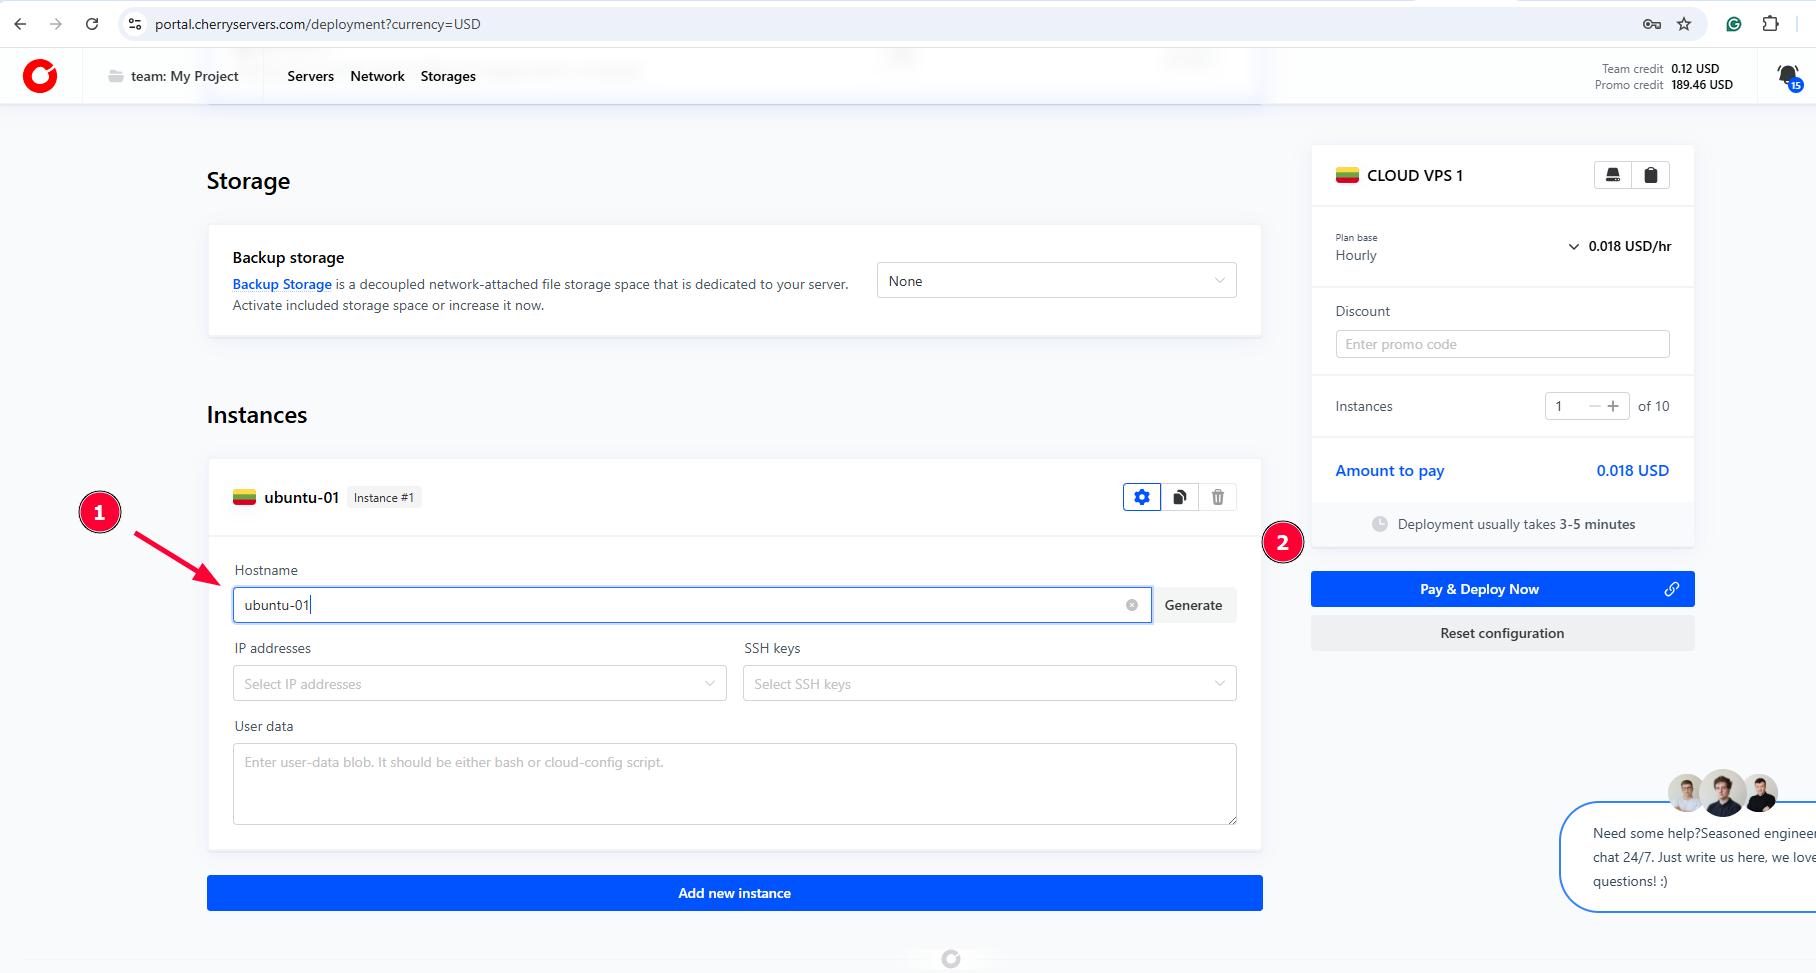
In the Instances section, an arbitrary hyphenated name is assigned as your VPS’s hostname. If you wish to change it to your preferred hostname, click the gear icon as shown.
Then fill in your hostname. Finally, click Pay and Deploy Now to launch the VPS.
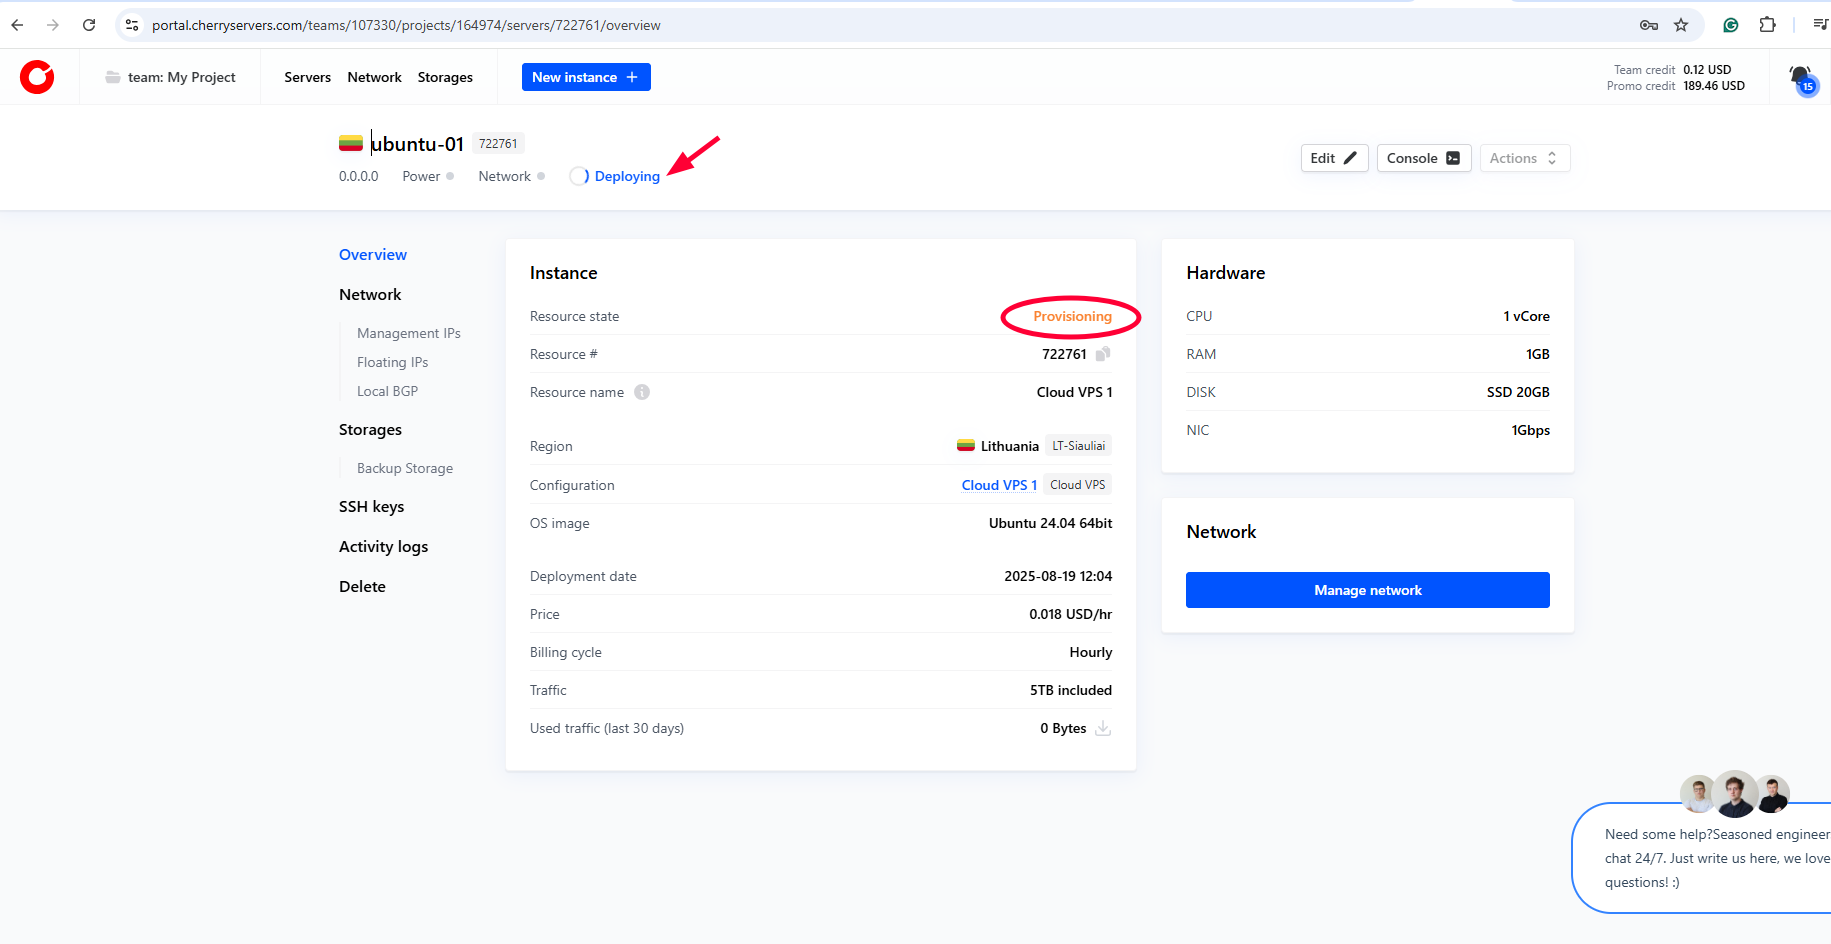
Once deployed, you will see your instance details, including the root password, which is visible for only 24 hours. Be sure to note it down somewhere before the time lapses. Even better, secure it in a password vault.
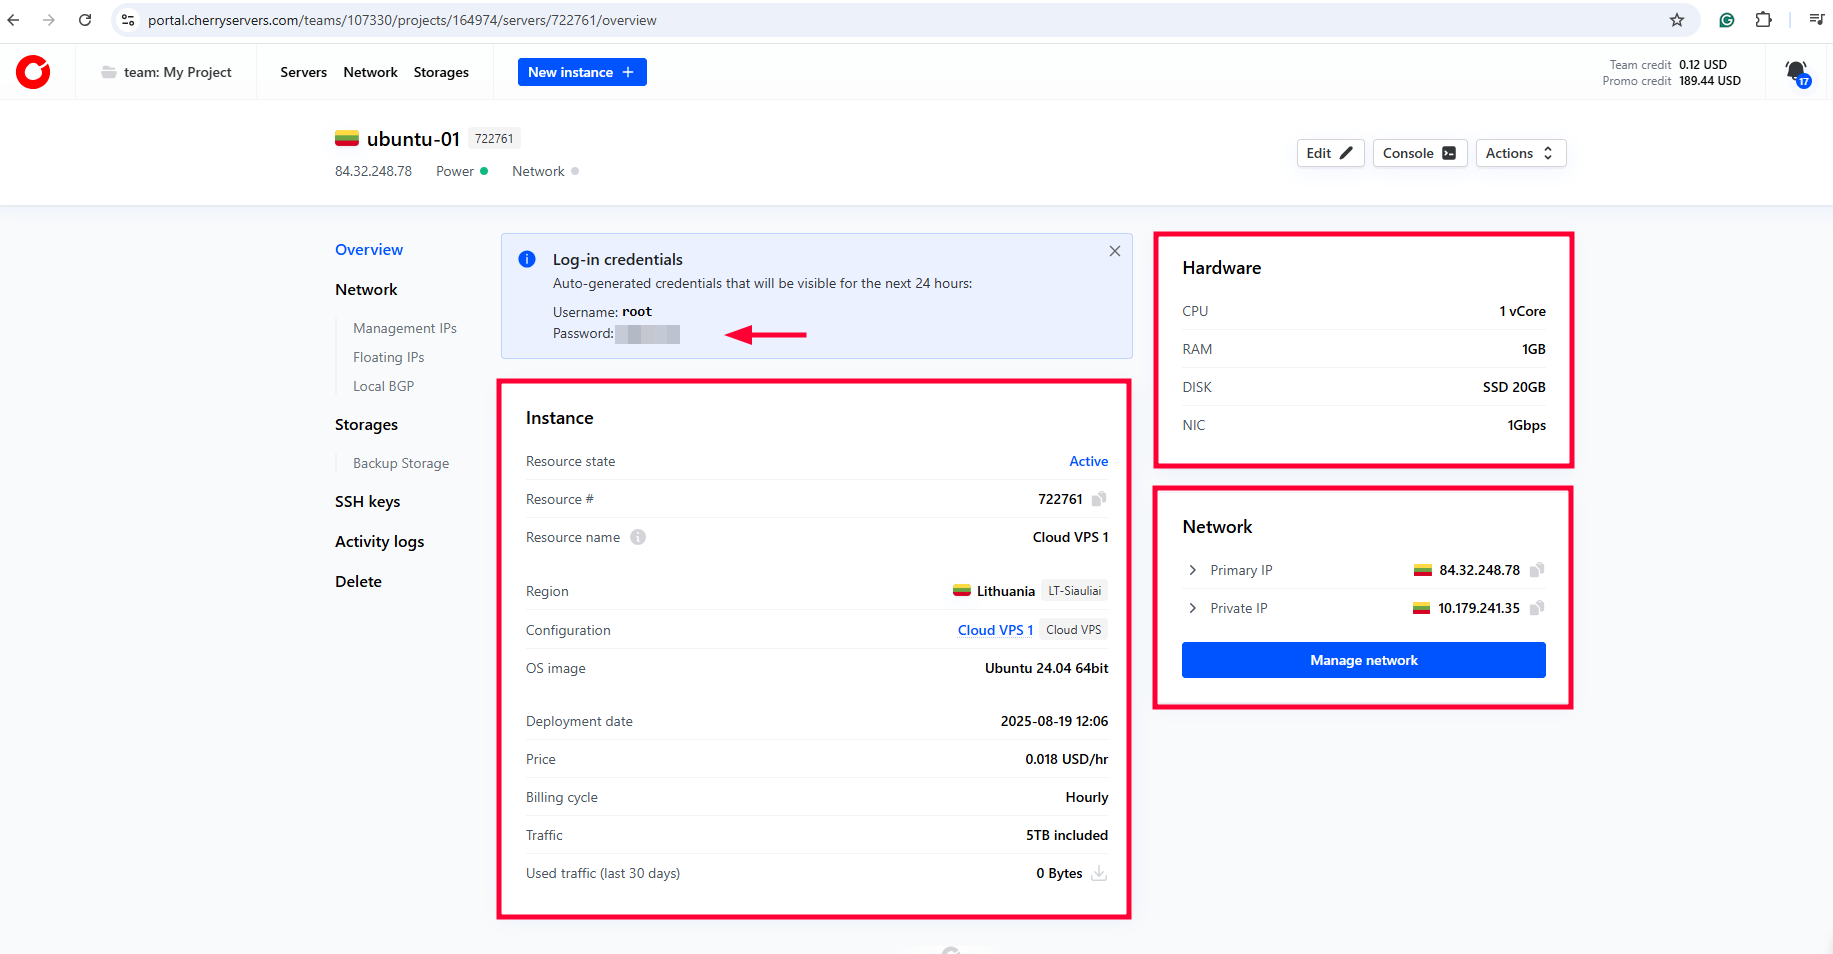
#Step 2: Access your VPS
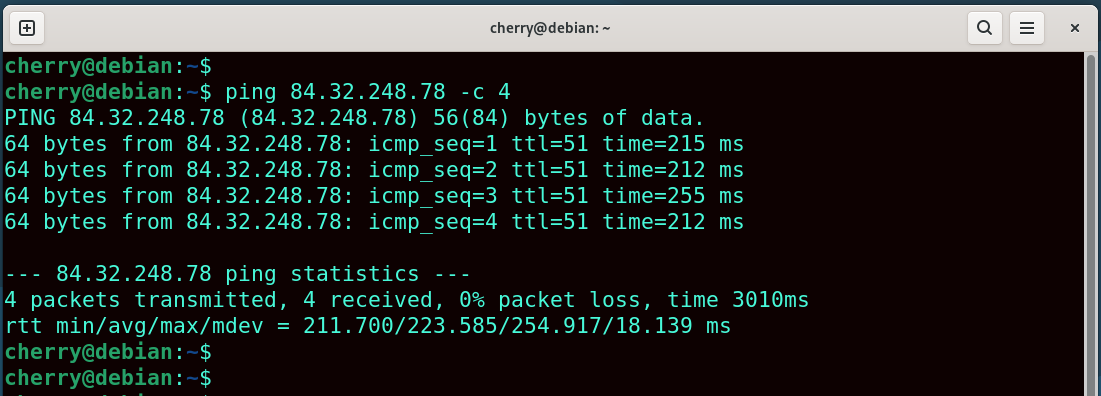
Your VPS is now ready. Now it's time to log in. But just before you do so, ensure you can reach it from your local PC using the ping command as follows.
ping 84.32.248.78 -c 4
The output below confirms we can access the VPS from our local environment.
There are two ways to log into your VPS instance: from the CLI or using an SSH client application like PuTTY. Let’s look at each in turn.
#From the CLI
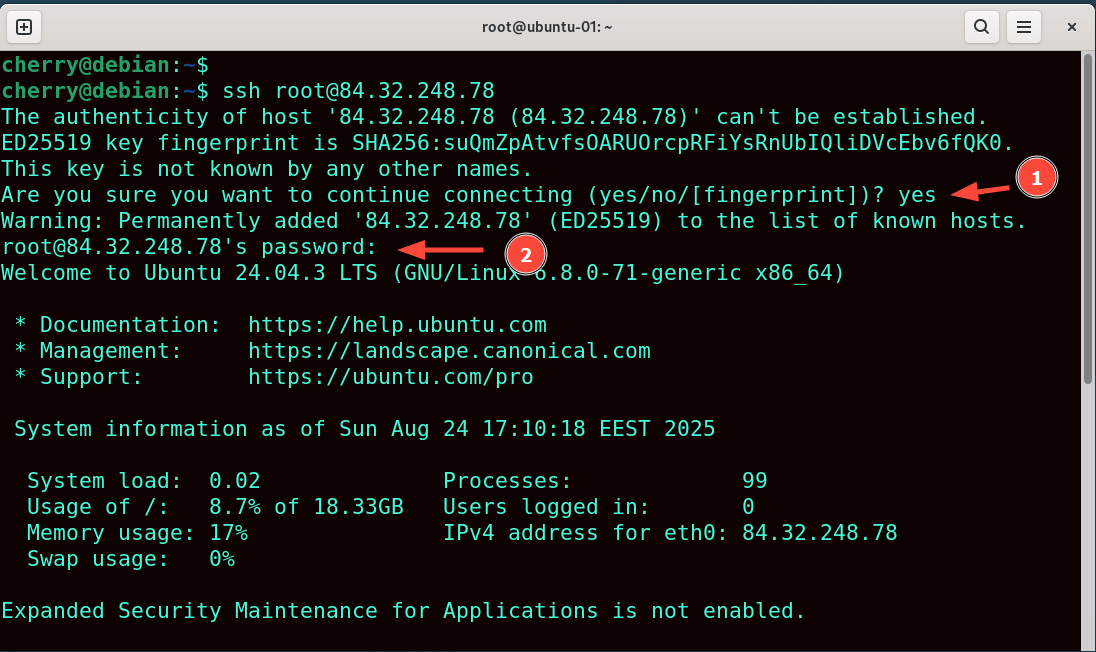
Access your VPS via the SSH protocol as follows.
ssh root@ip-address
Type "yes" when prompted and hit ENTER to save the remote server's host key fingerprint. Next, provide the root password to access the VPS.
Verify the currently logged-in user(s).
whoami
The w command offers fine-grained information about the logged-in user.
w

#Using an SSH client
Premium tools like Secure RT and MobaXterm Professional offer advanced features like enhanced session management and rich customization options for a better user experience.
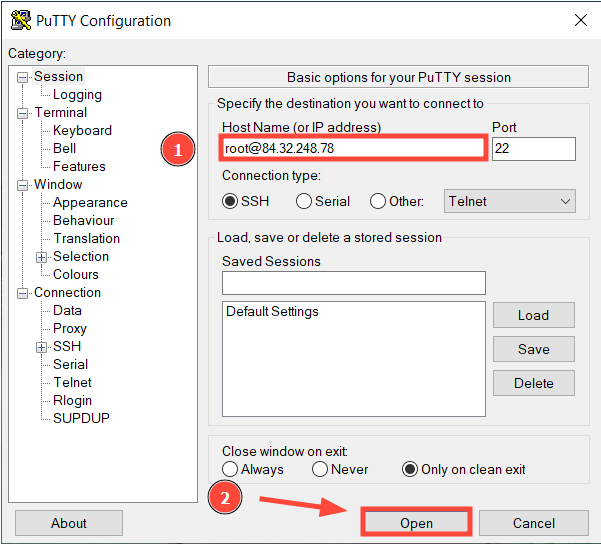
PuTTY's simplicity makes it an ideal SSH client. To install it, download the installer and run it.
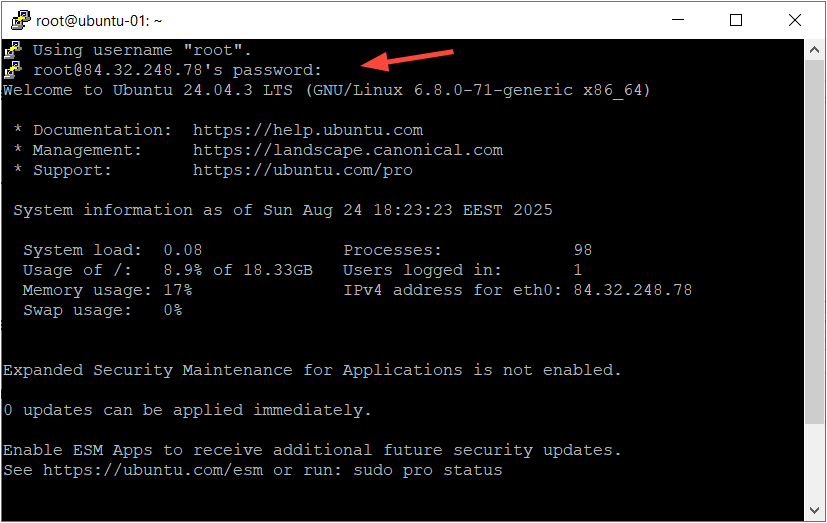
Launch it and provide your login details using the format username@ip-address. In this case, we have root@84.32.248.78.
Then click Open to initiate a connection.
Click Accept to acknowledge the remote host’s fingerprint and add it to PuTTY’s cache.
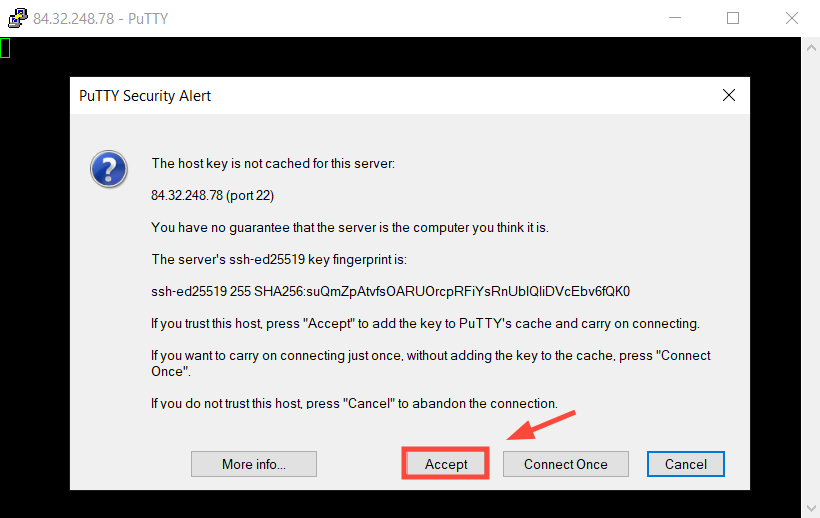
Type in the root password and hit ENTER.
#Step 3: Update the system
Before hosting any applications, ensure your system is up-to-date to address any loopholes present in older software packages. To update the system and software versions, run:
apt update && apt upgrade
#Step 4: Create a sudo user
A sudo user is recommended over the root for controlled root access and more accountability. The sudo utility grants a regular user controlled and temporary root access to perform system tasks, which can be logged back to the specific account. Hence, there is a reduced risk of error, better security, and protection of the root password, as the password will not have to be shared with other users.
Check out our detailed guide on how to create a sudo user in Ubuntu.
#Step 5: Basic security hardening
In addition to keeping your system up to date, some additional steps are required to augment your system’s security and make it more robust against external threats. Here are some of the key measures you can implement.
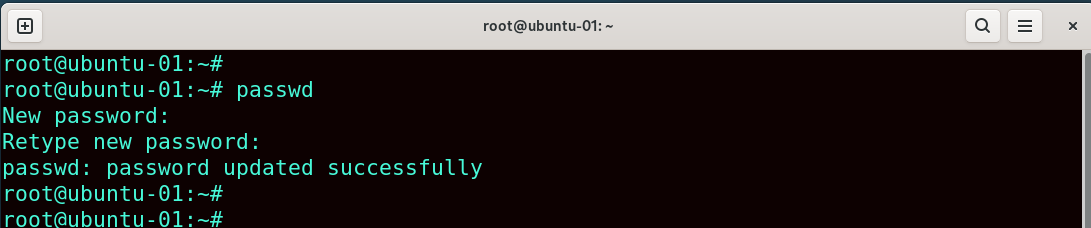
#Change default root user password (In case one was provided)
A default root password is provided once the VPS has been provisioned. This is the password you used in the initial VPS login. It’s highly recommended to change it for security reasons.
To achieve this, run the passwd command as root:
passwd
Be sure to provide a new, strong password and confirm it.
#Set up SSH public key authentication
While password authentication offers a sense of security, your VPS remains vulnerable to brute-force attacks from automated botnets. A more secure way to protect your system is to switch to public key authentication.
Read our comprehensive guide on how to generate SSH keys and configure public key authentication. This guide also shows you how to generate a key pair and add the public key to your client portal.
#Step 6: Install essential software
With basic server hardening measures in place, the next step is to install your software stacks and get your business running. If you are running a website, consider installing the LAMP or LEMP stack. You can also run web apps more reliably in Docker containers. Check out our latest article on how to install Docker on Ubuntu 24.04. Additionally, consider installing Kubernetes for scalability, efficient resource utilization, and high availability of your containerized applications.
#Step 7: Configure a Firewall
The most critical aspect of infrastructure security is the perimeter firewall. This creates an electronic safety net by blocking and/or allowing traffic depending on the configured firewall policies. This is increasingly important to large businesses dealing with high-value and sensitive financial or health records.
At the operating system level, it's just as essential to configure a firewall to shield your VPS from malicious entities, in the same way you would install a physical firewall to safeguard your network infrastructure.
Debian-based distros such as Ubuntu offer the UFW firewall, which simplifies management of firewall rules using iptables. Read our comprehensive tutorial on how to configure the UFW firewall.
#Step 8: Implement a real-time monitoring solution
Consider installing a robust monitoring system once your applications and services are running. This will help you track the health and performance of your VPS and applications.
A tag team of Prometheus and Grafana is widely used to provide insights into resource metrics and application performance. You can view various resource metrics on beautiful dashboards and also configure alerts if configured thresholds are exceeded.
Other robust open-source alternatives include:
-
Nagios
-
Zabbix
-
LibreNMS
-
Icinga
-
ELK stack
#Step 8: Backup and Recovery
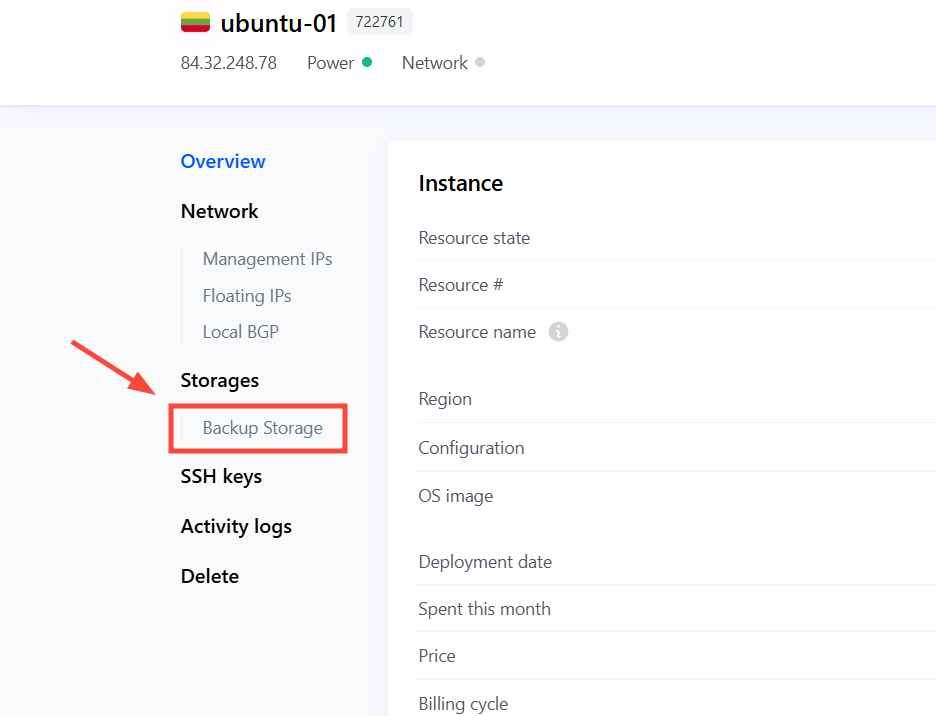
In addition to installing a reliable monitoring solution for your VPS, consider creating backup storage for data recovery if something goes wrong. Backup storage is a dedicated file storage space associated with your VPS. It can be accessed using SMB, FTP, BorgBackup, and NFS protocols.
To get started with creating a backup storage, head back to the client portal and click Backup Storage
Next, click the Activate button.
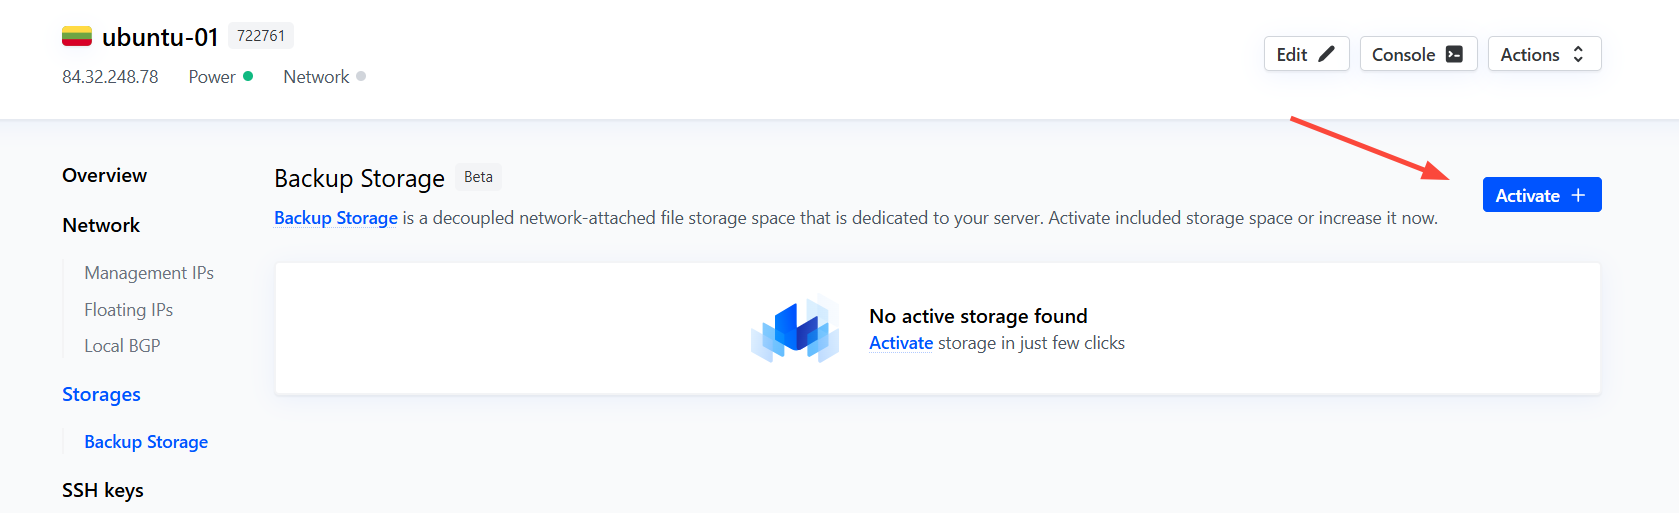
Select your preferred backup plan (plans start at $0.005/hr for 50 GB of backup storage). Then click Activate.

The deployment of the backup storage typically takes 2-3 minutes. You can refresh your browser at intervals to verify the status.
Once deployed, the backup storage dashboard will be displayed. It will show information including the instance's public and private IPs, and a short guide on how to access the storage.
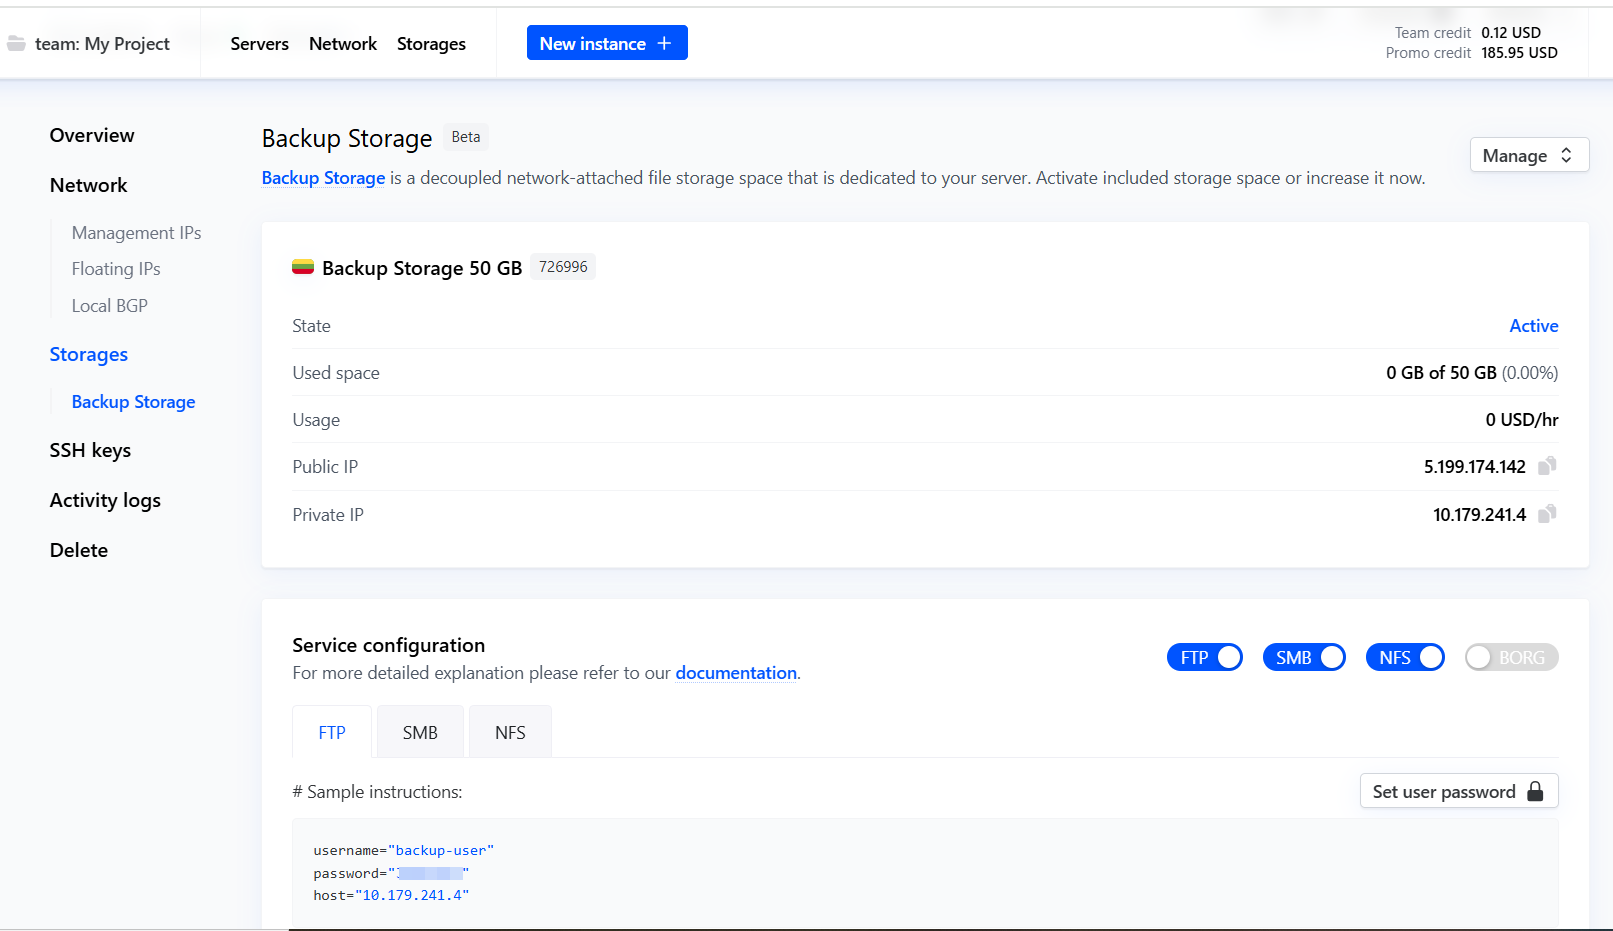
From here, you can use rsync and cron jobs to schedule data backups to your storage space. For more information on how to use the backup, check out our detailed documentation.
#Conclusion
In this guide, we outlined step by step how to set up a VPS from scratch from the Cherry Servers client dashboard.
You can deploy a VPS server on Cherry servers for as low as $3.51, which is ideal for small to average workloads. Every plan comes with standard DDoS protection and 1 TB free egress traffic. Each VPS server is easily scalable to a higher tier, and you can add additional features such as backup storage, private subnets, and floating IPs.


