How to Install Coolify on Ubuntu Server (Step-by-Step Guide)


Coolify is an open source control panel for running apps, databases, and small services on a self-managed server. It is similar to managed platforms like Heroku or Vercel. However, it runs on infrastructure under the user's control. Behind the scenes, it connects over SSH and runs the stack as Docker containers.
It also handles domains and HTTPS by putting a reverse proxy in front of the containers (Traefik by default, with Caddy as an option) and requesting Let’s Encrypt certificates when we enable TLS for a domain.
This guide shows how to install and configure Coolify on an Ubuntu server.
#Prerequisites
Have these ready:
- An SSH-accessible Linux server. Ubuntu LTS 20.04/22.04/24.04 recommended.
- Root access. Coolify’s installer must run with root permissions. If you are not logged in as root, run the installation with
sudo. - Firewall access to allow inbound ports:
22,80,443,8000,6001,6002. - A registered domain name with DNS access. This guide uses
example.comas a placeholder. Replace it with your actual domain throughout. - A public GitHub repository URL or a public container image for the test deployment.
- A local machine with a terminal (SSH client).
#Installing Coolify on Ubuntu
Coolify installs seamlessly, but a clean setup depends on getting the ports and domain steps right. The steps below take the server from a fresh install to a working dashboard and a reachable deployment over HTTPS.
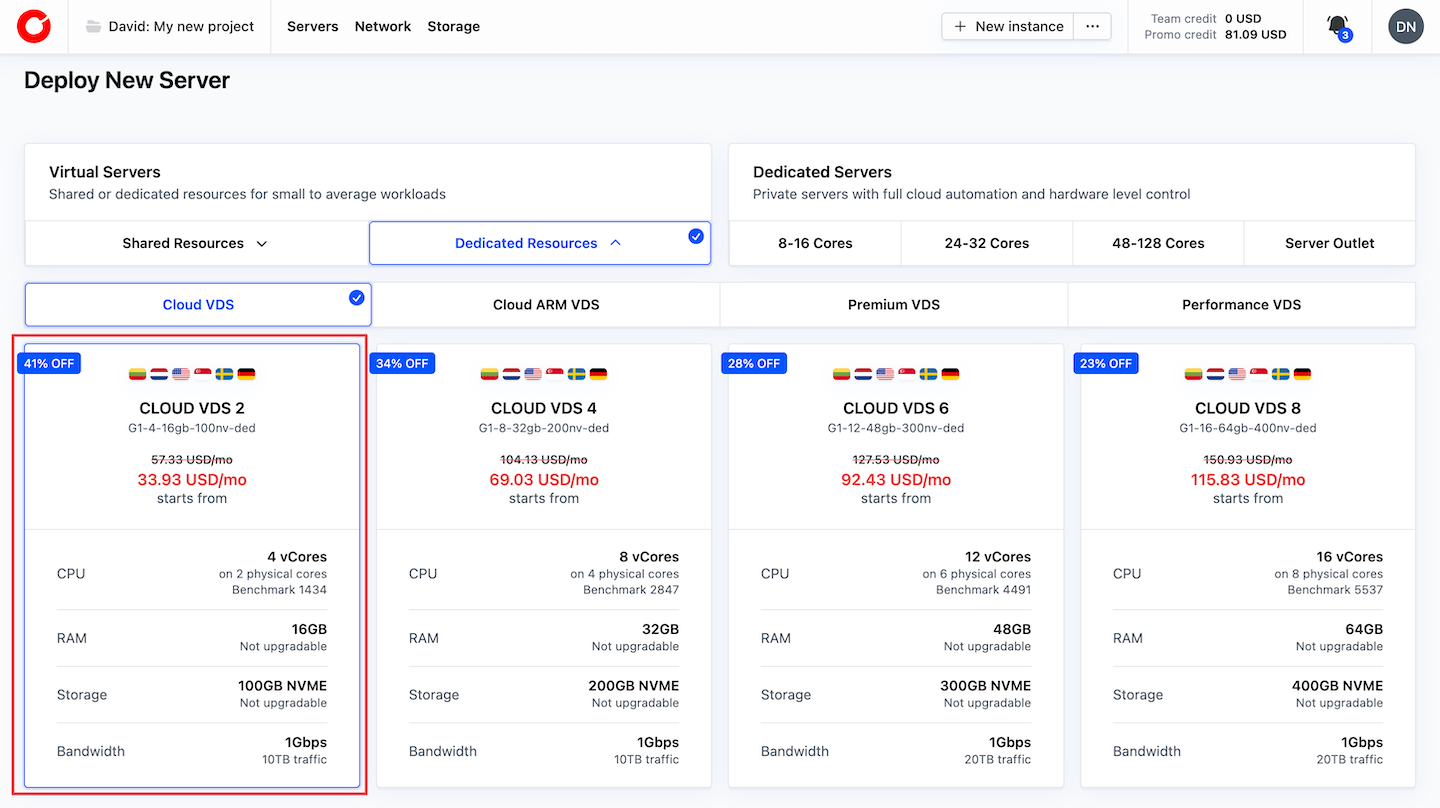
#Step 1: Provision a server
This guide uses a cloud VPS server from Cherry Servers. Any Linux server with SSH access would work.
Pick a server with these minimum requirements:
- 2 CPU cores
- 2 GB RAM
- 30 GB of free disk space
We are using the Cloud VDS 2 (4 vCores, 16 GB RAM, and 100 GB NVMe) virtual server for this guide. It is a comfortable starting point for Coolify.
Under Software, select Ubuntu 24.04 (64-bit).
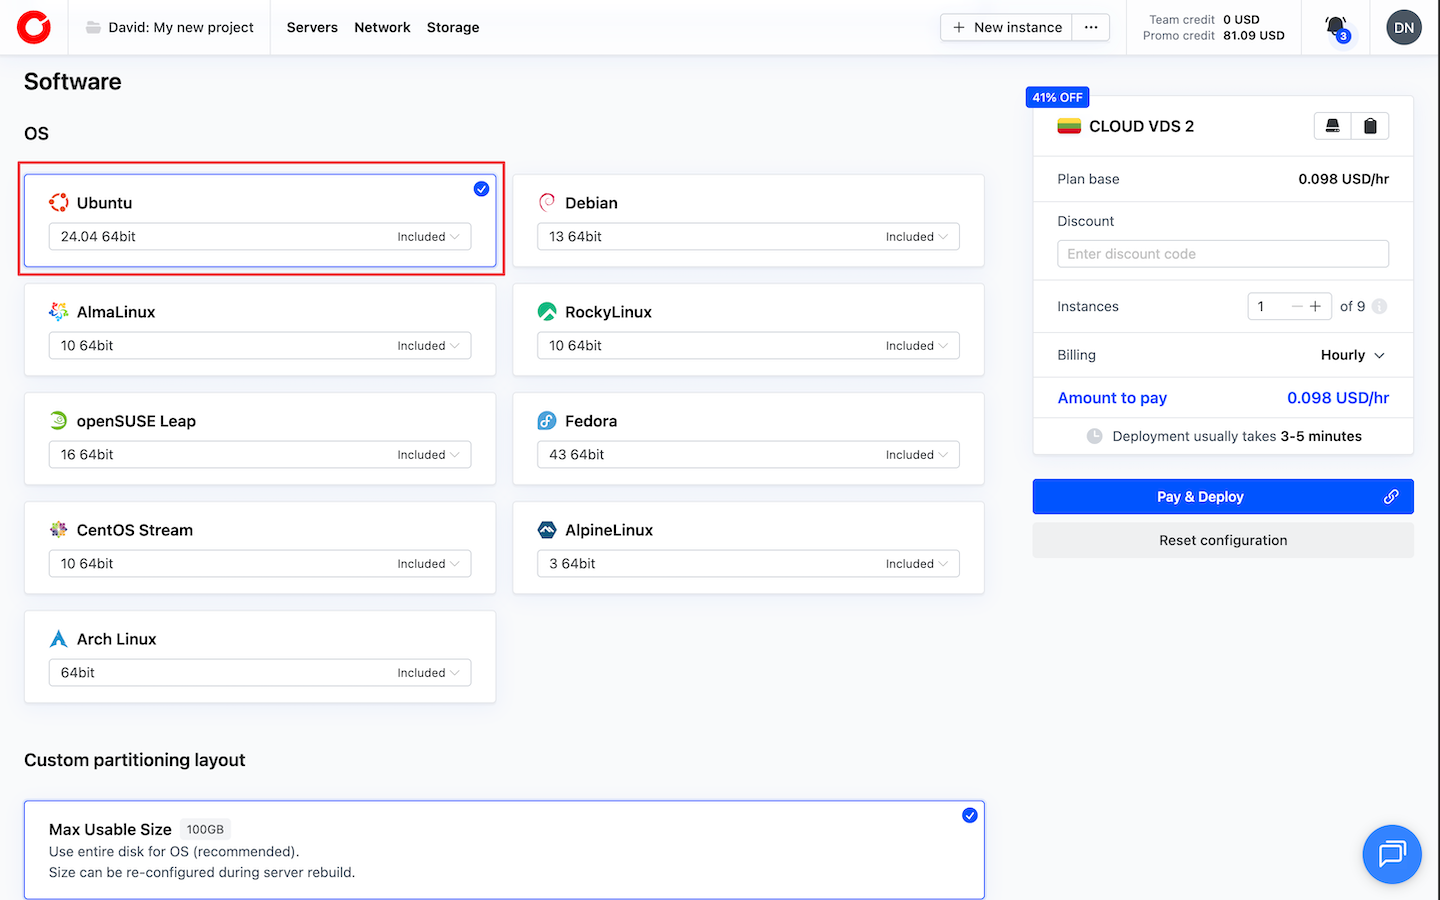
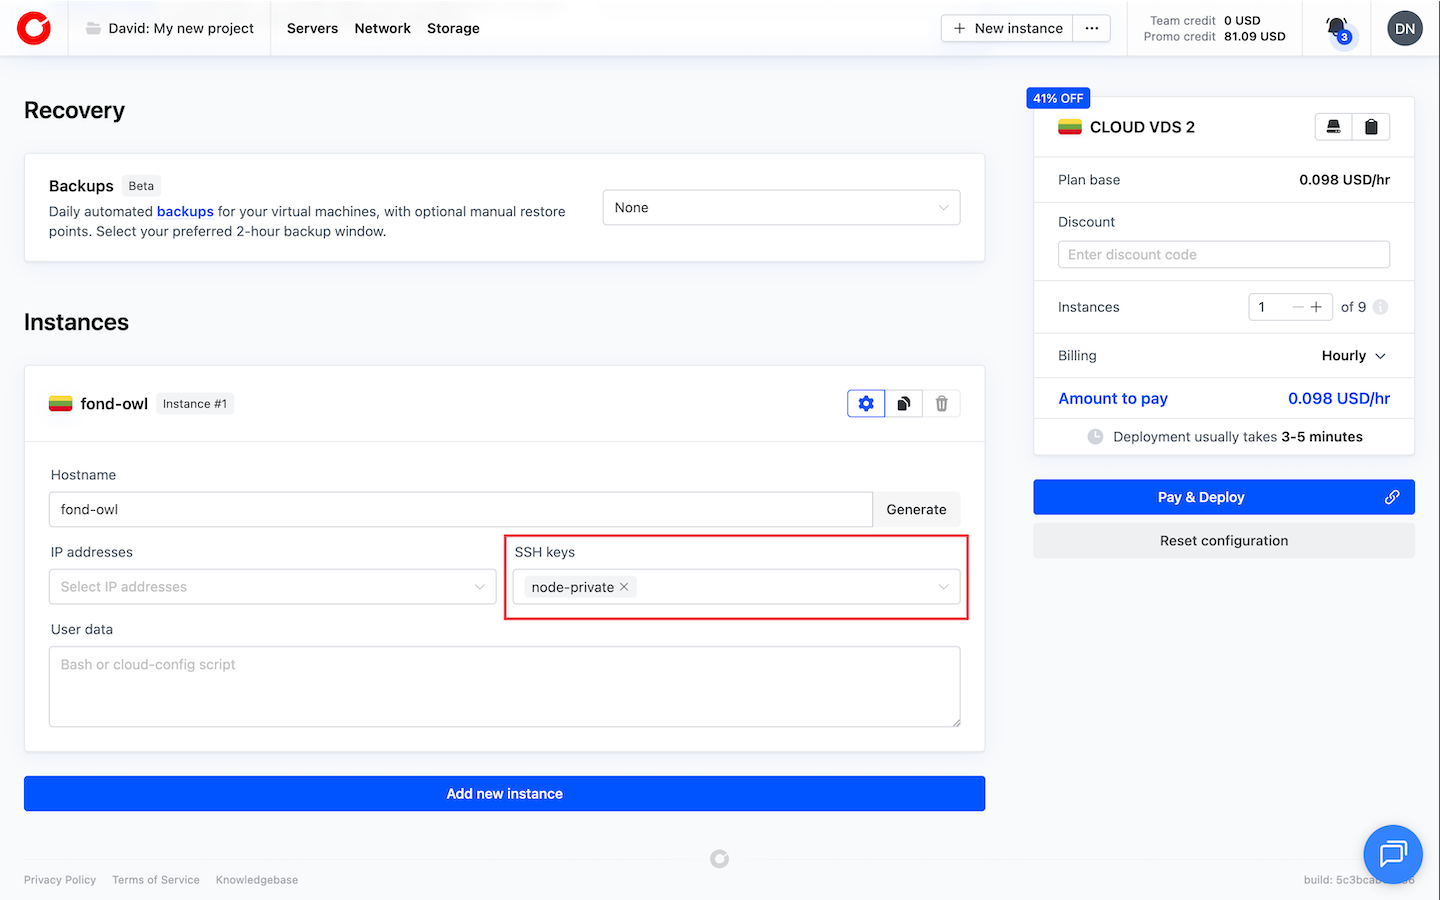
Add an SSH key and deploy the server.
#Step 2: Prepare the server
With our server deployed, do a quick baseline setup.
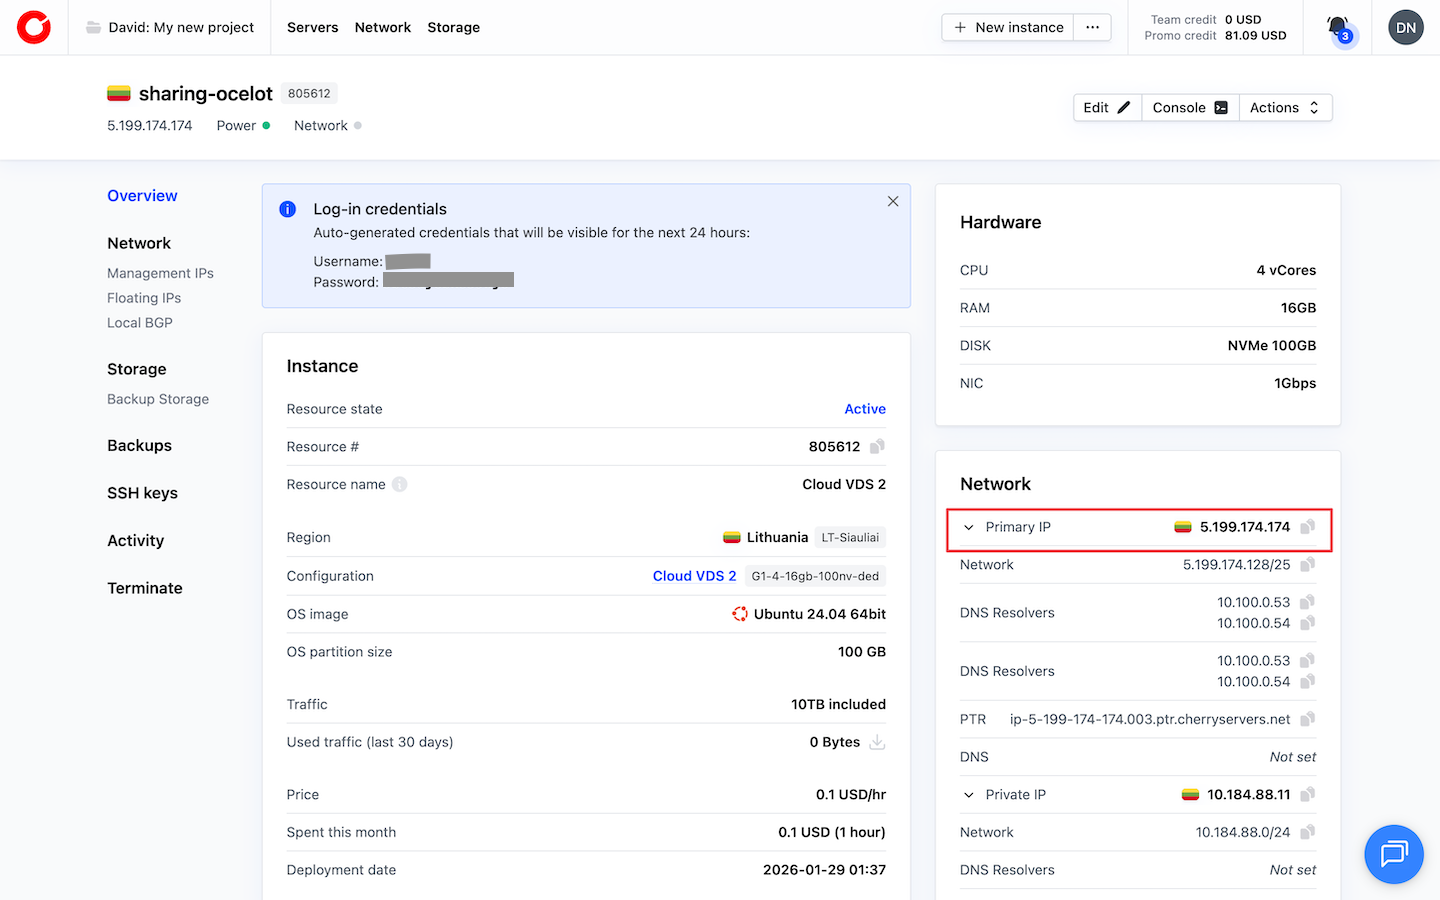
Copy the public IP address
From the dashboard, locate the Primary IP address, and copy it.
Connect to the server over SSH
From your local machine, connect as root:
ssh root@SERVER_IP
Replace SERVER_IP with the Primary IP you copied.
On the first connection, SSH may ask to confirm the host key. That is expected. Proceed by typing yes and pressing Enter.
OutputThe authenticity of host 'SERVER_IP' can't be established.
Are you sure you want to continue connecting (yes/no/[fingerprint])?
Update the system
Start by updating package metadata and installing available updates:
sudo apt update
sudo apt -y upgrade
Next, check if you need to reboot:
test -f /var/run/reboot-required && echo "Reboot required" || echo "No reboot required"
Only reboot if required:
sudo reboot
Then, reconnect:
ssh root@SERVER_IP
Install the required tools
Ubuntu usually has curl and CA certificates preinstalled. However, we should confirm they are installed before running the Coolify installer.
sudo apt -y install curl ca-certificates
Quick checks
Run a few quick checks to confirm the server is ready for the Coolify install.
Check the OS version:
cat /etc/os-release
Output:
OutputPRETTY_NAME="Ubuntu 24.04.3 LTS"
VERSION_CODENAME=noble
…
Check available disk space:
df -h /
You should see a similar output:
OutputFilesystem Size Used Avail Use% Mounted on
/dev/vda1 96G 2.0G 94G 2% /
The server is ready. SSH works, packages are up to date, and curl is installed. The next step is installing Coolify.
#Step 3: Install Coolify
Now we can install Coolify using the quick installer script for self-hosted setups.
Coolify uses port 8000 during the initial setup. Make sure nothing is listening on it:
sudo ss -tulpn | grep :8000
Run the installation script
The installer needs root privileges. Run this command as root:
curl -fsSL https://cdn.coollabs.io/coolify/install.sh | bash
If you are a non-root user, run:
curl -fsSL https://cdn.coollabs.io/coolify/install.sh | sudo bash
The script takes a few minutes. It installs what Coolify needs and starts the required containers. You should see output similar to this:
Output
==========================================
Coolify Installation - 20260129-044817
==========================================

Welcome to Coolify Installer!
This script will install everything for you. Sit back and relax.
Source code: https://github.com/coollabsio/coolify/blob/v4.x/scripts/install.sh
Using default registry URL: ghcr.io
---------------------------------------------
| Operating System | ubuntu 24.04
| Docker | 27.0
| Coolify | 4.0.0-beta.462
| Helper | 1.0.12
| Realtime | 1.0.10
| Docker Pool | 10.0.0.0/8 (size 24)
| Registry URL | ghcr.io
---------------------------------------------

============================================================
[2026-01-29 04:48:17] Step 1/9: Installing required packages
============================================================
1/9 Installing required packages (curl, wget, git, jq, openssl)...
[2026-01-29 04:48:17] All required packages already installed, skipping installation
- All required packages already installed.
…
After the installer completes, you should see the dashboard URL on port 8000. Copy it somewhere, we will use it in the next step.
#Step 4: Open the required firewall ports
Coolify exposes a small set of TCP ports from its containers. If inbound rules block them, the UI on 8000 will not come up, and later traffic for HTTP/HTTPS will also fail.
Allow inbound TCP on:
22- SSH access (or the custom SSH port in use)80- HTTP443- HTTPS8000- Coolify dashboard during the initial setup6001- Real-time communication6002- Terminal access (required for newer Coolify v4 betas)
If the host includes a provider firewall, allow these ports there as well. The steps below use UFW on Ubuntu for the server-side rules.
Allow the ports with UFW (Ubuntu)
First, check UFW status:
sudo ufw status
If it shows Status: inactive, that is normal on a fresh server.
Allow SSH first. This helps avoid locking the server out when UFW is enabled:
sudo ufw allow OpenSSH
Output:
OutputRules updated
Rules updated (v6)
Now allow the ports Coolify needs:
sudo ufw allow 80/tcp
sudo ufw allow 443/tcp
sudo ufw allow 8000/tcp
sudo ufw allow 6001/tcp
sudo ufw allow 6002/tcp
Enable UFW:
sudo ufw enable
Confirm by typing y, then press Enter:
OutputCommand may disrupt existing ssh connections. Proceed with operation (y|n)? y
Firewall is active and enabled on system startup
Confirm the rules:
sudo ufw status
You should see a similar output:
OutputStatus: active

To Action From
-- ------ ----
OpenSSH ALLOW Anywhere
80/tcp ALLOW Anywhere
443/tcp ALLOW Anywhere
8000/tcp ALLOW Anywhere
6001/tcp ALLOW Anywhere
6002/tcp ALLOW Anywhere
OpenSSH (v6) ALLOW Anywhere (v6)
80/tcp (v6) ALLOW Anywhere (v6)
443/tcp (v6) ALLOW Anywhere (v6)
8000/tcp (v6) ALLOW Anywhere (v6)
6001/tcp (v6) ALLOW Anywhere (v6)
6002/tcp (v6) ALLOW Anywhere (v6)
The dashboard should be reachable at: http://SERVER_IP:8000.
#Step 5: Access the dashboard and create the admin account
Open http://SERVER_IP:8000 in a browser to load the Coolify dashboard.
Complete registration immediately. The first person to finish this setup becomes the admin.
You may see a browser warning when visiting the dashboard. Confirm and proceed.
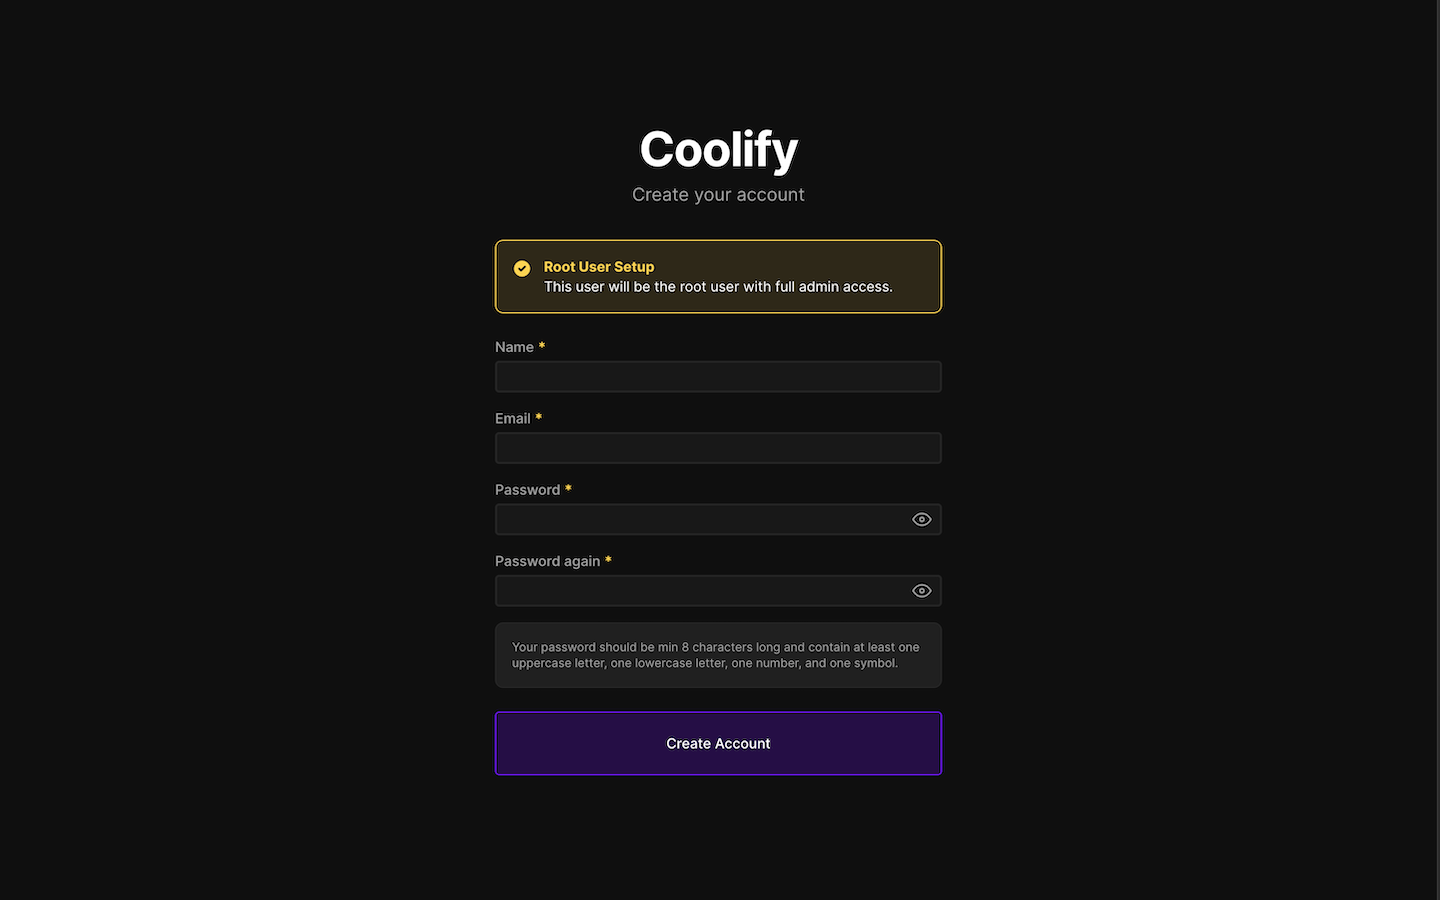
The page opens on Root User Setup. Enter a name, email address, and password, then click Create Account. That first user becomes the dashboard admin.
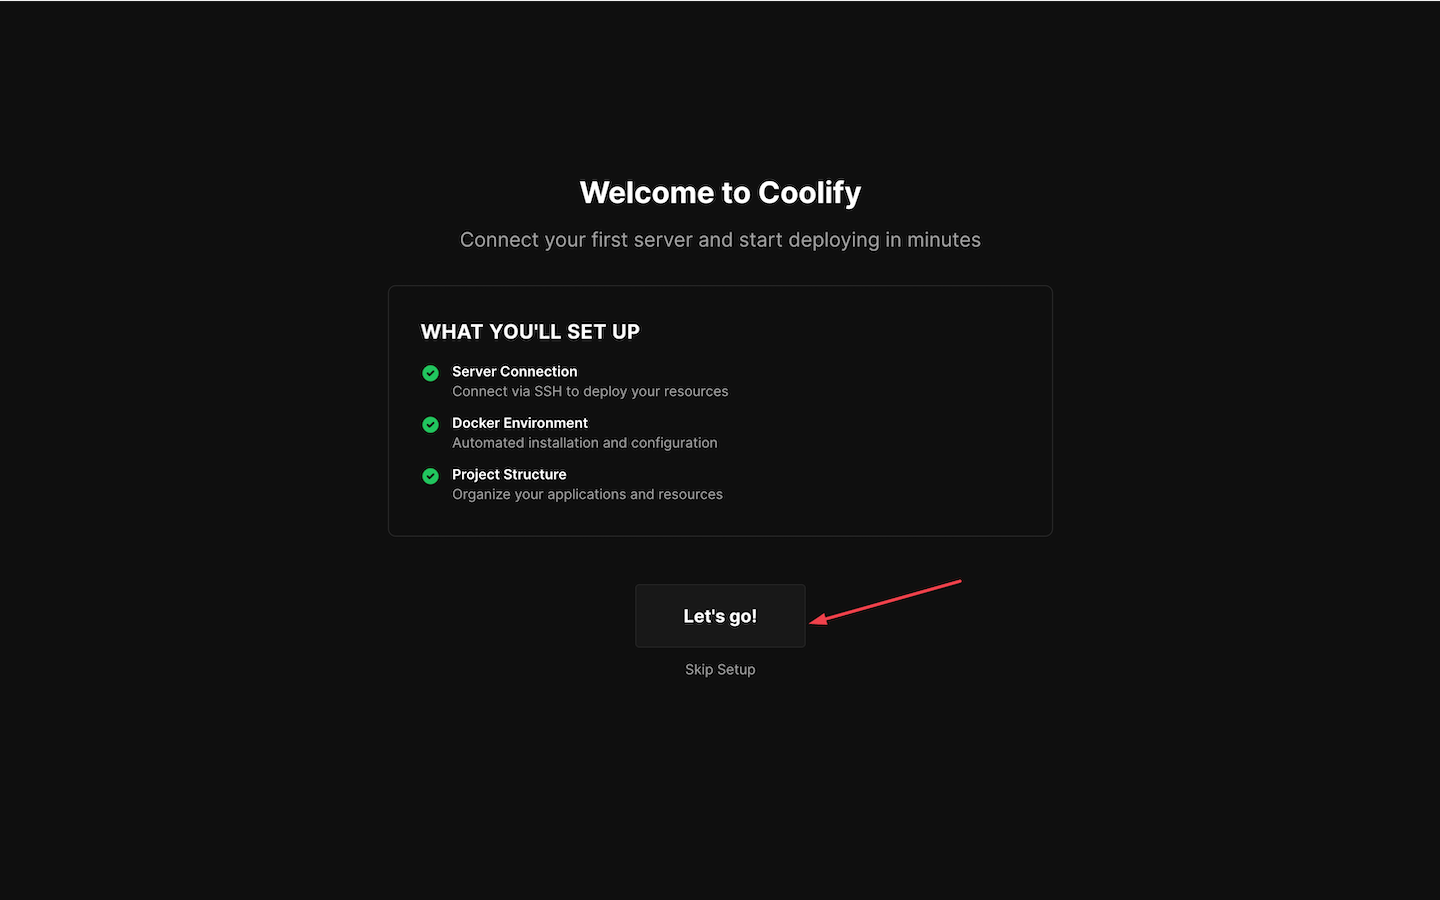
After the account is created, Coolify shows a welcome screen for the initial setup. Click Let’s go! to continue.
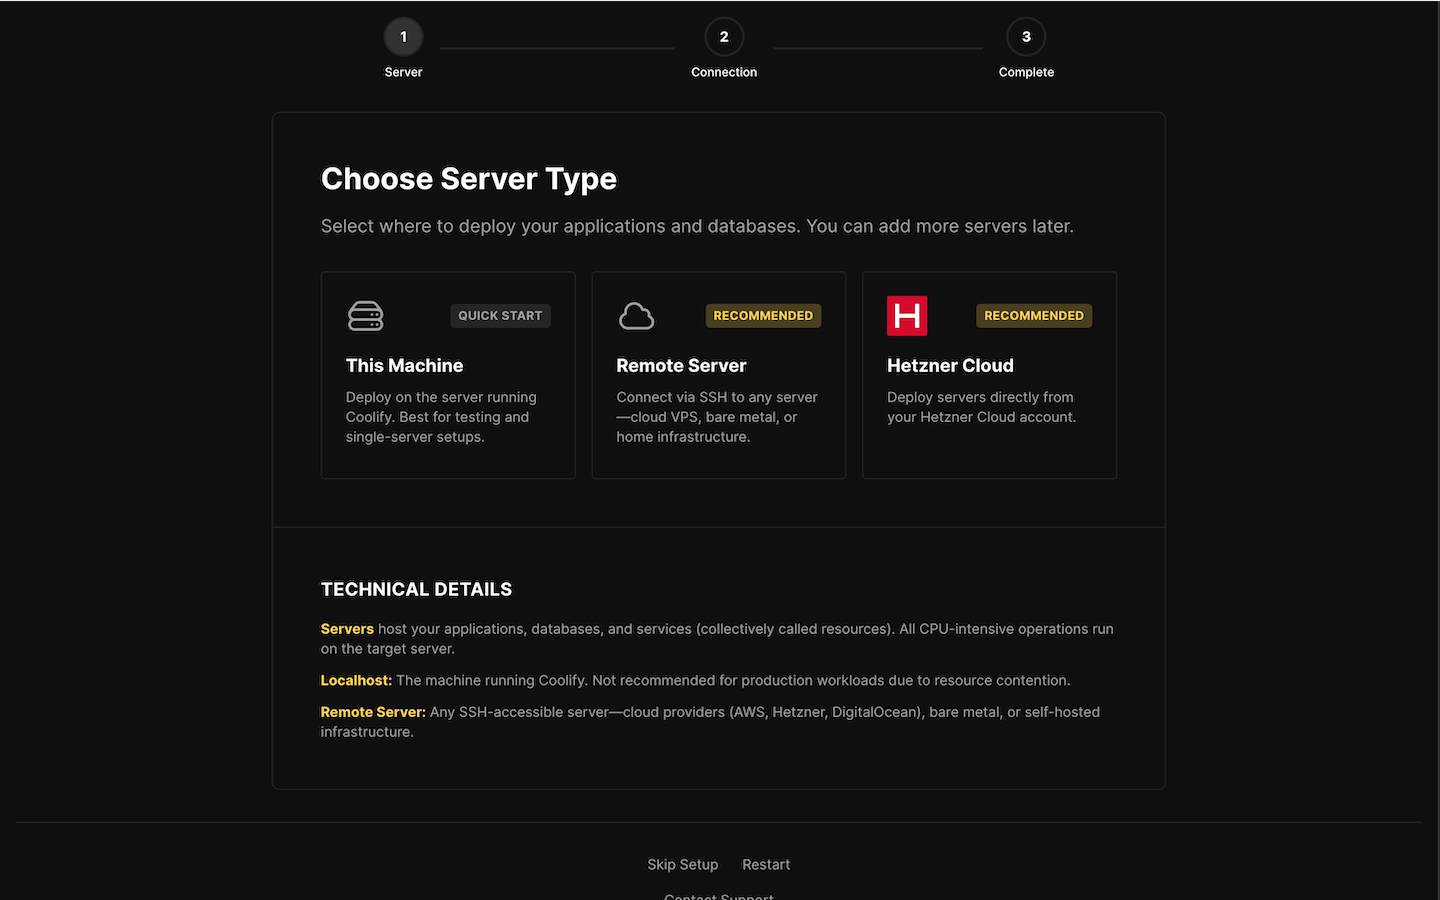
On the Choose Server Type screen, select This Machine. This keeps deployments on the same server where Coolify is installed.
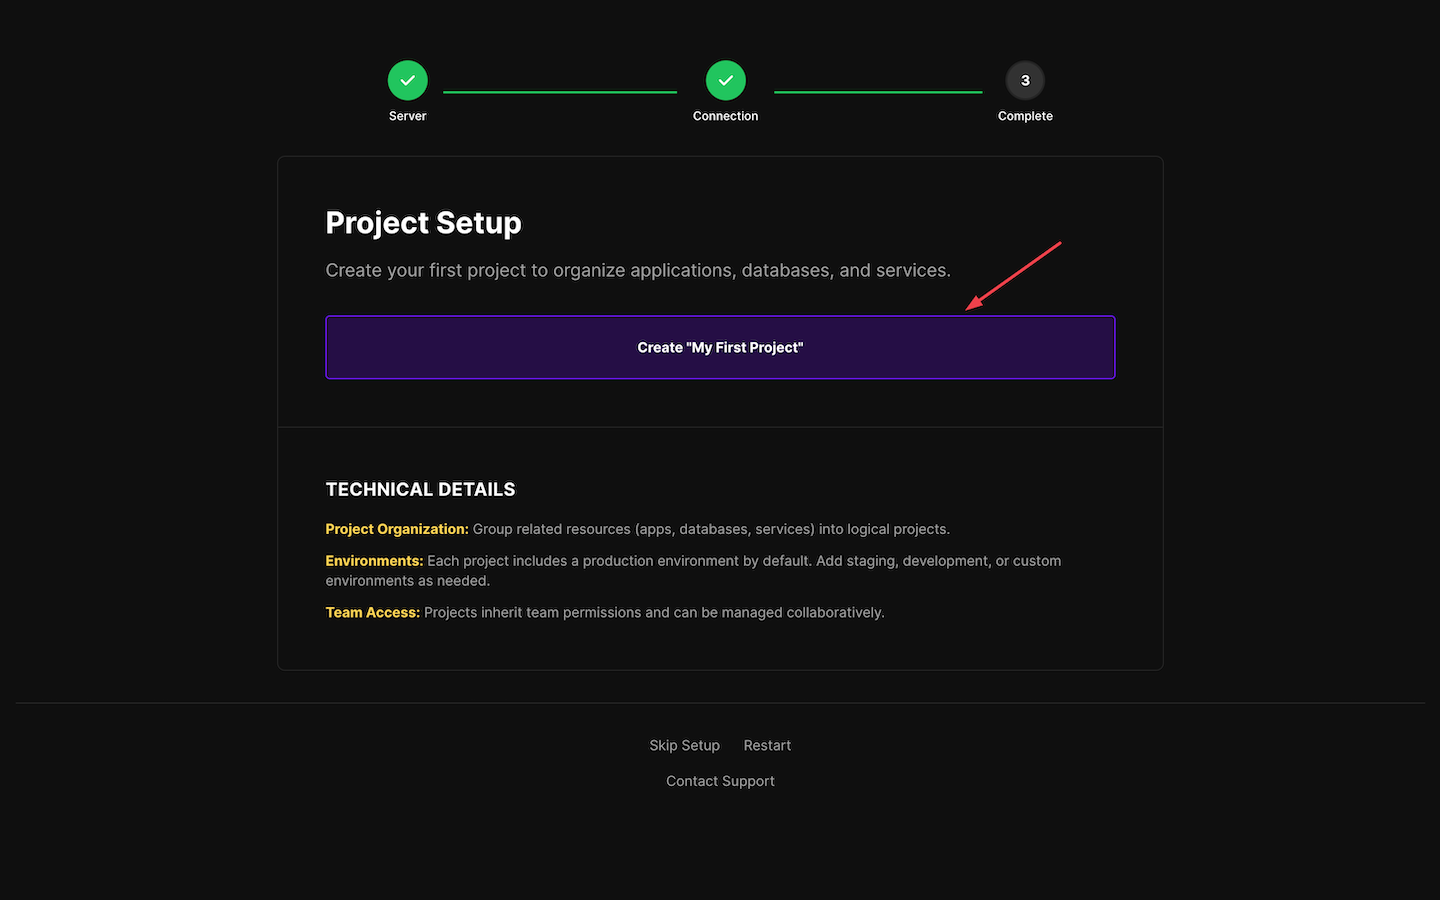
Next, Coolify prompts for a first project. Click Create “My First Project” to continue.
Once setup finishes, the Setup Complete screen appears. Click Go to Dashboard.
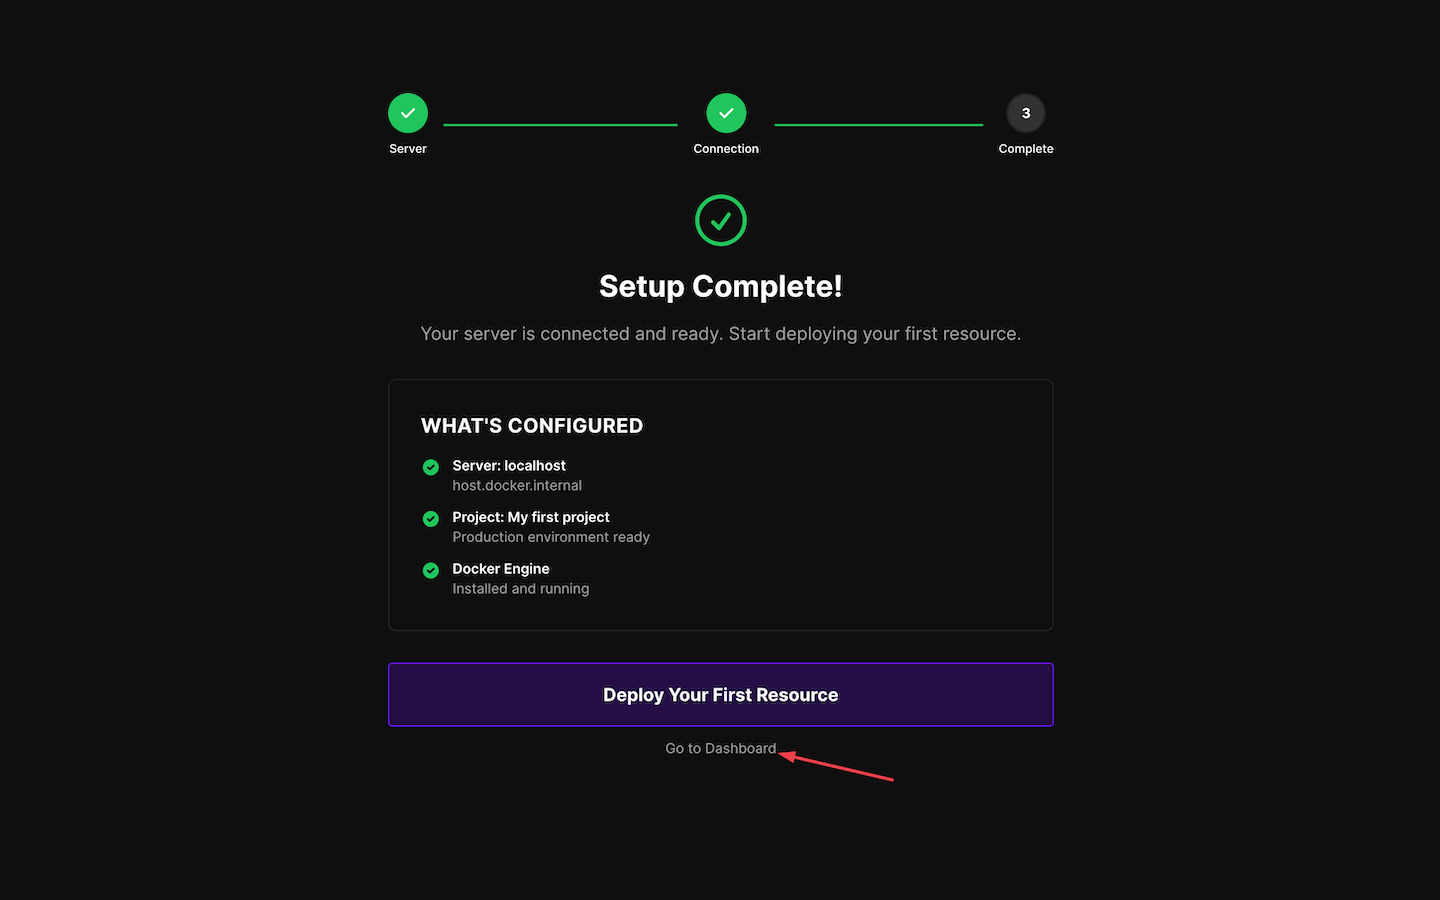
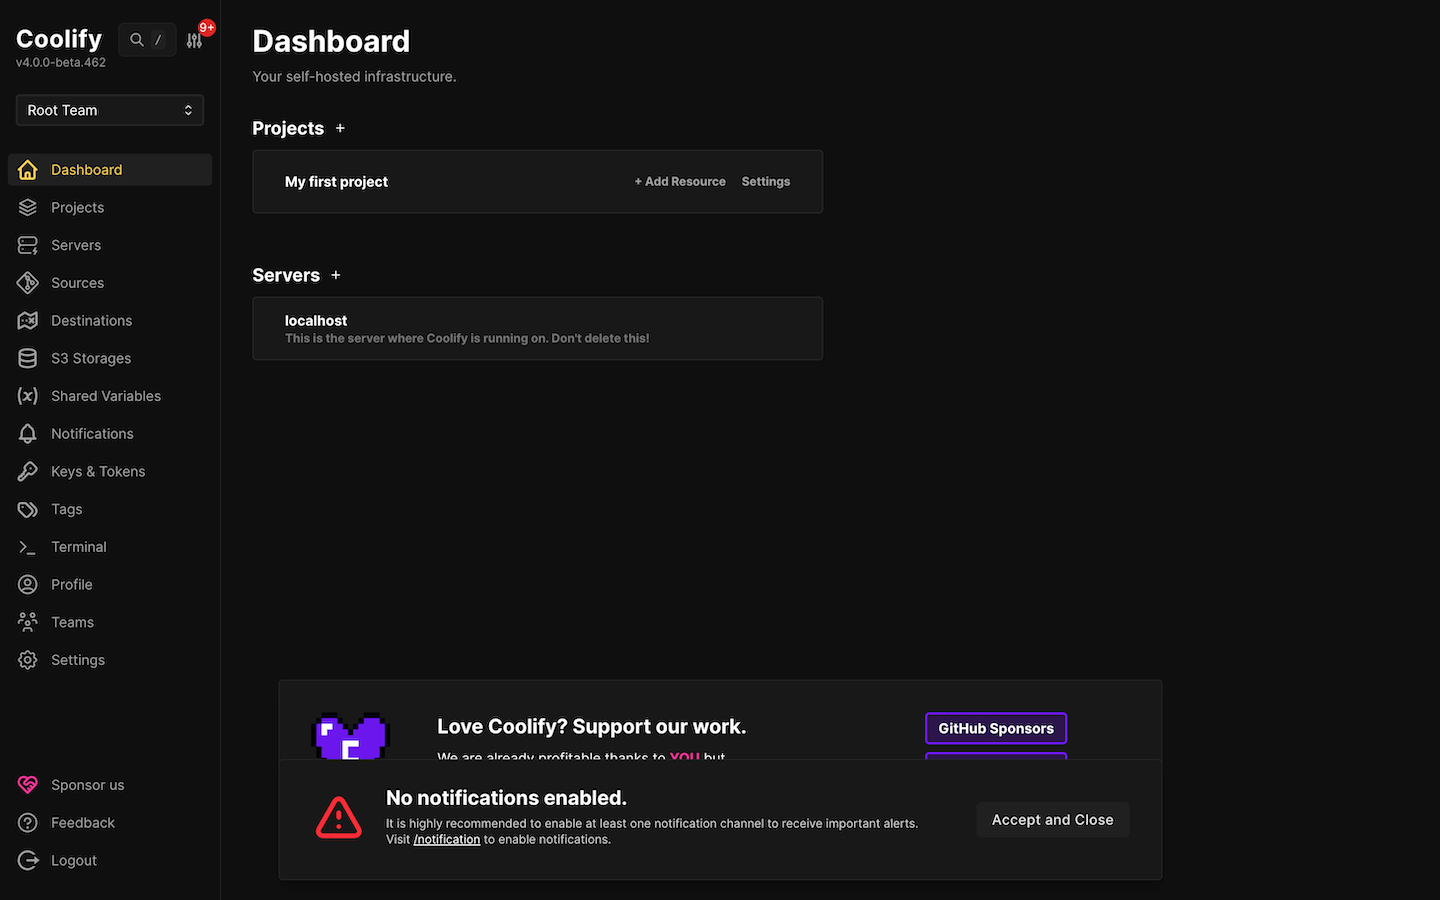
This will take you to the dashboard. You should see a project named My first project and a server entry named localhost.
#Step 6: Configure DNS records
Point the domain (and any subdomains) to the server’s public IP address. Coolify relies on standard A records for this.
A subdomain keeps things clean, for example: coolify.yourdomain.com.
Create the DNS records
Open the domain’s DNS settings in the DNS provider. This guide uses Namecheap.
Add these A records:
- Dashboard subdomain
- Type:
A Record - Host: coolify
- Value:
SERVER_IP - TTL: Automatic
- Type:

-
Wildcard subdomain (optional but recommended)
A wildcard record covers future subdomains without extra DNS entries.
- Type:
A Record - Host:
* - Value:
SERVER_IP - TTL: Automatic
- Type:

Save the changes, then give DNS a few minutes to update. Confirm the name resolves to the server IP.
Run (replacing coolify.example.com with your subdomain):
dig +short coolify.example.com
The command should return the server's public IP. If it returns nothing, wait for some time and try again.
#Step 7: Connect the domain in Coolify and enable HTTPS
This step tells Coolify which domain should be used for the dashboard. Coolify can then issue an SSL certificate and switch the dashboard to HTTPS.
Set the dashboard domain
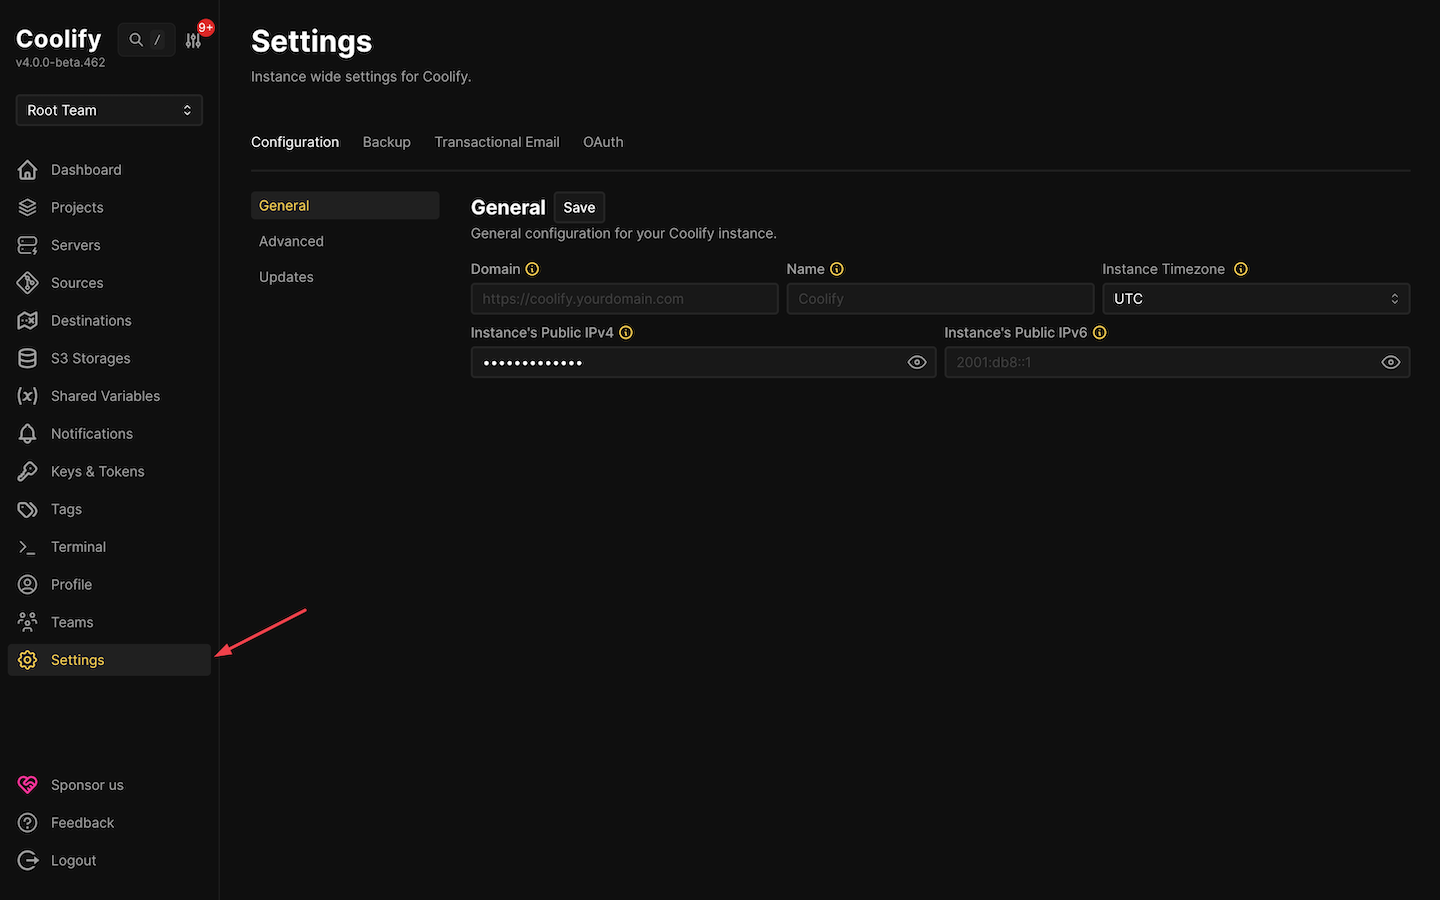
Navigate to the Settings from the sidebar.
Then, on the General tab, find the Domain field and enter the full URL, including https://. For example: https://coolify.example.com.
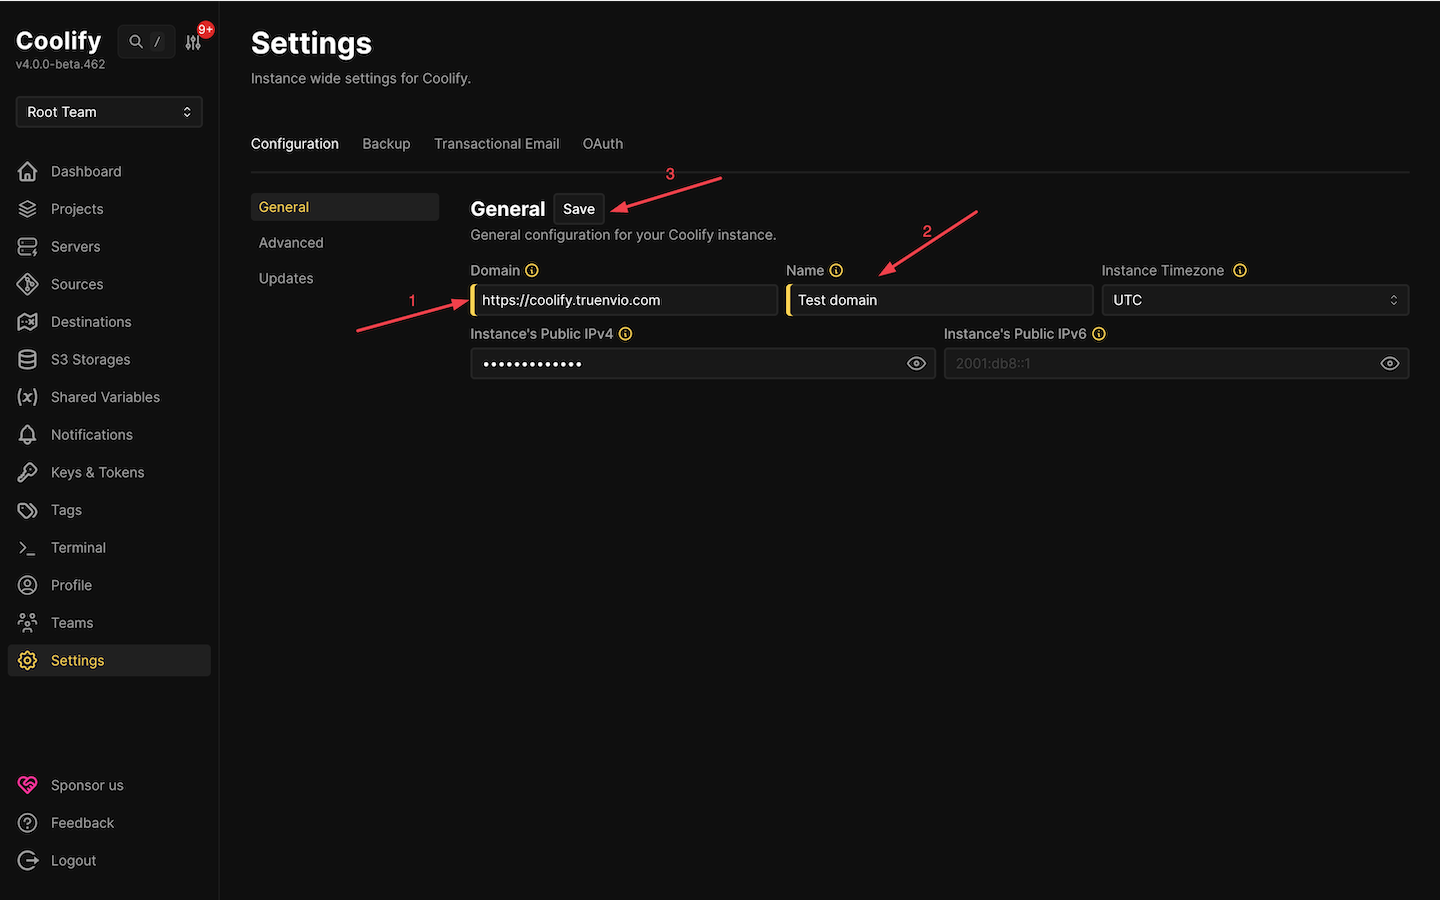
In Instance’s Public IPv4, enter the server's public IP. This should match the Primary IP from the Cherry Servers portal. Then, hit the Save button.
Enable HTTPS
After saving, reload the dashboard using your subdomain.
If DNS has propagated and ports 80 and 443 are open, the page should load over HTTPS.
If the browser still opens http:// or shows certificate errors, wait a few minutes and refresh. DNS and certificate issuance can take a short time.
#Step 8: Restrict firewall ports
The dashboard should be reachable through the domain over HTTPS. That means port 8000 is no longer needed for normal access.
Keep these ports open
Make sure these ports are still allowed:
22/tcpfor SSH80/tcpfor HTTP (used for redirects and SSL renewals)443/tcpfor HTTPS
Close the temporary Coolify ports
Remove the rules for the setup-only ports:
sudo ufw delete allow 8000/tcp
sudo ufw delete allow 6001/tcp
sudo ufw delete allow 6002/tcp
Confirm the rules
Check the firewall status again:
sudo ufw status
You should see a similar output:
OutputStatus: active

To Action From
-- ------ ----
OpenSSH ALLOW Anywhere
80/tcp ALLOW Anywhere
443/tcp ALLOW Anywhere
OpenSSH (v6) ALLOW Anywhere (v6)
80/tcp (v6) ALLOW Anywhere (v6)
443/tcp (v6) ALLOW Anywhere (v6)
Verify access
Open the dashboard using the domain: https://coolify.example.com.
The page should still load. If it does not, re-check the DNS record, and confirm that ports 80 and 443 are open in both UFW and the provider firewall.
#Step 9: Deploy a test application
A small test app is an easy way to confirm that deployments work and the domain routing is set up correctly.
Coolify supports multiple deployment methods, but a simple static site is the fastest sanity check.
When you create an application, Coolify auto-generates a .sslip.io URL by default. This is a wildcard DNS shortcut. It resolves hostnames that include an IP address back to that same IP. For example, http://app.5.199.174.174.sslip.io points to 5.199.174.174. This works immediately without adding DNS records.
A custom subdomain works too, for example, hello.example.com. We already set the wildcard record in Step 6 that handles routing automatically.
Use the default project (recommended)
Coolify already created “My first project” during the onboarding flow. Use it for this guide.
Create a new project only when separation matters, like one project per client, team, or environment. For a first test deployment, the default project is the quickest option.
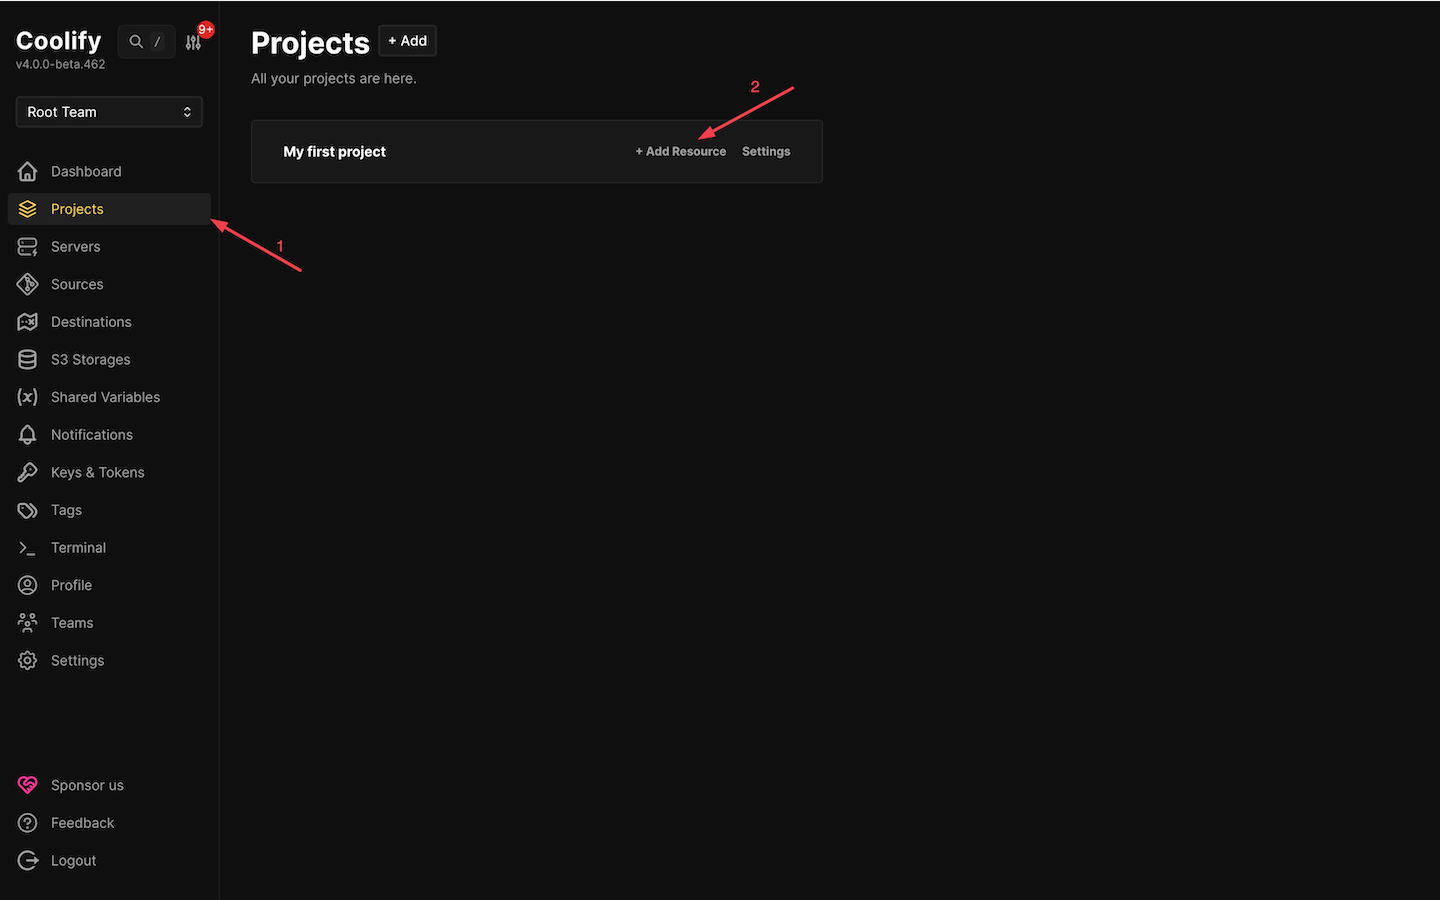
Add an application resource
From the left sidebar, open Projects, then click + Add Resource to create a new resource.
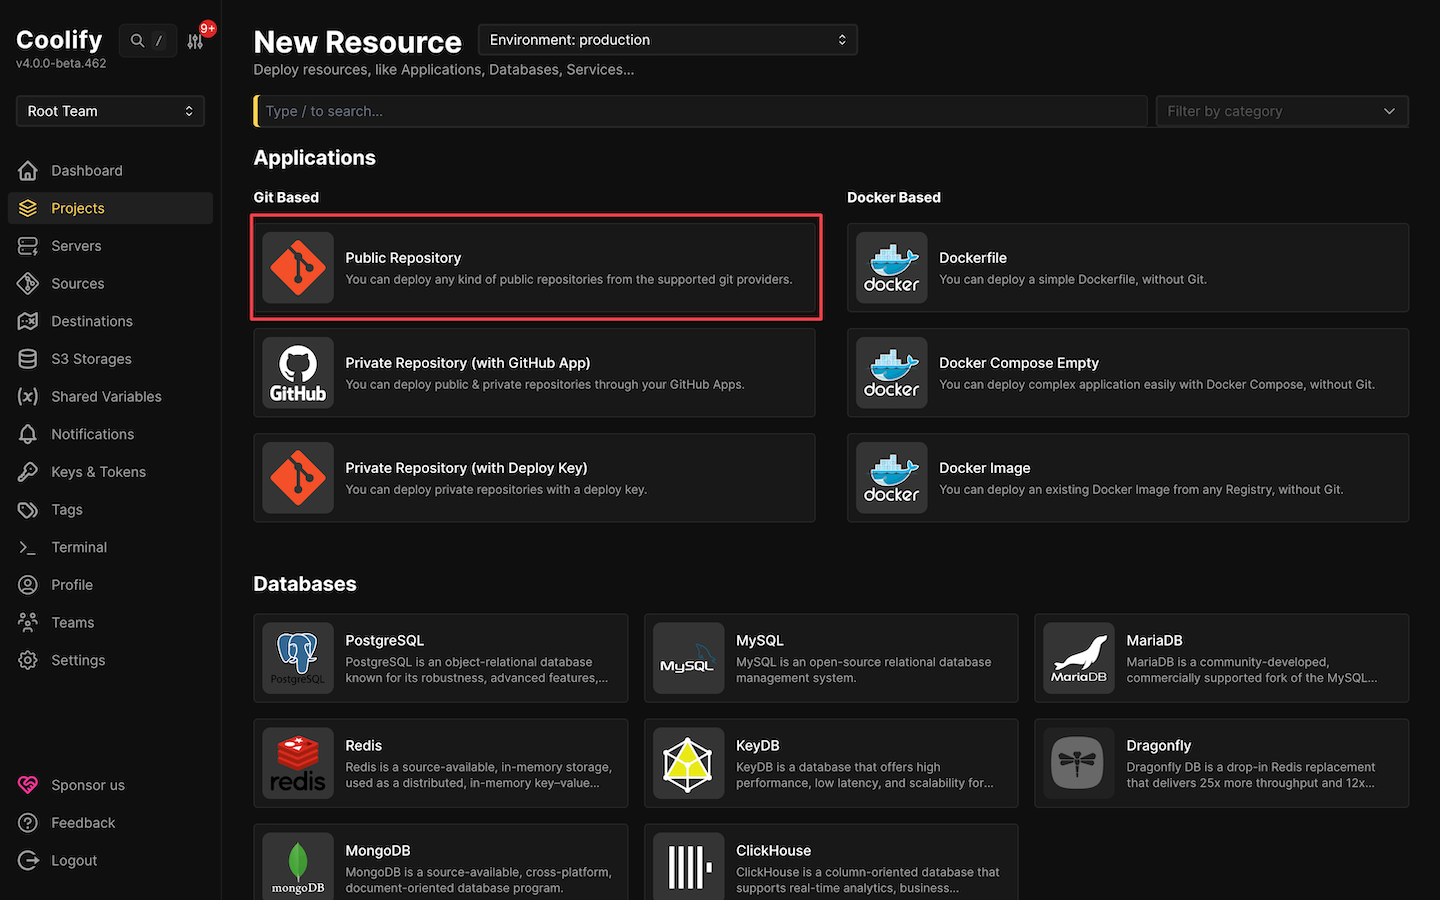
Next, select Public Repository
Then, paste this URL and click Check repository: https://github.com/coollabsio/coolify-examples
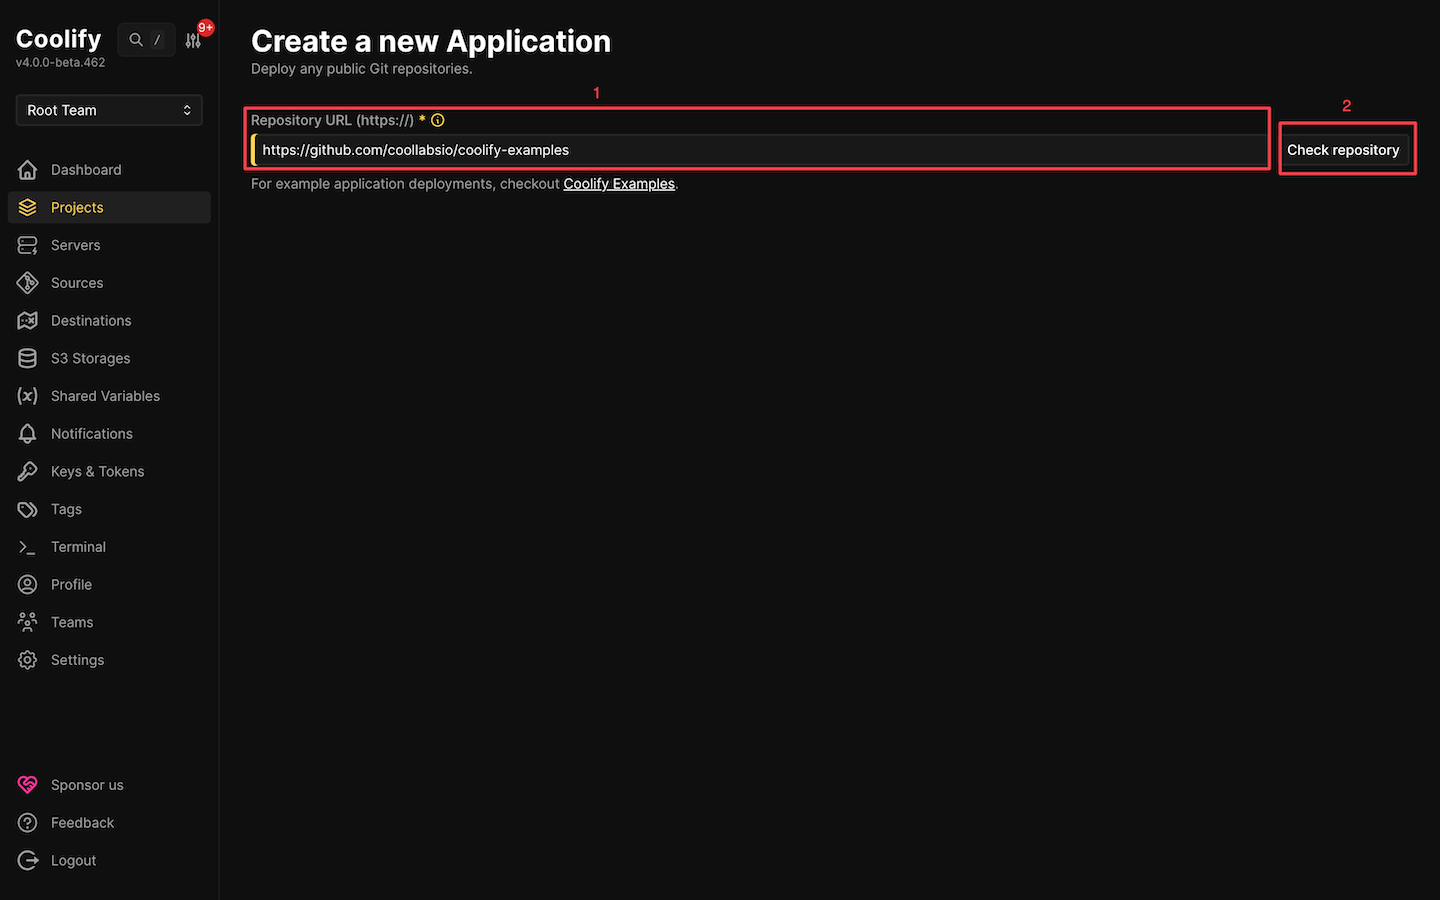
Coolify reads the repo and loads the fields like branch and build settings.
Pick the right folder and build type
The Coolify examples repo contains many projects. After the repository loads, set the base directory to the folder that contains the example you want to deploy.
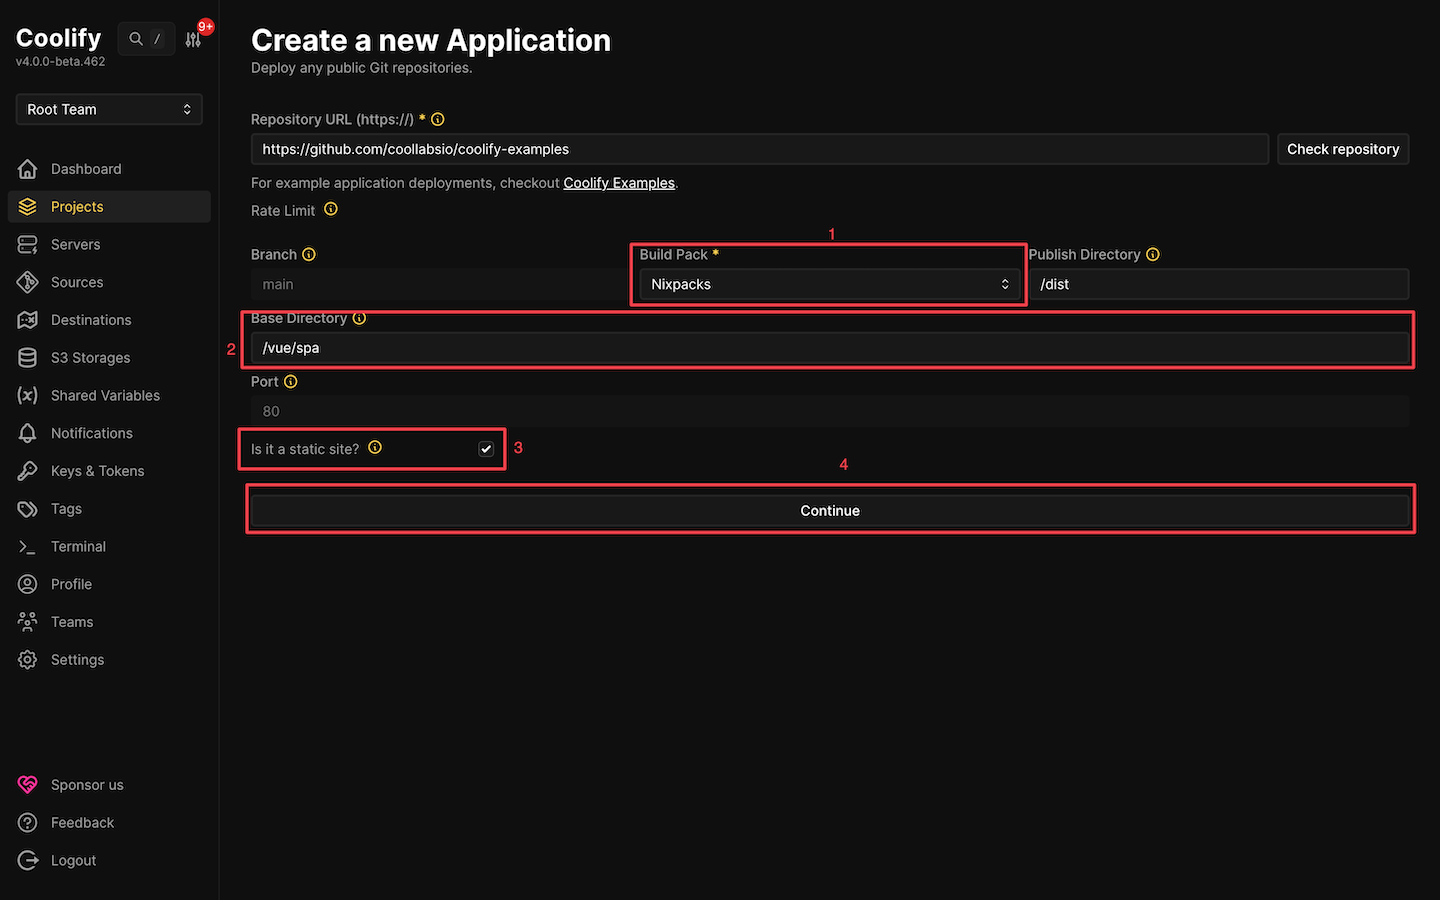
For this guide, we are deploying the Vue SPA example. Set Base Directory to /vue/spa.
Set Build Pack to Nixpacks. Enable Is it a static site? This will automatically set the Port to 80 and Publish Directory to /dist.
Next, click on Continue to proceed.
Confirm the static build settings and deploy
On the next page, go through and confirm that Base Directory, Publish Directory, and Is it a static site? options are configured correctly. Next, enable the Is it a SPA (Single Page Application)?. This ensures the app loads correctly when we refresh a routed page or open a deep link directly.
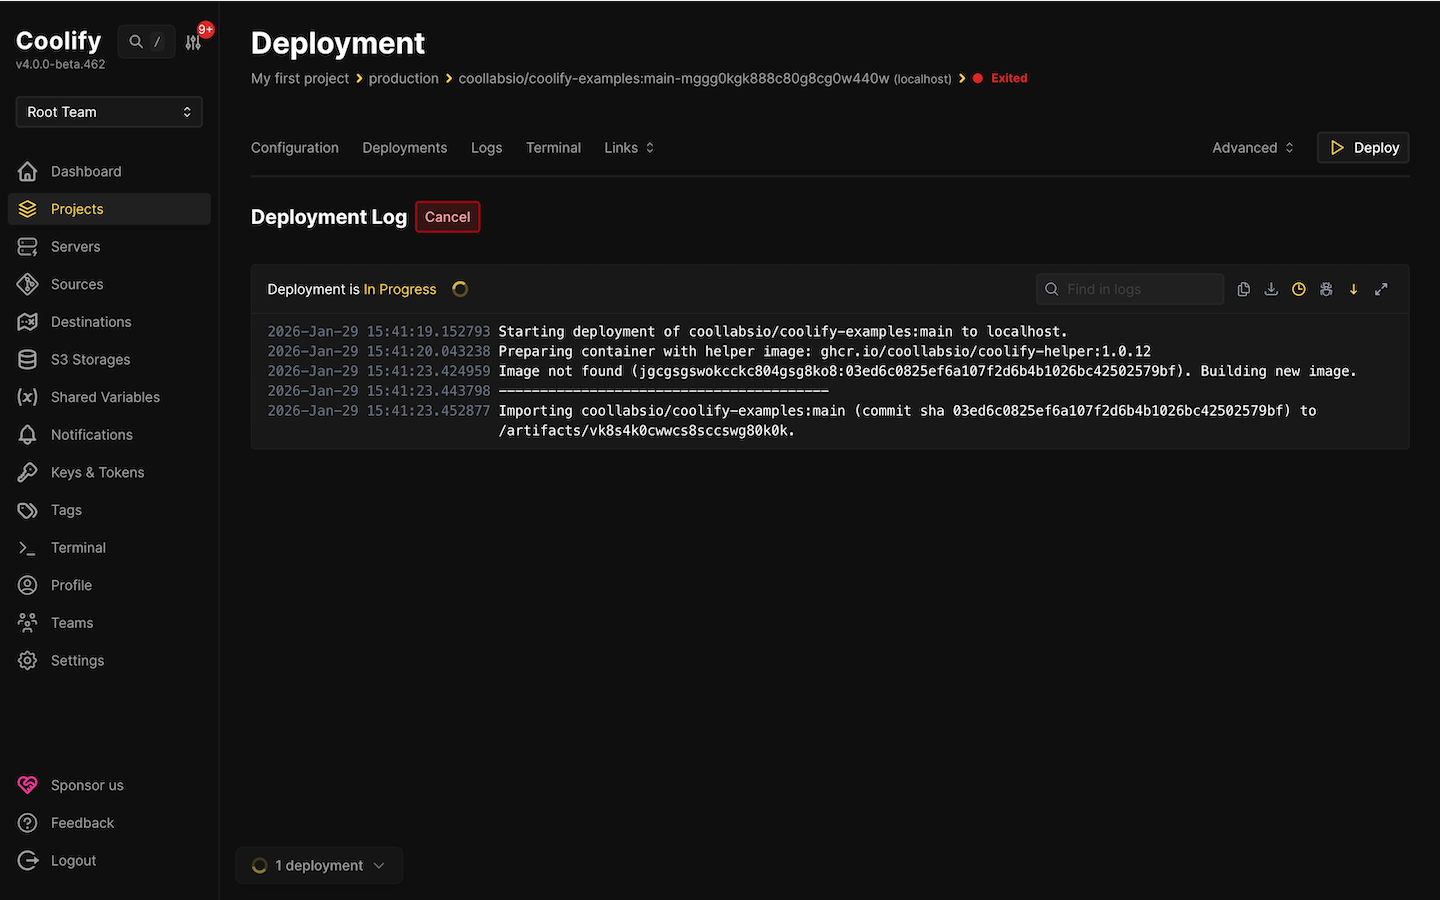
Click Save (if it is not auto-saved), then click Deploy.
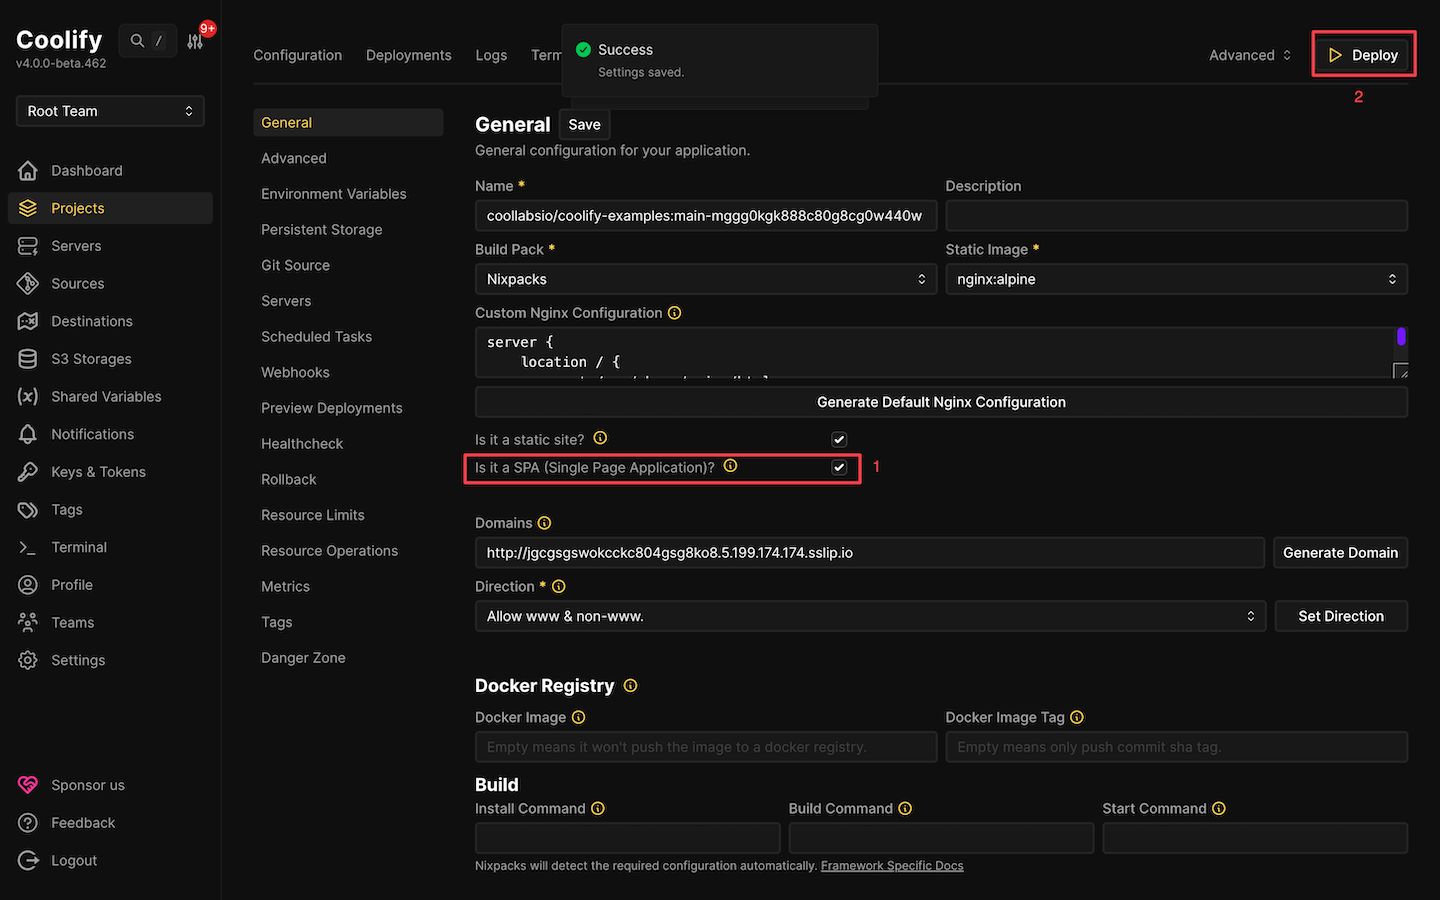
This will start the deployment process.
Once the deployment finishes, click the Links tab. You should see a URL, click on it to view your test app.
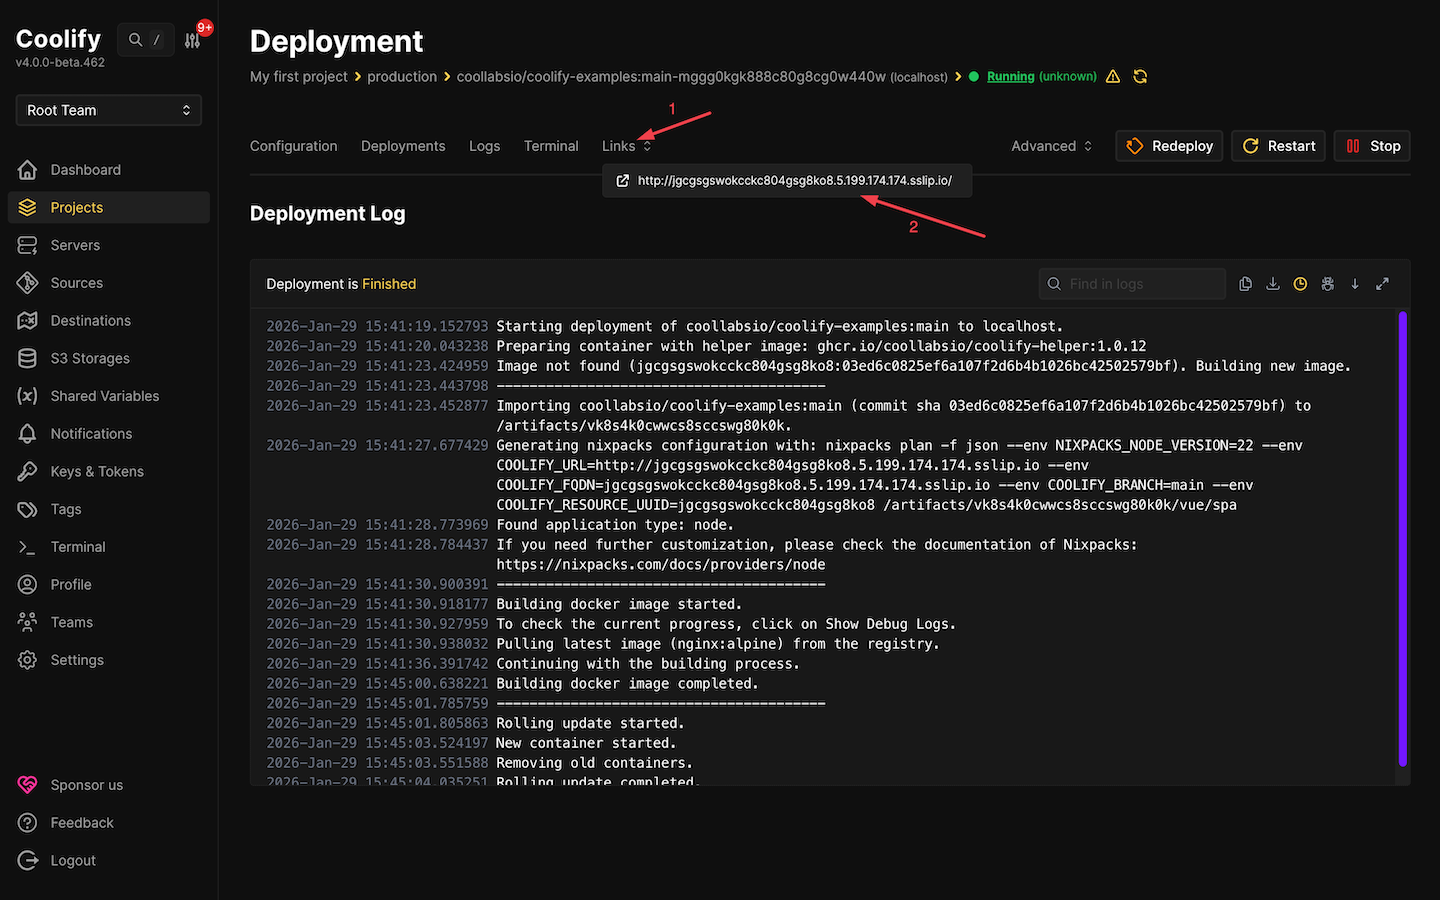
You should see a similar Vue project to this.

At this point, Coolify is up and running, and deployments work end-to-end. The test app loading from the Links URL confirms that the proxy and routing are set correctly.
From here, we can deploy real projects. Coolify can generate a temporary URL for testing, but production apps should use a real domain you own so HTTPS and routing behave predictably.
#FAQs
#Which ports must be open for Coolify to work?
Coolify exposes applications over ports 80 (HTTP) and 443 (HTTPS). The dashboard runs on port 8000 when you access it directly by IP.
If you do not use a custom domain yet, Coolify can also use ports 6001 and 6002 for real-time updates and the web terminal. Once a custom domain is configured, you can run Coolify using only 80 and 443, and close 8000, 6001, and 6002.
Port 22 is not for Coolify itself, but it is typically kept open for SSH administration.
#Does Coolify renew SSL certificates automatically?
Yes. Coolify uses Let's Encrypt certificates through its reverse proxy and handles renewals. For Let’s Encrypt HTTP validation and renewal to work, port 80 must remain reachable.
#What if builds fail or run slowly on a small server?
Builds can consume significant memory, especially for JavaScript frameworks that bundle dependencies. If the server runs out of RAM, the build process may be killed.
Swap can help stabilize builds on smaller servers. This example creates a 2 GB swap file:
sudo fallocate -l 2G /swapfile
sudo chmod 600 /swapfile
sudo mkswap /swapfile
sudo swapon /swapfile
echo '/swapfile none swap sw 0 0' | sudo tee -a /etc/fstab
sudo swapon --show
If builds still run slowly, the simplest fix is more RAM or moving builds to a separate build server.
#How do I update Coolify?
Coolify supports updating from the dashboard when a new version is available.
If you prefer updating over SSH, run the update from the directory that contains Coolify’s Docker Compose file (the exact path depends on how Coolify was installed):
docker compose pull
docker compose up -d --remove-orphans
#Conclusion
Coolify is now running on your server. The dashboard is accessible over HTTPS, DNS is configured, and the test deployment confirms that the build and routing pipeline works. From here, you can deploy real applications, connect private repositories, add databases, and manage everything through the web interface.
The setup in this guide is suitable for small projects and personal use. For production workloads, consider adding monitoring, backups, and a larger server. Coolify supports remote build servers if local resources become a bottleneck.
Check the official Coolify documentation for guides on connecting GitHub Apps, setting up notifications, and managing teams.
Coolify performs best on a stable and scalable server environment, and an Ubuntu VPS from Cherry Servers is well-suited for self-hosted deployments.


