How to Install MySQL on Ubuntu 24.04: Step-by-Step Tutorial


MySQL is a high-performance, relational database management system (RDBMS) that employs SQL syntax to store and manage data. It powers data-driven applications across various industries and has proven to be a reliable and robust database solution over the years.
This guide walks you step-by-step through MySQL installation on Ubuntu 24.04.
#Prerequisites
Here is a list of requirements before you get underway:
-
An instance of Ubuntu 24.04 LTS configured with SSH access
-
A sudo user configured on the VPS
-
Internet access
#How to Install MySQL on Ubuntu 24.04
We will demonstrate MySQL installation from the default APT repositories. In addition, you will learn how to harden its defenses according to best security practices and allow remote connections for carrying out routine tasks.
#Step 1: Update the local package index
At the top of the list is updating your local package index. To achieve this, run the command:
sudo apt update
Head to the next step to install the MySQL server.
#Step 2: Install MySQL server
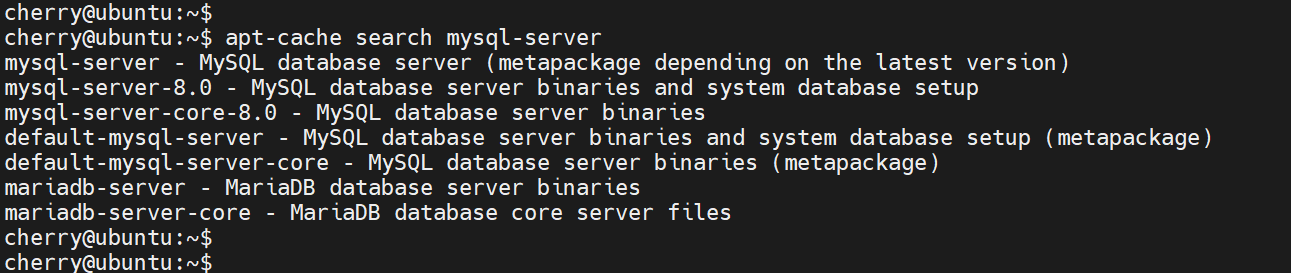
The Ubuntu repository provides the MySQL server package. To verify this, invoke the apt-cache command as follows.
apt-cache search mysql-server
The output confirms its availability.
To install the MySQL server package, run the command:
sudo apt install mysql-server -y
This installs the MySQL server package alongside additional libraries, dependencies, and configuration files.
#Step 3: Verify MySQL server installation
To verify the MySQL server's installation, issue the command shown.
mysql --version
Outputmysql Ver 8.0.41-0ubuntu0.24.04.1 for Linux on x86_64 ((Ubuntu))
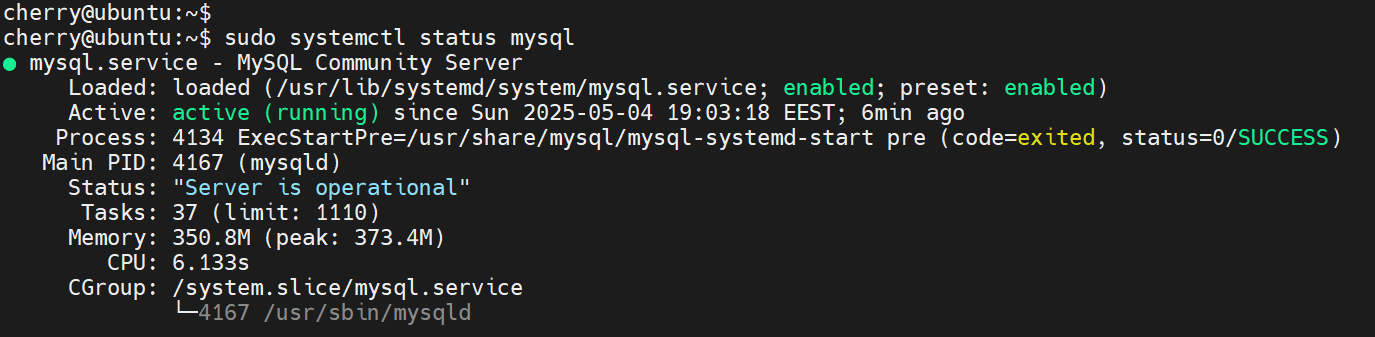
The installation spawns the MySQL systemd service, which starts automatically. You can confirm the service status as follows.
sudo systemctl status mysql
MySQL listens on port 3306 and is bound to the localhost IP 127.0.0.1. To confirm this, invoke the ss command.
sudo ss -antp | grep mysql
You should get output similar to what we have displayed.
OutputLISTEN 0      151               127.0.0.1:3306                 0.0.0.0:*     users:(("mysqld",pid=149925,fd=26))
LISTEN 0      70                127.0.0.1:33060                0.0.0.0:*     users:(("mysqld",pid=149925,fd=21))
#Step 4: Secure the MySQL Server
Data exposure is the last thing you want to deal with when going to production. It can translate to tremendous financial losses and reputational damage.
The default installation includes lax security settings. Thus, extra security hardening steps are necessary to guarantee a decent level of database security.
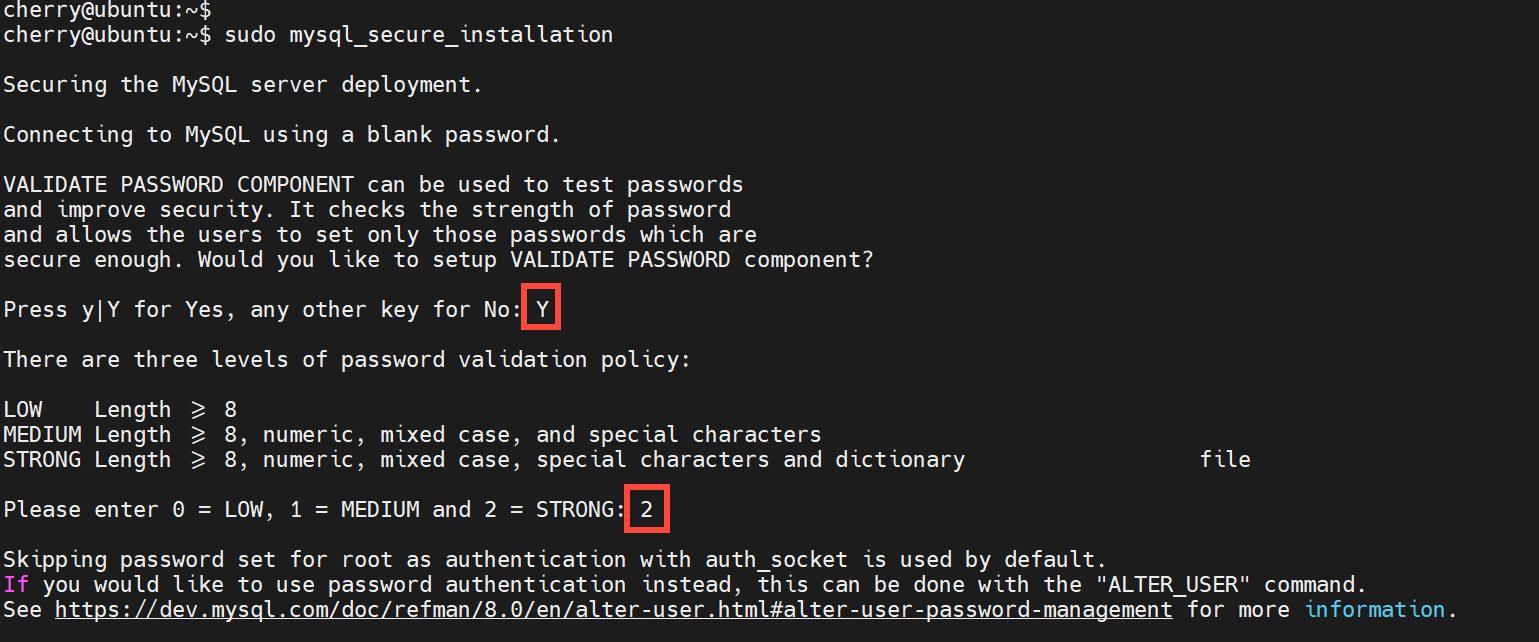
To secure the MySQL database server, run the command:
sudo mysql_secure_installation
Set up a password validation policy to enforce the strongest password complexity rules ideal to mitigate password-guessing attempts.
Follow the prompt and select the highest password policy level, in this case, type 2 and hit ENTER.
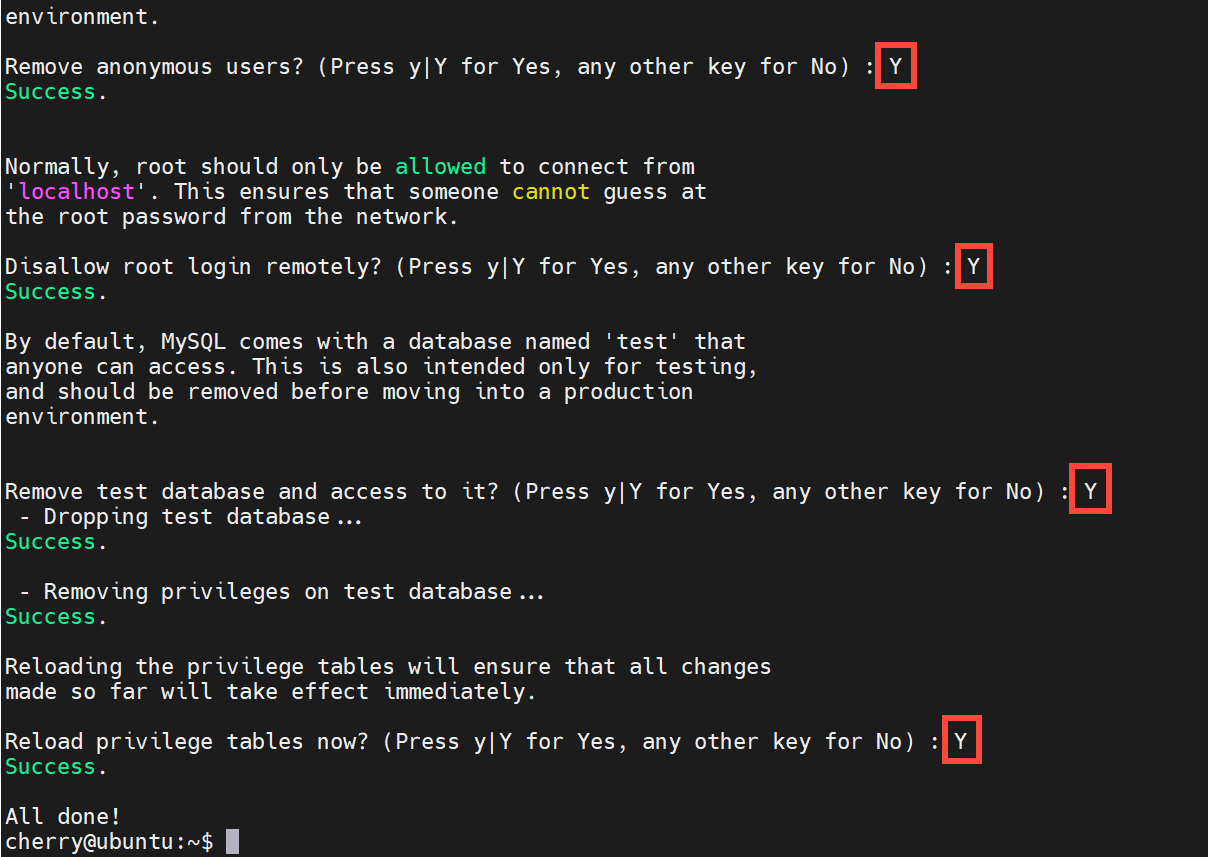
The remaining section will require you to configure MySQL to the recommended practice. Be sure to type Y for every prompt. This will do the following:
Removes anonymous users from the database. This is mostly used for testing purposes and should be removed as it grants access to anyone to the database server without a password.
Disallows remote root login. This blocks remote root access, effectively mitigating the risk of brute-force attacks.
Removes 'test' database, a globally accessible database.
Applies the changes made above by reloading privilege tables.
#Step 5: Configure authentication for MySQL root account
In the previous step, we took basic security-hardening measures to safeguard the server against potential breaches. However, the MySQL root account is not password-enabled by default, and anyone can log in as root. You want to avoid this situation at all costs.
To confirm this, you can try to log in as the MySQL root account user as shown:
sudo mysql -u root -p
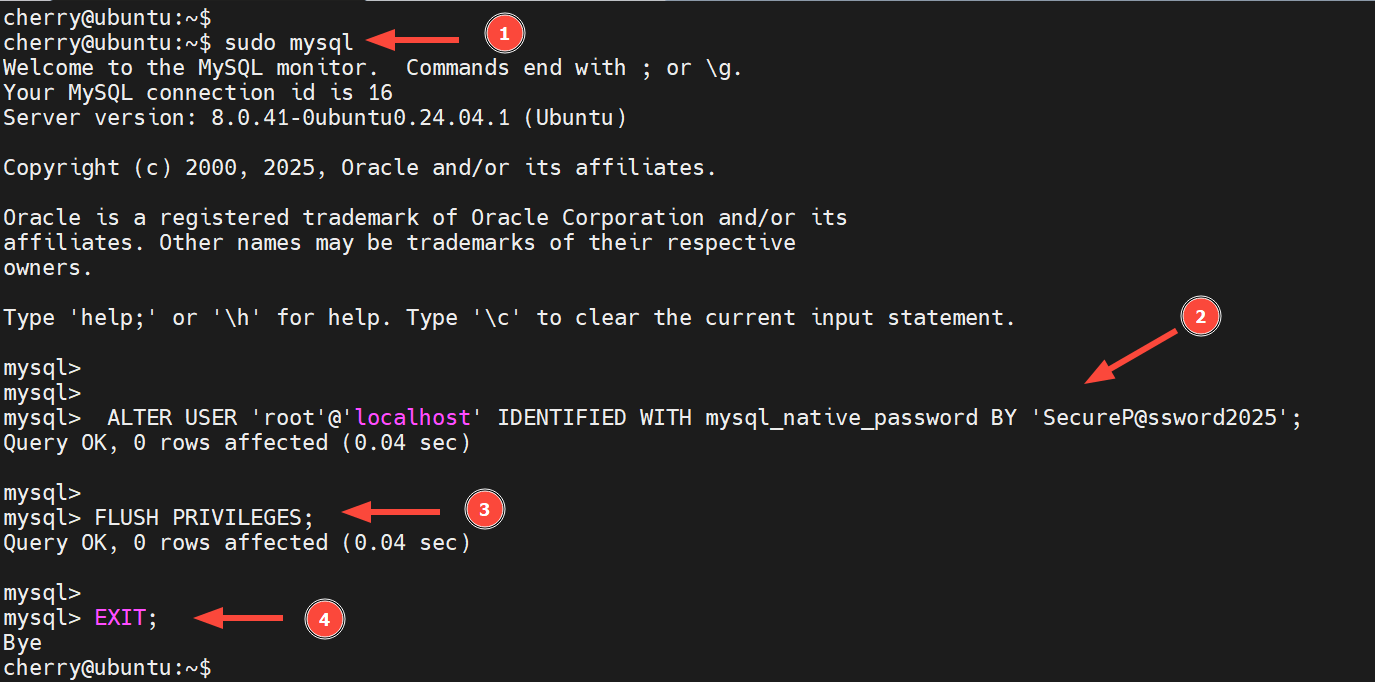
In this step, we will configure a password for the MySQL root account to access the MySQL shell.
sudo mysql
Next, set the root password using the following ALTER USER query.
ALTER USER 'root'@'localhost' IDENTIFIED WITH mysql_native_password BY 'SecurePassword';
Save the changes.
FLUSH PRIVILEGES;
Finally, exit the MySQL shell.
EXIT;
Subsequent login attempts will prompt you for a password while authenticating as root.
#Step 6: Create a MySQL Admin user
MySQL installation ships with a root user account with absolute privileges over every database, and by extension, tables, users, and so forth. Best practice recommends creating a new user and granting it specific privileges for controlled access and operations on the database server.
Create a new database user as follows.
CREATE USER 'cherry_user'@'localhost' IDENTIFIED WITH mysql_native_password BY 'YourSecurePassword';
Next, assign the desired privileges to the user. The query below assigns SELECT, UPDATE, INSERT, and RELOAD privileges to the user on all databases :
GRANT SELECT, UPDATE, INSERT, RELOAD ON *.* TO 'cherry_user'@'localhost' WITH GRANT OPTION;
Run the SHOW GRANTS query to display the privileges and roles granted to the MySQL user.
SHOW GRANTS FOR 'cherry'@'localhost';

To grant all privileges to the user, effectively making them the root user, run:
GRANT ALL PRIVILEGES ON *.* TO 'cherry_user'@'localhost' WITH GRANT OPTION;
Finally, flush privileges and exit the MySQL shell.
FLUSH PRIVILEGES;
EXIT;
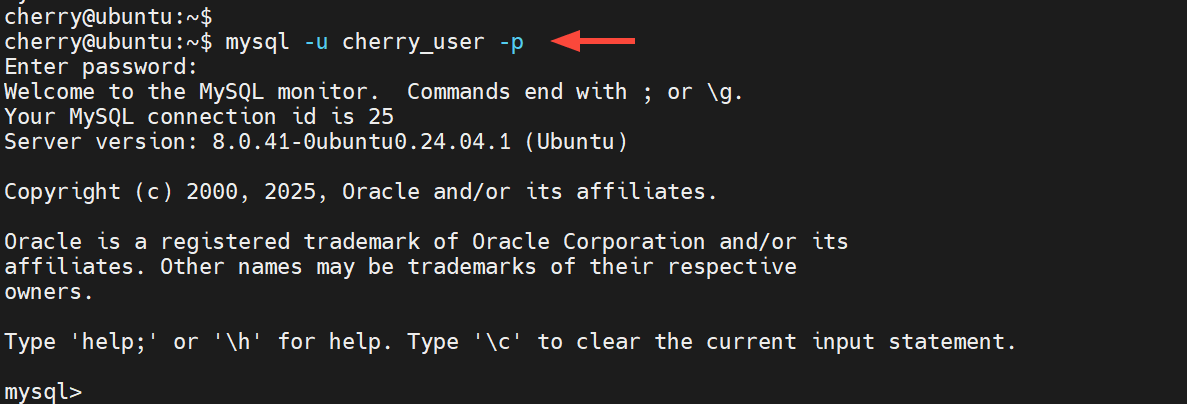
Once created, you can now log in as the administrative user with the password you used.
mysql -u cherry_user -p
#Step 7: Configure remote connections for MySQL
When administering your database server, some situations call for external database access, especially for routine tasks. Since MySQL is bound to the loopback address, you need to modify this and set it to accept remote connections.
Therefore, edit the default configuration file: mysqld.cnf file.
sudo nano /etc/mysql/mysql.conf.d/mysqld.cnf
Locate the bind-address directive and set it to 0.0.0.0.
bind-address: 0.0.0.0
Save the changes and exit.
Next, re-initialize the systemd configuration.
sudo systemctl daemon-reload
And restart the MySQL server.
sudo systemctl restart mysql
The next step is to modify the MySQL user's host from localhost to the external IP address of the remote server. So, log back to MySQL and run the following query. The remote_server_ip is the IP of the remote host that will access the MySQL server
RENAME USER 'cherry_user'@'localhost' TO 'cherry_user'@'remote_server_ip';
Next, flush privileges and exit.
FLUSH PRIVILEGES;
EXIT;
Allow database traffic on port 3306 if UFW is enabled.
sudo ufw allow 3306
You can grant a remote connection to a specific remote IP host as follows.
sudo ufw allow from remote_IP_address to any port 3306
And finally, be sure to reload the firewall for the rules to take effect.
sudo ufw reload
Head to the remote server and proceed to access the database as follows. Replace cherry_user and mysql_database_ip with your MySQL user and server IP address.
mysql -u cherry_user -h database_server_ip -p

#Step 8: Review installation with MySQL tuner
Assessing the state of your MySQL installation is generally recommended. One utility that can help achieve this is MySQL Tuner. This is a Perl script that quickly reviews your installation and offers suggestions on how to fine-tune your database server. It uncovers things such as:
Security issues, such as weak passwords or users without passwords Metrics for storage engines such as MyISAM, TokuDB, and Galera Performance metrics. It reports on slow queries, memory usage, table cache, etc. ThreadPool metrics Replication metrics
To install MySQL Tuner, run the command:
sudo apt install mysqltuner -y
Once installed, run the script:
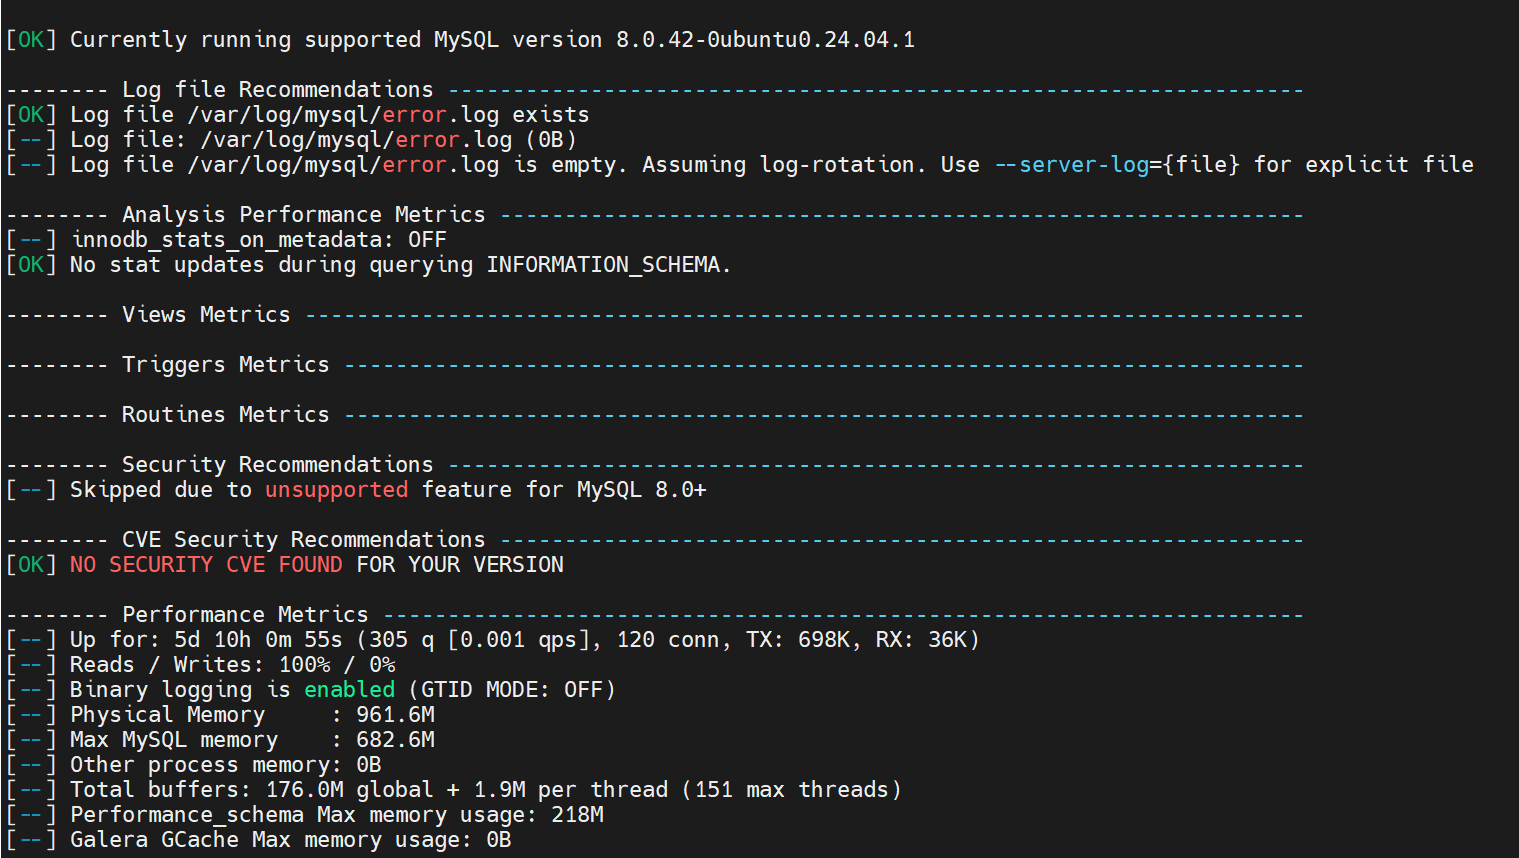
sudo mysqltuner
Here’s a snippet of the expected output
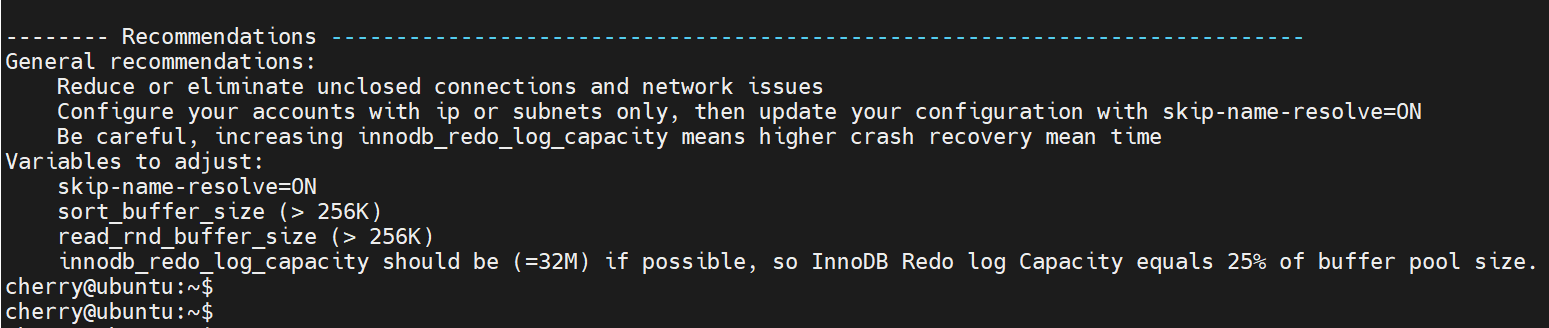
Here is an excerpt of some of the general recommendations made, including variables that need adjustment for optimal performance.
#Conclusion
We have successfully installed MySQL on Ubuntu 24.04 LTS. In addition, we performed basic database hardening using a simple script and configured the database server to allow connections from remote sources. We hope you can seamlessly set up and configure your MySQL database server.


