How to Install Ansible on Ubuntu 26.04




If you've ever found yourself connecting to servers every time via SSH to run the same set of commands, you're exactly who Ansible was built for. It is one of the most popular automation tools in DevOps, and its wide adoption is thanks to its agentless architecture.
Ansible just needs SSH (or WinRM for Windows hosts) and Python on the target. No agent is installed on remote hosts. This makes it easier to start managing a fresh host immediately. Other similar tools, such as Chef and Puppet, traditionally require an agent to be installed and registered with a server first, which can add to resource overhead.
Ansible is a push-based tool. The control node initiates connections and pushes configuration out on demand. Chef and Puppet are traditionally pull-based. Agents on each host periodically check in with a central server and pull down their configuration. The push-based model is preferred because it provides more immediate, on-demand control over managed hosts.
This guide covers the installation of Ansible on Ubuntu 26.04.
#Prerequisites
Here is what you need to get started.
-
Two nodes running Ubuntu 26.04 with SSH access: one node is the control node, and the other is the remote host. Cherry Servers offers scalable, high-performance cloud servers that you can easily provision, and follow this guide.
-
A sudo user configured on both nodes. For this guide, a sudo user called
ubuntuis already configured on the remote host -
SSH key-based authentication configured between the control node and the managed host. This is recommended over password authentication for speed and automation.
#Installing Ansible on Ubuntu 26.04
In this guide, we'll walk through installing Ansible on Ubuntu 26.04, covering installing from the default apt repository and from the official PPA. At the end, we will test the setup and write a playbook to automate software deployment and user creation on the remote host.
#Step 1: Install Ansible on the control node
There are two main ways to install Ansible: you can install it directly from the default APT repository or use the official Ansible PPA. Installing it from the default repository is as simple as running the commands:
sudo  apt update
sudo  apt install ansible -y
While straightforward, the version installed lags slightly behind the latest release. If you want the most current release, you need to install Ansible from the official PPA. To achieve this, be sure to add the PPA to the sources list directory.
First, update the package index and install the prerequisite packages:
sudo apt update
sudo apt install software-properties-common
Next, add the repository and install Ansible.
sudo add-apt-repository --yes --update ppa:ansible/ansible
sudo apt install ansible -y
Once installed, confirm the version by running:
ansible --version
The output shows we have installed Ansible 2.21.1.
Outputansible [core 2.21.1]
  config file = /etc/ansible/ansible.cfg
  configured module search path = ['/root/.ansible/plugins/modules', '/usr/share/ansible/plugins/modules']
  ansible python module location = /usr/lib/python3/dist-packages/ansible
  ansible collection location = /root/.ansible/collections:/usr/share/ansible/collections
  executable location = /usr/bin/ansible
  python version = 3.12.3 (main, Mar 23 2026, 19:04:32) [GCC 13.3.0] (/usr/bin/python3)
  jinja version = 3.1.2
  pyyaml version = 6.0.1 (with libyaml v0.2.5)
#Step 2: Creating an inventory
An inventory specifies the remote hosts being managed by Ansible. It's a plain-text file in INI format that Ansible checks each time before a task is executed.
By default, this file is /etc/ansible/hosts. You can preview it using the nano editor.
sudo nano /etc/ansible/hosts
The inventory file is also known as the hosts file. Target hosts are presented in the following ways:
1. Ungrouped hosts
The simplest inventory is just a list of IPs or hostnames, each on its own line.
192.168.50.10
192.168.50.20
mydomain1.com
mydomain2.com
2. Grouped hosts
A better approach is to organize your hosts under a group name. In the following inventory, database servers are grouped under the db-servers group.
[db-servers]
192.168.50.100
192.168.50.200
node1.example.com
node2.example.com
In addition to the default hosts file, you can create your own custom inventory in a directory of your choice.
For demonstration, create a directory called ansible-lab in your home directory and navigate into it.
mkdir -p ~/ansible-lab && cd ~/ansible-lab
Next, create a directory that will contain the inventory file and navigate into it.
mkdir inventory && cd inventory
Inside the directory, create an inventory file named inventory.ini.
touch inventory.ini
Your project structure should appear as follows.
ansible-lab/
├── inventory/
│   └── inventory.ini
Next, specify your managed hosts and host variables as shown.
[webservers]

web1 ansible_host=84.32.25.189

[webservers:vars]

ansible_user=ubuntu

ansible_python_interpreter=/usr/bin/python3
What each part means
-
[webservers]: This defines a group called webservers. Listing hosts under a group name is recommended when you want to target multiple hosts at once in a playbook or an ad hoc command. -
web 1is simply an alias (a friendly nickname) for this host. It's just a label that refers to the server in playbooks. -
ansible_host=84.32.25.189. This is a host variable that tells Ansible how to connect to the host. Here, Ansible will connect to the remote host 84.32.25.189 via SSH. -
[webservers:vars]: This section specifies the variables that the hosts will use in thewebserversgroup. Any variable set here automatically applies to all hosts in that group. This also implies the host with the IP84.32.25.189will inherit these settings without having to repeat them in a playbook. -
ansible_user=ubuntu: This is a connection variable that tells Ansible which username to use when connecting to a remote host over SSH. By default, Ansible tries to connect to a host using the local username of the account running Ansible on your control machine. In this case, Ansible will connect to the remote host as a user calledubuntu. This is a pre-existing user already on the remote host. -
ansible_python_interpreter=/usr/bin/python3: This tells Ansible which Python binary to use on the remote hosts when executing modules. This is commonly set explicitly because some systems have ambiguous Python paths, and Ansible needs to know exactly where Python 3 lives to run its modules correctly.
Save the changes and exit the file. You can head back to the home directory at this point.
cd ~
Run a quick check to verify the host information in the inventory. Notice we’ve used the -i option to target our custom inventory file.
ansible-inventory -i ~/ansible-lab/inventory/inventory.ini --list
Output{
    "_meta": {
        "hostvars": {
            "web1": {
                "ansible_host": "84.32.25.189",
                "ansible_python_interpreter": "/usr/bin/python3.12",
                "ansible_user": "ubuntu"
            }
        },
        "profile": "inventory_legacy"
    },
    "all": {
        "children": [
            "ungrouped",
            "servers"
        ]
    },
    "servers": {
        "hosts": [
            "web1"
        ]
    }
}
For a much cleaner output, specify a host’s alias as shown. In this example, the host alias is web1 as specified under the host group name.
ansible-inventory -i ~/ansible-lab/inventory/inventory.ini --host web1
This prints out all the variables in the inventory.
Output{
    "ansible_host": "84.32.25.189",
    "ansible_python_interpreter": "/usr/bin/python3.12",
    "ansible_user": "ubuntu"
}
#Step 3: Test connectivity to the managed host(s)
With the inventory file in place, let's perform a test to check if the control node can connect to and manage the host. Ansible provides a built-in ping module that checks if Ansible can reach the host and run Python (not to be confused with the ICMP ping).
To do this, run the command:
ansible -i ~/ansible-lab/inventory/inventory.ini -m ping webservers
Instead of specifying webservers, you can pass the all directive, which targets all the host groups in the inventory file.
ansible -i ~/ansible-lab/inventory/inventory.ini -m ping all
A successful response looks like the one below.
web1 | SUCCESS => {
    "changed": false,
    "ping": "pong"
}
The output confirms that the control node is ready to run automation tasks on the remote host(s).
#Step 4: Writing your first playbook
To test our Ansible setup, we will run a playbook that creates a new regular user called cherry and also installs the Apache web server on the remote host.
Inside the ansible-lab folder, create a directory called playbooks to store the playbook files and navigate into it.
mkdir playbooks && cd playbooks
Create a playbook file named install_apache_create_user.yaml.
`
touch install_apache_create_user.yaml
Your project should now look like this.
ansible-lab/
├── inventory/
 |   └── inventory.ini
└── playbooks/
      └── install_apache_create_user.yaml
Use the nano editor to open the file.
nano install_apache_create_user.yaml
Paste the following YAML code.
---
- name: Set up user and Apache web server
  hosts: webservers


  tasks:
    - name: Create regular user 'cherry'
      ansible.builtin.user:
        name: cherry
        state: present
        shell: /bin/bash
        create_home: true

    - name: Install Apache on Debian/Ubuntu
      ansible.builtin.package:
        name: apache2
        state: present

    - name: Ensure Apache service is running and enabled on boot
      ansible.builtin.service:
        name: apache2
        state: started
        enabled: true
Save the file and exit. Navigate back to the home folder.
cd ~
Before running the playbook, log into the remote node and configure passwordless sudo for the ubuntu user on the remote host for a seamless workflow (edit with visudo):
ubuntu ALL=(ALL) NOPASSWD: ALL
Next, head back to the control node and run the playbook as shown.
ansible-playbook ~/ansible-lab/playbooks/install_apache_create_user.yaml -i ~/ansible-lab/inventory/inventory.ini
You should get the following output.
BECOME password:

PLAY [Set up user and Apache web server] ******************************************************************

TASK [Gathering Facts] ************************************************************************************
ok: [web1]

TASK [Create regular user 'cherry'] ************************************************************************
changed: [web1]

TASK [Install Apache on Debian/Ubuntu] *********************************************************************
changed: [web1]

TASK [Ensure Apache service is running and enabled on boot] ************************************************
ok: [web1]

PLAY RECAP **************************************************************************************************
web1         : ok=4    changed=2    unreachable=0    failed=0    skipped=0    rescued=0    ignored=0
The ok=4 changed=2 directive confirms that four tasks have been executed and two changes have been made. The tasks are:
Gathering Facts
-
Creating a regular user
-
Installing the Apache web server
-
Ensure the Apache web service is running and is enabled on boot.
To avoid specifying the inventory file using the -i flag all the time, create an environment variable for your inventory. This tells Ansible the location of the file.
export ANSIBLE_INVENTORY=~/ansible-lab/inventory/inventory.ini
Add it to your ~/.bashrc file on the control node to make it persistent across sessions.
echo 'export ANSIBLE_INVENTORY=~/ansible-lab/inventory/inventory.ini' >> ~/.bashrc
source ~/.bashrc
For subsequent playbook execution, all you need to do is specify the playbook file.
ansible-playbook ~/ansible-lab/playbooks/install_apache_create_user.yaml
To confirm Apache was installed successfully and is running, browse the remote host's IP address in a web browser: http://server-ip. You should see Apache’s default welcome page.
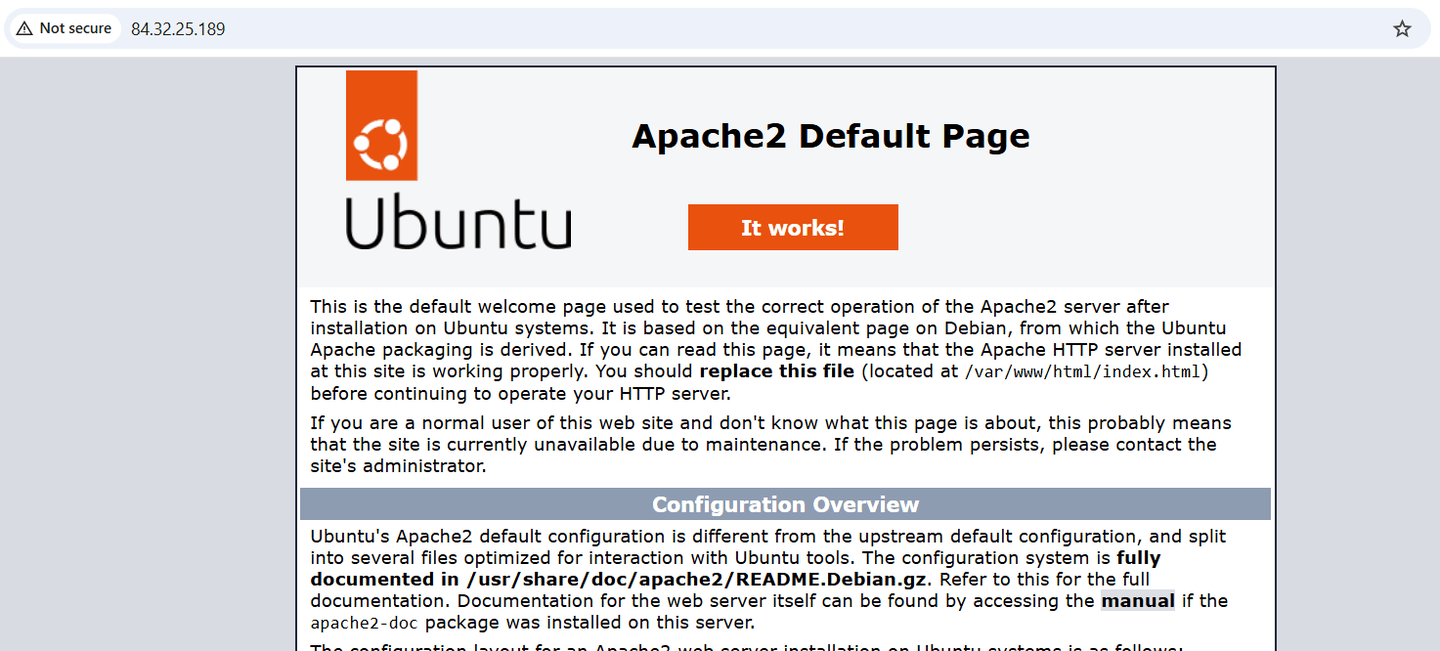
Alternatively, you can use the following Ansible command:
ansible webservers -a "systemctl status apache2"
Here’s some sample output
Outputweb1 | CHANGED | rc=0 >>
● apache2.service - The Apache HTTP Server
     Loaded: loaded (/usr/lib/systemd/system/apache2.service; enabled; preset: enabled)
     Active: active (running) since Fri 2026-07-17 00:12:53 EEST; 3 days ago
 Invocation: 65335ec3198f487787965c6230db7f6f
       Docs: https://httpd.apache.org/docs/2.4/
    Process: 45653 ExecReload=/usr/sbin/apachectl graceful (code=exited, status=0/SUCCESS)
   Main PID: 6470 (apache2)
     Status: "Total requests
To confirm the creation of a new user called cherry, run:
ansible webservers -a "id cherry"
You will get similar output to what we have:
Outputweb1 | CHANGED | rc=0 >>
uid=1001(cherry) gid=1001(cherry) groups=1001(cherry)
The output confirms the user cherry was successfully created.
#Next steps
So far, you’ve successfully configured an Ansible setup with a control node and one managed node. Here are the next steps you can take moving forward:
-
Expand your setup by adding more remote hosts.
-
Use Ansible Vault to encrypt sensitive data like passwords and API keys within your playbooks.
-
Explore Ansible ad hoc (one-off commands), which let you run commands on remote hosts instead of always running playbooks.
-
Incorporate Ansible roles to organize playbooks into reusable, self-contained units instead of specifying everything in one big YAML file. This makes for cleaner and neater playbooks. You can pull community roles using the
ansible-galaxy install <role>command.
#Conclusion
From here, you're ready to start automating repetitive tasks, from simple ad hoc commands to full configuration management with playbooks and roles. Instead of SSHing into each machine and running commands by hand, you define your desired state in a YAML file on the control node and let Ansible handle the rest, consistently and repeatably across any number of hosts.
Take some time to experiment with basic playbooks and ad hoc commands before moving on to more advanced features. Read more on Ansible and Ansible concepts.