How to Install Docker on Ubuntu 22.04 | Step-by-Step


The immensely popular Docker is widely adopted among developers and organizations thanks to its ability to streamline development/operations workflow. In this step-by-step tutorial, you will learn how to install Docker on Ubuntu 22.04, as well as how to manage Docker containers and images.
Not using Ubuntu 22.04? Check our guide on How to Install Docker on Ubuntu 24.04.
#What is Docker?
Docker is the world's most popular and widely used containerization platform that lets developers seamlessly build, share, deploy, and orchestrate applications anywhere - regardless of the computing environment.
#What is a Docker container?
In Docker, applications are deployed inside containers. Docker containers are isolated environments that contain everything an application needs - source code, libraries, dependencies, frameworks, and configuration files. This ensures that applications run reliably and consistently regardless of the environment.
#What is a Docker image?
A Docker image acts as a read-only template that defines how containers should be built and what they contain. The Docker run command pulls the specified image, creating a read-write container layer on top of the image. Several containers can be launched from the same image, each getting its changes but sharing the underlying image files/layers.
#Benefits of Docker
Docker improves portability, consistency, and efficiency, reducing friction for developers.
Here are some key benefits of Docker:
- Portability: Docker containers can run on any machine that supports Docker;
- Consistency: Allow reliable transfers from development to testing to production;
- Loose coupling: encapsulates applications and their dependencies into modular containers;
- Lightweight: Docker images share resources and use less storage than virtual machines since they share the kernel;
- Efficiency: Resource usage is optimized since containers share the host operating system;
- Automation: Docker images and Dockerfile provides an automated mechanism for building/running an application consistently every time;
- Scalability: Can be scaled horizontally by launching new containers on different machines without affecting others;
- Fast deployment: New containers can be cloned and deployed quickly from updated Docker images, an advantage over traditional virtualization.
#Prerequisites
To follow along and learn how to install Docker on Ubuntu 22.04, ensure you have the following requirements in place:
- An instance of Ubuntu 22.04 with SSH access;
- A sudo user configured on the server instance.
Without further ado, let’s dive in.
#How to install Docker on Ubuntu 22.04
Installing Docker is relatively straightforward and takes a few commands to be ready to use on Ubuntu, so let's dive right in. Follow the steps below to install Docker on Ubuntu 22.04 system.
#Step 1. Update the system and install dependencies
To get off the ground, log in to your server instance via SSH and update the local package index as shown. This is particularly useful if you have just provisioned a fresh instance of Ubuntu 22.04.
sudo apt update
Once updated, install the dependency packages required to install Docker.
sudo apt install apt-transport-https ca-certificates curl software-properties-common
With the dependencies installed, proceed to the next step.
#Step 2. Install Docker
The official Ubuntu repository already provides the Docker installation package. However, this may not always be up to date. To install the latest version of Docker, we recommend installing it from the official Docker repository, which always provides the latest version. In this step, we are going to use the official Docker repository.
First, use the curl command to add the GPG signing key for the Docker repository.
curl -fsSL https://download.docker.com/linux/ubuntu/gpg | sudo gpg --dearmor -o /usr/share/keyrings/docker-archive-keyring.gpg
Next, add the Docker APT repository to your system in the sources.list.d directory.
echo "deb [arch=$(dpkg --print-architecture) signed-by=/usr/share/keyrings/docker-archive-keyring.gpg] https://download.docker.com/linux/ubuntu $(lsb_release -cs) stable" | sudo tee /etc/apt/sources.list.d/docker.list > /dev/null
For the newly added Docker repository to be recognized by the system, update the local package index once more.
sudo apt update
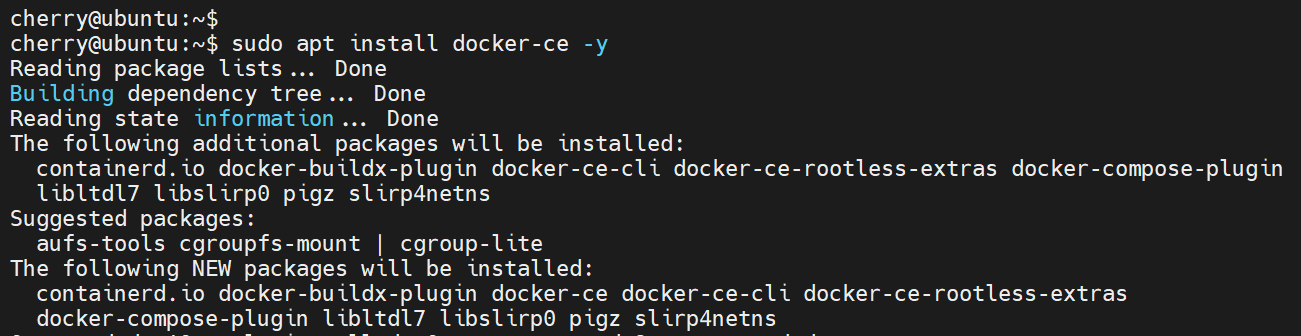
Now, install Docker Community Edition (free to download and use) as follows. The -y option allows for non-interactive installation.
sudo apt install docker-ce -y
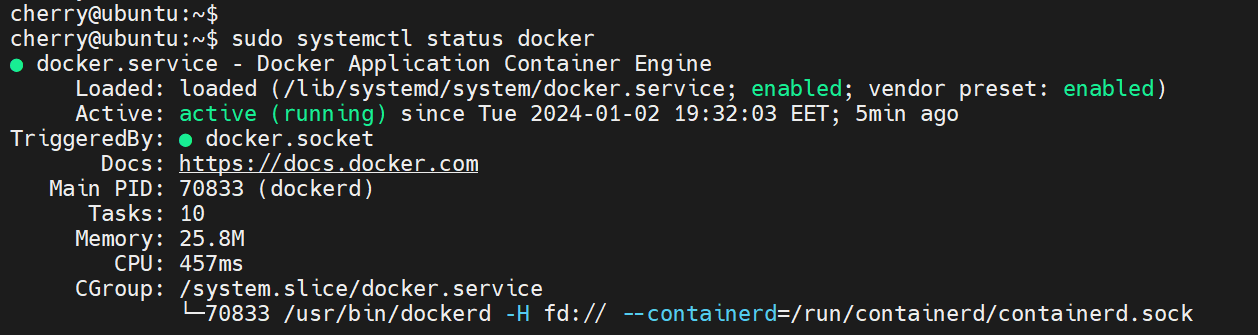
Once installed, the Docker daemon or service should be running. To confirm this, run the command:
sudo systemctl status docker
You should see the following output if the installation went along as expected. It confirms Docker is up and running.
#Step 3. Add user to Docker group
No, let’s see how to add a logged-in user to Docker group. By default, Docker is set to be run by the root user or user already in the docker group created upon installation. This implies that only the root user can successfully run docker commands.
If you attempt to run a Docker command such as docker run you will get a 'permissions error' message, as shown.

For convenience, adding the currently logged-in user to the docker group is recommended. This allows them to run docker commands without having to run as a sudo user. In our case, we will add the cherry user to the docker group. This is the user we are currently logged in as.
To do so, we will run the following command:
sudo usermod -aG docker ${USER}
Now, we will run the groups commands to counter-check that the user has been added to the docker group.
groups cherry
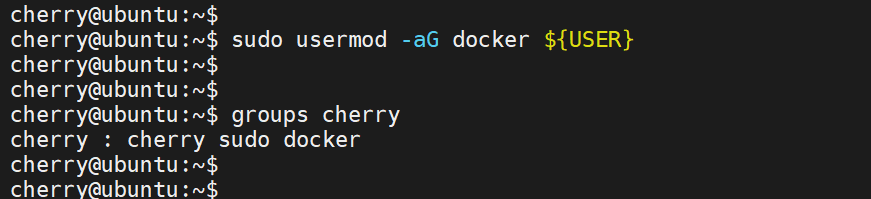
From the output, you can see that docker is part of the group to which the user belongs. To effect the change, simply close and start a new terminal session. Alternatively, you can run the following command:
su - ${USER}
From here, you can seamlessly run Docker commands without running into an error or invoking sudo to acquire administrative privileges.
#Step 4. How to run Docker commands
Docker commands follow the syntax provided:
docker [option] [command]
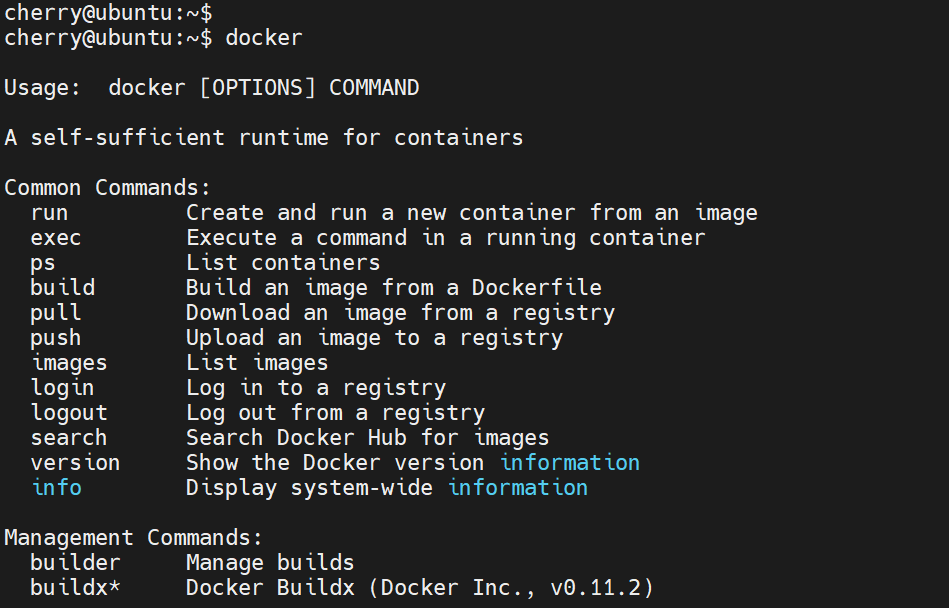
To glance at all the Docker commands at your disposal, run the docker command without any command options or arguments.
docker
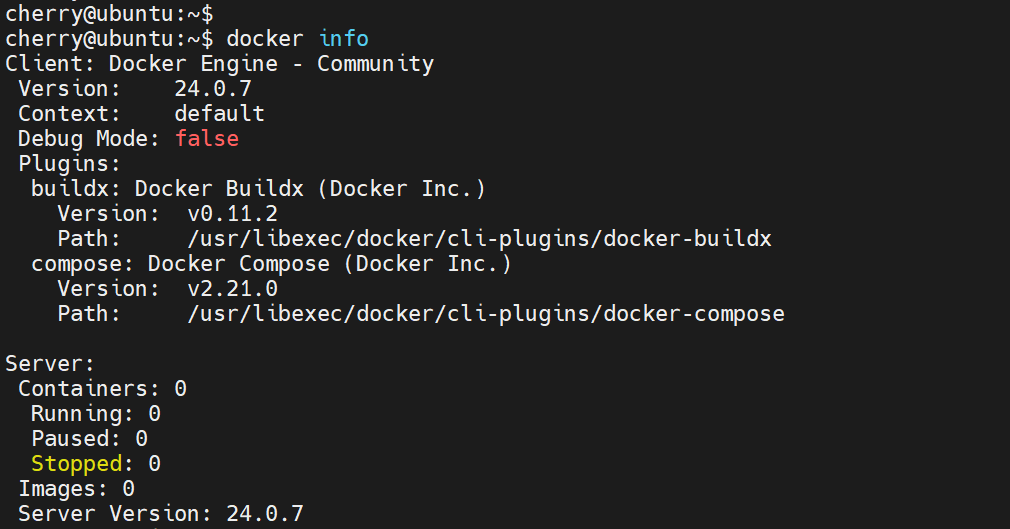
In addition, you can get system-wide information about Docker, including the Docker version, running containers, and images as shown.
docker info
#Step 5. Test Docker installation
Next, let’s check if Docker is installed. Docker is configured to download images from the Docker Hub registry by default. Docker Hub is the largest library for container images developed by software vendors and the open-source community at large.
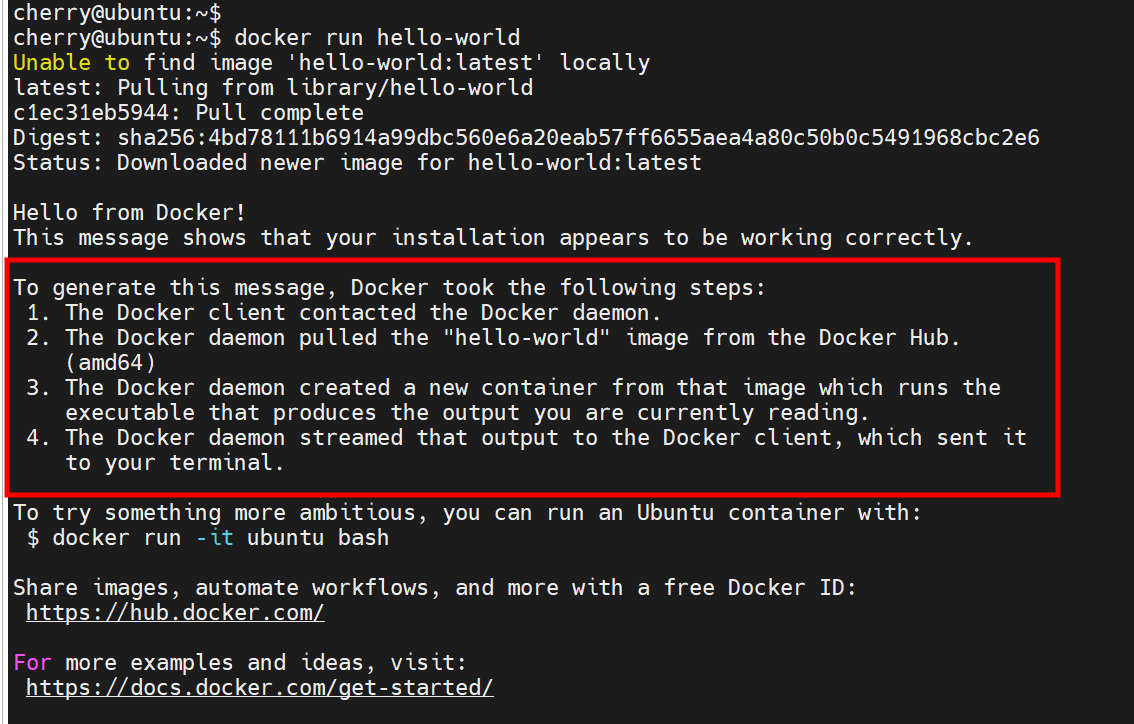
Before proceeding further, you need to confirm that you can access and pull images from the Docker Hub registry. To accomplish this, we will simulate how to run a simple container called hello-world as follows.
docker run hello-world
The following output is displayed on the terminal after running the container.
Behind the scenes, the Docker client looks for the hello-world image locally and fails to find it. It then contacts the Docker daemon, which pulls the image from the Docker Hub. Docker daemon then creates a container from the Docker image and streams the output to your terminal. Once the output is displayed, the container exits and stops running.
The output starts from the Hello from Docker line and goes right to the end of the shell prompt.
Also read: How to uninstall Docker
#Step 6. Working with Docker images
We have seen how to run a Docker container from a Docker image in the previous step. Now, let's briefly explore what Docker container vs image are.
A Docker container is a standalone isolated environment that packages an application alongside its code, libraries, and dependencies, built on top of an image.
A Docker image is a file containing instructions to build a container.
To search an image from the Docker hub, use the docker search command followed by the image name. For example, to search for the httpd image, run the command:
docker search httpd
Docker will run through the Docker registry and populate a list of images matching the image you are searching for. The output will be similar to what you can see below.

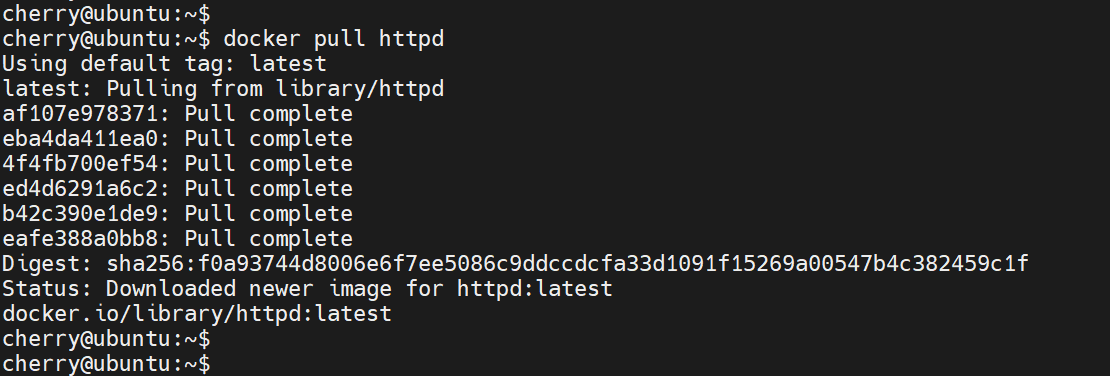
In the Official column, the Ok entry indicates that the image has been developed by the official company behind the project, in this case, Apache HTTP Server. To download the image, run the docker pull command.
docker pull httpd
To list the images downloaded on your system, run the docker images command.
docker images
The output provides information as shown.
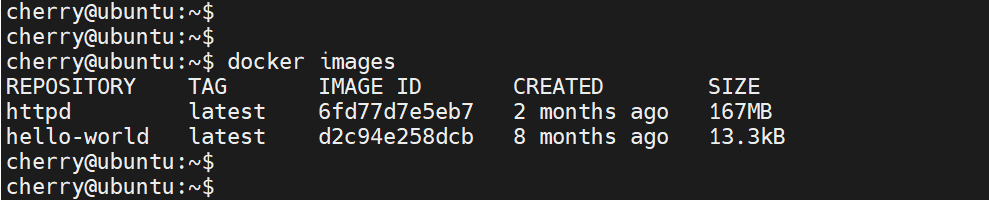
From the output, you can see that we have two images: the httpd and hello-world images, the latter of which we used to create our first container.
Let us now look at containers.
#Step 7. Working with Docker containers
You can create a container from a locally downloaded image using the docker run command followed by the image name. For example, to create a container from the httpd image, run the command:
docker run -d -p 8080:80 httpd
The -d option runs the container in the background while the -p option maps port 80 on the container to port 8080 on your local system. On the terminal, you will see the container ID presented as an alphanumeric digit.

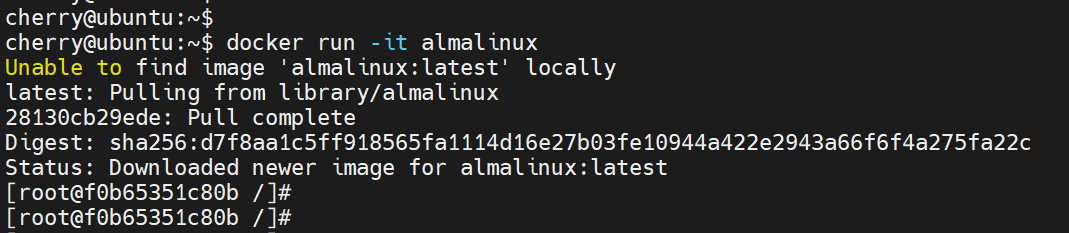
When dealing with OS containers, you can gain an interactive shell session using a combination of the -i and -t options. As an example, we will run the Almalinux container straight from Docker Hub.
docker run -it almalinux
Once again, the Docker daemon will search for the Almalinux image locally, and since it cannot find it, it will pull the image from Docker Hub, create a container, and provide an interactive shell session.
Your command prompt will immediately change, indicating that you are now working inside the container as the root user.
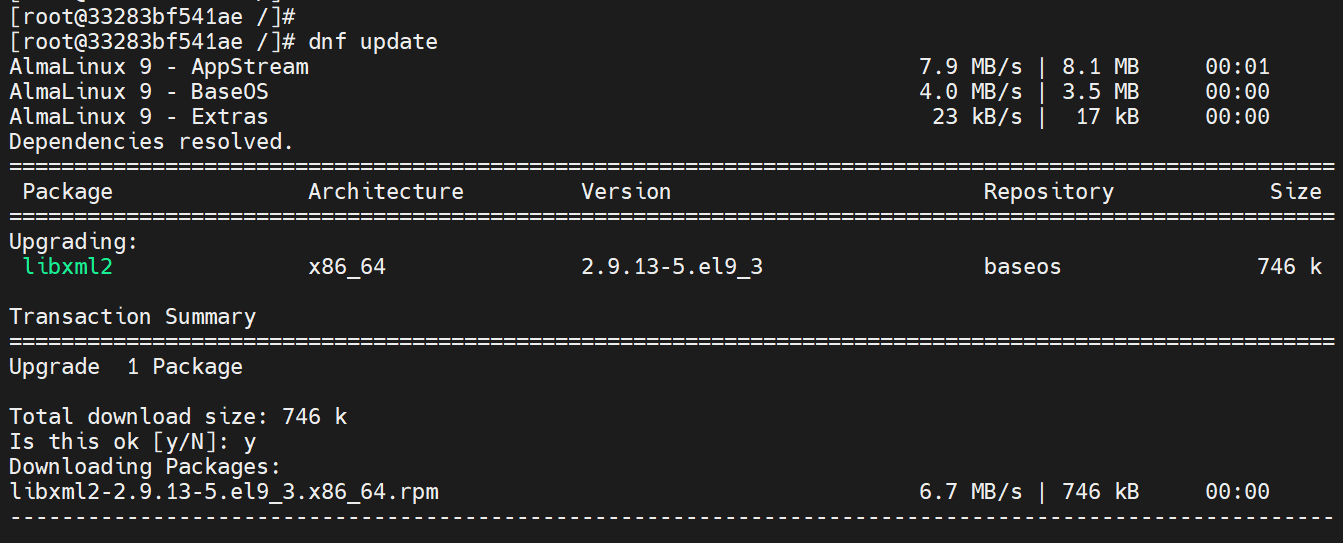
You can now run any command within the container. For example, to upgrade the system, run:
dnf update
Press y on the keyboard to proceed with the installation.
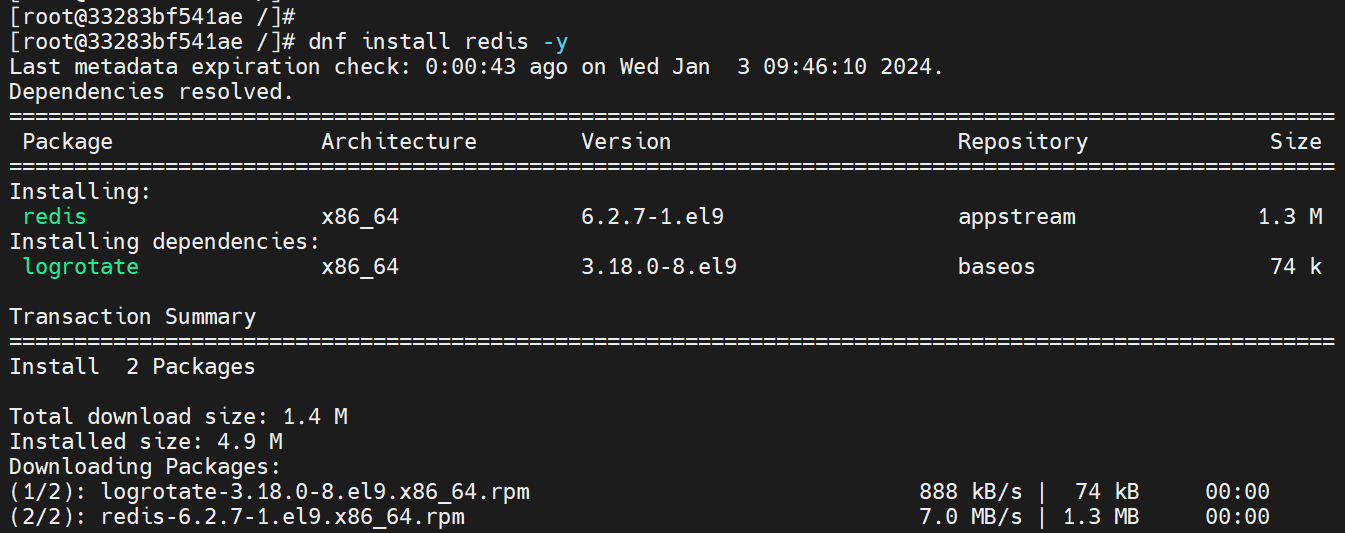
Let’s now install the Redis database.
dnf install redis -y
The output below shows that the installation was successful.
Note that any changes made only apply to that container. To exit from the container, run the exit command.
#Step 8. Managing Docker containers and images
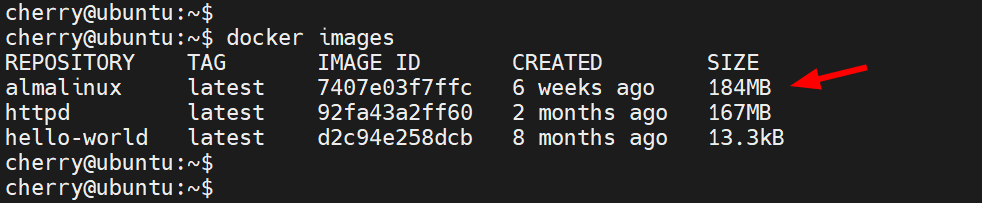
So far, we have three images on our system and deployed a few Docker containers. To list the current Docker images, run the docker images command.
docker images
From the output, we have almalinux, httpd, and hello-world images from which we created containers.
Run the 'docker ps' command to view active or currently running containers.
docker ps

Append the'- a' option to view all containers, including those that have exited or are no longer running.
docker ps -a
You should see output on your terminal similar to this. We have one active container - the httpd container, and two exited containers - almalinux and hello-world.

To view the last container created, use the command:
docker ps -l

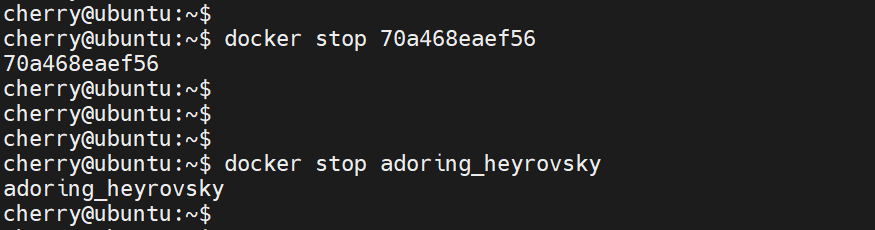
To stop a running container, use the docker stop command followed by the container ID or name. For example, to stop the httpd container, run the following command where 70a468eaef56 is the container ID.
docker stop 70a468eaef56
Alternatively, you can stop it using its name, which, just like the ID, is unique to every container.
docker stop adoring_heyrovsky
To start a container, use the docker start command followed by the container ID or name. For example, to stop the httpd container, run the following command.
docker start 70a468eaef56

Additionally, you can restart a container using the docker restart command.
docker restart 70a468eaef56

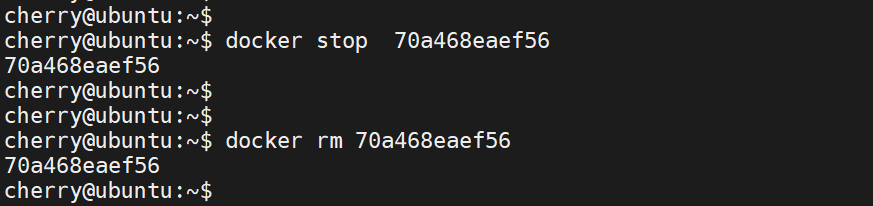
To remove a running container, stop it and then remove it using the docker rm command. If you try to remove it without stopping it first, you will encounter the following error notifying you that you need to stop it before attempting to remove it.

Therefore, to remove the httpd container, first stop it.
docker stop 70a468eaef56
Then remove it.
docker rm 70a468eaef56
Alternatively, you can force remove a running container by passing the -f switch.
docker rm -f 70a468eaef56
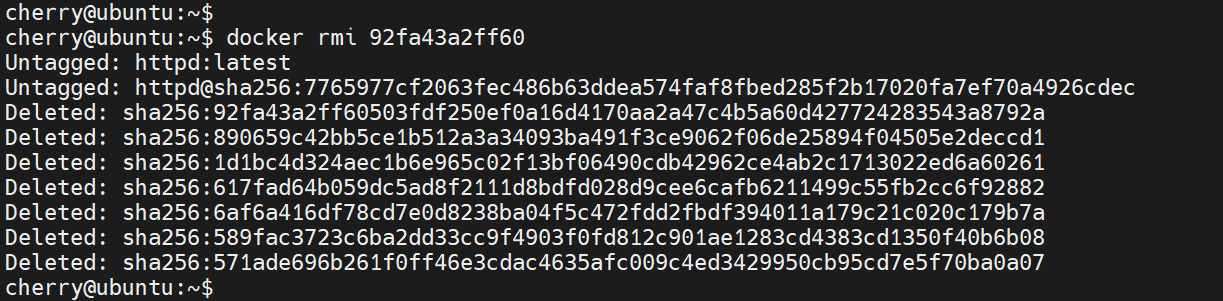
To remove an image, you need first to remove the container, then remove the image using the docker rmi command followed by the image ID.
Since we have already removed the httpd container, we can simply remove its image as shown.
docker rmi 92fa43a2ff60
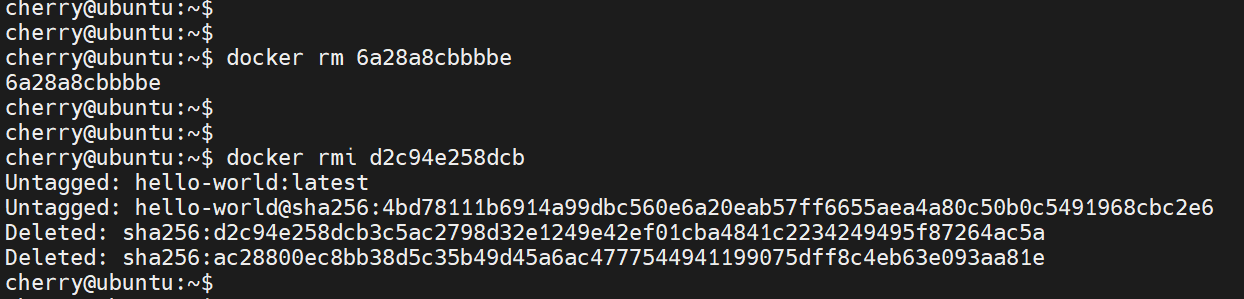
To remove the hello-world image, we need to remove the container first.
docker rm 6a28a8cbbbbe
Then finally, remove the image using its Image ID.
docker rm d2c94e258dcb
#Conclusion
In this tutorial, you have learned how to install Docker on Ubuntu 22.04, including instructions on how to work and manage Docker containers and images. Check out the official Docker documentation to learn more about Docker.


