How to Get Started With Docker Swarm Container Orchestration


Businesses are increasingly utilizing containerization technologies to simplify processes for application development. Containers are easily scalable based on demand, which allows for handling changing workloads efficiently. However, to scale containers, you'll need a container orchestration tool. One of the most popular today is Docker Swarm.
This comprehensive Docker Swarm tutorial will first help you understand what Docker Swarm is and then guide you through different implementation methods.
#What is Docker Swarm?
Docker Swarm is a docker-native container orchestration tool built into the Docker Engine, therefore, it integrates well with Docker. It is used for simplifying the management of multiple containers of an application.
Containers are self-contained units of software that contain all the necessary components for an application to run, including code, libraries, and settings. Docker Swarm, also known as the Docker orchestration tool, ensures that all containers work well, even if they are not on the same computer.
#What is Docker Swarm used for?
Docker Swarm is used for managing and deploying multiple containers simultaneously and distributing workload evenly among them to avoid overloading. It also handles adding and removing containers to manage varying traffic levels and workloads. Container management tools like Docker Swarm generally offer resource management, scalability, high availability, and load-balancing features.
Docker Swarm is one of the two most popular container orchestration platforms next to Kubernetes - both offer several benefits. For example, Kubernetes has more advanced scaling capabilities, a larger ecosystem, basic built-in monitoring tools, and a more robust built-in self-healing mechanism than Docker Swarm.
#Docker Swarm vs Docker Compose
Simply put, Docker is the core technology used for container management. Docker Compose is for configuring multiple Docker containers on the same host. Lastly, Docker Swarm is a container orchestration tool, similar to Kubernetes, that allows you to run containers on multiple hosts.
With Docker Compose, for example, you can create a YAML file that specifies the services, networks, and volumes required for your application, simplifying the process of running complex, multi-container applications on a single host. On the other hand, Docker Swarm is a native clustering and orchestration tool used for horizontally scaling your application by distributing containers across multiple nodes based on the nodes' resources.
You can use both Docker Compose and Docker Swarm together - while you use Docker Compose to define multiple services, you can use Docker Swarm to distribute those services across a swarm of Docker nodes.
Having understood the basic concept of Docker Swarm, let us explore how it can be implemented in our projects.
#Prerequisites
You will need two Ubuntu machines for this Docker Swarm tutorial. However, if you don't have access to two Ubuntu machines, you can use Windows as the worker node.
You will also be required to have experience working with Ubuntu terminal.
We don't assume you have the knowledge of Docker for this tutorial. We will start with a fresh installation of Docker.
Ready to supercharge your Docker infrastructure? Scale effortlessly and enjoy flexible storage with Cherry Servers bare metal or virtual servers. Eliminate infrastructure headaches with free 24/7 technical support, pay-as-you-go pricing, and global availability.
#Preparing Your Environment
To get started with Docker Swarm container orchestration, the first step is to prepare your environment by installing Docker Engine and Docker Compose.
#Installing Docker Engine and Docker Compose
Docker Engine enables us to run containers on our computers, while Docker Compose is a tool that facilitates running and defining multi-container Docker applications. Although not mandatory, Docker Compose can be a useful tool for managing and deploying services in a Swarm environment.
You mostly need Docker Swarm when you need to run multi-container Docker applications because it allows you to run them across multiple nodes in a cluster. Docker Compose allows you to define a set of Docker services in a single YAML file, and then spin up and manage those services using a single command.
To show how Docker Swarm works, we need at least a cluster of two nodes. A Docker Swarm cluster can have at least one master node and any number of worker nodes. The master node is responsible for managing the cluster and handling tasks such as scheduling services and orchestrating container deployments. The worker nodes, on the other hand, are responsible for running the containers and executing the tasks assigned to them by the master node.
Let’s start with Installing Docker Engine on Ubuntu.
sudo apt-get update
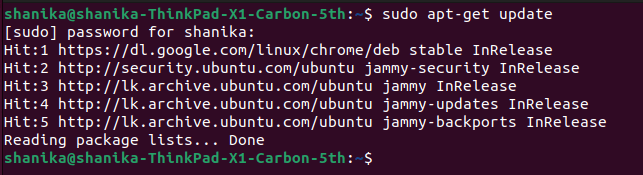
Before installing Docker, you need to add a Docker repository to your system. To do that, you need to add the GPG key of the Docker Repository with the below command.
curl -fsSL https://download.docker.com/linux/ubuntu/gpg | sudo gpg --dearmor -o /etc/apt/trusted.gpg.d/docker-archive-keyring.gpg

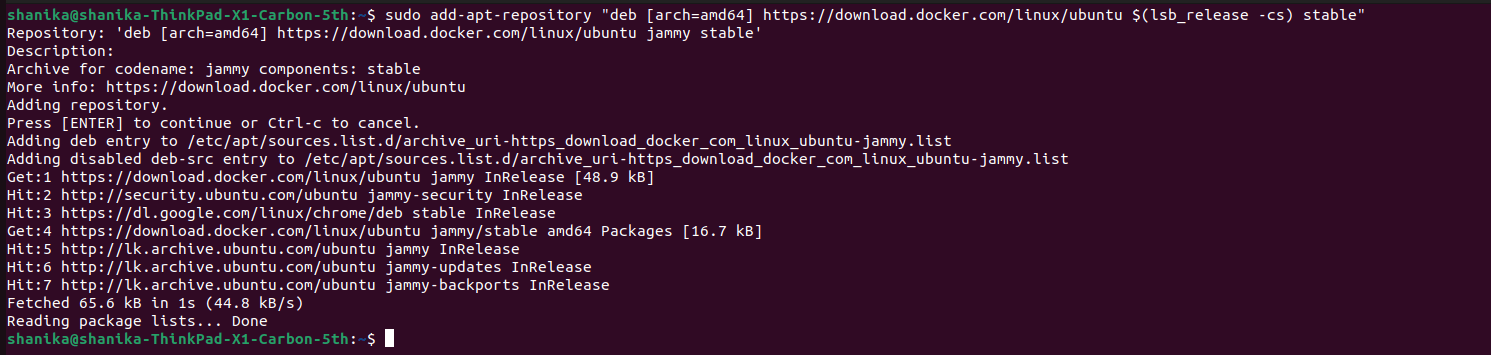
Next, add the Docker repository with the following command.
sudo add-apt-repository "deb [arch=amd64] https://download.docker.com/linux/ubuntu $(lsb_release -cs) stable"
Update the libraries with the sudo apt-get update command.
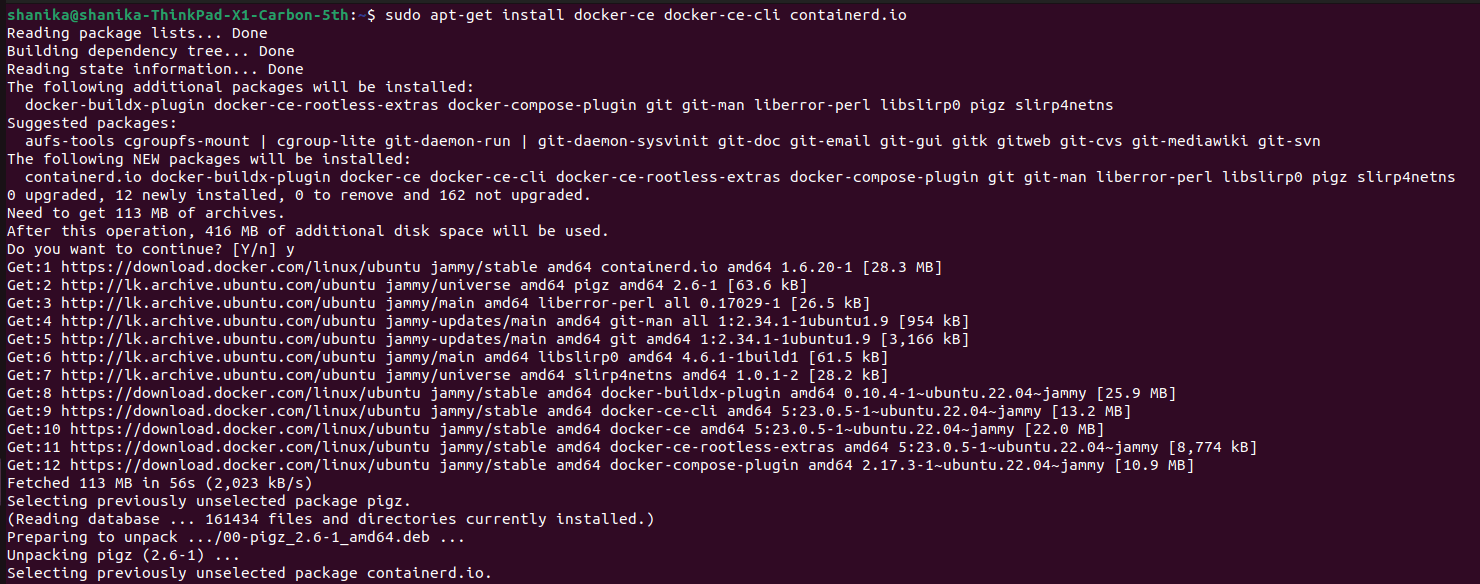
Next, install Docker with the following command:
sudo apt-get install docker-ce docker-ce-cli containerd.io
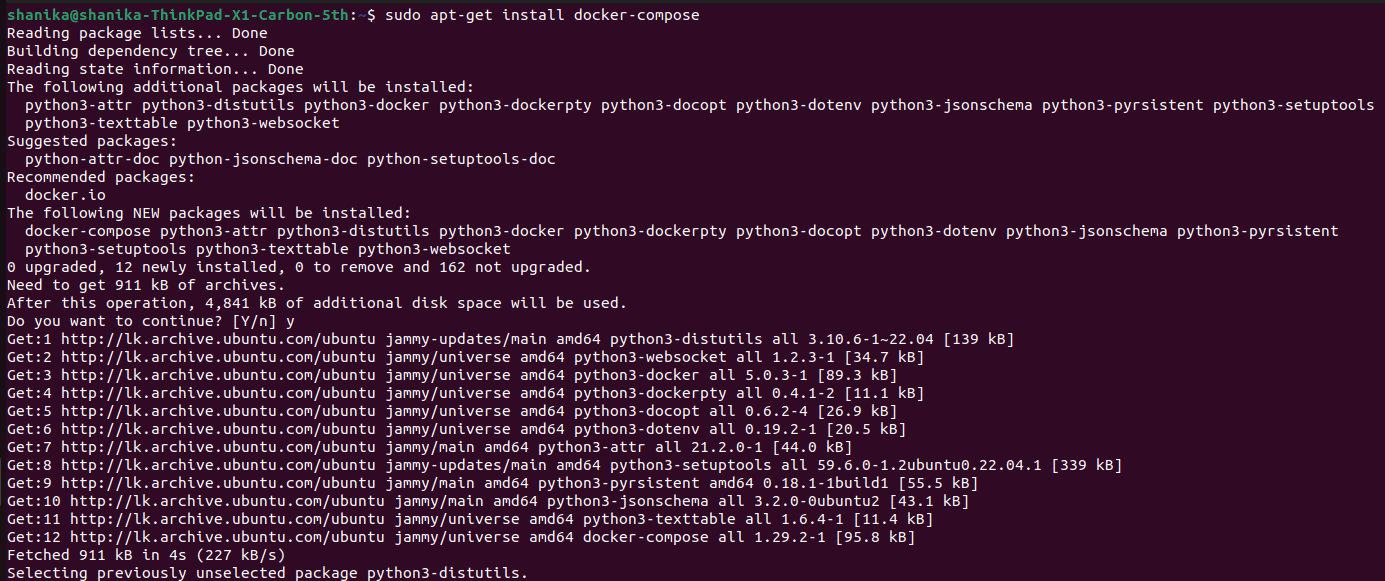
After installing the Docker engine, let’s Install the Docker Compose on Ubuntu.
sudo apt-get update && apt-get install docker-compose
#Creating a Swarm by initializing a manager node
Next, we need to initialize a manager node by running the sudo docker swarm init command. This will set up Swarm and generate a unique token. This token can be used to add worker nodes.
sudo docker swarm init --advertise-addr <manager-node-IP>
My IP address is 192.168.8.200. If you don’t know your IP address, try the ip address command on your Ubuntu machine.

#Adding worker nodes to the Swarm
We need the generated token to add worker nodes to our Swarm cluster. Next, run the following command on the worker node. In my case, I am running it on my Windows machine.
We usually use port 2377 as the default port for Swarm Management. Then let’s join the created worker node to the Swarm using the below command.
sudo docker swarm join --token <worker-token> <manager-node-IP>:<port>
In my case, I’ll be running the below command:
sudo docker swarm join --token SWMTKN-1-604v5yv1e68lcl293cqyyx9mk7qhwuimgrqy3r0jni5f8kbhag-etru8aobjpvycg63emnb4lqcp 192.168.8.200:2377

To confirm whether the worker node has been added to docker, run the sudo docker node ls command on your master node. It will show a list of all the nodes in the Swarm.

#Creating services with Docker commands or a Docker Compose file
With the help of Docker Commands or Docker Compose Files, you can create services in Docker. The following Docker command can be used to create services with a specific name, number of replicas, and image.
sudo docker service create --name my-service --replicas 3 my-image
For this tutorial, I'm going to create a service called my-nginx-service with 3 replicas from the nginx image in the Docker hub.
sudo docker service create --name my-nginx-service --replicas 3 nginx

Run the following command to see how replicas are distributed among nodes:
sudo docker service ps my-nginx-service

On the other hand, Docker Compose Files can be used to define multiple services and their dependencies, then deploy the Swarm as a stack. Let’s see how we can create a service with a Docker Compose file.
First, you need to create a docker-compose.yml file, as shown below. Next, note that you need to create a stack to fit your use case. In this example stack, I have defined a web service with 2 replicas, api service with 2 replicas, and a db service with 1 replica.
version: '3'


services:
 web:
   image: nginx
   ports:
     - "80:80"
   deploy:
     replicas: 2
 api:
   image: httpd
   deploy:
     replicas: 2
 db:
   image: mysql
   deploy:
     replicas: 1
Next, you need to run the following command:
sudo docker stack deploy -c docker-compose.yml my-stack

Run the sudo docker service ls command to list the running services. You can see the newly created stack of three services along with the my-nginx-service I created earlier.

Let’s run the sudo docker service ps my-stack-web command to see how the two replicas of my-stack-web service are distributed among my two nodes.

#Managing services with Docker Swarm
When it comes to managing services, Docker Swarm has provided commands to list all services, inspect specific services, and also to update existing services.
To list all the services in the Swarm, we use the sudo docker service ls command.

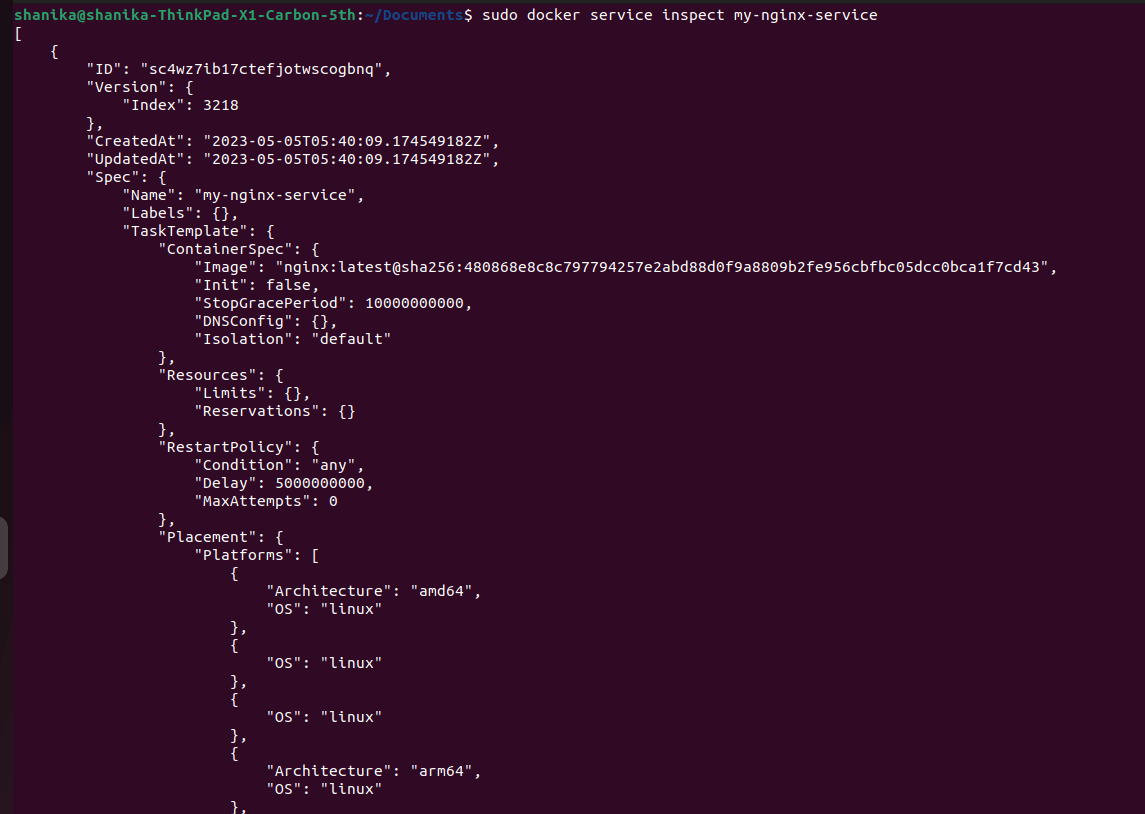
The command sudo docker service inspect my-service is there to inspect the services. You can view its details like current state, replicas, and ports.
#Understanding service updates and rolling updates
Rolling updates can be used to update a Docker service without causing downtime or service interruption. Docker Swarm updates each replica of the service one at a time to ensure that a certain number of replicas are always running. The rolling update strategy allows you to update a service without affecting its availability.
To update the Docker image used by a service, you can use the sudo docker service update command with the --image option, followed by the new image name and tag.
For example, to update the my-nginx-service service with a new image named new-nginx-image with the latest tag, you can use the following command:
sudo docker service update --image new-nginx-image:latest my-nginx-service
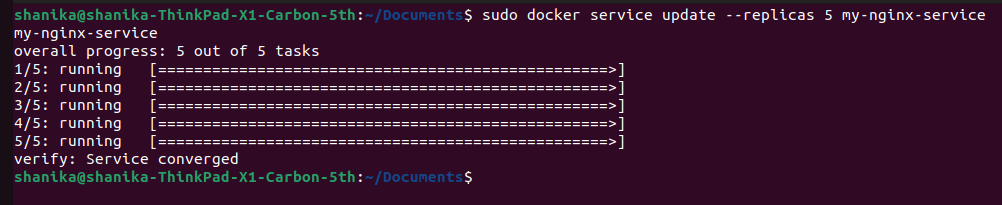
To update the number of replicas running for a service, you can use the docker service update command with the --replicas option, followed by the desired number of replicas.
For example, to update the my-nginx-service service to have five replicas running, you can use the following command:
sudo docker service update --replicas 5 my-nginx-service
You can check the replica distribution with the sudo docker service ps my-nginx-service command.

When it comes to rolling updates with health checks, you can use the docker service update command with additional options.
A health check page that is specific to your application is important for accurately monitoring the health and availability of your application running in Docker Swarm. For this tutorial, we will create a simple health check page to show you how to do it.
Edit the Nginx configuration file (nginx.conf) to include a custom location block that defines the health check endpoint, as shown below.
location /health {
    return 200 'OK';
}
This is a very simplified health check page. A typical health check page will:
- Verify database connectivity and execute a simple query.
- Check the availability and responsiveness of external APIs or services.
- Monitor key metrics such as memory usage, CPU utilization, or disk space.
Next, you can use the following command to update the my-nginx-service service with a new image and perform rolling updates with health checks.
sudo docker service update --image new-nginx-image:latest --update-parallelism 1 --update-delay 10s --health-cmd "curl -f http://localhost/health || exit 1" --health-timeout 5s --health-retries 3 my-nginx-service
This command updates the my-nginx-service service with the new new-nginx-image image, while also specifying options for the rolling update process.
Let's see what the options in this command do.
--update-parallelismoption specifies the number of replicas to update at a time (in this case, 1)--update-delayoption specifies the delay between updates (in this case, 10 seconds).--health-cmdoption specifies the command or script to be executed as a health check. A typical health check script expects a successful response, such as HTTP status code 2xx or 3xx, from the endpoint to consider the container or service as healthy. (in my example, I'll receive the status code of 200 and the message "OK").--health-timeoutoption sets the maximum time Docker waits for the health check command to complete before considering it a timeout. (in this case, 5 seconds).--health-retriesoption determines the number of consecutive failures Docker allows before considering the container or service as unhealthy. (in our example, it's 3)
By using these commands and options, you can easily update and manage Docker services running on a Docker Swarm cluster and perform rolling updates without causing downtime or service interruption.
#Scaling Your Services with Docker Swarm
#Using the Docker CLI to scale services
Scaling a service in a Docker Swarm cluster involves adding or removing replicas of the service. You can scale a service either by using the Docker CLI.
To scale the my-nginx-service service using the Docker CLI, you can use the following command.
sudo docker service scale my-nginx-service=3
This command will add or remove replicas of the my-nginx-service service as needed, to bring the total number of replicas up to 3.

While you can change the number of replicas using the docker service update command, the docker service scale is built specifically for that. Therefore, this command is a bit shorter than the docker service update command. On the other hand, the docker service update command is used to modify various properties of a service.
#Automatic service scaling with Docker Swarm
By default, Docker Swarm employs a load-balancing strategy to distribute replicas of service across the available nodes in a balanced manner. However, there may be scenarios where you want to control the number of replicas per node to manage resource allocation or ensure high availability. This is where you need the automatic service scaling feature of Docker Swarm.
You can use the sudo docker service update command with the --replicas-max-per-node option to set an upper limit on the number of replicas that can run on a single node. This will prevent overloading or resource exhaustion on individual nodes.
The final command will look like this.
sudo docker service update my-service --replicas-max-per-node 5
(here, my-service should be the service name you want to scale)
#Load balancing with Docker Swarm
You can achieve load balancing in Docker Swarm through a feature called routing mesh which is enabled by default. The routing mesh automatically distributes network traffic across multiple replicas of a service. This provides high availability and scalability.
To accomplish this, you need to create a service with a published port. Let's see the command for that and the options it provides.
sudo docker service create --name my-service --replicas 3 --publish published=8080,target=80 my-image
–namespecifies the name of the service. You can have any meaningful name for that.–replicassets the number of replicas for the service.--publish published=8080,target=80configures port publishing for the service. It maps the published port 8080 on the host to the target port 80 in the service's containers. This allows incoming traffic to be directed to the service through the published port.my-imagerefers to the Docker image used to create the service.
Now, you can access the services through the load balancer by using the following command.
curl http://<manager-node-IP>:8080
#Monitoring and Troubleshooting Your Docker Swarm
#Monitoring Docker Swarm
As we have already done, to determine whether a node is active or inactive, use the following command.
sudo docker node ls
To check the status of a service, use this command.
sudo docker service ps my-service
You can also use third-party monitoring tools for this purpose, such as Prometheus or Grafana. Additionally, monitoring the security of the Docker Swarm environment is equally important. Docker Bench Security is a useful tool for this purpose. By utilizing Docker Cloud, you can set up alerts and notifications to inform you of any issues with your Swarm.
#Troubleshooting common issues with Docker Swarm
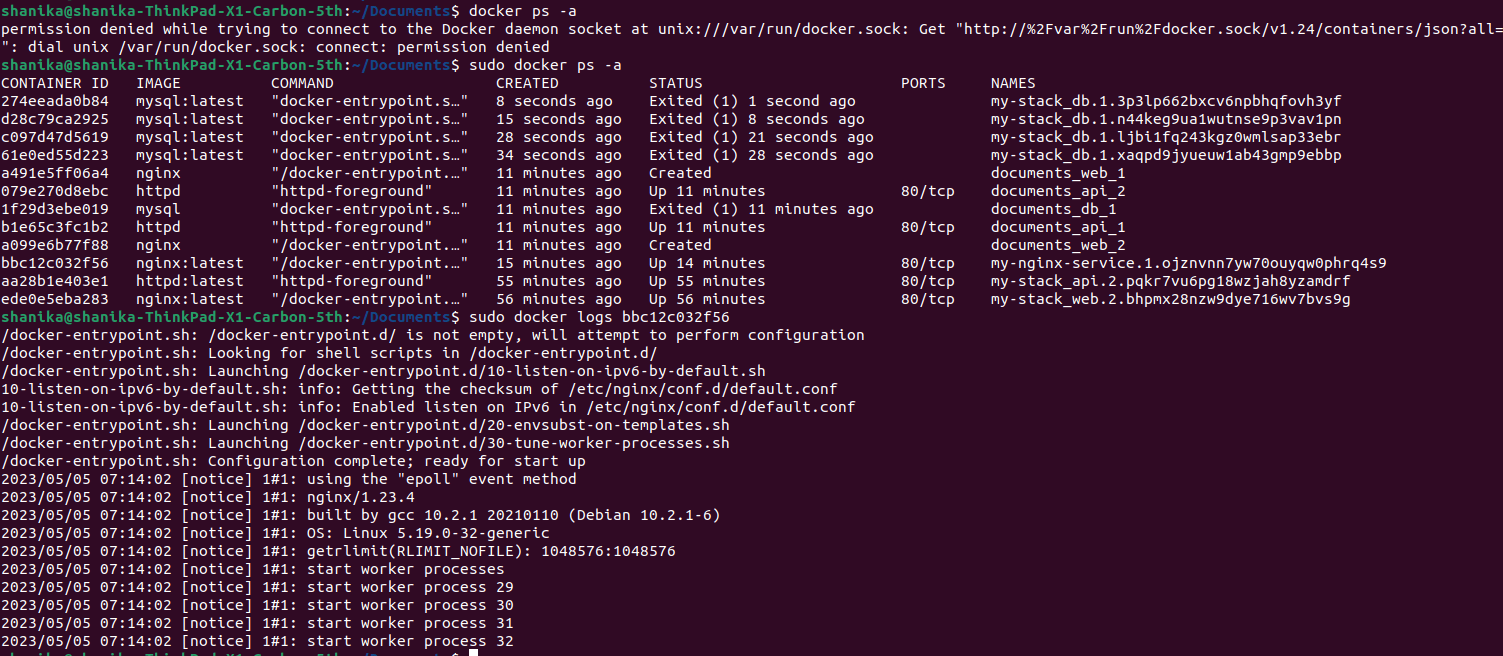
When troubleshooting issues with Docker Swarm, you can use the docker logs command to check the logs for a container.
For example, to check the logs for a container with Container ID - abc, you can use the following command:
sudo docker logs abc
If you can’t find the container-id of your service, run the sudo docker ps -a command. As you can see, it returns all the services with their container-id and other related information.
If you need to debug a container by SSHing into it, you can use the sudo docker exec command. For example, to SSH into a container named my-container and open a Bash shell, you can use the following command.
sudo docker exec -it my-container /bin/bash
If a service is failing to start or is stuck in a pending state, it may be due to a lack of resources, such as CPU and memory on your nodes. You can check the available resources on each node of the Swarm by using the sudo docker node inspect <node-id> command.
You can also use the sudo docker network inspect and sudo docker network ls commands to check the status and configuration of your Docker networks.
By using these commands, you can quickly troubleshoot common issues that may arise when running Docker services on a Swarm cluster, and ensure that your applications are running smoothly.
#Conclusion
As discussed earlier in this article, Docker Swarm offers many benefits that can make life easier for developers. These benefits include automatic service scaling, easy service management, high availability, and fault tolerance. These features make Docker Swarm a powerful tool for container orchestration and management.
If you plan to deploy large-scale containerized applications, Docker Swarm is one of the best tools available. However, if you're new to containers and just starting to learn about containerized applications, it's recommended that you first learn the basics of Docker and containerization before diving into Docker Swarm.


