How to Secure a Linux Server (11 Tips)


It is often strongly believed that Linux is more secure than Windows. While this may be the commonly held belief, no system is without fault, and your server is one misconfiguration away from a potential attack, including unauthorized access, privilege escalation, data exfiltration, and malware compromise, all of which can result in data loss or a service outage.
Let's review some basic Linux server hardening practices that provide a solid security foundation for your system and help minimize the risk of attacks.
#Linux Server Hardening: Best Practices
#1. Ensure software packages are updated regularly
A recent report by UpGuard shows that outdated software ranks among the Top 5 causes of data breaches. Unpatched software often contains loopholes or vulnerabilities that are easily exploitable to occasion a data breach. If history is anything to go by, we are all too familiar with the ramifications of data breaches on organizations: tarnished reputation, astronomical losses, and endless court battles.
Delays in updating your system give hackers a window of opportunity to breach it. It may also result in non-compliance and potentially lead to legal action. In view of this, regularly updating your system is recommended to protect against future breaches.
For Debian/Ubuntu systems, run :
apt update && apt upgrade -y
For RHEL-based distros, run:
dnf update
#2. Enable the automatic upgrades utility
While it's crucial to get into the habit of updating your system, the first method we’ve just discussed requires manual input. This can create operational overhead, and if not done regularly, can lead to missed software patches. In a world where automation has been integrated into every tech stack, it makes more sense to automate software patching to address the challenges of the manual approach.
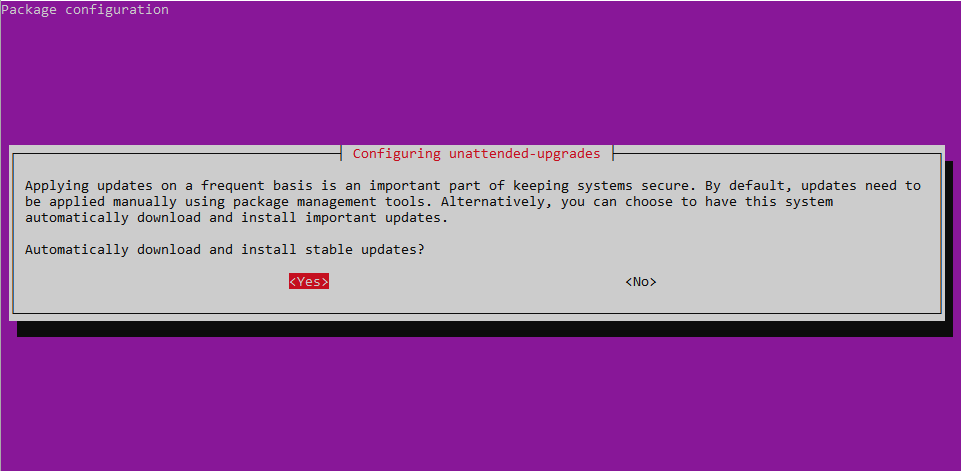
The unattended-upgrades service is a feature specific to Debian distributions that installs security and other updates to ensure the system remains up to date. It runs on a scheduled basis to detect and apply updates. Once found, the updates are applied automatically without manual input.
To enable automatic updates, run the following command.
dpkg-reconfigure --priority=low unattended-upgrades
Select the yes option.
Some files are generated in the /etc/apt/apt.conf.d/ folder. To confirm this, run the command:
ls -l /etc/apt/apt.conf.d/
Output-rw-r--r-- 1 root root   92 Mar 22  2024 01-vendor-ubuntu
-rw-r--r-- 1 root root  399 Mar 31  2024 01autoremove
-rw-r--r-- 1 root root  129 Apr  2  2025 10periodic
-rw-r--r-- 1 root root  108 Apr  2  2025 15update-stamp
-rw-r--r-- 1 root root  392 Oct 27 14:42 20apt-esm-hook.conf
-rw-r--r-- 1 root root   85 Apr  2  2025 20archive
-rw-r--r-- 1 root root   80 Feb 12  2024 20auto-upgrades
-rw-r--r-- 1 root root 1037 Nov  8  2023 20packagekit
-rw-r--r-- 1 root root  127 Sep 18 11:00 20snapd.conf
-rw-r--r-- 1 root root 2569 Feb 24  2024 50appstream
-rw-r--r-- 1 root root  625 Jan 20  2023 50command-not-found
-rw-r--r-- 1 root root 6155 Feb 12  2024 50unattended-upgrades
-rw-r--r-- 1 root root  182 Apr 12  2024 70debconf
-rw-r--r-- 1 root root  343 Dec  5  2024 99needrestart
-rw-r--r-- 1 root root  305 Apr  2  2025 99update-notifier
You can carry out a dry run to simulate the actual automatic update process.
unattended-upgrade --dry-run --debug
On your display, some text output will appear, mimicking the installation of updates.
OutputRunning on the development release
Starting unattended upgrades script
Allowed origins are: o=Ubuntu,a=noble, o=Ubuntu,a=noble-security, o=UbuntuESMApps,a=noble-apps-security, o=UbuntuESM,a=noble-infra-security
Initial blacklist:
Initial whitelist (not strict):
Marking not allowed <apt_pkg.PackageFile object: filename:'/var/lib/apt/lists/archive.ubuntu.com_ubuntu_dists_noble-backports_universe_i18n_Translation-en'  a=noble-backports,c=universe,v=24.04,o=Ubuntu,l=Ubuntu arch='' site='archive.ubuntu.com' IndexType='Debian Translation Index' Size=64559 ID:19> with -32768 pin
Marking not allowed <apt_pkg.PackageFile object: filename:'/var/lib/apt/lists/archive.ubuntu.com_ubuntu_dists_noble-backports_universe_binary-amd64_Packages'  a=noble-backports,c=universe,v=24.04,o=Ubuntu,l=Ubuntu arch='amd64' site='archive.ubuntu.com' IndexType='Debian Package Index' Size=137879 ID:18> with -32768 pin
Marking not allowed <apt_pkg.PackageFile object: filename:'/var/lib/apt/lists/archive.ubuntu.com_ubuntu_dists_noble-backports_main_i18n_Translation-en'  a=noble-backports,c=main,v=24.04,o=Ubuntu,l=Ubuntu arch='' site='archive.ubuntu.com' IndexType='Debian Translation Index' Size=121056 ID:17> with -32768 pin
#3. Configure a non-root user
So far, we've been running the system as root. Generally, this is not recommended for everyday tasks. The root user can execute any command - including commands that can crash your server, accidentally or otherwise. The user interface should be reserved for experienced users.
Configuring a sudo user account is a better alternative to running the system. This is a special regular account that acquires temporary root-level privileges to run special tasks when invoked using the sudo command.
But first, let's create a new regular account called cherry. Run the adduser command as shown.
adduser cherry
Verify the user's existence:
grep -i cherry /etc/passwd
Here’s some sample output, confirming the user exists.
Outputcherry:x:1000:1000:cherry,,,:/home/cherry:/bin/bash
Next, add the user to the sudo group.
usermod -aG sudo cherry
To verify the regular user belongs to the sudo group, run the command:
groups cherry | grep -i sudo
The user should now be a part of the sudo group.
#4. Configure SSH passwordless authentication
Top companies are gradually phasing out password authentication from their stacks and embracing more innovative and secure channels like passkeys and biometrics. SSH key-based authentication is among the top and most preferred authentication methods owing to its strong cryptographic keys.
The benefits of passwordless SSH authentication are two-fold: enhanced security and simplified server management for businesses looking to scale their operations. Configuration management tools like Ansible and automated processes, such as automatic file backups, require SSH passwordless authentication for a streamlined workflow.
#5. Close unused services/ports
Every running service or open port on a Linux server is a potential entry point for attackers. This also includes non-essential services and ports.
A service not needed by the server could still remain in a listening state, which hackers might exploit to identify system weaknesses. The system remains at risk because services that are no longer required can serve as a foothold for attackers and be easily compromised, often without detection.
A perfect example is the Telnet service. Its lack of encryption exposes the server to constant threats of being breached.
Simply put, "If you don’t need it, disable it."
To check active connections and their corresponding ports, run the ss command:
sudo ss -pnltu
Let’s break down the command options:
-p: Displays the process name and PID (process ID).
-n: Shows numeric IP addresses and corresponding ports.
-l: Displays services waiting for incoming connections.
-t: Shows TCP connections, e.g., RDP, SSH, HTTP, and MySQL.
-u: Shows UDP connections, e.g., DNS and DHCP.
Output Netid      State       Recv-Q      Send-Q            Local Address:Port             Peer Address:Port      Process
udp        UNCONN      0           0                    127.0.0.54:53                    0.0.0.0:*          users:(("systemd-resolve",pid=473,fd=16))
udp        UNCONN      0           0                 127.0.0.53%lo:53                    0.0.0.0:*          users:(("systemd-resolve",pid=473,fd=14))
tcp        LISTEN      0           4096              127.0.0.53%lo:53                    0.0.0.0:*          users:(("systemd-resolve",pid=473,fd=15))
tcp        LISTEN      0           128                   127.0.0.1:6010                  0.0.0.0:*          users:(("sshd",pid=1029,fd=7))
tcp        LISTEN      0           4096                    0.0.0.0:22                    0.0.0.0:*          users:(("sshd",pid=988,fd=3),("systemd",pid=1,fd=156))
tcp        LISTEN      0           4096                 127.0.0.54:53                    0.0.0.0:*          users:(("systemd-resolve",pid=473,fd=17))
In addition, you can run the lsof command to explore listening connections.
sudo lsof -i -P -n | grep LISTEN
Outputsystemd      1            root  119u  IPv4   6631      0t0  TCP *:22 (LISTEN)
systemd      1            root  123u  IPv6   6635      0t0  TCP *:22 (LISTEN)
systemd-r  473 systemd-resolve   15u  IPv4    4905      0t0  TCP 127.0.0.53:53 (LISTEN)
systemd-r  473 systemd-resolve   17u  IPv4    4910      0t0  TCP 127.0.0.54:53 (LISTEN)
sshd       988            root    3u  IPv4   6631         0t0  TCP *:22 (LISTEN)
sshd       988            root    4u  IPv6   6635         0t0  TCP *:22 (LISTEN)
sshd      1029           root    5u  IPv6   8864         0t0  TCP [::1]:6010 (LISTEN)
sshd      1029           root    7u  IPv4   8865         0t0  TCP 127.0.0.1:6010 (LISTEN)
glances   4771        root    4u  IPv4  21407        0t0  TCP 127.0.0.1:61209 (LISTEN)
apache2   5222       root    4u  IPv6  22649        0t0  TCP *:80 (LISTEN)
Additionally, you can list all the systemd services using the command:
sudo systemctl list-units --type=service --state=running
OutputUNIT                        LOAD   ACTIVE SUB     DESCRIPTION
  apache-htcacheclean.service loaded active running Disk Cache Cleaning Daemon for Apache HTTP Server
  apache2.service             loaded active running The Apache HTTP Server
  cron.service                loaded active running Regular background program processing daemon
  dbus.service                loaded active running D-Bus System Message Bus
  fwupd.service               loaded active running Firmware update daemon
  getty@tty1.service          loaded active running Getty on tty1
  glances.service             loaded active running Glances
  ModemManager.service        loaded active running Modem Manager
  multipathd.service          loaded active running Device-Mapper Multipath Device Controller
To disable unwanted or unused services, use the systemctl systemd command. For example, to stop or disable the Apache2 web service, , run the command:
sudo systemctl stop apache2
#6. Restrict ports using a firewall
Disabling or uninstalling unused services requires an additional step, which involves blocking all unnecessary ports. The fact is, unused ports are fair game for hackers and can potentially put your system at risk of system breaches. These channels serve as communication pathways that allow bots and malware to contact your system for system exploitation.
Best practice recommends leaving open only the ports that are absolutely needed and closing unused ones to reduce the attack surface. One way to do this is to install a firewall.
The UFW firewall is the default firewall solution for recent Debian/Ubuntu releases. Best practice calls for opening only the ports that are absolutely needed for application traffic and closing the rest. It comes disabled by default. Once enabled, it blocks all incoming network connections.
In that regard, to prevent your SSH connection from dropping, it's recommended to allow it first before enabling the firewall.
sudo ufw allow 22/tcp
Then reload the firewall to effect the change made.
sudo ufw reload
To block an unwanted port, use the ufw deny command, followed by the port number and protocol (TCP/UDP).
The following example blocks AnyDesk traffic on TCP port 7070.
sudo ufw deny 7070/tcp
You can also specify a range of ports separated by a full colon. Here, we are blocking TCP ports from 1024 to 4000.
sudo ufw deny 1024:4000/tcp
Once done, reload the firewall.
sudo ufw reload
To view the firewall rules, run the command:
sudo ufw status verbose
#7. Install an IPS (intrusion prevention system), e.g, Fail2ban
An IPS provides an additional layer of protection, shielding your server from intrusions and malware that bypass the firewall. A well-configured IPS can detect and block application-layer threats, including XSS (Cross-site scripting), and HTTP flooding.
IPS systems employ signature-based and anomaly-based detection approaches to identify threats. In the former, the system checks incoming traffic for matches in a database of threats, while in the latter, it identifies normal traffic to alert against any odd traffic pattern.
Key benefits of implementing an IPS include:
Automated response to threats: An IPS automatically takes action once a threat is detected. It drops malicious packets and blocks offending IP addresses without manual intervention, making it an effective solution for warding off attackers.
Granular network visibility: IPS systems offer comprehensive analysis of network traffic down to individual packets. It checks for odd patterns or suspicious activity in incoming network traffic, blocks threats, and alerts administrators.
Protection Against Known and zero-day exploits: While older signature-based IPS systems cannot ward off emerging threats, advanced systems use a combination of AI and Machine Learning and behavioral analysis to pick up unusual activity indicative of a zero-day exploit. Once detected, the threat is blocked immediately, and an alert is sent to the operations teams.
Regulatory Compliance and Reporting: Compliance regulations such as HIPAA and PCI DSS require the protection of sensitive customer data. Implementation of an IPS goes a long way toward meeting these requirements by generating logs, audit trails, and alerts as proof of proactive security measures.
Popular IPS solutions include Fail2ban, Suricata, and Snort.
#8. Secure using SELinux and AppArmor
SELinux (Security-Enhanced Linux) and AppArmor (Application Armor) are security frameworks that provide an extra security layer to a Linux system to mitigate security threats and reduce the attack surface.
SELinux is a label-based security model common in Red Hat distributions like RHEL, CentOS Stream, and AlmaLinux. It uses a special security layer called Mandatory Access Control (MAC) to define access control for processes, files, and applications. It contains security policies that dictate what applications and processes can do in the face of an attack, thereby mitigating risk.
SELinux comes enabled and is set to enforcing mode by default. You can verify this on a Red Hat system by running:
sestatus
When enabled, you should get enforcing as the output.
enforcing
AppArmor is to Debian what SELinux is to Red Hat. However, unlike SELinux, it is a user-friendly, profile-based security model. It restricts what an application can do through profiles. It lets you define a security policy for each program/application, specifying what actions it can perform and which resources, including files and network sockets, it can access. These restrictions limit the damage the applications can cause, even when compromised.
AppArmor is also enabled by default and runs in enforce mode. To check AppArmor status, run the command:
sudo apparmor_status
You will get output showing loaded modules and profiles, and the mode they are in.
Outputapparmor module is loaded.
119 profiles are loaded.
24 profiles are in enforce mode.
   /usr/bin/man
   /usr/lib/snapd/snap-confine
   /usr/lib/snapd/snap-confine//mount-namespace-capture-helper
   lsb_release
   man_filter
   man_groff
   nvidia_modprobe
   nvidia_modprobe//kmod
   plasmashell
   plasmashell//QtWebEngineProcess
   rsyslogd
The default settings for both SELinux and AppArmor are considered safe and offer great security benefits. However, custom or tailor-made policies offer tighter security controls, making for a safer and more robust server environment.
#9. Install malware & rootkit scanners
Despite its tight, secure permissions model and access controls like AppArmor and SELinux, Linux remains a target for attackers. This is especially true for internet-facing servers. The security through obscurity approach does not provide enough protection.
Although not universally accepted as best practice for desktop PCs, installing rootkit scanners and anti-malware is beneficial, specifically in enterprise environments. Some of the general benefits it offers include:
Real-time threat mitigation: Modern scanners detect and block malicious applications and files in real time before they harm the system.
Automated scanning: Malware scanners can be configured to perform periodic scans to detect threats without manual input.
Detection and neutralization of known threats: signature-based detection finds and cleans trojans, worms, viruses, and other malware.
Popular open-source anti-malware solutions for Linux systems include ClamAV, Rkhunter, and Chkrootkit.
#10. Monitor logs and incorporate automated alerts
In addition to all the server hardening tips we have outlined, it's essential to monitor your server's log files and configure automated alerts for real-time notifications. Logs track major events occurring in your system, from login attempts and boot sequences to scheduled tasks and behavior of daemons and running applications, including warnings and errors.
#11. Automate backups
Lastly, it’s always a great idea to have an automatic backup for your server, especially for critical files such as databases and website files. You can accomplish this using powerful command-line tools like Rsync and tar to back up data to a remote location. Even better, you can implement scheduling mechanisms like cron jobs, which automate backups at regular intervals.
We’ve recently unveiled a new automatic backup service for Cherry Servers’ Virtual Servers (both VPS and VDS) in the Lithuania region, with more locations to follow. You can enable VM backups during server deployment through the Recovery section or activate them later. In addition, you can seamlessly configure the backup window and select a timeframe during which your server is least busy.
Also read: How to Evaluate a Cloud Provider’s Security
#Conclusion
Securing your server is not a one-time exercise; rather, it is a continuous process that demands proactive measures, including regular updates, disabling non-essential services, performing vulnerability assessments, and active monitoring. These foundational steps ensure that all possible entry points to the server are well-secured and risks well mitigated. Ultimately, a well-hardened Linux server provides stability, reliability, and peace of mind to administrators and users alike.
Need a powerful and secure infrastructure for your workloads? Deploy a Linux Dedicated Server at Cherry Servers and get full root access, high-performance hardware, and complete control. Choose from instant or fully customizable configurations to match your performance and security requirements.


