How to Host a Website on Linux VPS? A Complete Guide


Hosting a website on a Linux VPS gives you dedicated resources, full root access, and the freedom to configure every part of your server stack. A VPS (Virtual Private Server) allocates isolated CPU, RAM, and storage within a shared physical machine. You get the control of a dedicated server at a fraction of the cost.
Linux dominates the web server market. According to a recent survey, Unix-based systems (primarily Linux) power over 80% of all websites. The combination of stability, security, open-source tooling, and zero licensing fees makes Linux the default choice for web hosting.
In this tutorial, we walk through the steps to host your website on a Linux VPS. These include choosing a good VPS provider, setting up the server environment, installing a web server, deploying website files, and managing domain and DNS settings to make your site accessible online.
#What is VPS hosting?
VPS (Virtual Private Server) hosting is a type of web hosting where a physical server is partitioned into multiple isolated virtual servers, each functioning as an independent machine.
A hypervisor partitions a single physical server into multiple virtual machines. Each compartment gets its own operating system, CPU allocation, memory, and storage. The hypervisor enforces boundaries between these compartments, so processes running on one VPS cannot access or affect those running on another.
#Why do you need a VPS provider?
A VPS provider gives you the infrastructure to host your website in a dedicated environment. Unlike shared hosting, VPS gives you full control, better performance, and flexibility when configuring the resources according to your needs. With faster website performance and better security comes higher rankings on search engines.
Therefore, moving to VPS hosting can directly improve your SEO efforts. Furthermore, on shared hosting, email performance can be affected by other users sending spam or abusing resources. VPS hosting provides better control over your email system.
Providers like Cherry Servers offer scalable VPS plans with excellent support that lets you customize the server environment to your website's needs.
#Prerequisites
Before you begin to host your website on a Linux VPS, certain things need to be in place.
-
Register a domain name through which the visitors shall access your site.
-
Have a stable and speedy internet connection to handle your server.
-
Sign up with a reputable VPS provider such as Cherry Servers.
-
Choose a VPS with enough resources for your website with at least 1 GB of RAM for lightweight websites, a multi-core CPU for better performance, and enough storage to fit your website's files and database.
The above steps cannot be skipped and serve as the foundation of your website hosting system.
#How to host a website on Linux VPS?
Now that you have completed the prerequisites, you are now in a good position to execute this process. Follow the steps listed below to launch your website successfully.
#Step 1: Setting up your Linux VPS
The first thing you should do is set up the server environment. For this, you have to choose a distribution that suits your needs. The most common ones that are suitable for web hosting include Ubuntu, CentOS, and Debian. Ubuntu is highly recommended for beginners because it is easy to handle and has a great community behind it.
Next, access your VPS using SSH with credentials given by your VPS provider. You can now connect remotely to the terminal of your server, where you'll perform all configurations.
Connect to your server from your local terminal:
ssh root@your_server_ip
Once connected, update all system packages to their latest versions:
sudo apt update && sudo apt upgrade -y
Proceed to create a new user with limited privileges for security purposes by running the adduser command, and then setting a secure password. Due to security concerns, one should not use the default root account for day-to-day operations.
adduser webadmin
usermod -aG sudo webadmin
The first command creates a new user called webadmin. The second command adds that user to the sudo group, which grants administrative privileges when needed.
Now, configure your server with a firewall to protect against unauthorized access. Use a simple tool like UFW to set up basic firewall rules. Allow the required ports to proper functionality - SSH for remote login on port 22, HTTP for the web at port 80, and HTTPS for secure web traffic on port 443.
sudo ufw allow OpenSSH
sudo ufw allow 80/tcp
sudo ufw allow 443/tcp
sudo ufw enable
Verify the firewall status:
sudo ufw status
You should see all three rules listed as ALLOW:
OutputStatus: active

To Action From
-- ------ ----
OpenSSH ALLOW Anywhere
80/tcp ALLOW Anywhere
443/tcp ALLOW Anywhere
OpenSSH (v6) ALLOW Anywhere (v6)
80/tcp (v6) ALLOW Anywhere (v6)
443/tcp (v6) ALLOW Anywhere (v6)
Always make sure that your firewall matches any other specific security policies or procedures with regard to your server. You are now ready to do further configurations on your Linux VPS.
#Step 2: Web server setup
After setting up a Linux VPS, the next step is to install a web server that hosts your website. The two options that naturally come into mind are Apache and Nginx. Apache is very flexible and well-documented. Therefore, it is an excellent choice for a beginner. Nginx is known for its performance in handling high loads and is hence the best choice for scalable websites.
To install Apache on your Linux VPS, execute the following command in your terminal.
sudo apt-get update
sudo apt-get install apache2
For Nginx, execute this.
sudo apt update
sudo apt install nginx
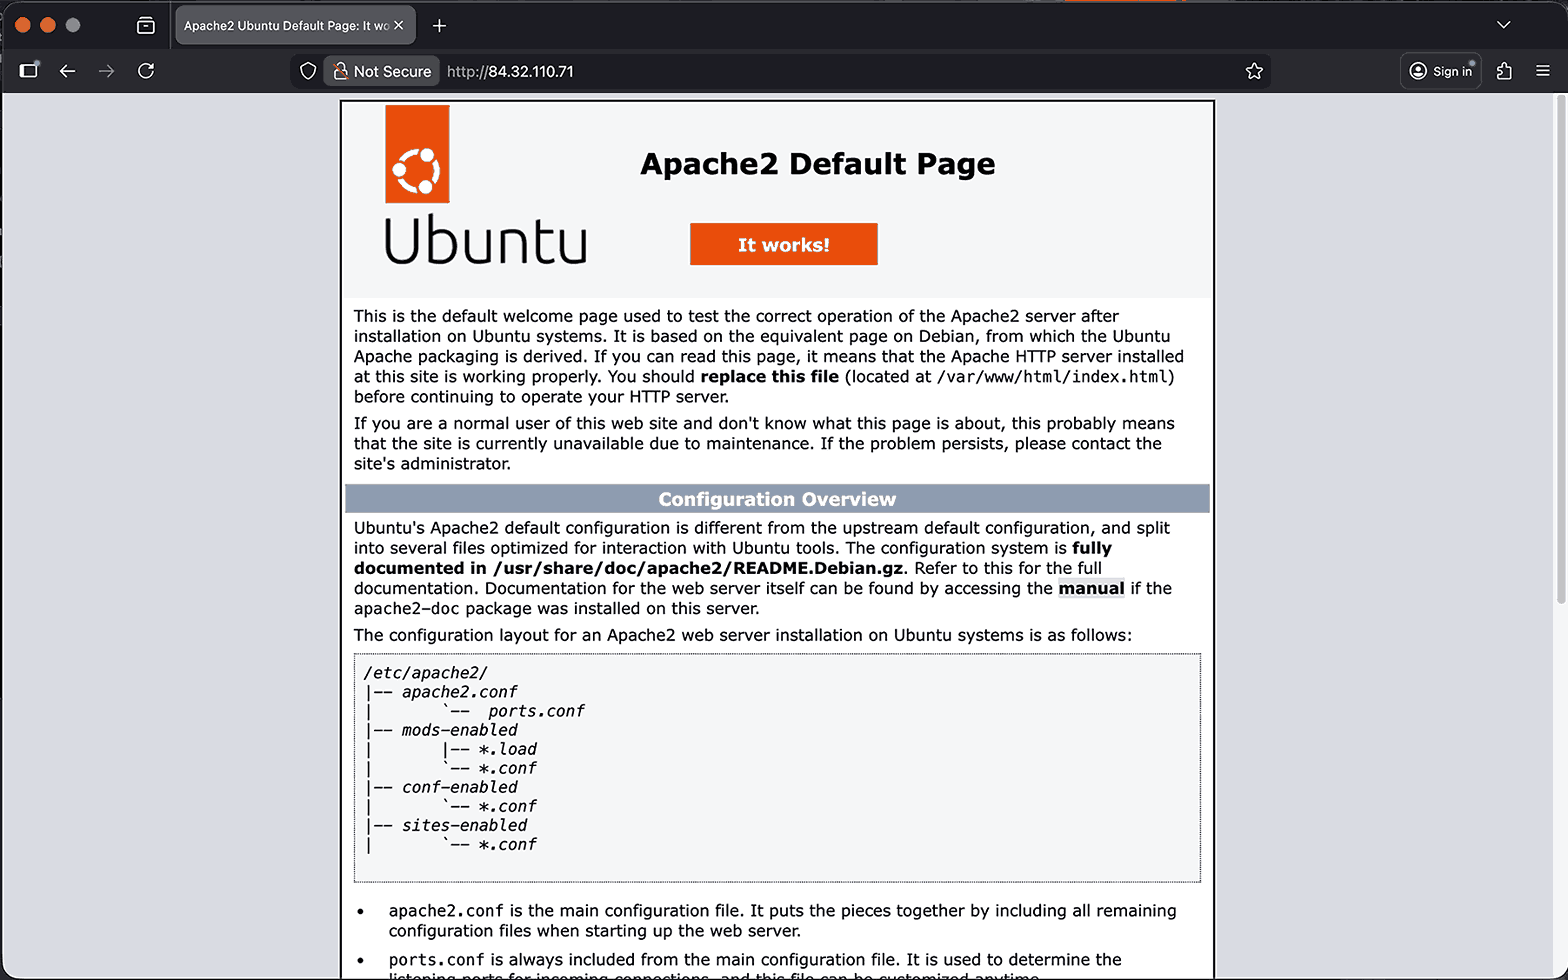
Your web server should automatically start after installation. Just for confirmation, try accessing the IP address of your VPS via a web browser. If you've installed Apache, this should show you the default Apache2 Ubuntu page. If you've installed Nginx, it should show you a welcome page that confirms the successful installation.
You can ensure that when the system starts, the web server will launch automatically by executing the following command.
For Apache:
sudo systemctl enable apache2
For Nginx:
sudo systemctl enable nginx
With the web server up and running, you are one step closer to hosting your website.
#Step 3: Testing the web server
After installing the web server, you should test its functionality. Open a web browser and enter the public IP address of your server. Alternatively, use the following command to check the response.
curl -I localhost
However, if you're accessing from another machine, you can use the command below.
curl -I server-ip
You should see HTTP headers confirming the web server is running, such as 200 OK or 301 Moved Permanently for Nginx. If everything is working correctly, you can proceed.
OutputHTTP/1.1 200 OK
Date: Thu, 26 Feb 2026 05:44:34 GMT
Server: Apache/2.4.58 (Ubuntu)
Last-Modified: Thu, 26 Feb 2026 05:43:17 GMT
ETag: "29af-64bb398eb6d76"
Accept-Ranges: bytes
Content-Length: 10671
Vary: Accept-Encoding
Content-Type: text/html
On the web browser, visit the server's IP address or domain name, and you should get the following welcome page:
If the page does not load, check two things. First, confirm that the firewall allows HTTP traffic on port 80 (sudo ufw status). Second, verify that the web server process is running (sudo systemctl status apache2 or sudo systemctl status nginx).
#Step 4: Setting up a domain name
You should now connect a domain name with your VPS. That way, visitors can access your website using a friendly name instead of your server's IP address.
First, purchase a domain name from a domain registrar such as GoDaddy, Namecheap, or Google Domains. Having bought a domain, you need to configure its DNS through your registrar's control panel.
Create an 'A' record to point the domain name to the public IP of your VPS instance. Indicate your VPS's IP address in the 'A' record. For the root domain, leave it blank or use the hostname as the subdomain.
If you also want visitors to reach your site through www.yourdomain.com, add a CNAME record pointing www to yourdomain.com.
DNS updates might take several hours to propagate across the entire internet. Enter your domain name in a web browser to check the connection. If everything is configured properly, the default web server page should be displayed to you.
You can also run a DNS lookup command from the terminal.
dig yourdomain.com
This will show whether the domain is correctly pointing to your VPS. If the correct IP is listed, your domain is connected successfully, and you're ready to move on to configuring your website.
Also read: 8 Cheap VPS hosting providers
#Step 5: Setting up your database
Most websites rely on databases for storing and managing content. Therefore, read carefully and set up the database accordingly. For websites, MySQL and MariaDB are likely the most popular open-source DBMSs.
MariaDB is a fork of MySQL and is always advisable for use in production because it has many improvements in both performance and security. While both are great options, this article will focus on MySQL.
Now, let's set up the database on your Linux VPS. Start by updating your package list and installing the MySQL server.
sudo apt update
sudo apt install mysql-server -y
Once the installation is complete, MySQL will start automatically. You can verify this by checking the service status.
sudo systemctl status mysql
Output● mysql.service - MySQL Community Server
     Loaded: loaded (/usr/lib/systemd/system/mysql.service; enabled; preset: enabled)
     Active: active (running) since Thu 2026-02-26 07:54:00 EET; 10s ago
    Process: 10537 ExecStartPre=/usr/share/mysql/mysql-systemd-start pre (code=exited, status=0/SUCCESS)
   Main PID: 10546 (mysqld)
     Status: "Server is operational"
      Tasks: 38 (limit: 7063)
     Memory: 363.8M (peak: 378.6M)
        CPU: 963ms
     CGroup: /system.slice/mysql.service
             └─10546 /usr/sbin/mysqld

Feb 26 07:53:59 balanced-foal systemd[1]: Starting mysql.service - MySQL Community Server...
Feb 26 07:54:00 balanced-foal systemd[1]: Started mysql.service - MySQL Community Server.
After confirming MySQL is running, log in to the MySQL shell as the root user.
sudo mysql -u root -p
Create a new database for your website with the following command.
CREATE DATABASE my_website_db;
Next, create a user and grant it the necessary permissions to access and manage the database.
CREATE USER 'myuser'@'localhost' IDENTIFIED BY 'securepassword';
GRANT ALL PRIVILEGES ON my_website_db.* TO 'myuser'@'localhost';
FLUSH PRIVILEGES;
EXIT;
For added security, run the mysql_secure_installation script.
sudo mysql_secure_installation
Be sure to set up a strong password validation policy.
OutputSecuring the MySQL server deployment.

Connecting to MySQL using a blank password.

VALIDATE PASSWORD COMPONENT can be used to test passwords
and improve security. It checks the strength of password
and allows the users to set only those passwords which are
secure enough. Would you like to setup VALIDATE PASSWORD component?

Press y|Y for Yes, any other key for No: y

There are three levels of password validation policy:

LOW Length >= 8
MEDIUM Length >= 8, numeric, mixed case, and special characters
STRONG Length >= 8, numeric, mixed case, special characters and dictionary file

Please enter 0 = LOW, 1 = MEDIUM and 2 = STRONG: 2
Next, the script will guide you through securing your MySQL installation by removing insecure default settings, setting a root password, and more. Once complete, your MySQL database will be ready for use, ensuring secure and efficient data management for your website.
OutputRemove anonymous users? (Press y|Y for Yes, any other key for No) : y
Success.


Normally, root should only be allowed to connect from
'localhost'. This ensures that someone cannot guess at
the root password from the network.

Disallow root login remotely? (Press y|Y for Yes, any other key for No) : y
Success.

By default, MySQL comes with a database named 'test' that
anyone can access. This is also intended only for testing,
and should be removed before moving into a production
environment.


Remove test database and access to it? (Press y|Y for Yes, any other key for No) : y
- Dropping test database...
Success.

- Removing privileges on test database...
Success.

Reloading the privilege tables will ensure that all changes
made so far will take effect immediately.

Reload privilege tables now? (Press y|Y for Yes, any other key for No) : y
Success.

All done!
For a more detailed walkthrough of MySQL setup and security hardening, see our guide on how to install MySQL on Ubuntu 24.04.
Also read: How to host a discord bot on VPS
#Step 6: Uploading website files
Immediately after setting up the database, you need to upload your website files to your Linux VPS. The files can be transferred using secure protocols such as SCP, FTP, or SFTP. Command-line users favor SCP, whereas FTP or SFTP offer a simple interface for those who prefer graphical tools.
Before uploading, create a good directory structure on your server. The website files are normally held in the /var/www/ directory. You can create a folder for your website by executing the following.
sudo mkdir -p /var/www/mywebsite
Once the directory is set up, transfer your files using your chosen method. Make sure to upload HTML, CSS, JavaScript files, and any other assets to this folder.
To copy files from your local machine to the server using SCP, run this command on your local terminal:
scp -r /path/to/local/files webadmin@your_server_ip:/var/www/mywebsite/
The -r flag copies directories recursively. Replace /path/to/local/files with the actual path to your website files on your local machine.
After uploading, configure appropriate file permissions to ensure security. Use the chmod command to grant necessary access.
sudo chmod -R 755 /var/www/mywebsite
Also, set the correct ownership so the web server can read the files:
sudo chown -R www-data:www-data /var/www/mywebsite
The www-data user is the default user that both Apache and Nginx run as on Ubuntu. Setting ownership to this user prevents permission errors when the web server tries to serve your files.
This ensures the right balance of accessibility and security for your website files.
#Step 7: Configuring your web server
To ensure your web server serves your website correctly, configure virtual hosts for Apache or server blocks for Nginx.
For Apache, create a virtual host file in the /etc/apache2/sites-available/ directory. Here's how to set it up.
sudo nano /etc/apache2/sites-available/mywebsite.conf
Add the following configuration, replacing mywebsite.com with your domain:
<VirtualHost *:80>
    ServerAdmin webmaster@mywebsite.com
    ServerName mywebsite.com
    ServerAlias www.mywebsite.com
    DocumentRoot /var/www/mywebsite
    ErrorLog ${APACHE_LOG_DIR}/mywebsite.com-error.log
    CustomLog ${APACHE_LOG_DIR}/mywebsite.com-access.log combined
</VirtualHost>
Note that the ErrorLog and CustomLog directives must sit inside the <VirtualHost> block. Placing them outside will cause Apache to throw a configuration error on restart.
Enable the site and restart Apache.
sudo a2ensite mywebsite.conf
sudo systemctl restart apache2
For Nginx, create a directory structure for your website files. In this example, I'll create it in the /var/www directory.
sudo mkdir -p /var/www/mywebsite/html
Make sure to upload HTML, CSS, JavaScript files, and any other assets to this folder.
Next, create a server block in /etc/nginx/sites-available/.
sudo nano /etc/nginx/sites-available/mywebsite
Add the following lines of code:
server {
    listen 80;
    server_name mywebsite.com www.mywebsite.com;
    root /var/www/mywebsite/html;
    index index.html;
    access_log /var/log/nginx/mywebsite.com.access.log;
    error_log /var/log/nginx/mywebsite.com.error.log;
}
Next, create a symbolic link to enable the site. The symbolic link allows Nginx to recognize your configuration and include it in its active sites.
sudo ln -s /etc/nginx/sites-available/mywebsite
/etc/nginx/sites-enabled/
Before restarting, test the configuration for syntax errors:
sudo nginx -t
If the output shows syntax is ok and test is successful, proceed to restart:
sudo systemctl restart nginx
Test the configuration by accessing your domain. If everything is set up correctly, your website should be live.
For a complete walkthrough of Nginx setup, including server blocks and SSL, see our guide on how to install Nginx on Ubuntu 24.04.
#Step 8: Securing your website with SSL
SSL/TLS encryption protects data in transit between your server and visitors. Every modern website needs it. Browsers flag HTTP sites as "Not Secure," and HTTP sites even increase your SEO ranking. Let's Encrypt provides free certificates, and Certbot automates the entire process.
For Apache:
sudo apt-get install certbot python3-certbot-apache
For Nginx:
sudo apt-get install certbot python3-certbot-nginx
Then, request an SSL certificate.
For Apache:
sudo certbot --apache
For Nginx:
sudo certbot --nginx
Follow the prompts to complete the installation.
Let's Encrypt certificates are valid for 90 days, but Certbot can automatically renew them. Set up auto-renewal with this command.
sudo systemctl enable certbot.timer
Test the renewal process to confirm it works:
sudo certbot renew --dry-run
If the dry run completes without errors, Certbot will handle all future renewals automatically.
With SSL configured, your website is secure with HTTPS.
#Step 9: Setting up backups and monitoring
To keep your website data secure, you need to set up periodic backups and server health checks. These automated backups facilitate quick restores in case of data loss or server failure. You can schedule backups for your website files and database using tools such as rsync or tar. Set up a cron job to automate backups like this.
0 2 * * * /usr/bin/rsync -av /var/www/mywebsite /backup/directory/
This command will run the backup daily at 2 AM.
Do not forget your database. Use mysqldump to back up the MySQL database alongside your website files:
0 2 * * * /usr/bin/mysqldump -u myuser -p'securepassword' my_website_db > /backup/directory/db_backup_$(date +\%F).sql
This command exports the entire database to a timestamped SQL file every night at 2 AM. Store backups on a separate volume or in a remote location to protect against disk failure.
You have to take care of the health of your server, too. For that, you need to obtain real-time system resource usage statistics by using tools such as htop, top, nmon, while further monitoring can be done with Netdata, Monit, or Prometheus to track CPU, memory, and disk usage.
Set up alerts to notify you so that you can fix a problem well before it affects your website's performance. Regular backups and monitoring ensure ongoing reliability.
#Step 10: Installing PHP (optional)
Static HTML websites do not need PHP. But if you plan to run a CMS like WordPress, a framework like Laravel, or any dynamic application, you need PHP installed on your server.
Install PHP and common extensions:
sudo apt install php php-fpm php-mysql php-xml php-mbstring php-curl php-zip -y
For Nginx, PHP-FPM (FastCGI Process Manager) handles PHP processing. Verify that PHP-FPM is running:
sudo systemctl status php8.3-fpm
Note: The version number (8.3) may differ based on your Ubuntu release. Run php -v to check the installed version.
For Apache, enable the PHP module instead:
sudo apt install libapache2-mod-php -y
sudo systemctl restart apache2
Test PHP by creating a simple info page:
echo "<?php phpinfo(); ?>" | sudo tee /var/www/mywebsite/info.php
Visit http://your_server_ip/info.php in a browser. You should see the PHP information page. Remove this file after testing, as it exposes server details:
sudo rm /var/www/mywebsite/info.php
#Troubleshooting common issues
When hosting a website on a Linux VPS, several common issues may arise.
-
Delays in DNS propagation: It may take anywhere from several minutes to 48 hours for changes to your domain's DNS records to propagate globally. During this time, your website may be intermittently unavailable. If the process takes too long, verify that your DNS settings are correctly configured and proactively resolve any issues using tools like dig or nslookup.
-
Web server errors: If your website isn't loading or is showing error pages, check the web server's log files for clues. Common errors include misconfigurations in virtual host or server block files, which can be resolved by reviewing and correcting your configuration settings.
-
Database connection issues: These are typically due to incorrect credentials or server settings. Ensure your MySQL credentials in the configuration file match those in your database, and verify that the database server is running.
-
Permission denied errors: If your web server returns 403 Forbidden errors, the file ownership or permissions are likely wrong. Verify that the web server user (
www-dataon Ubuntu) owns or can read the website files. Runsudo chown -R www-data:www-data /var/www/mywebsiteto fix ownership. -
Port already in use: If Apache or Nginx fails to start with a "port already in use" error, another process is occupying port 80 or 443. Run
sudo ss -tlnp | grep :80to identify the conflicting process. Stop or remove it before restarting your web server. -
SSL certificate renewal failures: Certbot renewals can fail if port 80 is blocked or if the domain no longer points to the server. Check the Certbot log at
/var/log/letsencrypt/letsencrypt.logfor specific error messages. Ensure your firewall allows port 80 traffic, as Let's Encrypt uses HTTP-01 challenges for domain validation.
Once your website is live, consider these next steps:
-
Set up a database management interface with phpMyAdmin for easier database administration.
-
Deploy a CMS like WordPress on Ubuntu 24.04 if you need a content management system.
-
Containerize your applications with Docker for easier deployment and portability.
-
Explore Cherry Servers' VPS plans for scalable hosting with hourly billing and 24/7 technical support.
#Conclusion
Linux VPS hosting allows flexibility, full control, and the ability to scale, which is why many webmasters choose it as the best option. With the steps discussed above, it should not be an issue to set up your VPS, install your web server, configure your domain, secure your site with SSL, and develop normal backups and monitoring to create a safe and reliable hosting environment.