How to Install Ubuntu 26.04 (Step-by-Step Guide)



Ubuntu 26.04 is finally here and promises to be one of the most compelling LTS releases in recent history. It makes a huge leap from its predecessor, delivering a richer, more refined Linux experience through a blend of new features and under-the-hood improvements.
The biggest philosophical shift in the latest release is the complete switch to Wayland. This has yielded a superior desktop experience with improved security. Users have reported smoother graphics, better scaling on HiDPI displays, and lower latency on modern GPUs.
In this guide, we will walk through installing Ubuntu 26.04 LTS on a PC.
#Prerequisites
Canonical has raised the bar on minimum hardware requirements with this release. The recommended RAM now sits at 6 GB — up 50% from previous LTS versions like 24.04 and 22.04.
The CPU and storage requirements remain unchanged from previous releases. At the very least, you need a minimum of a 2 GHz dual-core CPU and 25 GB of storage.
Here's a summary of what you need before getting started.
-
25 GB disk space
-
2 GHz dual-core 64-bit processor
-
6 GB RAM (Although not a hard requirement, you can still have 4GB, but your PC will suffer performance issues)
-
1024x768 screen resolution, 3D acceleration
-
A spare PC and a USB drive for creating a bootable medium
Now let’s dive in and see how to install Ubuntu 26.04 on a PC step-by-step.
If you're looking to deploy Ubuntu 26.04 on production infrastructure, Cherry Servers has you covered. Ubuntu 26.04 LTS is now available on both Bare Metal servers and Virtual Servers.
Already on Ubuntu 24.04? Skip the fresh install and upgrade to Ubuntu 26.04 directly and keep your data and settings intact.
#Installing Ubuntu 26.04
If you've installed previous versions of Ubuntu desktop before, setting up Ubuntu 26.04 will feel familiar. The process remains largely unchanged, with just a few minor changes. We'll begin by downloading the ISO image, flashing it to a bootable drive, and following the guided installer through each step.
#Step 1: Download the ISO image
Before anything else, you need to download the ISO image from which you will create a bootable USB drive. On a different PC, visit the official Ubuntu desktop download page and download the ISO file for 'Intel/AMD 64-bit architecture'.
#Step 2: Create a bootable USB medium
Once the ISO file download is complete, plug in your pen drive, then use an open-source tool like Balena Etcher or Rufus to create a bootable USB drive.
Alternatively, you can use the Linux dd command to create the bootable medium as follows:
sudo dd if=/path/to/ubuntu-26.04-desktop-amd64.iso of=/dev/sdX bs=4M status=progress oflag=sync
Where:
if: specifies the path of the ISO image of: Indicates the USB device /dev/sdX: Specifies the physical SCSI drive
Ensure the command finishes before unplugging the USB drive.
#Step 3: Boot From the USB Drive
Once ready, remove the bootable USB drive and plug it into the PC on which you want to install Ubuntu.
Next, restart or power on the PC. Be sure to set the USB drive to have the highest boot priority in the BIOS. You can access the BIOS by pressing the F12, F10, F2, Del, or Esc keys (this varies by manufacturer).
#Step 4: Start the installation
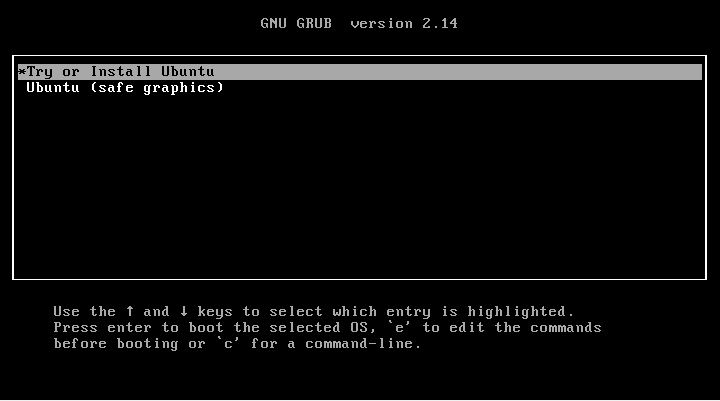
Upon successful reboot, Ubuntu's GRUB menu screen will appear with two options:
Try Ubuntu — Runs Ubuntu straight from the USB without touching your hard drive. Ideal for checking that your hardware works before committing.
Install Ubuntu — Kicks off the installation.
Since the goal is to install Ubuntu, select 'Try or Install Ubuntu' and press Enter.
Select installation language
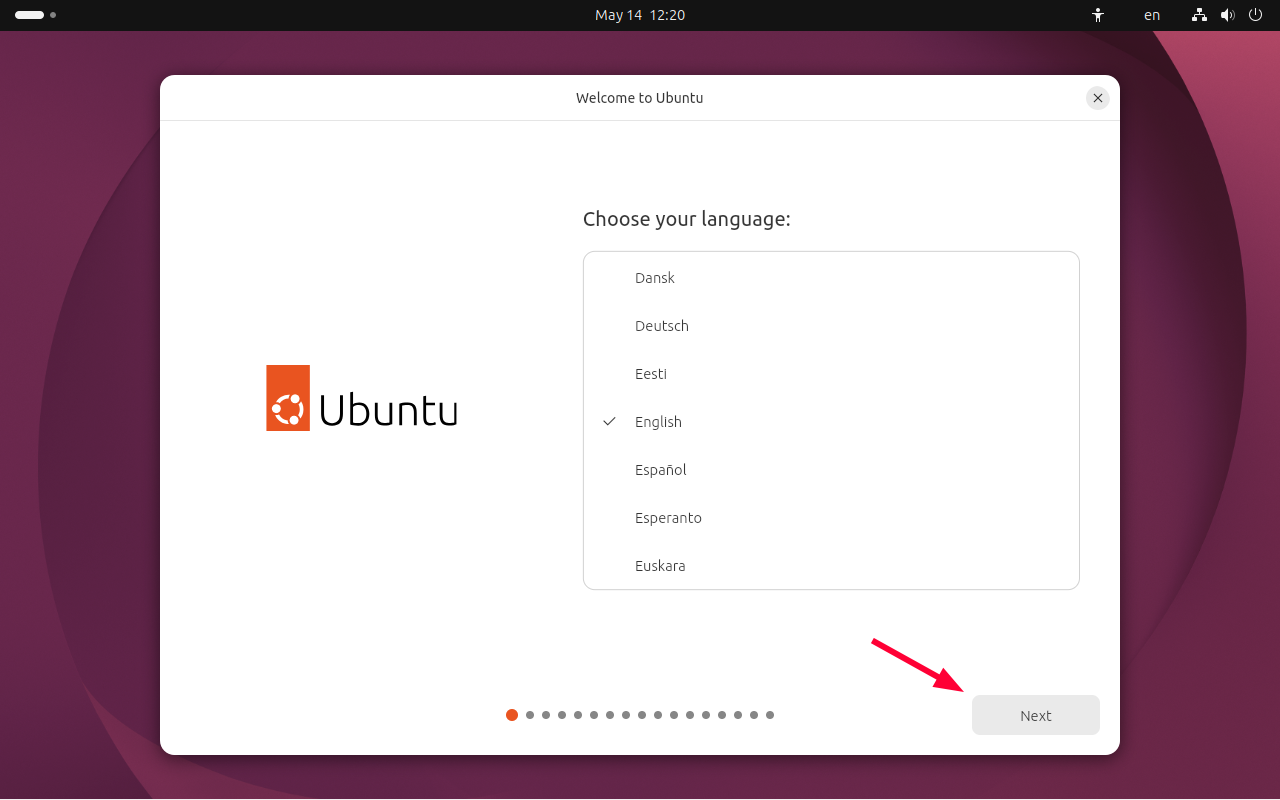
When the installation wizard opens, the first step is to select the installation language. By default, this is set to English. Feel free to select the language you are comfortable with and hit 'Next'.
Accessibility
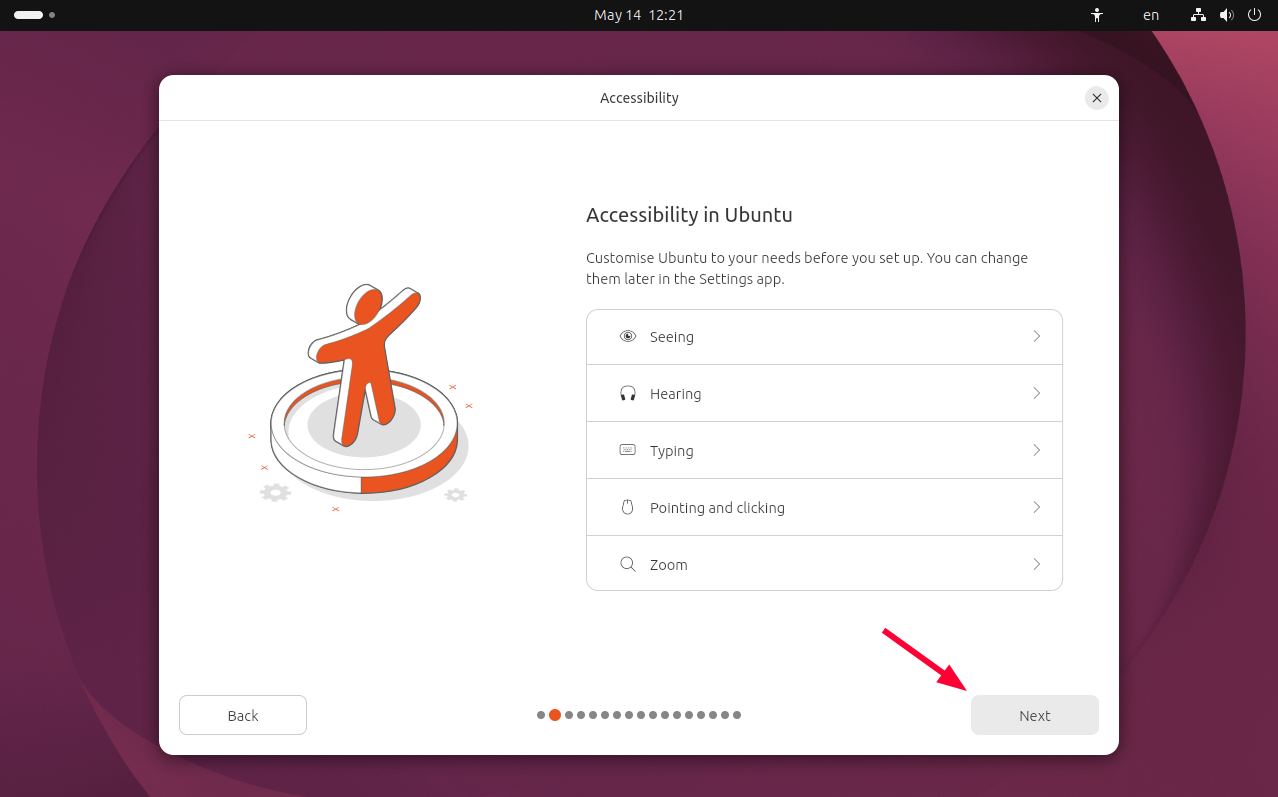
The next section provides options to enhance the user experience/interaction. These are mostly tailored for users with visual or hearing impairments. For example, you can increase the font size for better readability or turn on a screen reader. You can also enable sticky keys to assist users who have trouble holding down multiple keys simultaneously.
By default, these options are disabled. Enable your preferred feature, or if you prefer to leave everything as is, click 'Next' to proceed with the installation.
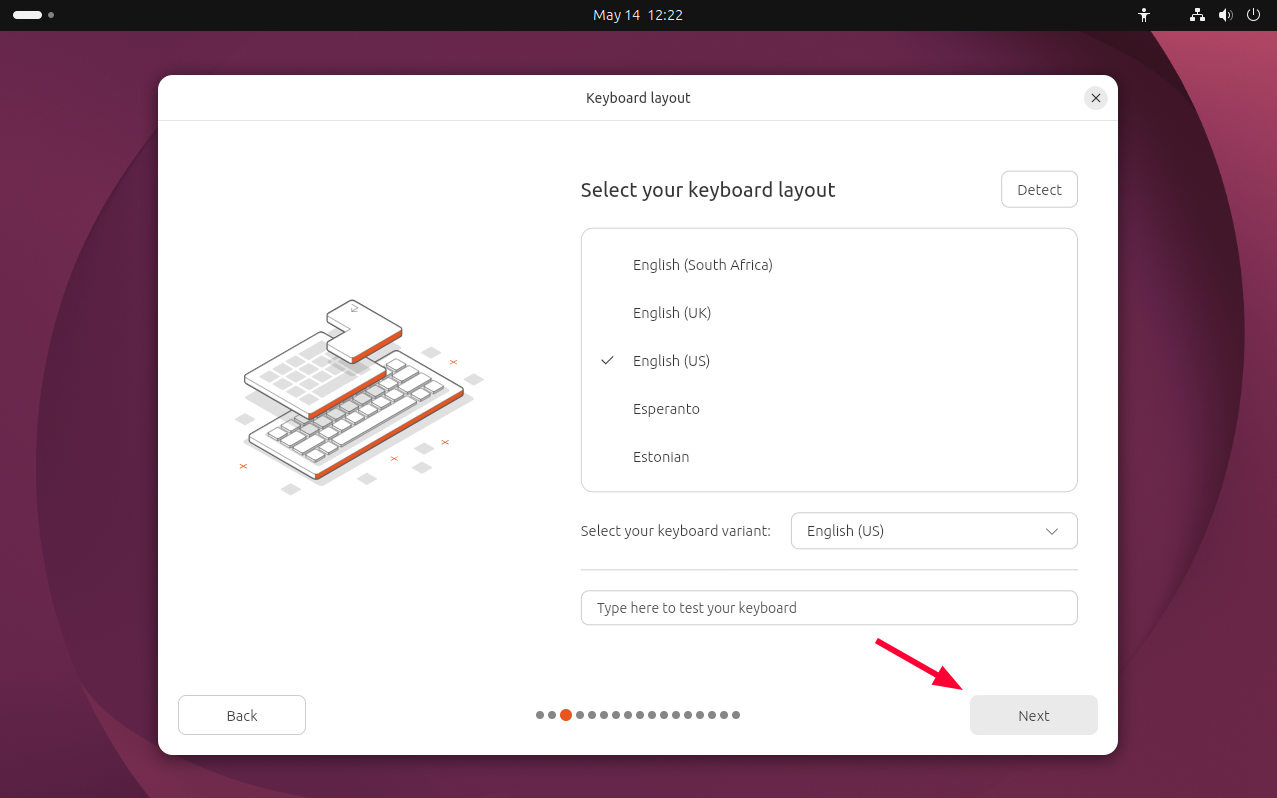
Select keyboard layout
The keyboard variant is typically set to 'English US' by default. Select your desired layout from the menu provided. Better still, you can test out the keyboard by typing in a few words in the text field provided.
Once satisfied with the chosen layout, click 'Next'.
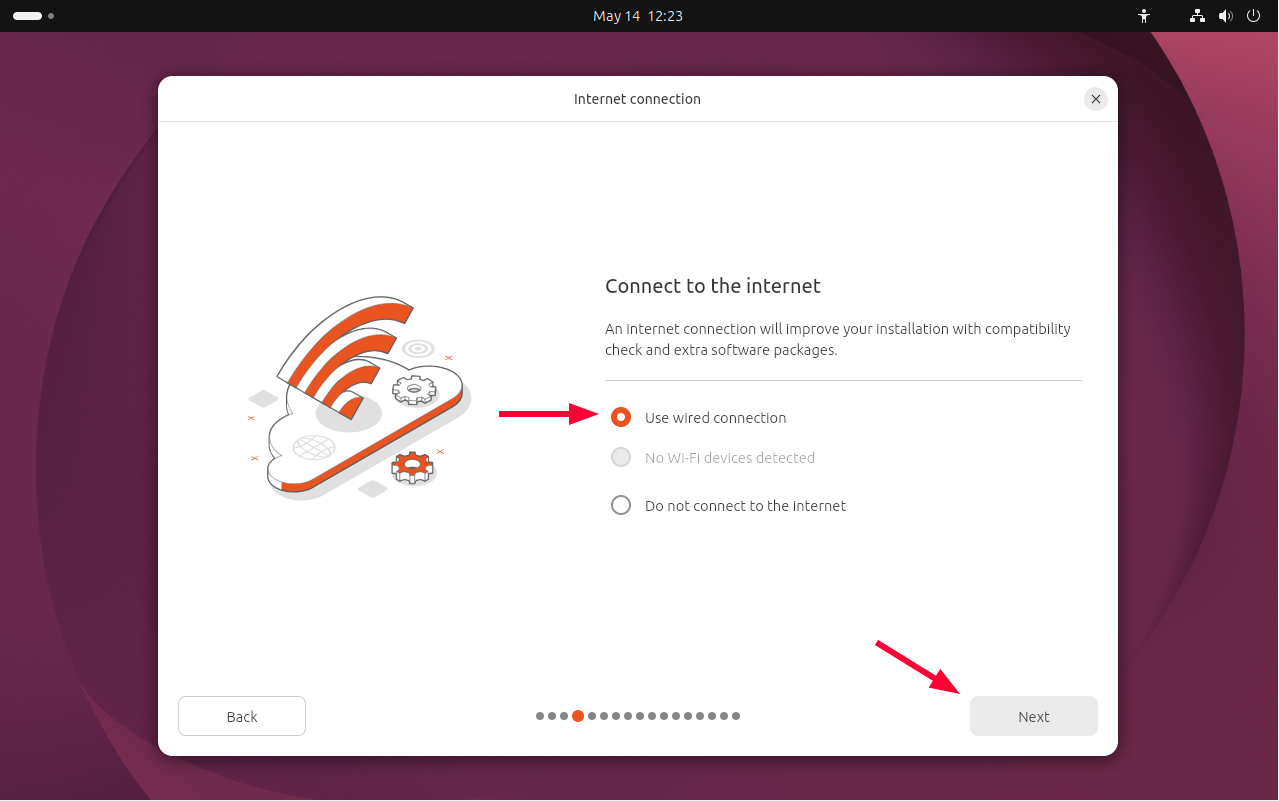
Connect to the internet
This step provides the option to connect to the internet before the installation completes. While not strictly required, it is worth doing. Ubuntu will pull all the latest security patches, bug fixes, and hardware drivers (including NVIDIA and Wi-Fi) during setup, saving you a round of updates on first boot.
There are two connection options available. If your PC is plugged into a router via an Ethernet cable, select the Wired connection option. If your machine has a wireless adapter (standard on most laptop PCs), you can connect over Wi-Fi instead.
Select your preferred option and click 'Next'.
Installer update
You might be prompted to update the installer for improved reliability. This is not really necessary as you can update the system after installation by running the sudo apt update && sudo apt upgrade commands.
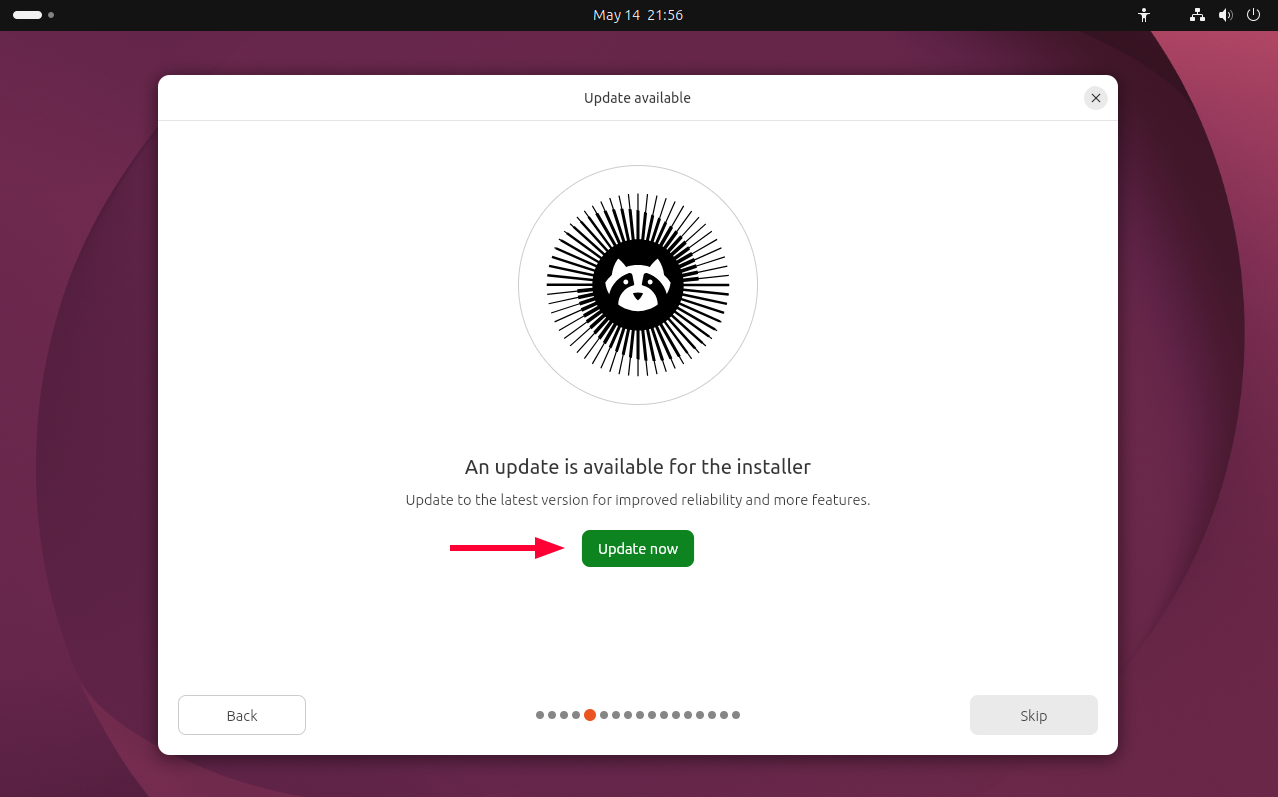
If you choose to update the installer, you will be required to close and relaunch it, then start over from selecting the installation language.
Installation options
The next few steps will guide you through the installation. Since our mission is to install Ubuntu, select 'Install Ubuntu' and click 'Next'.
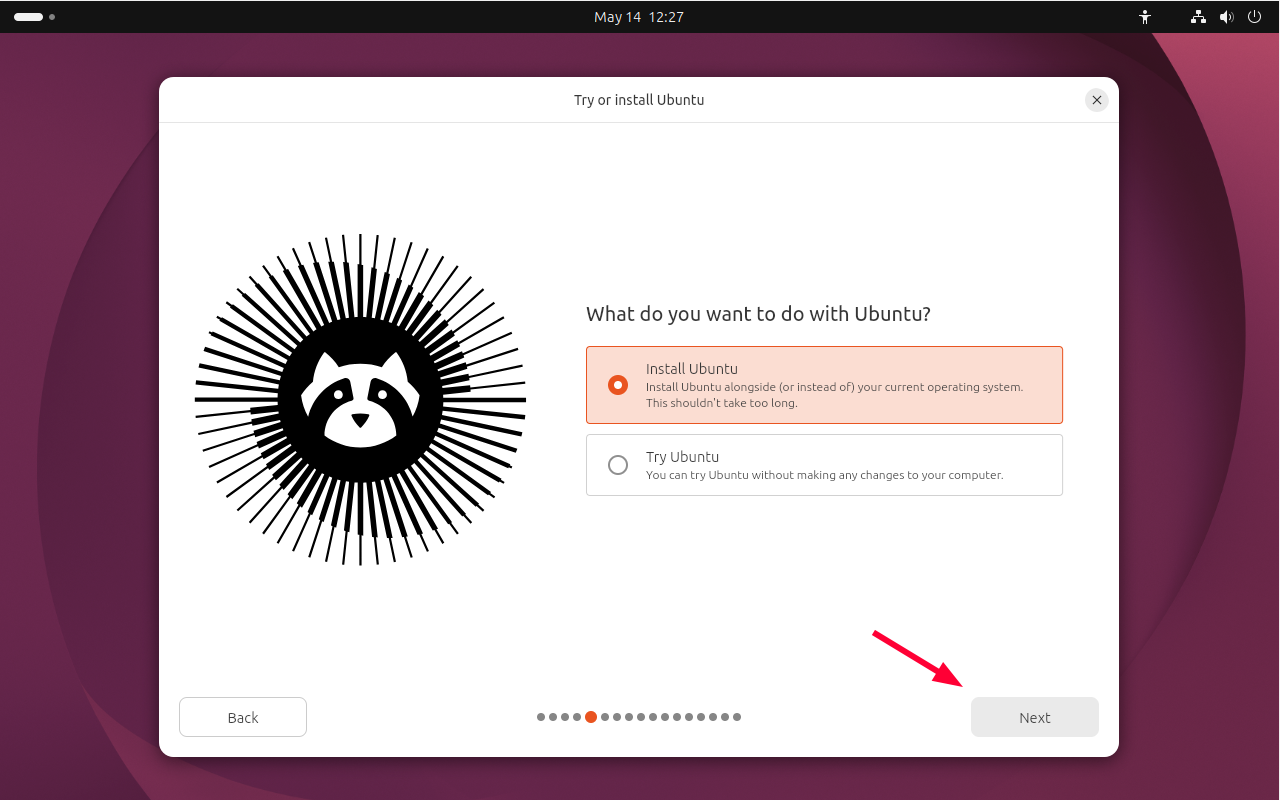
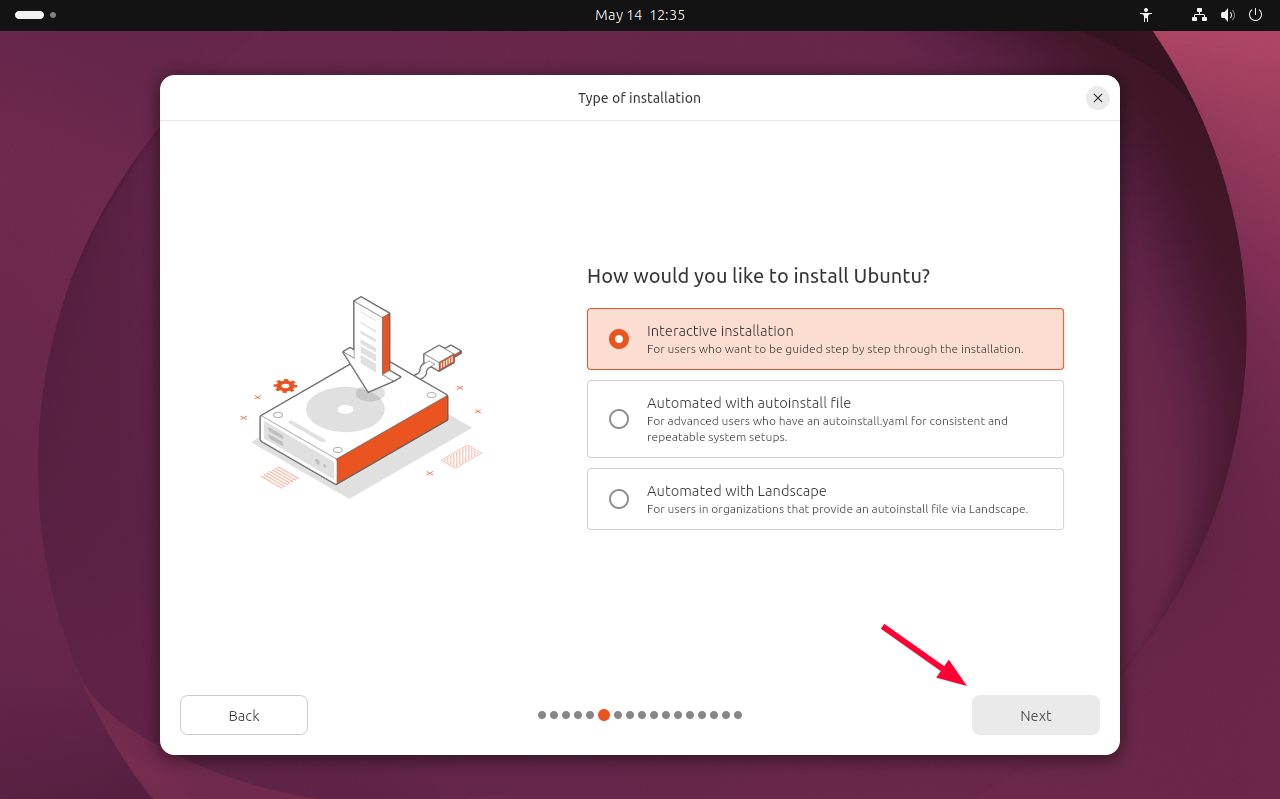
Next, you will be prompted to choose your preferred installation option. Three methods are presented:
Interactive installation: This is the default option. It walks you through the installation step by step using the GUI. You get to choose the applications to install, set up the time zone, create a user account, and partition the hard drive (erasing the disk or manually partitioning).
Automated with an autoinstall file: This uses a YAML file to define installation steps, such as installing apps, creating a user, and disk partitioning. It allows for unattended installation and is ideal for setting up multiple machines with the same configuration. Mostly used by advanced users.
Automated with Landscape: This is a new option in Ubuntu 26.04. It’s designed for enterprise environments for centralized management and automatic enrollment with the Landscape server.
For simplicity, we will go with the first option, Interactive installation. This will guide us through the installation step by step.
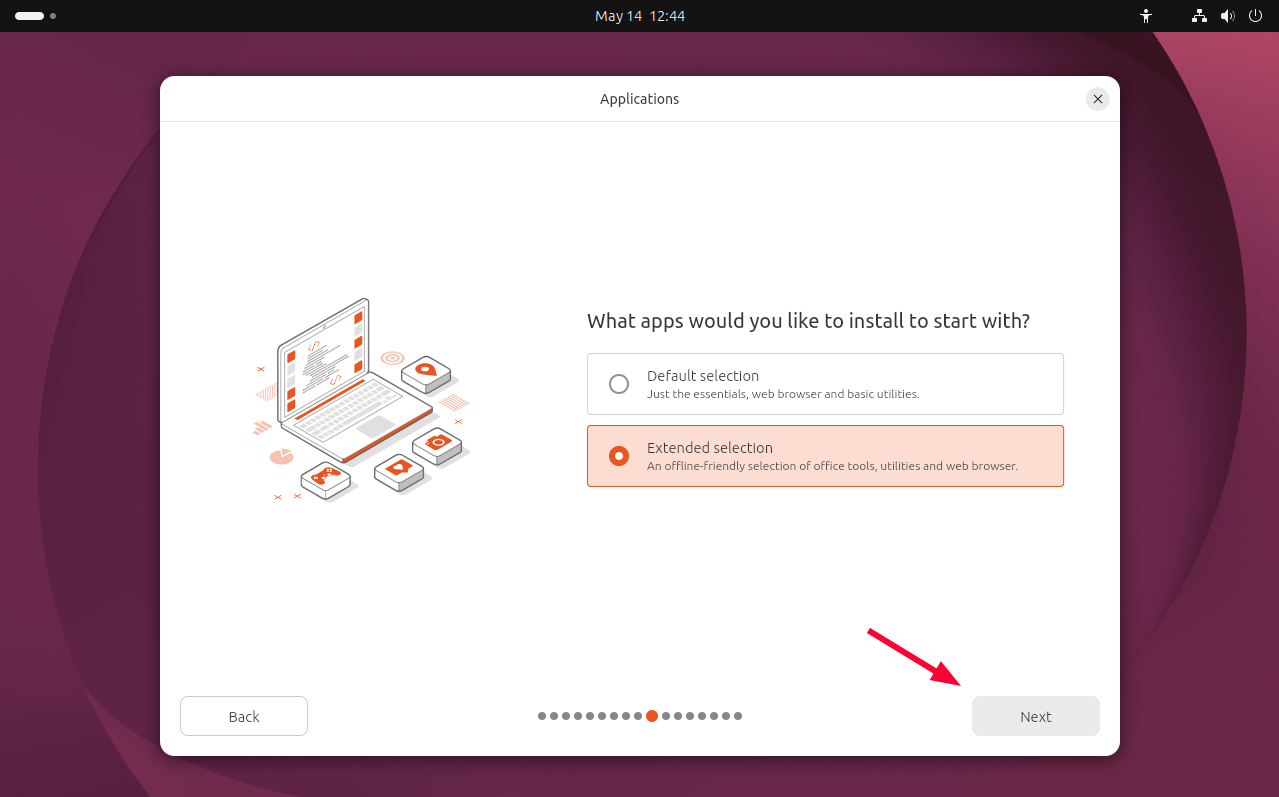
Next, you will be required to choose the App selection. Two options are provided:
Default - This gives you a bare-bones setup. You get a web browser and essential apps to get you started, keeping things light and uncluttered.
Extended - Unlike the default selection, the extended selection comes with additional apps such as LibreOffice, Firefox, Thunderbird, and more. This is the ideal option for desktop users who want to get started without installing these apps.
In this case, we will choose the Extended Selection option, which offers a full suite of default applications. Click 'Next'.
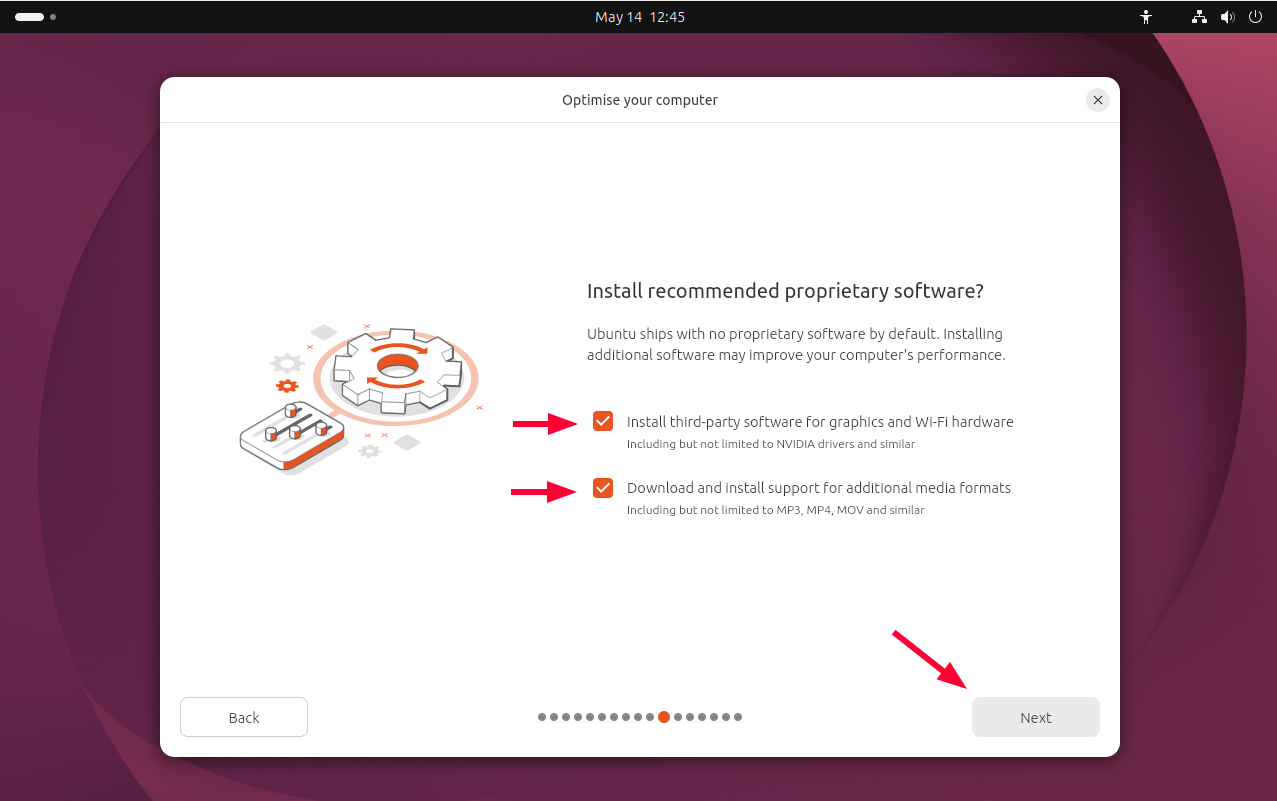
Install recommended proprietary software
It's usually a good idea to install third-party proprietary software during setup — it'll save you a lot of headaches later. This covers things like NVIDIA graphics drivers, media codecs, and Wi-Fi drivers, all handled for you upfront.
Check both checkboxes to install third-party graphics and hardware software. Then click 'Next'.
Disk Setup
Disk partitioning is one of the most critical steps during the installation process. It involves dividing the hard drive into multiple logical sections, allowing the system to organize data more efficiently. It determines which files go into which partitions, contributing to overall data protection and system stability.
The installer presents two installation options:
Erase Disk and Install Ubuntu: Here, the installer erases the entire disk and partitions it automatically. This is recommended for beginners and users who are not well-versed in Linux disk partitioning.
Manual Installation: This is the preferred option for more experienced Linux users who prefer control over hard disk partitioning. It lets you manually create disk partitions and specify their disk sizes.
For this guide, we will let the installer automatically partition the hard drive.

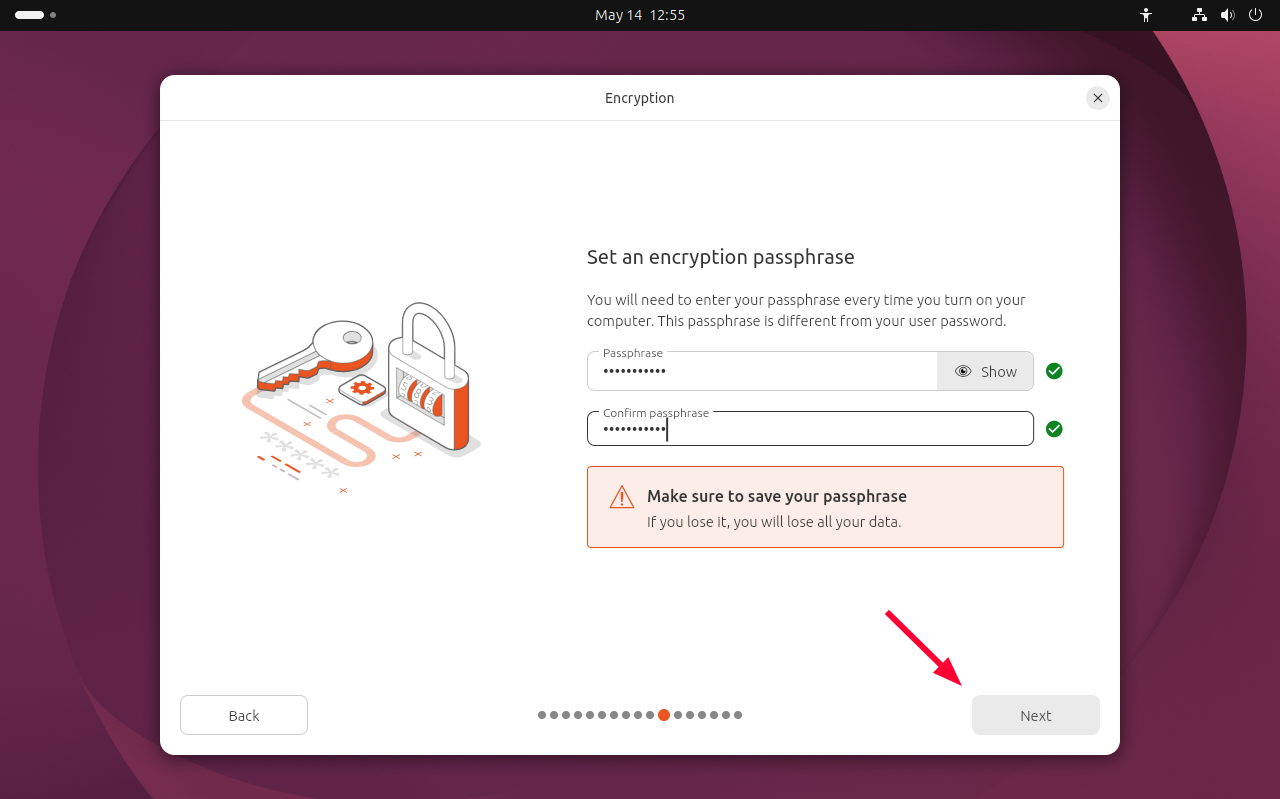
Next, you will be asked whether you want to encrypt your hard drive. It’s strongly advised to encrypt your drive using a passphrase to add an extra layer of protection. This will require you to provide a password early in the startup process to unlock the drive before you can log in.
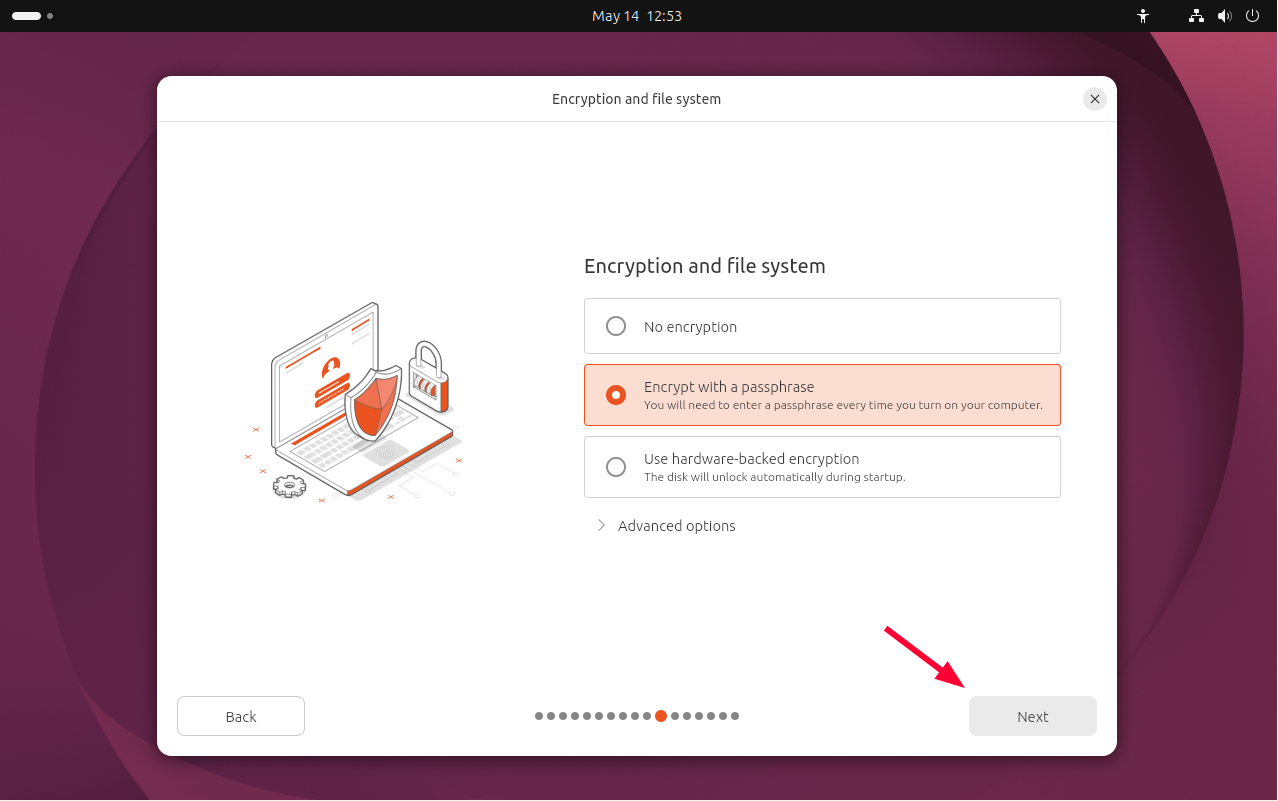
Provide a password and confirm it.
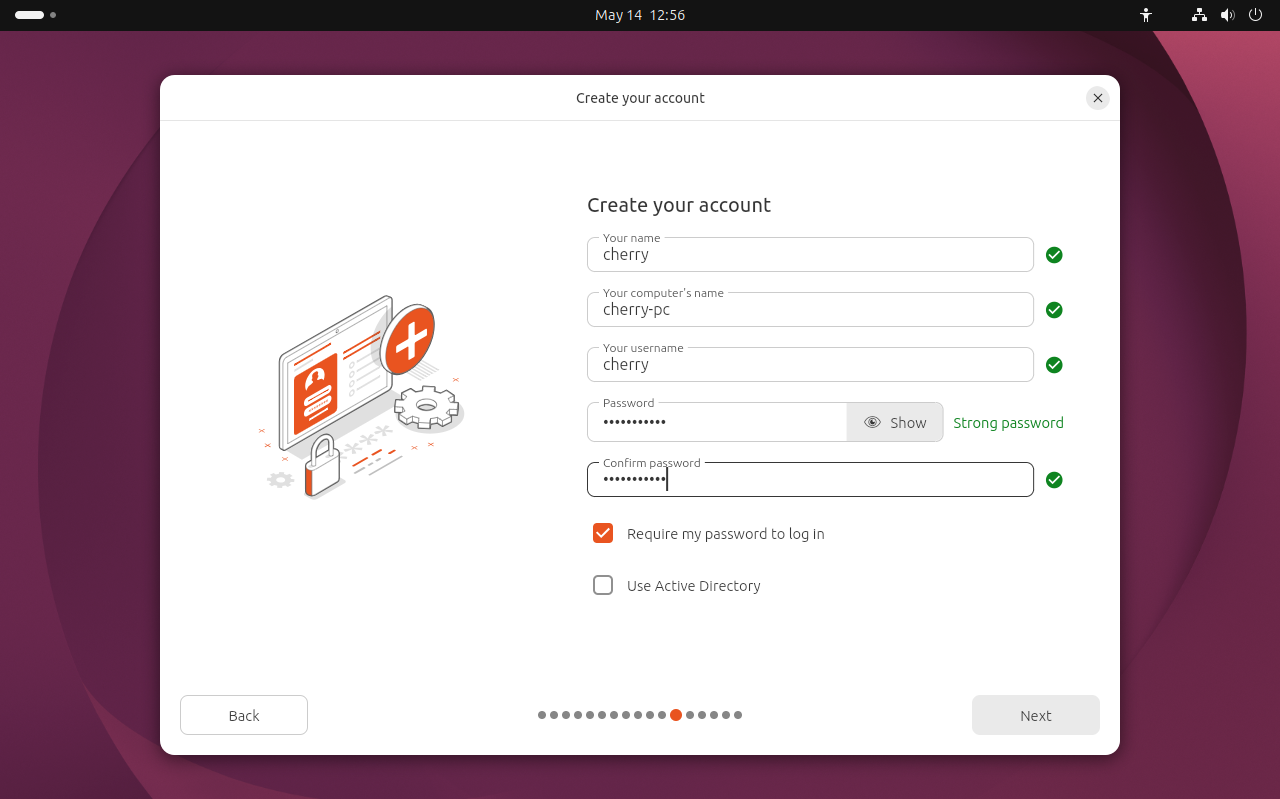
Create user account
In this section, create a local account by specifying your name, hostname, username, and password. Then click 'Next' to proceed.
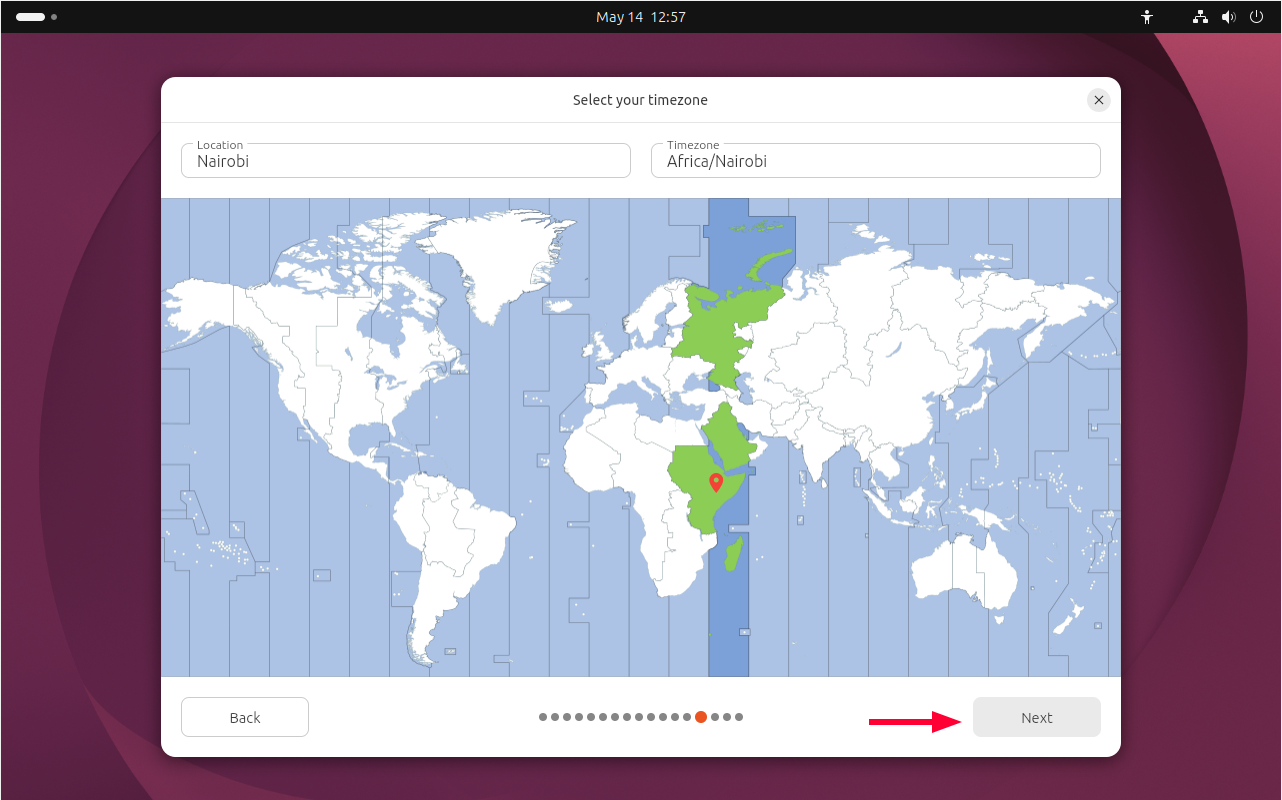
Select Timezone
In this step, select your geographical location on the world map to set the time zone. Typically, your location is automatically detected when your PC is connected to the internet.
Once you have specified your location and timezone, hit 'Next'.
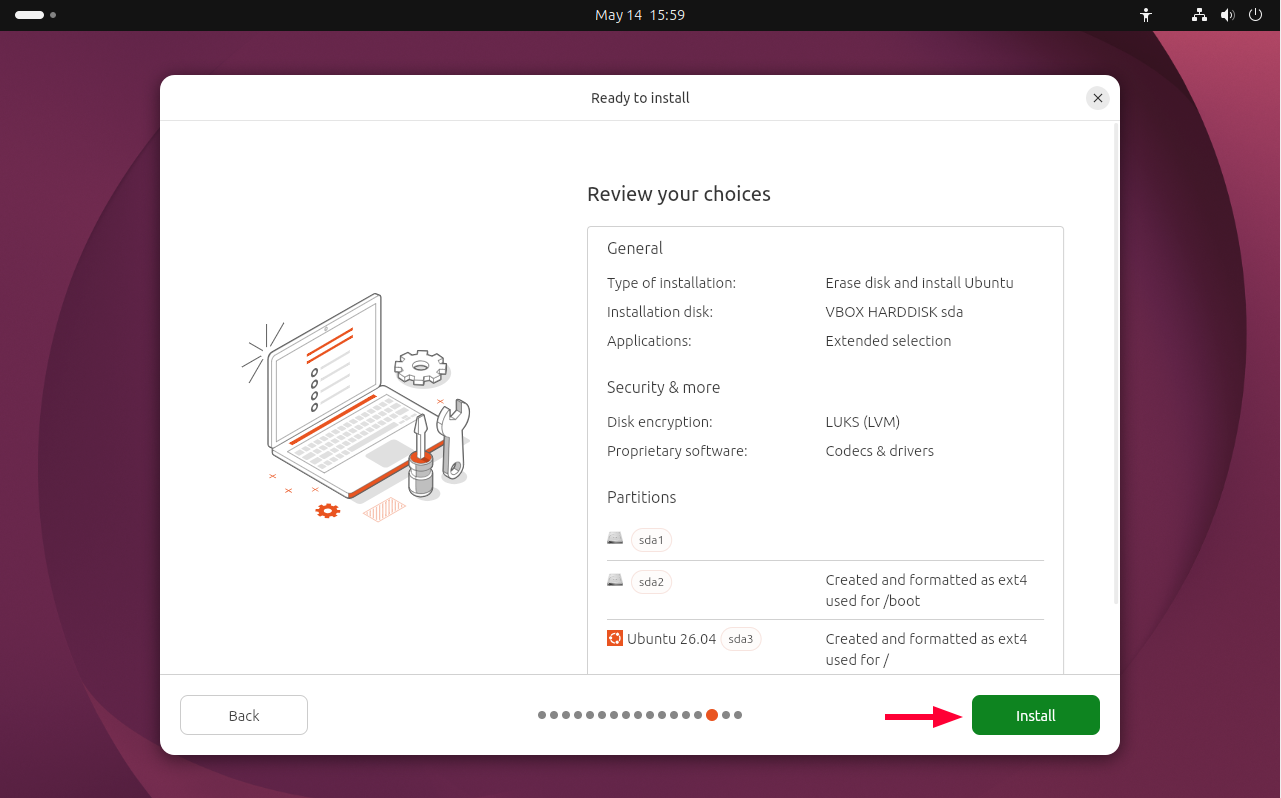
Review configurations
Finally, you will be presented with a list of all configuration options, including disk setup and partitions. If everything looks okay, hit the Install button.
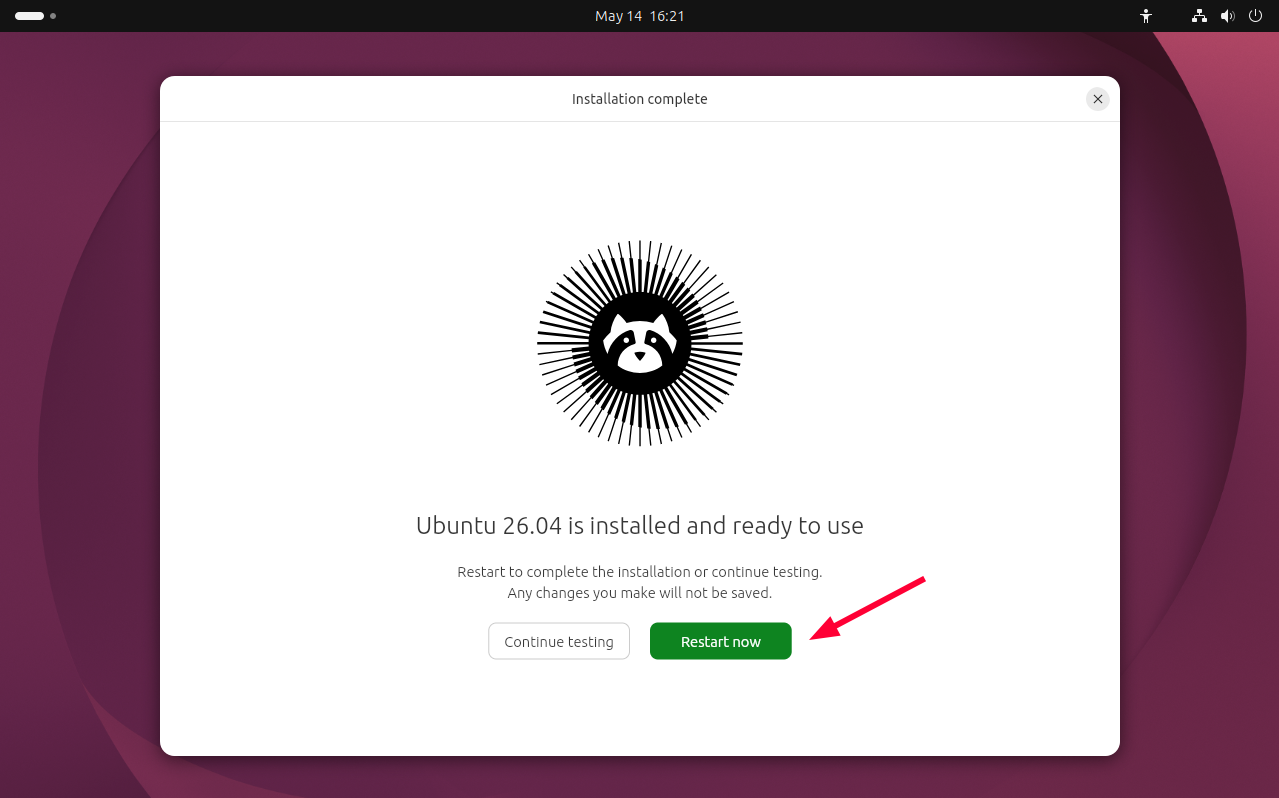
When the installation finishes, you'll be prompted to restart your computer. Click on "Restart Now" to reboot your system.
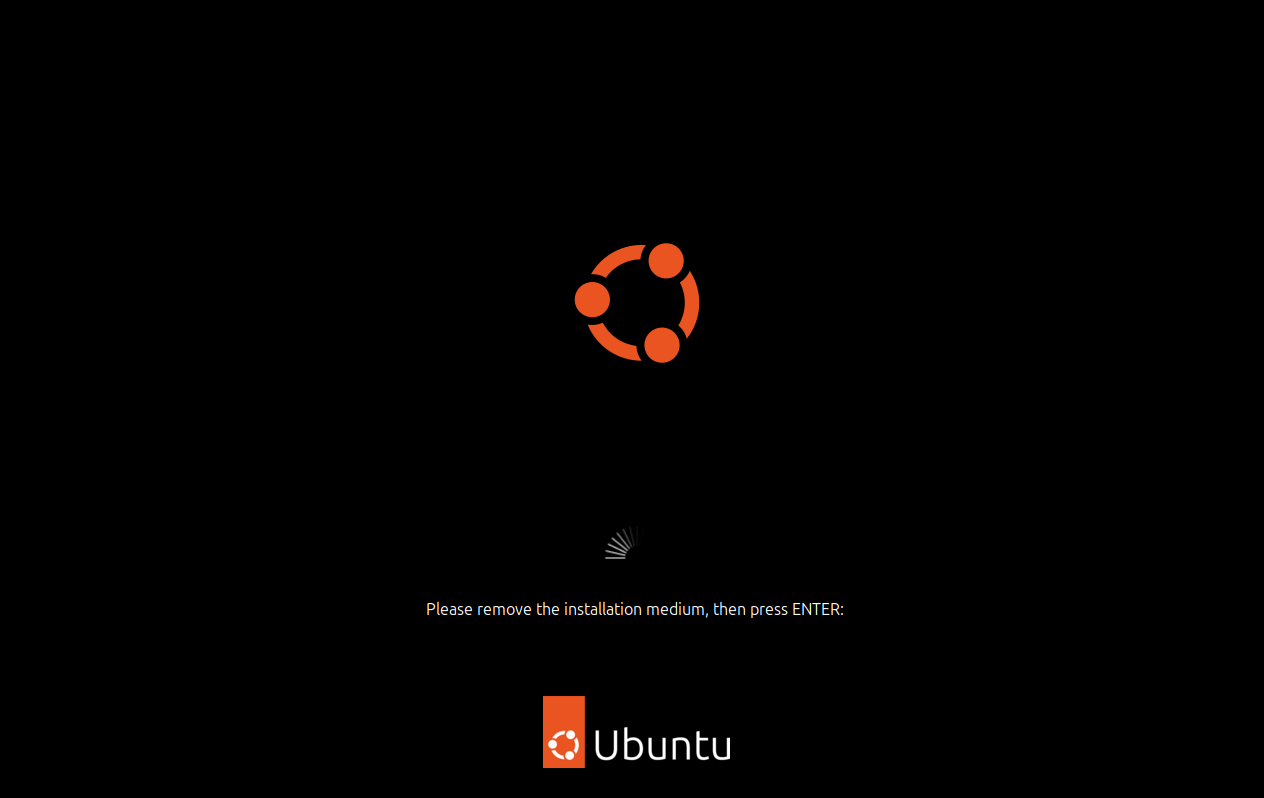
Also, remember to remove the installation medium.
#Step 5: Boot into Ubuntu 26.04
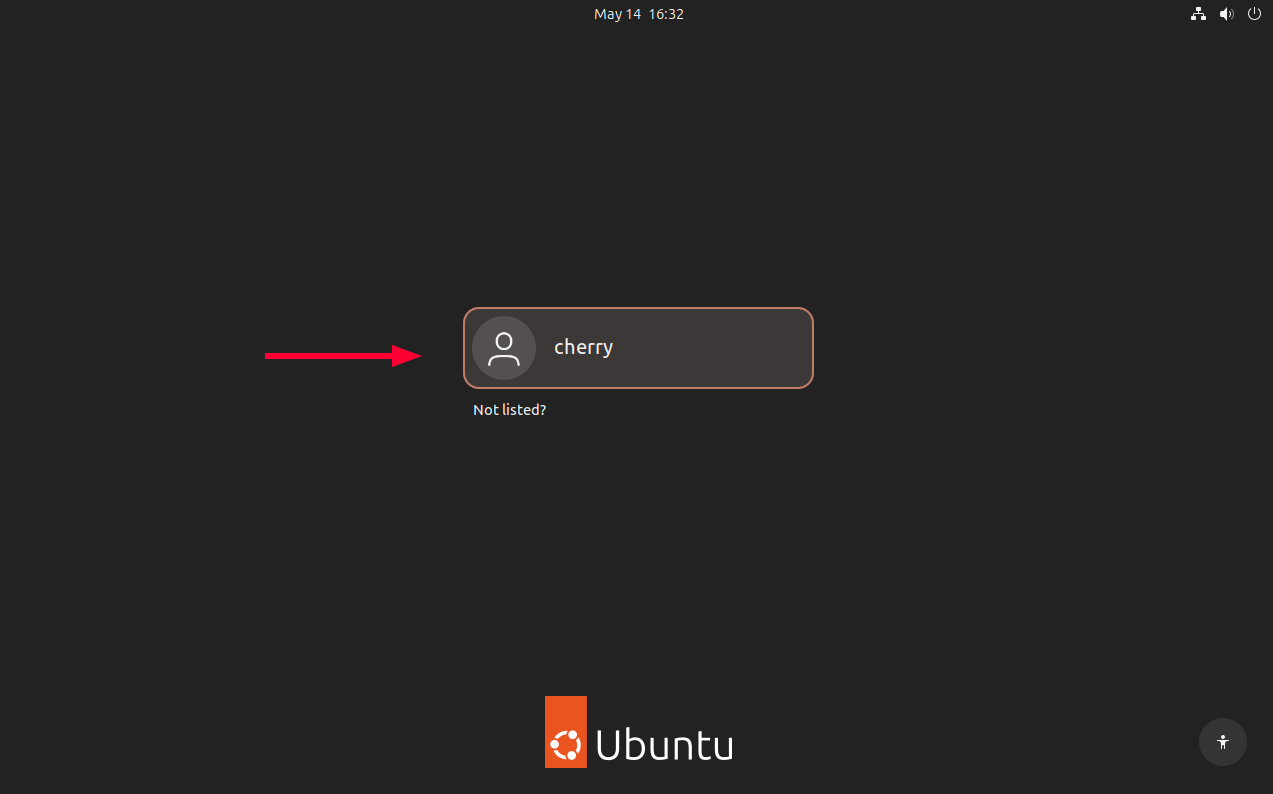
Once the system reboots, the screen shown will appear. Click the account avatar with your name and type in your password.
#Step 6: Post installation steps
Upon logging in, you will be required to complete some post-installation steps.
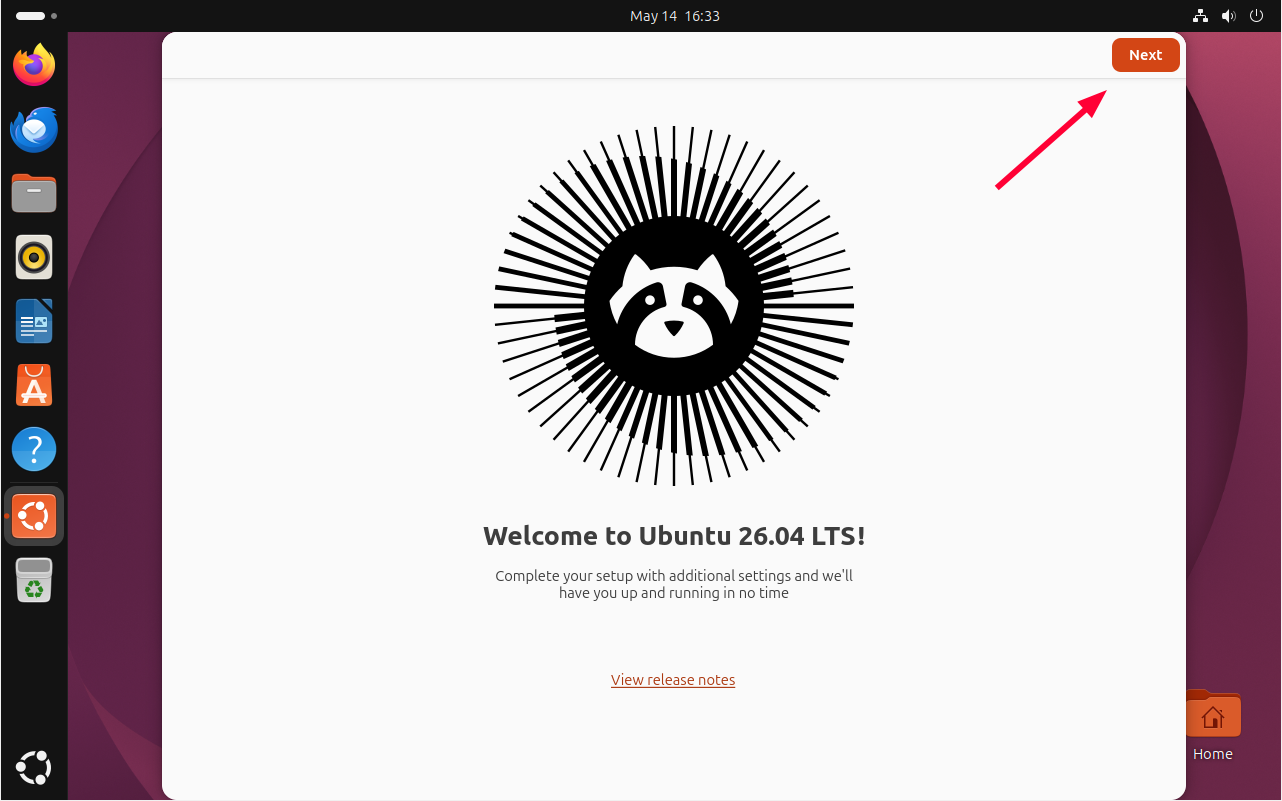
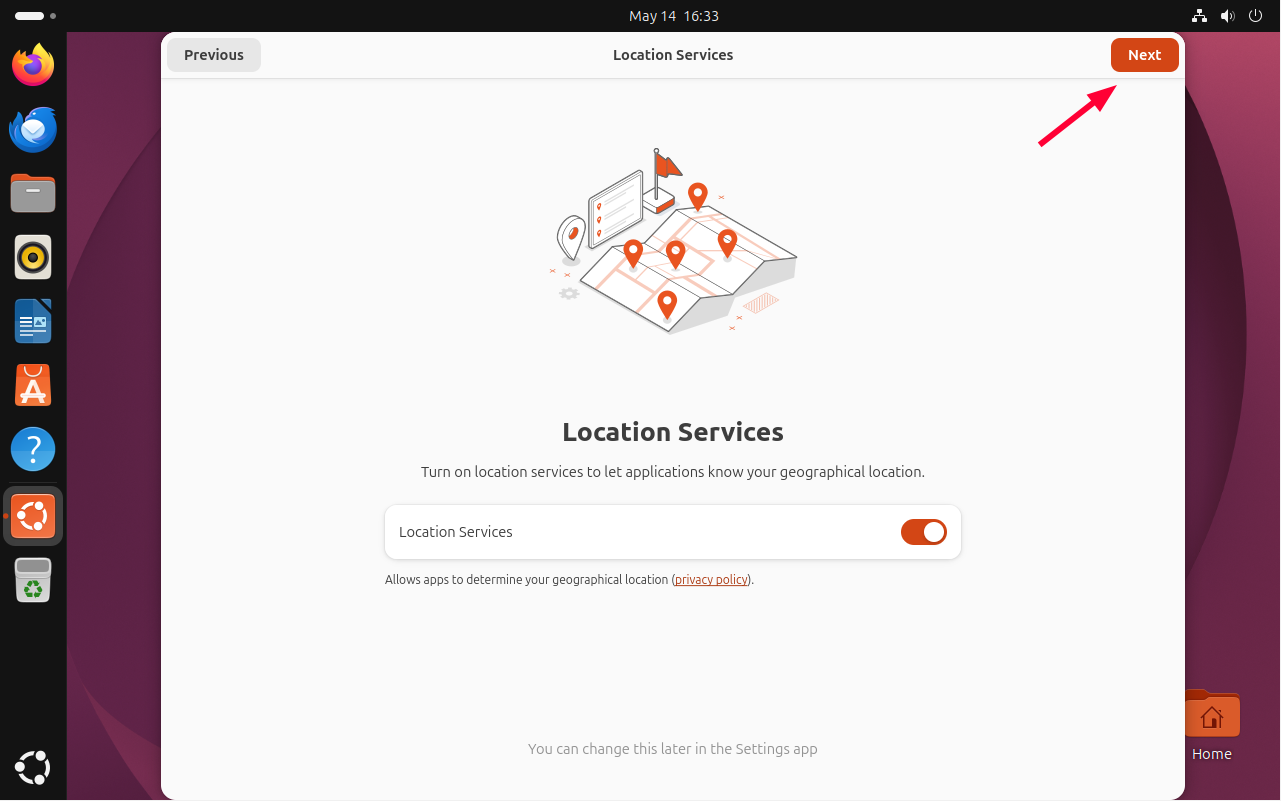
First, you can turn on location services for your apps to know your location.
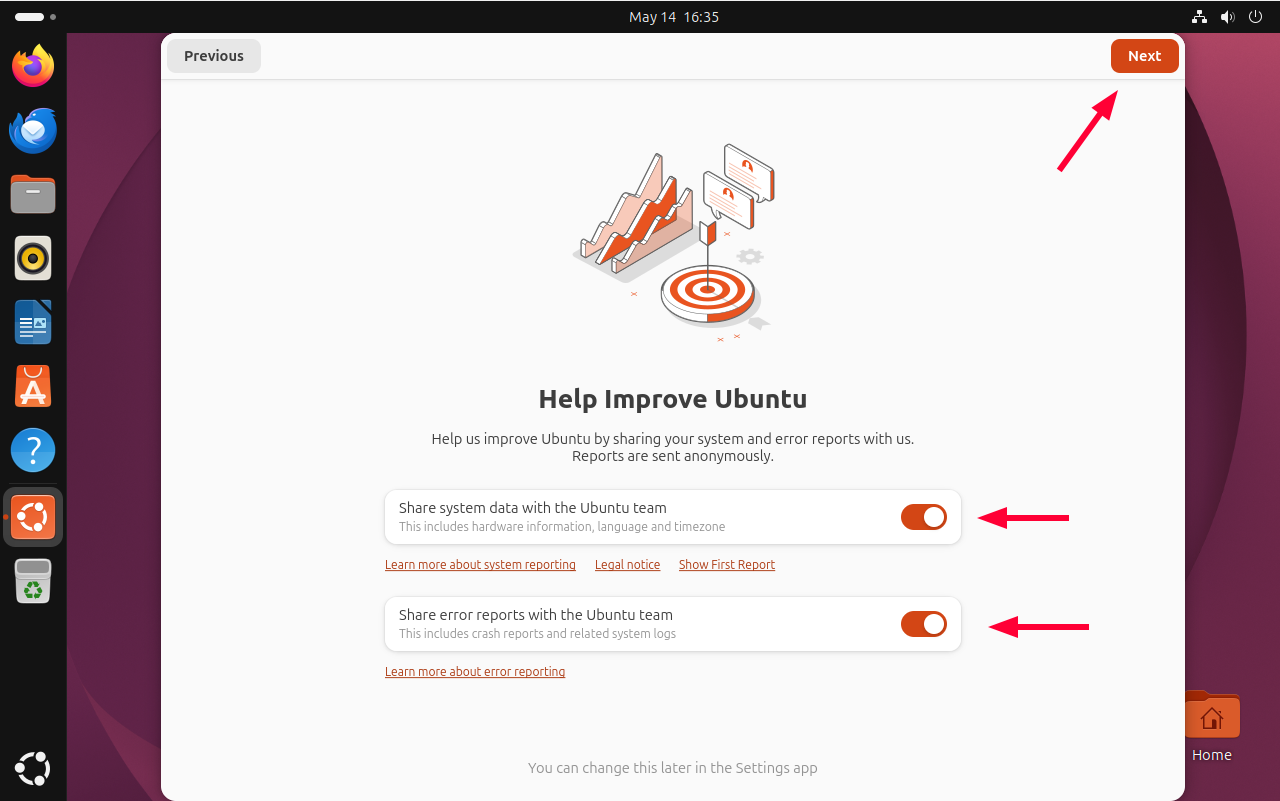
 Next, you can choose whether to share system data and error data with the Ubuntu team to help with continuous improvement of the operating system.
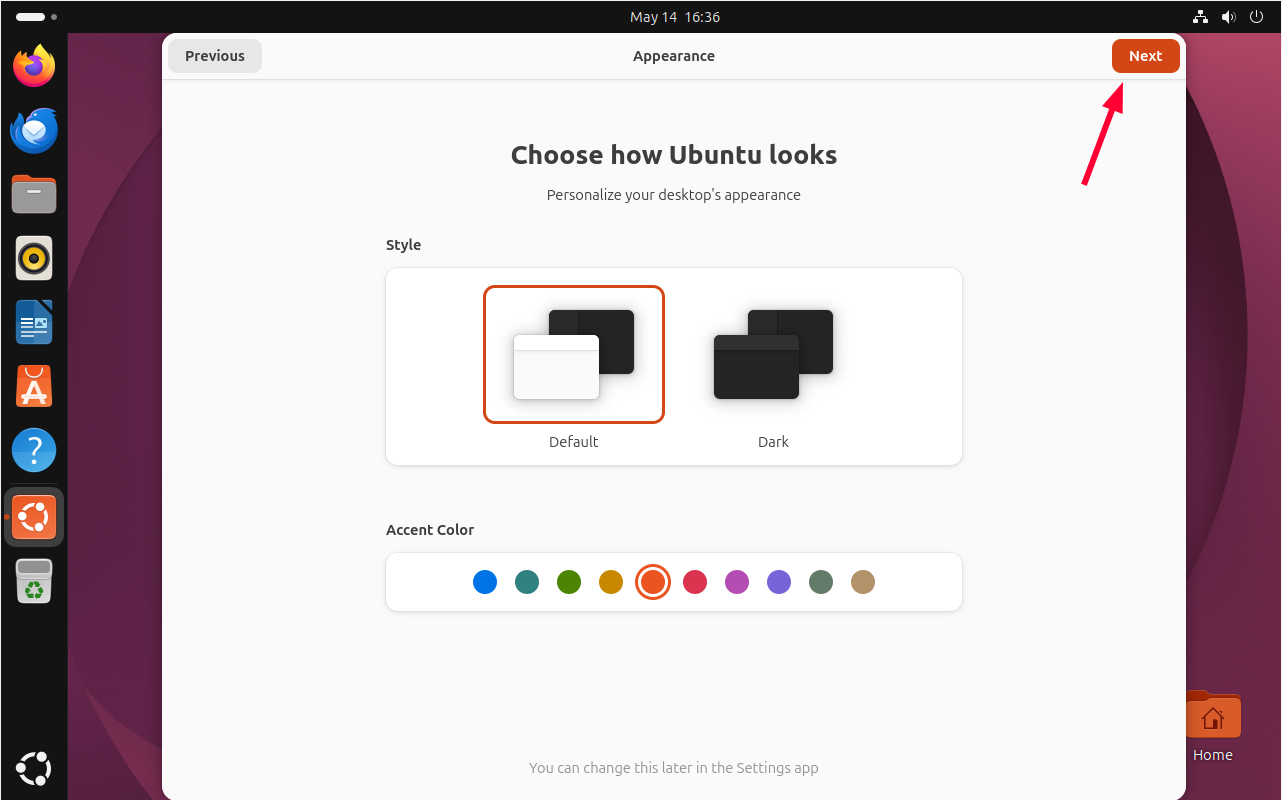
Next, choose a style and accent color from the provided color palette.
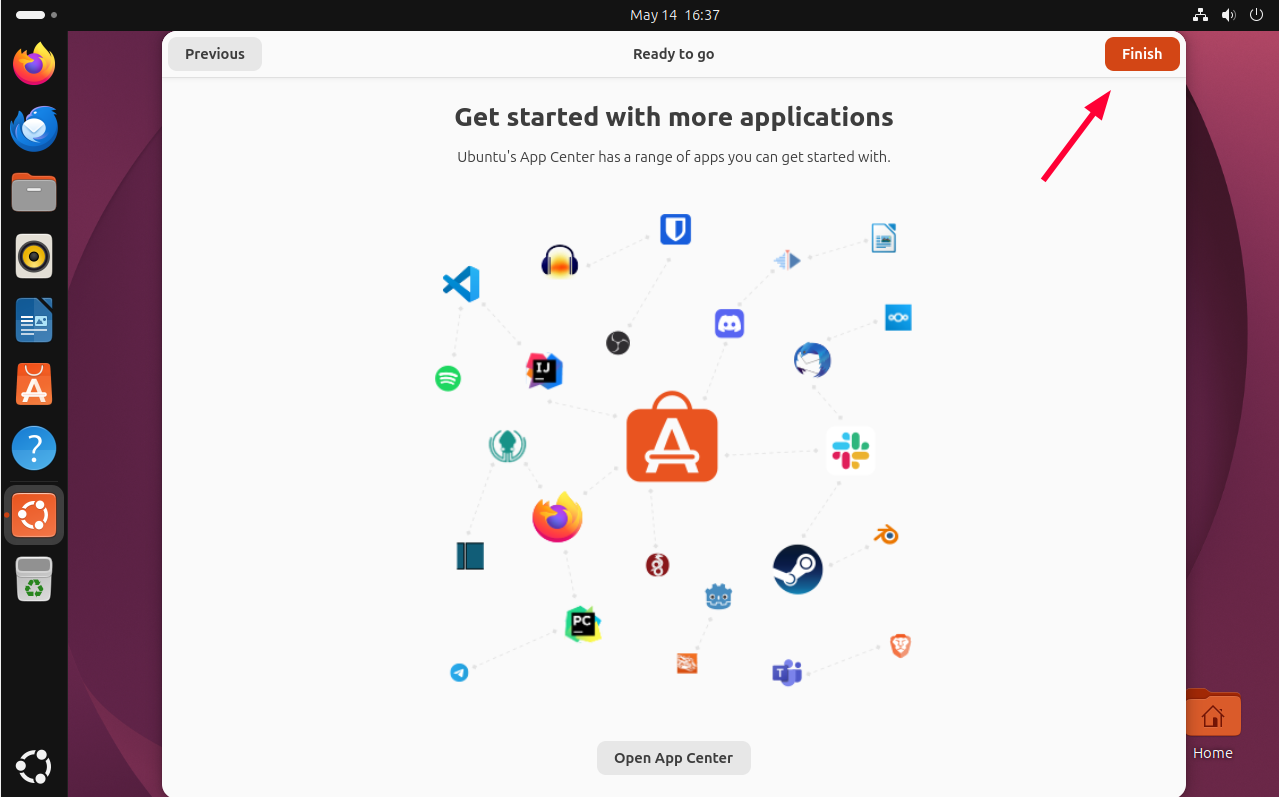
Finally, click ‘Finish’ to access the desktop.
#Conclusion
With your system now fully set up, the real journey begins. You can tweak the desktop to match your style and aesthetic, and fine-tune various settings for optimal performance. Check out the release notes for more tips and information about other derivatives, including Kubuntu, Lubuntu, and Xubuntu.