How to Install Dokploy on Ubuntu 24.04


Dokploy is a free, open-source, self-hosted deployment solution for your personal projects built on Docker and Traefik. Think of it as a self-hosted PaaS, similar in spirit to Vercel or Netlify, but running entirely on your own infrastructure. It competes most directly with other self-hosted tools like Coolify and CapRover.
As an open-source solution, it lets developers deploy and manage applications without being subject to vendor lock-in or exorbitant cloud costs. It allows you to host any kind of application (Python, Node.js, Go, Java, Rust, etc.), manage databases, and monitor resources. One-click database setup and automated SSL certificates keep the deployment workflow short and predictable.
You can easily self-host Dokploy on your VPS in a few simple steps.
#Key features of Dokploy
#Web UI with CLI integration
The web dashboard is the most notable feature in Dokploy. It provides a neat and intuitive UI that lets you deploy and manage apps seamlessly. You can monitor your server metrics and tweak various settings.
A CLI option is available for scripting and running tasks from the console. It provides an API for integration with version control platforms such as GitHub and GitLab.
#Docker management
At the core of Dokploy is Docker, a container engine and containerization platform that lets you run your apps in isolated units called containers. Dokploy’s entire system runs in Docker containers. In addition, it lets you deploy and manage your apps in a containerized format.
#Rich support for programming languages and runtimes
If your app can be containerized, Dokploy can host it. This basically means the programming languages you can use are not set in stone. From Go, Python, and Rust to popular backend platforms like FastAPI, Django/Flask, and Node.js.
#Database management
To provide persistence and backup storage, Dokploy supports a broad range of database engines: from relational engines such as MySQL and PostgreSQL to non-relational databases like MongoDB.
#Multiple deployment options
With Dokploy, you are spoilt for choice when it comes to deployment options. First of all, you can use it on a single VPS, as we will show you later in this tutorial. This is best used for personal or hobby-type projects, such as a personal portfolio site.
In addition, you can use a multi-server setup in which you have a master node or a "control plane" connected to multiple nodes. This is best used for scaling apps or for heavier use cases.
Other options include Git deployments, which let you connect your Dokploy instance to GitHub and deploy applications from repositories. Also, you can deploy applications from pre-built Docker images, ideal for custom setups.
#Automated SSL generation
Worried about switching from plain-text HTTP to HTTPS? Dokploy automates SSL certificate activation and renewal, securing traffic exchanged between your server and web clients.
#Installing Dokploy on Ubuntu 24.04
In this guide, you’ll learn how to deploy Dokploy on an Ubuntu server step by step. We’ll cover the installation process and get Dokploy up and running so you can start deploying applications immediately.
#Prerequisites
Here is the list of essentials required to install Dokploy.
-
A VPS instance of Ubuntu 24.04 LTS: minimum of 2GB RAM and 2 vCPU cores. Cherry Servers offers a neat and intuitive control panel for a rapid VPS setup.
-
SSH connection to the instance.
-
A sudo user configured.
-
A Fully Qualified Domain Name (FQDN). This is optional, but recommended for convenience.
#Step 1: Configure DNS records
If you intend to use your domain to access your Dokploy instance after the initial setup, the first order of business is to configure an A record in your Domain registrar's UI. Unlike accessing Dokploy with an IP address, a domain name does not require you to specify a port number in the browser URL.
Type		Name		Value			TTL
 A		     @		 84.32.223.45	300 or Auto
Once you save the changes, DNS propagation can take anywhere from 30 minutes to 24 hours, depending on your Domain registrar.
#Step 2: Update the local package index
As the Domain propagates, log in to your server via SSH and be sure to update the local package index.
sudo apt update
In addition, install a couple of dependencies that you might need along the way.
sudo apt install curl gnupg wget
Once installed, proceed to the next step.
#Step 3: Install Dokploy
Dokpoy provides an installation script that simplifies the installation process. To run it, simply execute:
curl -sSL https://dokploy.com/install.sh | sudo sh
The command downloads the install.sh bash script and performs the following tasks:
Auto-detects the OS and confirms if prerequisite tools and dependencies are installed.
Installs the latest versions of Docker and Docker Compose. Dokploy runs entirely on Docker, so this is very crucial.
Pulls official Dokploy images and spawns containers for the Dokploy web UI, Traefik reverse proxy, and PostgreSQL.
Creates persistent volumes and ensures data survives container restarts.
At the very end, you will see the following output.
OutputCongratulations, Dokploy is installed!
Wait 15 seconds for the server to start
Please go to http://84.32.223.45:3000
When Dokploy is installed, four containers are automatically deployed.
Traefik: Serves as a reverse proxy, routing traffic to containers. It supports both HTTP and HTTPS traffic & automatically configures Let's Encrypt certificates for your domain names.
Dokploy - This is the control center. Runs and manages all the tasks. Listens publicly on TCP port 3000.
Redis - Enhances performance by caching frequently used data. It relays real-time updates to the web UI and live deployment of logs. Listens on TCP port 6379 in the container. It’s not port-forwarded.
PostgreSQL - A relational database system that acts as the primary database. It stores and persists all DokPloy data, including users, domains, services, metadata, and deployment information. Listens on port 5432 in the container. It’s not port-forwarded.
#Step 4: Access the Dokploy Web UI
To access Dokploy, open your web browser and head to the server’s IP address as shown.
http://server-public-ip:3000
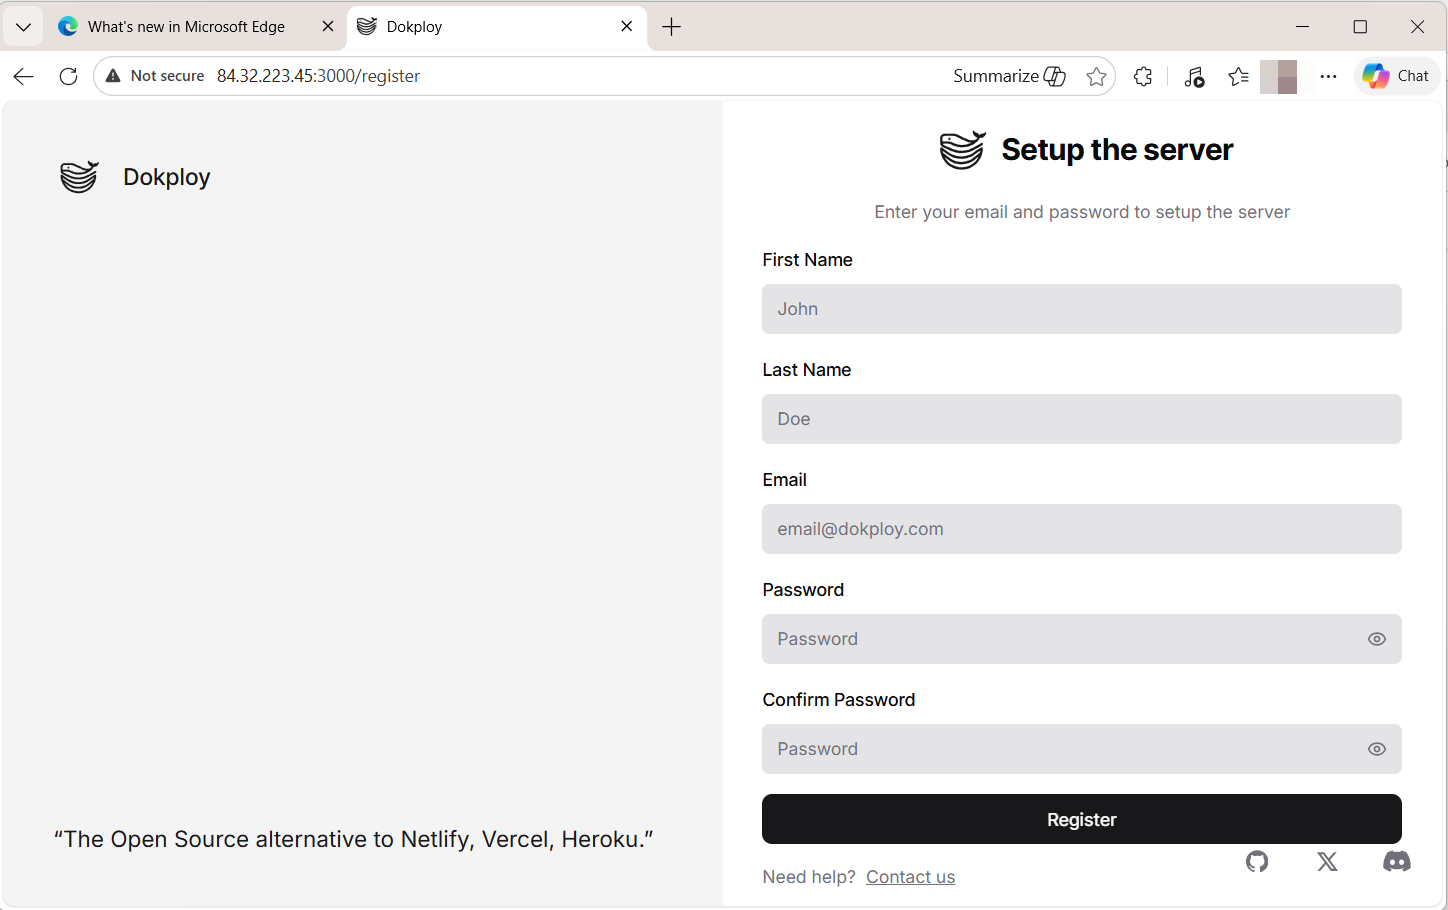
Once loaded, the Dokploy web login page will appear. Fill in all required details (First Name, Last Name, email, and password). Click Register.
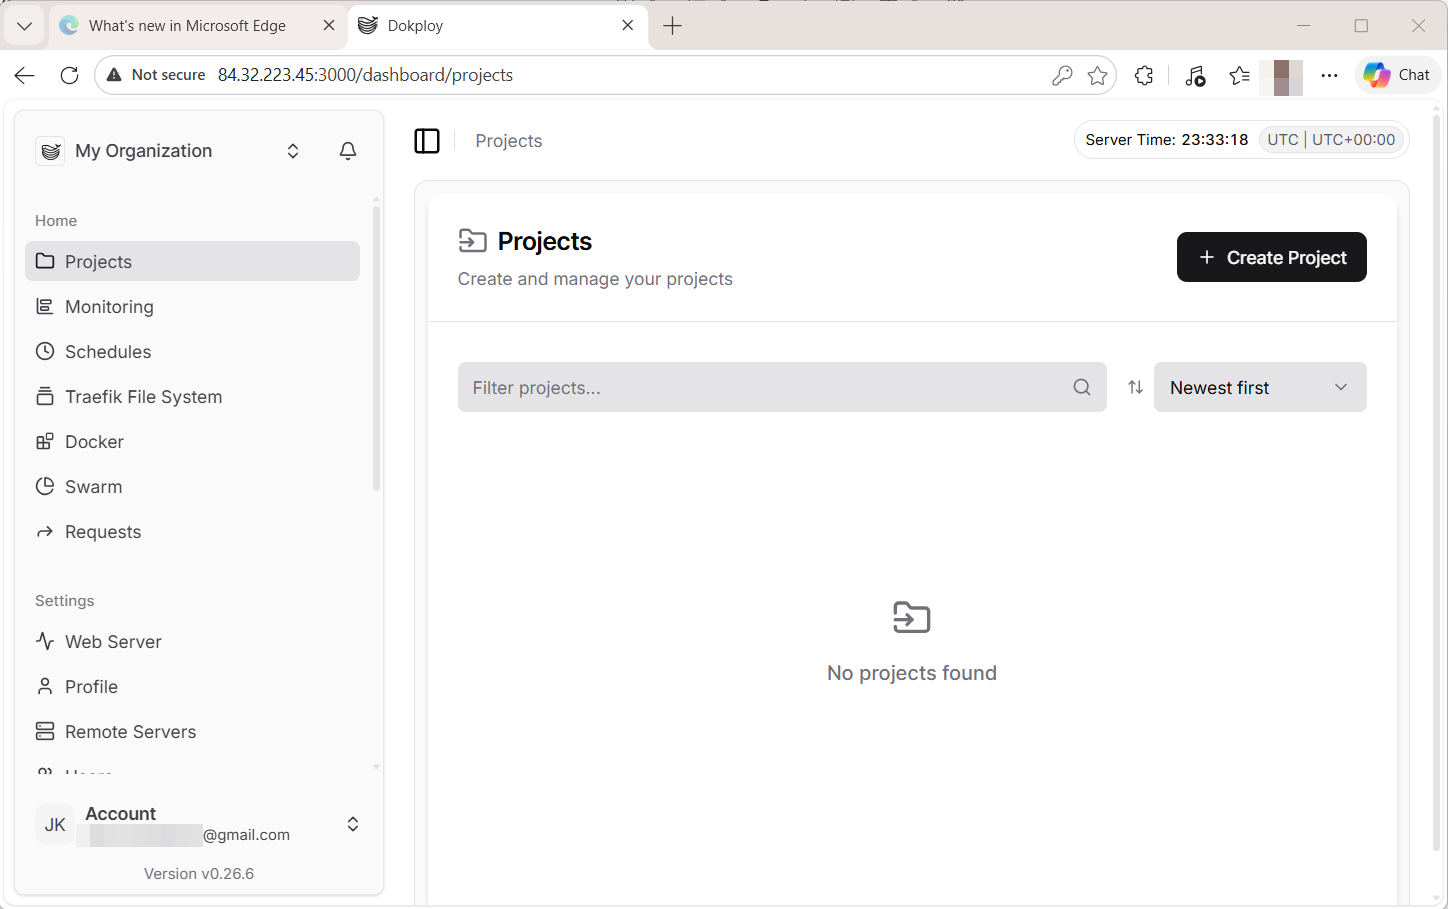
Once logged the web dashboard control panel will be displayed. From here, you can perform tasks like deploying complex applications with Docker Compose, scheduling repetitive tasks, monitoring your server’s metrics, and deploying SSL certificates.
#Troubleshooting tips
In case you can’t access the Dokploy web UI, verify if your domain name has propagated. Use the ping command to ping the domain name. You should see your server’s public IP in the results.
You can also use the nslookup command to check the IP associated with your domain name:
nslookup domain
If you get a ‘Site cannot be reached’ error in your browser, ensure the A record is correctly defined in your Domain registrar’s control UI.
#Step 5: Configure secure HTTPS access
The current web dashboard access method requires users to use the server IP address and port 3000. For a better and more secure login process, you can set up SSL for your domain and start using the HTTPS protocol, which is more secure than plain-text HTTP
To accomplish this task, proceed to the left sidebar and select Web Server. This action takes you to the Server Domain section. Please enter your domain name (example: example.com) and provide your email address for Let's Encrypt notifications. You must switch the HTTPS button to the ON position to start automatic SSL certificate delivery.
Finally, select Let's Encrypt from the drop-down and click Save.
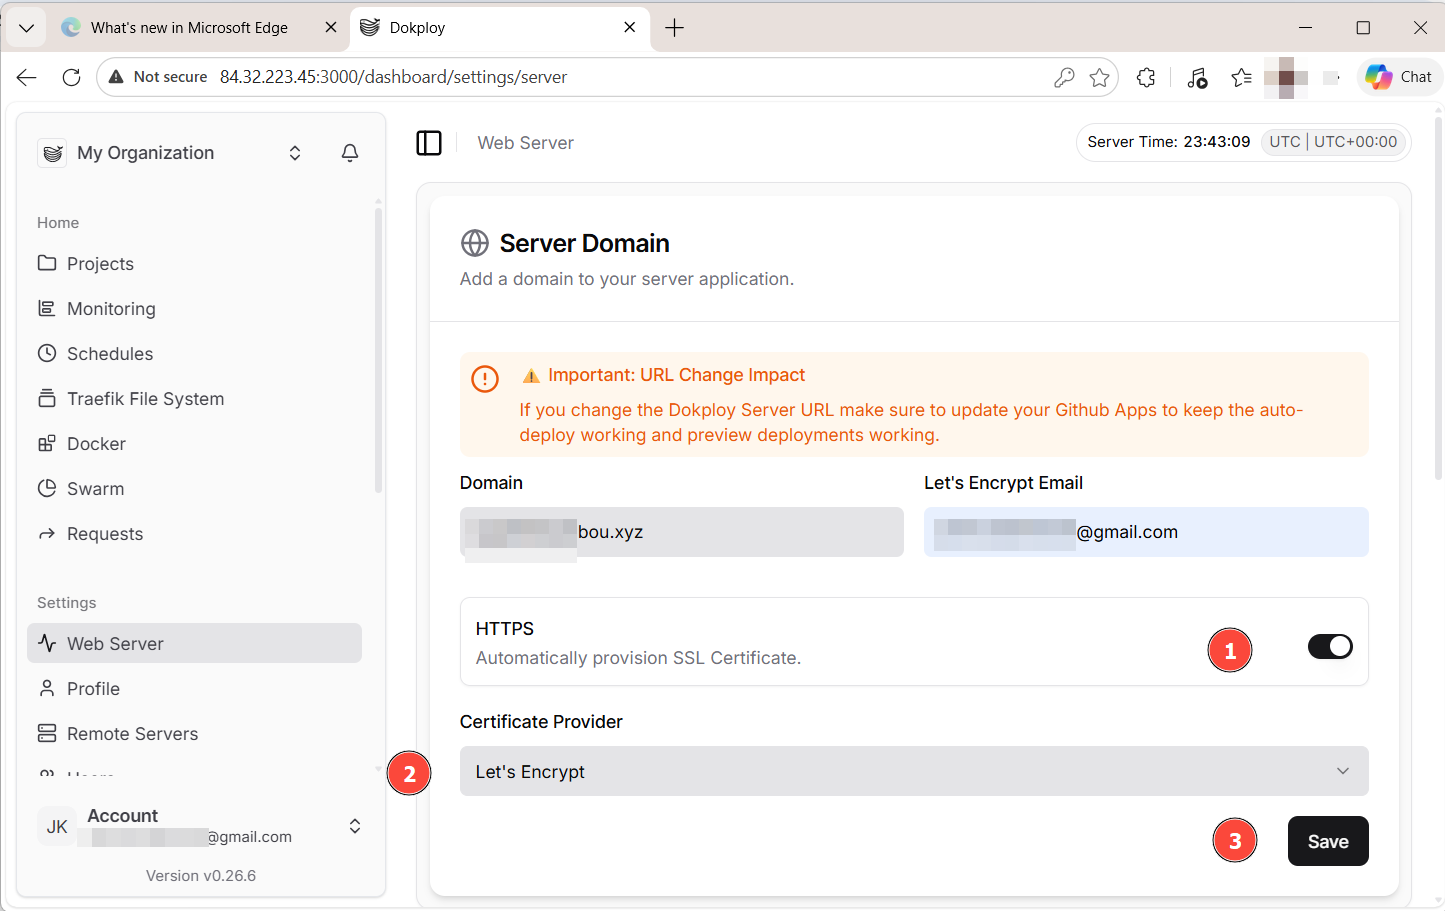
Wait for about 3 minutes for the certificate to be properly provisioned.
#Step 6: Confirm HTTPS access to Dokploy
To confirm secure access to Dokploy on your browser, provide your domain as shown. Replace example.com with your Fully Qualified Domain Name (FQDN).
https://example.com
You will be ushered to the login page. SSL is enabled, and traffic is being encrypted. The HTTP protocol is auto-redirected to HTTPS, a sure sign that the SSL setup is working as expected.
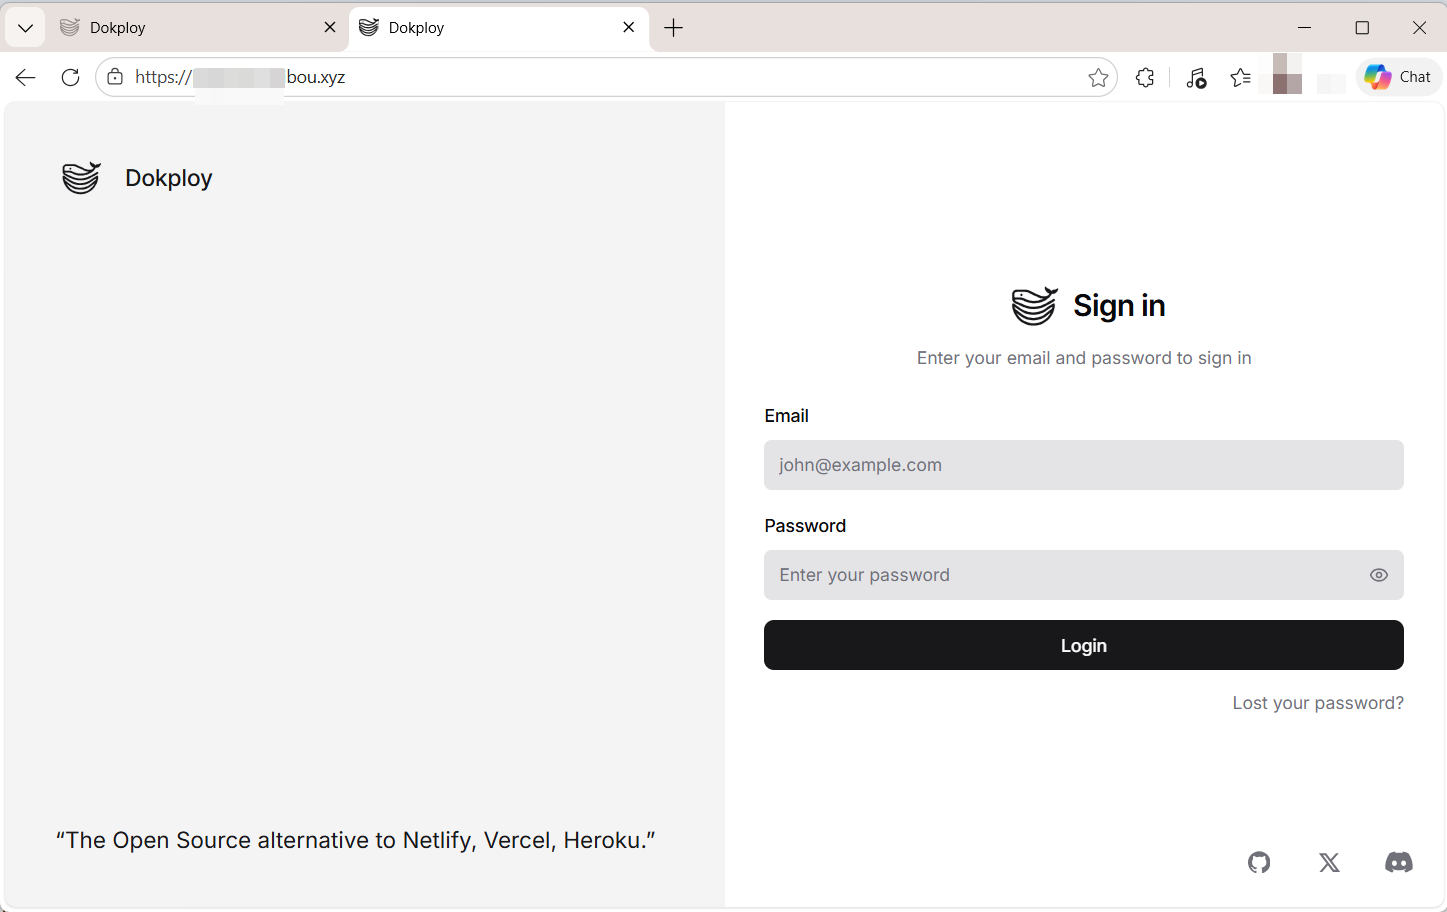
Dokploy is fully set up, and you can log in and set up databases, deploy your applications, and configure CI/CD pipelines.
#Step 7: Configure UFW firewall
As it stands, Dokploy is exposed to the public internet and is susceptible to attacks, as there’s no protection layer.
Ubuntu provides UFW ( Uncomplicated Firewall) that offers a layer of protection by allowing valid network traffic to your VPS and denying the rest. It lets you open only the ports you need and blocks the rest.
For the Dokploy setup, you need to open the following TCP ports:
22: Needed for SSH traffic, which allows access to your server via CLI.
80: Required for redirecting HTTP to HTTPS.
443: For handling all encrypted HTTPS traffic to your server.
To open the ports, run:
For port 22:
sudo ufw allow 22/tcp
For port 80:
sudo ufw allow 80/tcp
For port 443:
sudo ufw allow 443/tcp
Next, enable the firewall.
sudo ufw enable
Once enabled, check the firewall status to confirm the aforementioned ports have been opened.
sudo ufw status
Your VPS will now allow traffic only along those ports.
#Step 8: Additional security tips
Implementing a firewall is just one of the security measures you can take to secure your VPS. Some additional steps are required to secure your server from unauthorized access and other threats.
We have outlined 12 Linux server security tips that you can implement to harden your instance further. At a glance, some of these measures include:
-
Implementing SSH key-based authentication
-
Disallowing remote root login
-
Installing a malware scanner
-
Installing intrusion detection/intrusion prevention systems
-
Taking regular backups
#Conclusion
In this guide, we have covered how to install Dokploy on Ubuntu 24.04. We have also configured a domain name with HTTPS for enhanced security.
Dokploy is a perfect alternative for self-hosting fans. It is ideal for developers who want full control and flexibility in deploying applications without incurring exorbitant cloud bills. Moreover, you can customize it to your preference, avoiding vendor lock-in.
If you have a firm grasp of Docker and Docker Compose, Dokploy is your go-to platform. You're now set up to install Dokploy and use Docker to deploy your applications.
If you’re looking for a reliable VPS to self-host Dokploy, Cherry Servers offers Ubuntu-based VPS instances that are well-suited for Docker and containerized workloads.


