How to Deploy Kubernetes on Bare Metal: Step-by-Step




Bare metal Kubernetes runs your cluster directly on physical servers, with no hypervisor between the workload and the hardware. Teams choose it for predictable performance and full hardware control, which suits high-performance computing, AI, and machine learning, and large databases.
You will go from a clean Ubuntu server to a running cluster: a container runtime, a kubeadm control plane, a worker node, Calico for pod networking, and a sample application accessible from outside the cluster. For the trade-offs to weigh first, see the pros and cons of Kubernetes on bare metal.
#What is bare-metal Kubernetes?
You can run Kubernetes locally, virtually, or on a Kubernetes service. The problem with this is that you don't have full access to all the machine's resource capabilities. This is where bare metal Kubernetes comes in. Running Kubernetes on bare metal gives your Kubernetes clusters and your containers direct access to the resources of the bare metal machine.
Setting up the cluster this way is beneficial for workloads that require high-performance operations. Some operations that can be performed with this kind of setup include high-performance computing, AI/ML workloads, and large-scale database operations.
If you are thinking of building your private cloud infrastructure, bare-metal Kubernetes is a great option.
Also read: OpenShift vs Kubernetes on Bare Metal
#Prerequisites
-
Two bare metal machines with Ubuntu 24.04 installed (one control plane, one worker node)
-
SSH access to the servers
-
Understanding of Kubernetes
Here is the two-node lab setup used in this guide. Swap in the IP addresses of your own servers as you follow along.
| Role | Hostname | IP address | OS |
|---|---|---|---|
| Control plane | control-plane | 84.32.70.202 | Ubuntu 24.04 |
| Worker node | worker-01 | 84.32.70.203 | Ubuntu 24.04 |
Build and scale your self-managed Kubernetes clusters effortlessly with powerful Dedicated Servers — ideal for containerized workloads.
#How to deploy Kubernetes on bare metal
The walkthrough uses two machines: the first becomes the control plane, and the second joins as a worker node. You will prepare both, bootstrap the cluster with kubeadm, configure pod networking with Calico, and finish by deploying an NGINX application accessible from outside the cluster.
#Step 1: Setting up the bare metal infrastructure
Set a unique hostname on each machine so the cluster can tell its nodes apart. Use the names from the lab table above: control-plane for the first server and worker-01 for the second. These are the names you will see later when listing the cluster's nodes. On the control plane, run:
sudo hostnamectl set-hostname control-plane
Next, disable swap. Kubernetes needs swap turned off so the scheduler can manage memory predictably. Turn it off now, and comment out the swap entry in /etc/fstab so it stays off after a reboot.
sudo swapoff -a
sudo sed -i '/[[:space:]]swap[[:space:]]/ s/^/#/' /etc/fstab
Next, prepare the kernel so the cluster can route pod traffic correctly. Load the overlay and br_netfilter modules, then enable the matching sysctl settings. The br_netfilter module lets iptables see bridged traffic, and IP forwarding allows packets to move between pods on different nodes.
cat <<EOF | sudo tee /etc/modules-load.d/k8s.conf

overlay

br_netfilter

EOF


sudo modprobe overlay

sudo modprobe br_netfilter


cat <<EOF | sudo tee /etc/sysctl.d/k8s.conf

net.bridge.bridge-nf-call-iptables = 1

net.bridge.bridge-nf-call-ip6tables = 1

net.ipv4.ip_forward = 1

EOF


sudo sysctl --system
Install containerd:
sudo apt install -y containerd
Configure containerd to use SystemdCgroup:
mkdir -p /etc/containerd

containerd config default | sudo tee /etc/containerd/config.toml
Edit /etc/containerd/config.toml and set SystemdCgroup = true. This is important because Kubernetes and the container runtime both rely on systemd for cgroup management. You can use the following command to do it:
sudo sed -i 's/SystemdCgroup = false/SystemdCgroup = true/' /etc/containerd/config.toml
Restart containerd:
systemctl restart containerd
Now, install the Kubernetes tools. You will add kubelet, kubeadm, and kubectl over the next few steps. For a deeper walkthrough, see our guide on how to install Kubernetes.
Start by installing the packages needed to fetch the Kubernetes repository over HTTPS.
sudo apt-get update
sudo apt-get install -y apt-transport-https ca-certificates curl gpg socat
Create the keyrings directory, then download the Kubernetes repository signing key into it.
sudo mkdir -p -m 755 /etc/apt/keyrings
curl -fsSL https://pkgs.k8s.io/core:/stable:/v1.36/deb/Release.key | sudo gpg --dearmor -o /etc/apt/keyrings/kubernetes-apt-keyring.gpg
Add the Kubernetes repository to your apt sources so the package manager can find the packages.
echo 'deb [signed-by=/etc/apt/keyrings/kubernetes-apt-keyring.gpg] https://pkgs.k8s.io/core:/stable:/v1.36/deb/ /' | sudo tee /etc/apt/sources.list.d/kubernetes.list
Update the package index again so apt picks up the new repository, then install kubelet and kubeadm.
sudo apt-get update
sudo apt-get install -y kubelet kubeadm
Check if all tools were installed properly. You can check the various versions that were installed by running the following commands:
kubelet --version
kubeadm version
Install kubectl binary with curl on Linux:
curl -LO "https://dl.k8s.io/release/$(curl -L -s https://dl.k8s.io/release/stable.txt)/bin/linux/amd64/kubectl"
sudo install -o root -g root -m 0755 kubectl /usr/local/bin/kubectl # install kubectl
kubectl version --client # check kubectl version
Also read: How to Install OpenShift on Bare Metal
#Step 2: Initializing the control plane
Before we can use a machine, we need to first make it either a control plane or a worker node. In this section, you will learn how to initialize your server for Kubernetes. One server will serve as the control plane, and the other as the worker node.
You already enabled IP forwarding and the bridge-netfilter settings in Step 1, so the node is ready to become the control plane. Initialize it next. The --pod-network-cidr flag sets the range of IP addresses (the CIDR block) that Kubernetes assigns to pods, and 192.168.0.0/16 matches Calico's default pool.
sudo kubeadm config images pull
sudo kubeadm init --pod-network-cidr=192.168.0.0/16
On successful execution, you should see output similar to the following:
OutputYour Kubernetes control-plane has initialized successfully!

To start using your cluster, you need to run the following as a regular user:

mkdir -p $HOME/.kube

sudo cp -i /etc/kubernetes/admin.conf $HOME/.kube/config

sudo chown $(id -u):$(id -g) $HOME/.kube/config

Alternatively, if you are the root user, you can run:

export KUBECONFIG=/etc/kubernetes/admin.conf

You should now deploy a pod network to the cluster.

Run "kubectl apply -f [podnetwork].yaml" with one of the options listed at:

https://kubernetes.io/docs/concepts/cluster-administration/addons/

Then you can join any number of worker nodes by running the following on each as root:

kubeadm join 84.32.70.202:6443 --token 4fkhgz.nibte4tmaa97dudu \

--discovery-token-ca-cert-hash sha256:7af39abe380605a2bf1908310f0c058547aa8f05df5040481b9029751679eb53
You will need the join command shown in that output to attach a worker node later. Set up kubeconfig:
mkdir -p $HOME/.kube
sudo cp -i /etc/kubernetes/admin.conf $HOME/.kube/config
sudo chown $(id -u):$(id -g) $HOME/.kube/config
To let pods communicate across nodes, install a Container Network Interface (CNI) plugin. Calico is widely used, and the current method installs it via the Tigera Operator rather than the single manifest URL referenced in earlier guides.
See our Calico installation guide for more details. Install the operator and its custom resource definitions first.
kubectl create -f https://raw.githubusercontent.com/projectcalico/calico/v3.32.0/manifests/v1_crd_projectcalico_org.yaml
kubectl create -f https://raw.githubusercontent.com/projectcalico/calico/v3.32.0/manifests/tigera-operator.yaml
Next, download and apply the custom resources that tell the operator how to configure Calico. Because you used the 192.168.0.0/16 pod network, no edit is needed.
curl -O https://raw.githubusercontent.com/projectcalico/calico/v3.32.0/manifests/custom-resources.yaml
kubectl create -f custom-resources.yaml
Watch the components come up. Calico is ready once every row reports True in the AVAILABLE column.
watch kubectl get tigerastatus
OutputEvery 2.0s: kubectl get tigerastatus major-monitor: Sun Jun 14 22:58:12 2026

NAME      AVAILABLE PROGRESSING DEGRADED SINCE MESSAGE
apiserver True      False       False    88s   All objects available
calico    True      False       False    68s   All objects available
goldmane  True      False       False    68s   All objects available
ippools   True      False       False    103s  All objects available
tiers     True      False       False    83s   All objects available
whisker   True      False       False    68s   All objects available
Press Ctrl + C to exit.
Once Calico settles, confirm that the control plane node has reached the Ready state.
kubectl get nodes
OutputNAME STATUS ROLES AGE VERSION

control-plane Ready control-plane 5m v1.36.2
#Step 3: Set up the worker node
Run the same node preparation on the worker that you ran on the control plane (kernel modules, containerd, swap, and the Kubernetes packages), then join it to the cluster.
# set a unique hostname for the worker
sudo hostnamectl set-hostname worker-01

# disable swap
sudo swapoff -a
sudo sed -i '/[[:space:]]swap[[:space:]]/ s/^/#/' /etc/fstab

# kernel modules and sysctl settings
cat <<EOF | sudo tee /etc/modules-load.d/k8s.conf
overlay
br_netfilter
EOF

sudo modprobe overlay
sudo modprobe br_netfilter
cat <<EOF | sudo tee /etc/sysctl.d/k8s.conf

net.bridge.bridge-nf-call-iptables = 1
net.bridge.bridge-nf-call-ip6tables = 1
net.ipv4.ip_forward = 1

EOF

sudo sysctl --system

# container runtime
sudo apt install -y containerd
sudo mkdir -p /etc/containerd
containerd config default | sudo tee /etc/containerd/config.toml
sudo sed -i 's/SystemdCgroup = false/SystemdCgroup = true/' /etc/containerd/config.toml
sudo systemctl restart containerd

# Kubernetes packages
sudo apt-get update
sudo apt-get install -y apt-transport-https ca-certificates curl gpg socat
sudo mkdir -p -m 755 /etc/apt/keyrings

curl -fsSL https://pkgs.k8s.io/core:/stable:/v1.36/deb/Release.key | sudo gpg --dearmor -o /etc/apt/keyrings/kubernetes-apt-keyring.gpg

echo 'deb [signed-by=/etc/apt/keyrings/kubernetes-apt-keyring.gpg] https://pkgs.k8s.io/core:/stable:/v1.36/deb/ /' | sudo tee /etc/apt/sources.list.d/kubernetes.list

sudo apt-get update
sudo apt-get install -y kubelet kubeadm
Join the worker to the cluster with the kubeadm join command that kubeadm init printed on the control plane. Run it with sudo privilege on the worker node.
kubeadm join 84.32.70.202:6443 --token 4fkhgz.nibte4tmaa97dudu \
	--discovery-token-ca-cert-hash sha256:7af39abe380605a2bf1908310f0c058547aa8f05df5040481b9029751679eb53
On success, you should see output similar to the following:
Output[preflight] Running pre-flight checks

[preflight] Reading configuration from the "kubeadm-config" ConfigMap in namespace "kube-system"...

[preflight] Use 'kubeadm init phase upload-config kubeadm --config your-config-file' to re-upload it.

W0614 23:59:04.136094 26645 utils.go:69] The recommended value for "bindAddress" in "KubeProxyConfiguration" is: ::; the provided value is: 0.0.0.0

[kubelet-start] Writing kubelet configuration to file "/var/lib/kubelet/instance-config.yaml"

[patches] Applied patch of type "application/strategic-merge-patch+json" to target "kubeletconfiguration"

[kubelet-start] Writing kubelet configuration to file "/var/lib/kubelet/config.yaml"

[kubelet-start] Writing kubelet environment file with flags to file "/var/lib/kubelet/kubeadm-flags.env"

[kubelet-start] Starting the kubelet

[kubelet-check] Waiting for a healthy kubelet at http://127.0.0.1:10248/healthz. This can take up to 4m0s

[kubelet-check] The kubelet is healthy after 501.278811ms

[kubelet-start] Waiting for the kubelet to perform the TLS Bootstrap

This node has joined the cluster:

* Certificate signing request was sent to apiserver and a response was received.

* The Kubelet was informed of the new secure connection details.

Run 'kubectl get nodes' on the control-plane to see this node join the cluster.
Back on the control plane, run kubectl get nodes again to confirm the worker has joined and reached Ready.
kubectl get nodes
OutputNAME          STATUS  ROLES         AGE   VERSION

control-plane Ready   control-plane 12m   v1.36.2

worker-01     Ready   <none>        3m    v1.36.2
#Step 4: Deploying an application
After you have your Kubernetes cluster in place, you are set to deploy an application. In the samples for this tutorial, we are going to work on a simple NGINX server.
The application is managed using configurations referred to as manifests in the case of Kubernetes. These manifests define the desired state of your application, including how it should be deployed and exposed to the network. This will be done on the control plane.
Deployments
First, we'll create a Deployment manifest. This manifest specifies how many replicas of your application should run, what container image to use, and other details.
Create a file, deployment.yaml:
nano deployment.yaml
Here's a Deployment manifest for our NGINX server. Paste the below content in the file, deployment.yaml:
apiVersion: apps/v1
kind: Deployment
metadata:
  name: nginx-deployment
spec:
  replicas: 2
  selector:
    matchLabels:
      app: nginx
  template:
    metadata:
      labels:
        app: nginx
    spec:
      containers:
      - name: nginx
        image: nginx:latest
        ports:
        - containerPort: 80
The configuration above creates two replicas of the NGINX container. You can apply this configuration by running the following command:
kubectl apply -f deployment.yaml
This command tells Kubernetes to create and manage the deployment according to the specifications in the manifest.
Services
Next, we need to expose our application so that it's accessible from outside the Kubernetes cluster. This is done by creating a Service manifest. Below is an example of a Service manifest for our NGINX deployment.
Create a file, service.yaml:
nano service.yaml
Then paste the below content:
apiVersion: v1
kind: Service
metadata:
  name: nginx-service
spec:
  selector:
    app: nginx
  ports:
  - protocol: TCP
    port: 80
    targetPort: 80
  type: NodePort
This manifest tells Kubernetes to expose the NGINX deployment on port 80. To expose the service, run:
kubectl apply -f service.yaml
The NodePort type opens a port on every node and routes it to the NGINX pods, so you can reach the application from outside the cluster without any extra components. Kubernetes assigns a port in the 30000 to 32767 range, which you will find in the next step.
#Verifying the deployment
Once your application is deployed, we can now ensure that everything is functioning correctly. This involves ingress controllers to manage external access to your services.
First, check the status of your pods to see if your pods are running:
kubectl get pods
OutputNAME                              READY STATUS   RESTARTS AGE

nginx-deployment-59c4c87bc6-4dvcb 1/1   Running  0        2m32s

nginx-deployment-59c4c87bc6-rwnns 1/1   Running  0        2m32s
You should see two pods with the status "Running" for your NGINX deployment.
Now check that the Service has been created and note the node port it exposes:
kubectl get services
OutputNAME           TYPE       CLUSTER-IP   EXTERNAL-IP PORT(S)      AGE
kubernetes     ClusterIP  10.96.0.1    <none>      443/TCP      80m
nginx-service  NodePort   10.98.111.7  <none>      80:32408/TCP 2m26s
The PORT(S) column shows 80:32408/TCP, which means the Service is reachable on node port 32408. Your number will differ.
#Accessing your application
Open the application in a web browser using a node's public IP and the node port from the previous step, for example, http://84.32.70.202:32408. Use the IP of any node in the cluster. If the page does not load, make sure your firewall or provider security group allows that port.
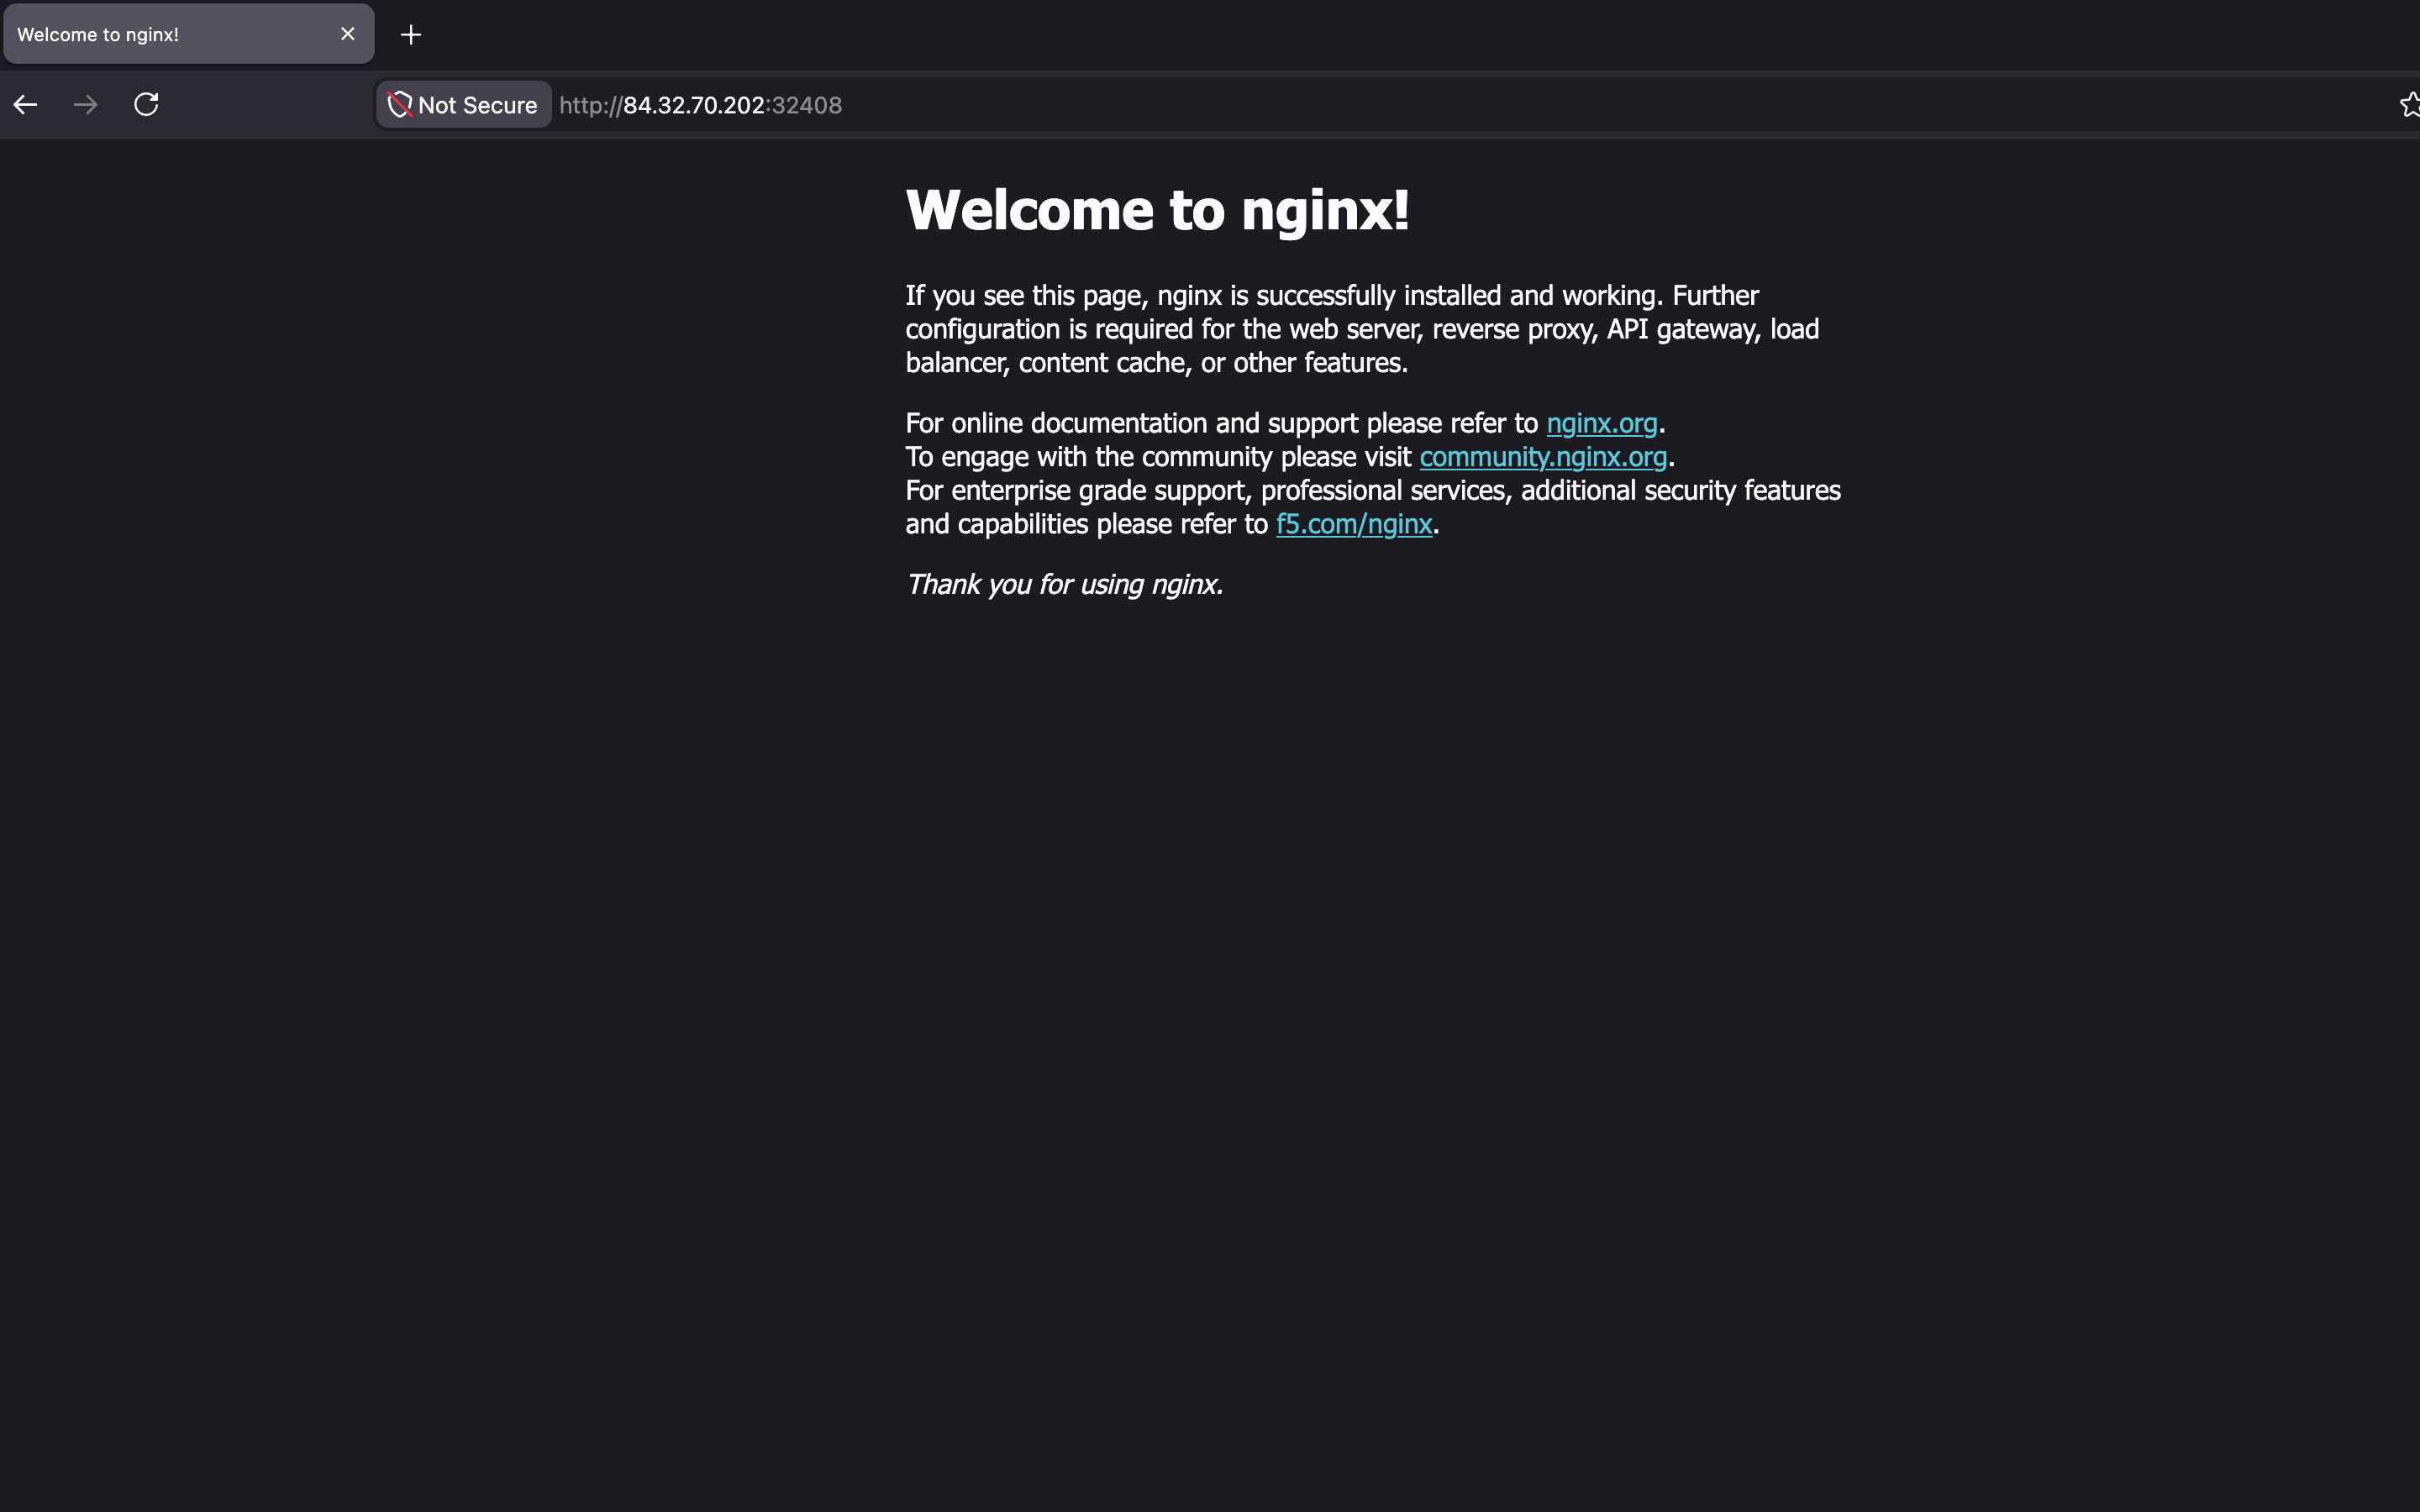
A NodePort Service works well for exposing an application during testing and for many production setups. When you need to route traffic to several services by hostname or path, you would historically reach for an Ingress controller. The most common one, ingress-nginx, was retired by the Kubernetes project in March 2026 and no longer receives security updates, so new clusters should avoid it.
The current direction for HTTP routing is the Gateway API, the successor to the Ingress resource. It works with a controller such as NGINX Gateway Fabric, or Envoy Gateway. For a full walkthrough, see the official Gateway API documentation.
Also read: How to secure Kubernetes cluster
#Troubleshooting common bare metal Kubernetes issues
Even a careful setup can hit a few predictable problems on bare metal. The fixes below cover the ones you are most likely to see.
If you cannot reach the application on its node port, a firewall is the usual cause. Allow the port with sudo ufw allow <node-port>/tcp, and check your provider's security group or cloud firewall, since those sit outside the server. To confirm the app itself is healthy, run curl http://localhost:<node-port> on a node; if that returns the NGINX HTML, only external access is blocked.
A node stuck in the NotReady state usually means the CNI plugin is missing or unhealthy. Run kubectl get pods -n calico-system to confirm Calico started, and check kubectl describe node <name> for network-related errors near the bottom of the output.
A kubeadm join that fails with an expired token is common, because the token kubeadm init prints lasts only 24 hours. Generate a fresh one on the control plane with kubeadm token create --print-join-command, then run the new command on the worker.
If your pods stay in Pending on a single-node cluster, the control plane taint is likely blocking them. Remove it with kubectl taint nodes --all node-role.kubernetes.io/control-plane- so workloads can schedule on the control plane.
#Conclusion
You now have a working bare-metal Kubernetes cluster: a control plane and a worker node running on physical hardware, with Calico handling pod networking and a NodePort Service exposing your application to the outside world. The NGINX deployment confirms the whole path works end-to-end.
From here, the natural next steps are securing the cluster and planning for growth. Add network policies and TLS, set up monitoring, and decide how you will handle persistent storage before moving real workloads onto the cluster. If you would rather build on managed hardware, Cherry Servers' dedicated servers give you the single-tenant performance that self-managed Kubernetes depends on.
Also read:
FAQs
Can you run Kubernetes on bare metal?
Yes. Kubernetes runs directly on physical servers with no hypervisor in between, which gives pods full access to CPU, memory, and storage. You install a container runtime, bootstrap the cluster with kubeadm, and add a CNI plugin, exactly as shown above.
Do you need a load balancer for bare metal Kubernetes?
Not necessarily. A `NodePort` Service exposes your application on a port on every node, which is enough for most setups and is what this guide uses. Cloud-style `LoadBalancer` Services with their own IP addresses need extra software on bare metal, since there is no built-in load balancer.
How many servers do you need for a bare metal Kubernetes cluster?
A minimal cluster needs at least two machines: one control plane and one worker. Production clusters typically use three or more control plane nodes for high availability, plus as many workers as the workload requires.
What is the difference between bare metal and managed Kubernetes?
Managed Kubernetes hides the control plane and infrastructure behind a provider's API, while bare metal Kubernetes gives you control over every layer, from the kernel to the network. The trade-off is that you handle upgrades, networking, and load balancing yourself.
Is Kubernetes on bare metal faster than on virtual machines?
For many workloads, yes, because no hypervisor consumes a share of the resources. The gain is most noticeable for CPU-bound, memory-bound, and latency-sensitive applications such as databases and machine learning.
Can I run Kubernetes on Cherry Servers?
Yes. Cherry Servers' dedicated servers provide single-tenant bare metal with the CPU, RAM, and NVMe storage that self-managed clusters need, and you can deploy several nodes in the same region to build a cluster.