How to Access a Windows Server from Windows and Linux, and Change User Passwords
In this guide, we'll walk through how to access a Windows server from both a Windows PC and a Linux machine using Remmina. After successfully accessing the server, we will cover how to change a user password for yourself, or for another user if you have administrative privileges, through Computer Management, PowerShell, and the Command Prompt.
#Instructions to Access a Windows Server
#Step 1: Accessing the Windows Server
A server running a Windows OS can be accessed from any system using their native access methods. This step will cover accessing your Windows server via Windows and Linux machines.
From Windows Using Remote Desktop Connection (RDP)
-
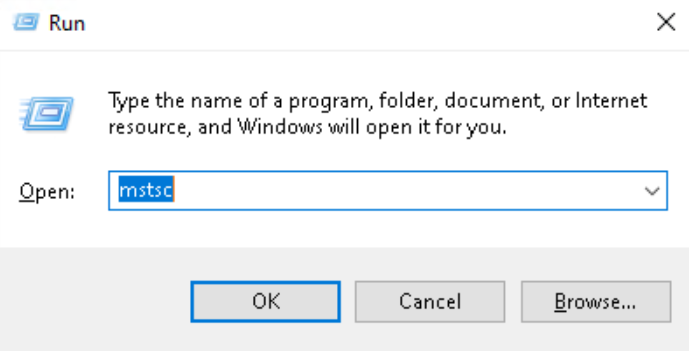
Open Remote Desktop Connection.
- Option 1 - Press Windows + R to open the Run dialog, type "mstsc", and press Enter to open Remote Desktop Connection.

- Option 2 - Click on the Start menu and search for "Remote Desktop Connection" in the search bar. Select the Remote Desktop Connection application from the search results.
- Option 1 - Press Windows + R to open the Run dialog, type "mstsc", and press Enter to open Remote Desktop Connection.
-
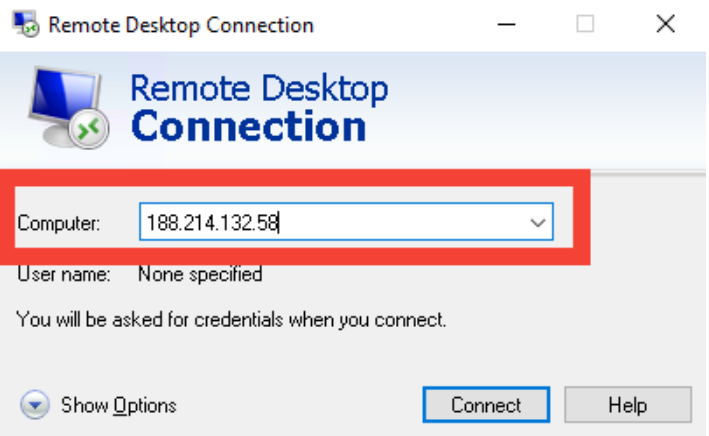
Enter the Windows Server IP Address.
In the Computer field, input the IP address or hostname of the Windows server. You may also click Show Options and enter your username for convenience. Then click "Connect".

-
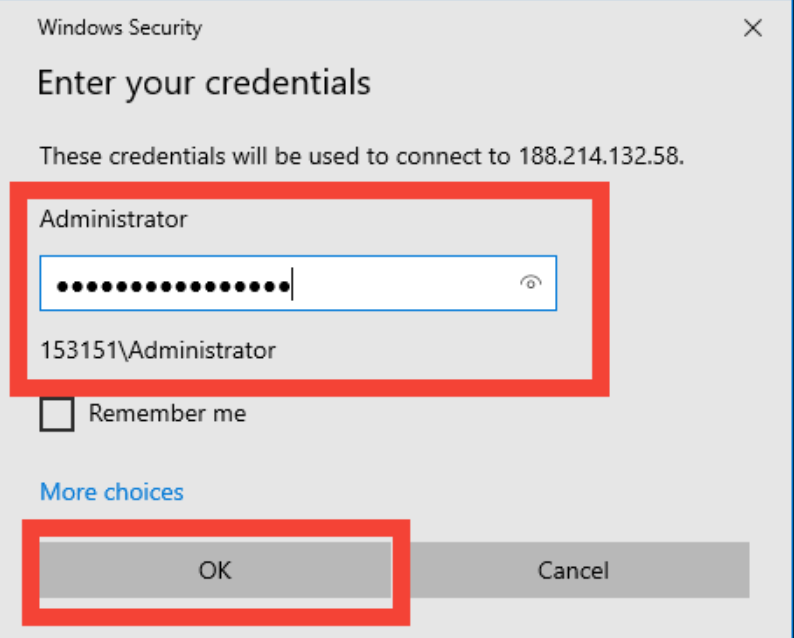
Enter Credentials.
A prompt will appear requesting your username and password.
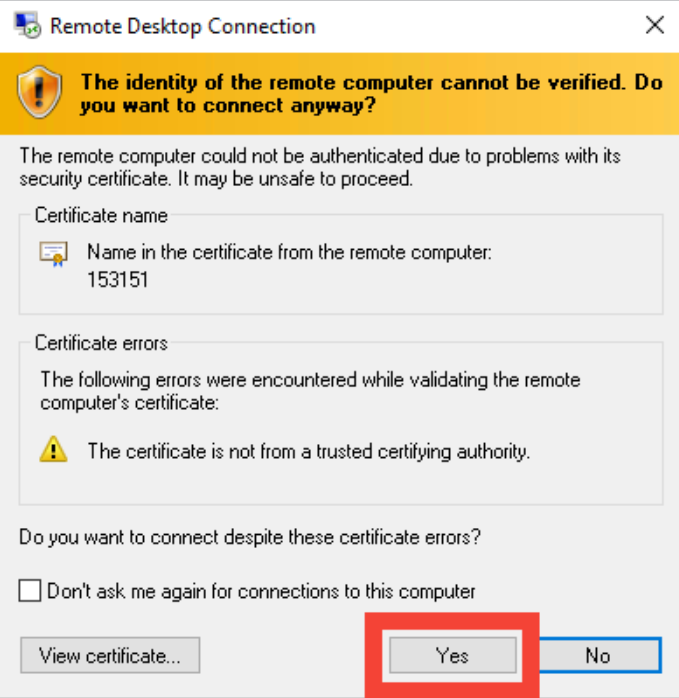
 If you receive a certificate warning, click may safely select “Yes” to proceed.

-
You are now logged into the Windows Server and can interact with its desktop.
From Linux Using Remmina
-
Install Remmina (if not already installed).
- On Ubuntu/Debian, install using:
sudo apt install remmina remmina-plugin-rdp- On Fedora, use:
sudo dnf install remmina- On Arch Linux, use:
sudo pacman -S remmina -
Launch Remina.
Open Remmina from your applications menu or run remmina from the terminal.
-
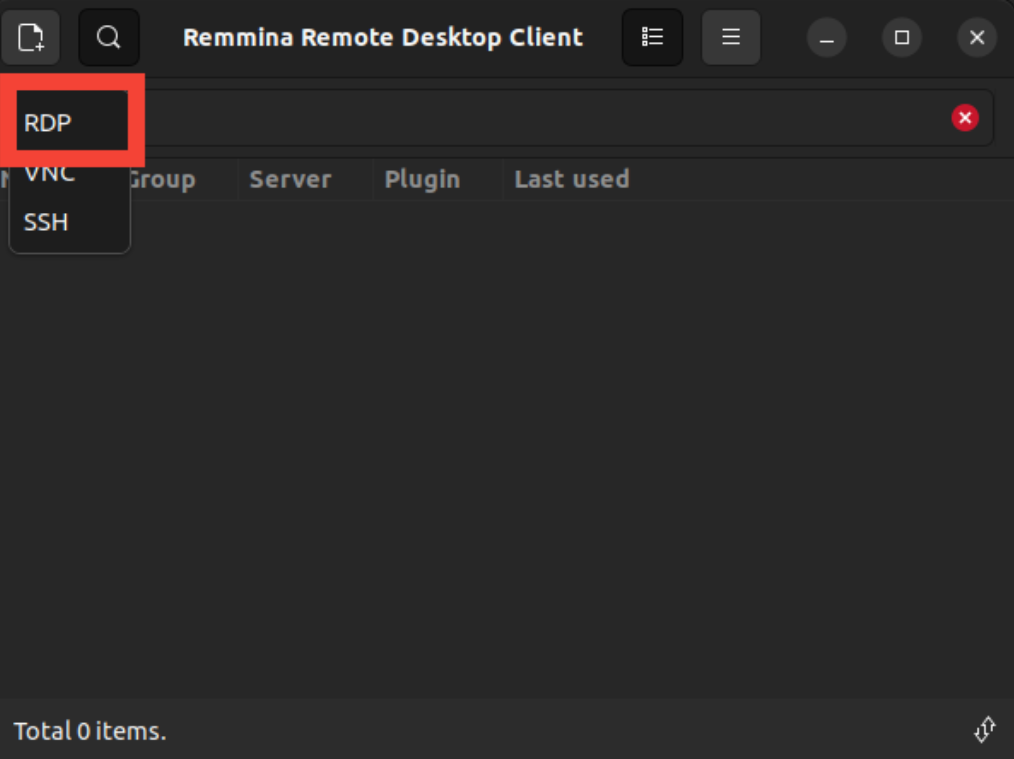
Select RDP and Enter the IP Address.
In the main Remmina window, select RDP from the protocol dropdown.
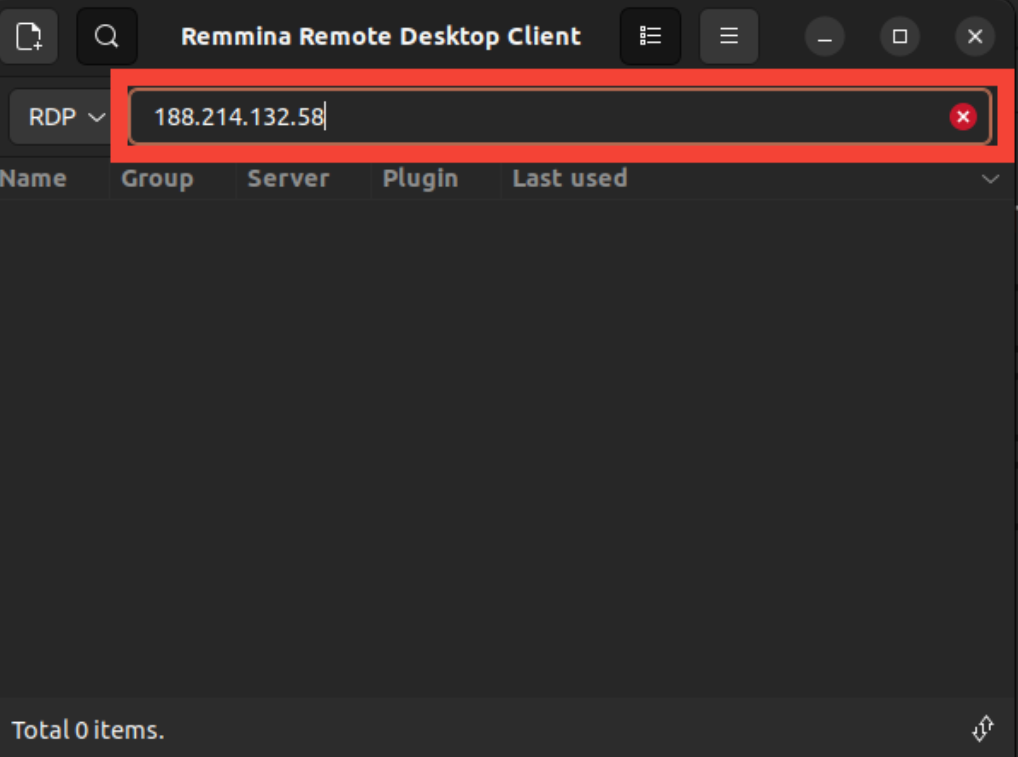
 Enter the IP address or hostname of the Windows Server in the field next to the RDP dropdown, and press Enter.

-
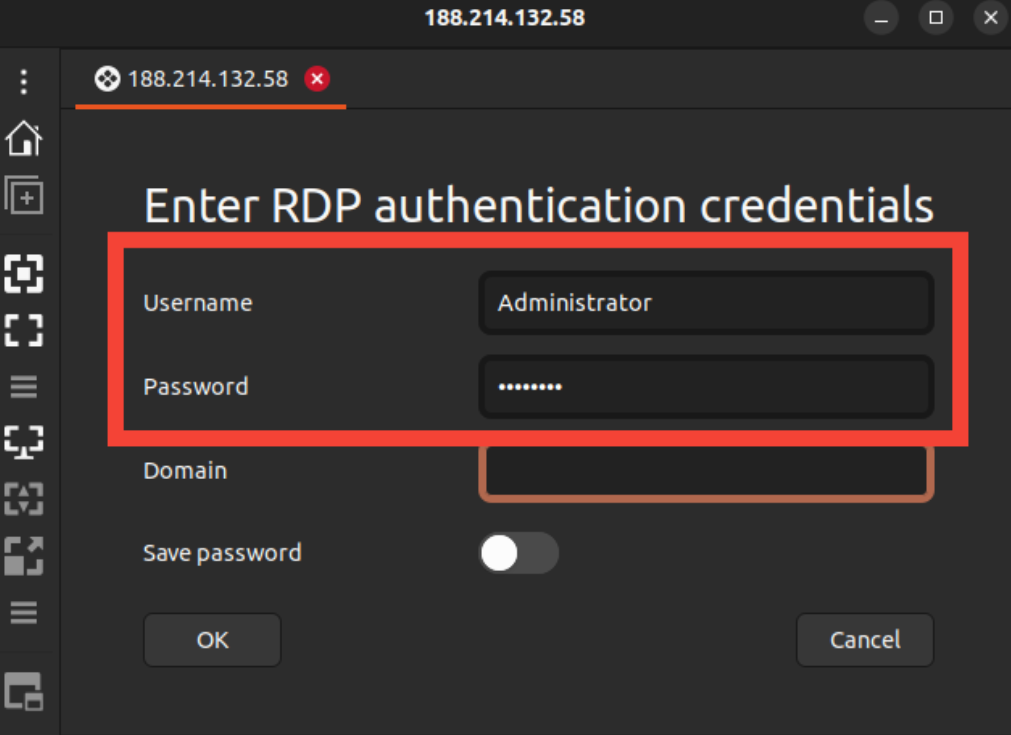
Enter credentials.
After pressing Enter, a pop-up window will appear asking for your username and password. Enter your credentials in the field provided.
 Click "OK", and "Accept" on the Certificate Warning, if prompted.
 -
Access the server.
Once connected, you will have full access to the Windows Server desktop.
#Step 2: Change a User's Password on the Windows Server
Once logged into the Windows Server, whether from Windows or Linux, you can change any user's password, as long as you have administrative privileges.
Method 1: Change Password Using Computer Management
-
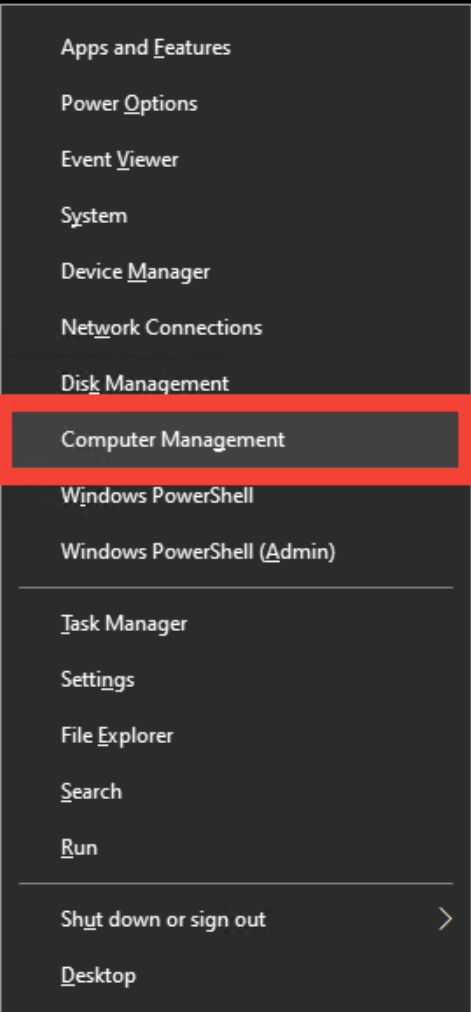
Open Computer Management.
Press Windows + X and select Computer Management from the menu.

-
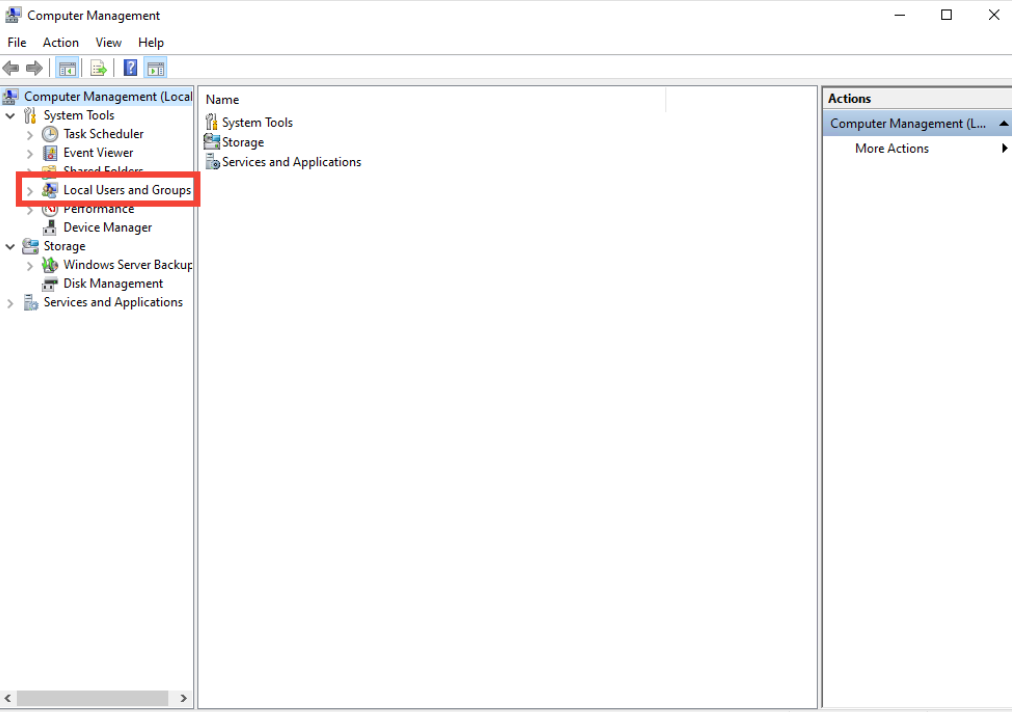
Access Local Users and Groups.
In the Computer Management window, expand Local Users and Groups on the left.
 Click on "Users" to see the list of users on the server.
-
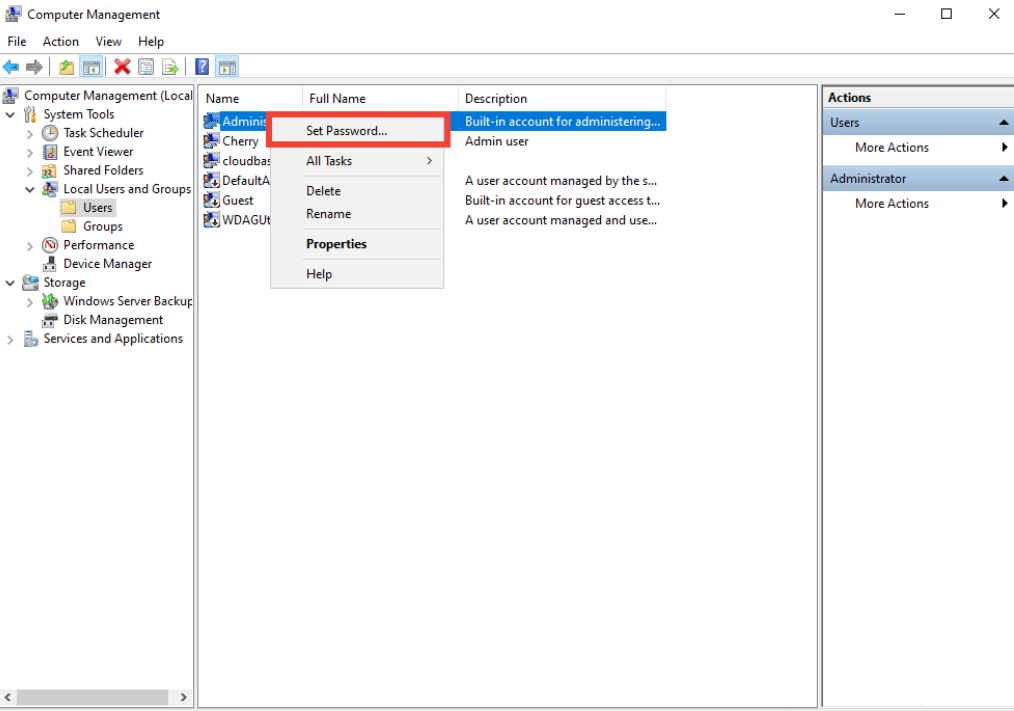
Select the user:
Find the user whose password you want to change, right click the username and select "Set Password".

-
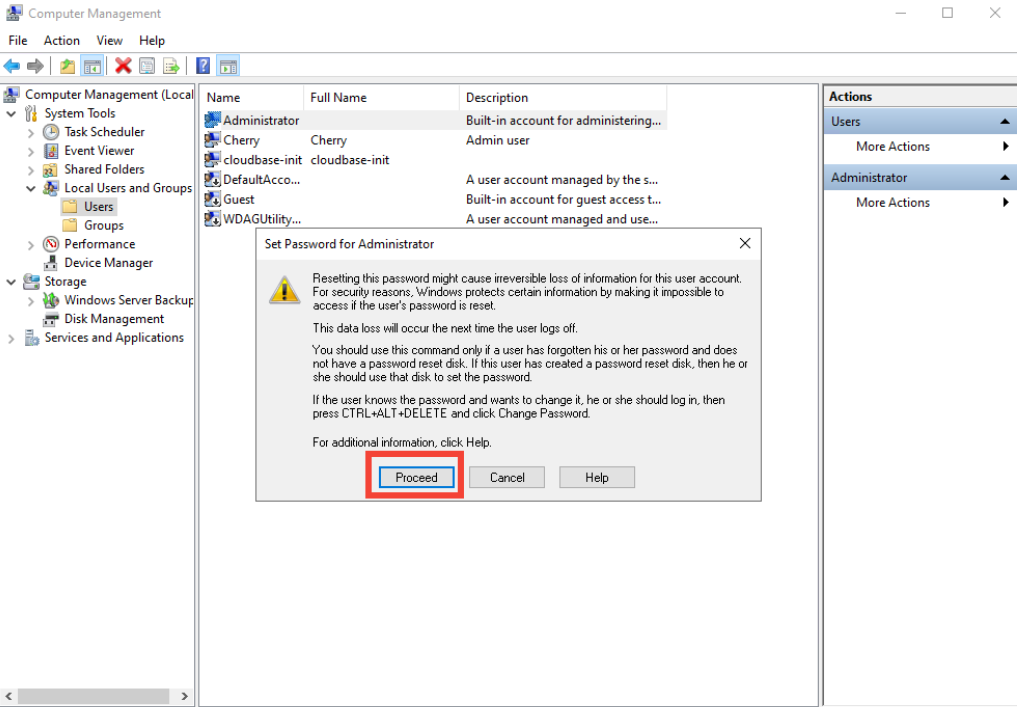
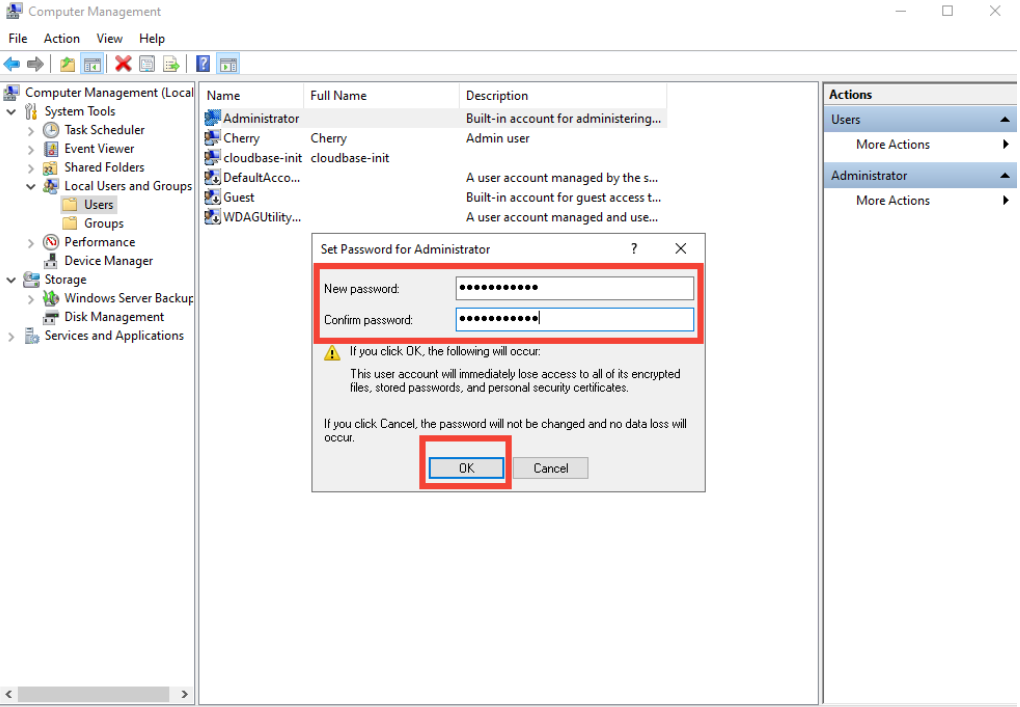
Set the new password:
A warning will appear explaining potential data loss if the user has encrypted data. Click "Proceed".
 Enter the new password and click "OK" to confirm the change.


Method 2: Change Password Using PowerShell
-
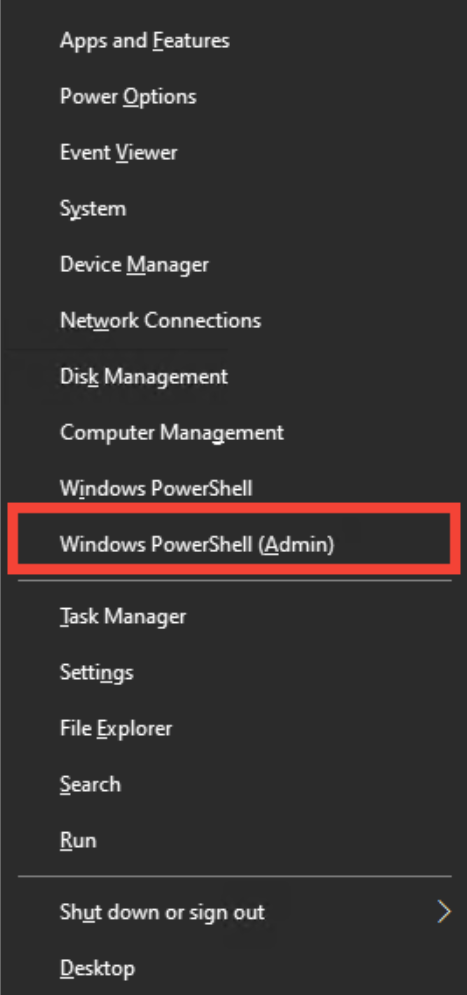
Open PowerShell. Press Windows + X and select Windows PowerShell (Admin).

-
Use the command to change the password: Enter the following command to change the password. Replace "target_username" with the user’s name and follow the prompt to input the new password:
$username = "target_username" $newPassword = Read-Host -AsSecureString "Enter the new password for $username" Set-LocalUser -Name $username -Password $newPassword -
Password change complete.
The password will be updated after you enter the new password and confirm.
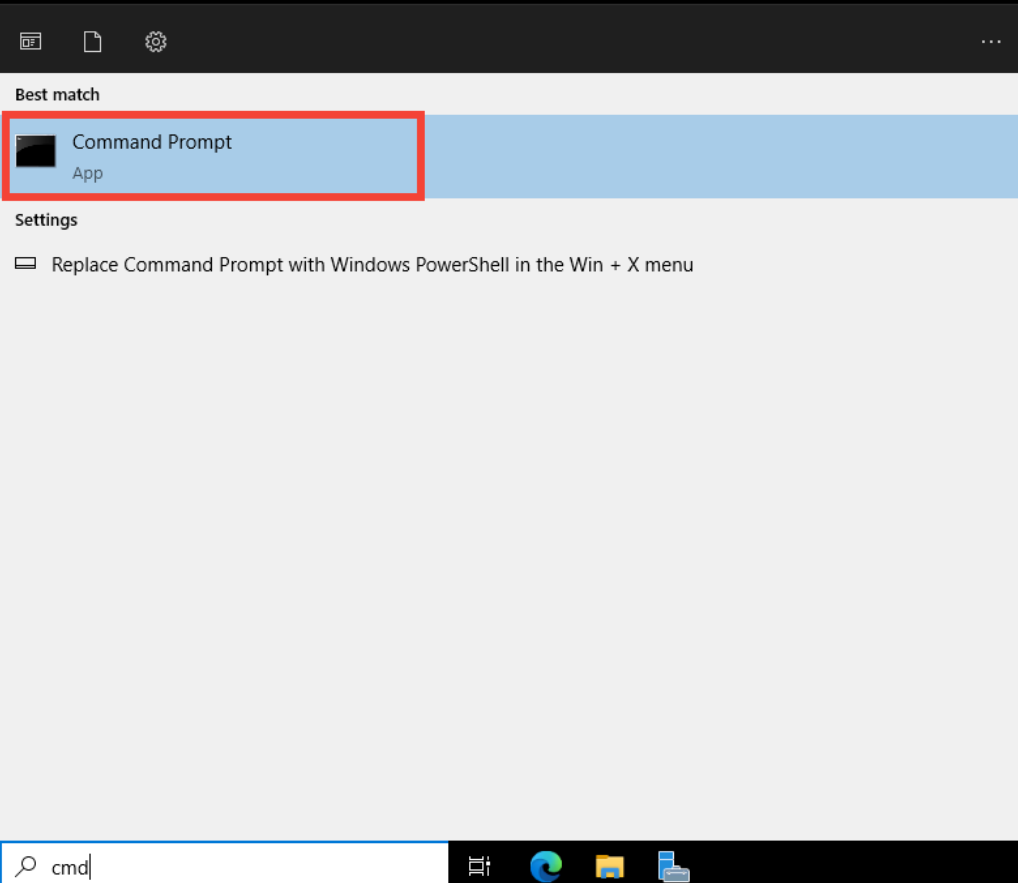
Method 3: Change password using Command Prompt
-
Open Command Prompt.
Press Windows + X and select Command Prompt (Admin) or search for "cmd".

-
Change the password.
Run the following command, replacing "username" with the user’s name and "newpassword" with the desired password:
net user username newpassword -
Password Change Complete:
You’ll see a confirmation message that the command was successful.
Output
The command completed successfully.