How to Reset the Root Password Using Rescue Mode
If you find yourself in the position of having lost access to your server, or you have security concerns, you may need to reset your server’s root password. This guide will give you a detailed overview of how to use Rescue Mode to make essential changes to your system, such as resetting the root password.
#Instructions to Reset Your Root Password Using Rescue Mode
#Step 1: Access the Cherry Servers Client Portal
- Log in to your Cherry Servers account using your credentials.
- Navigate to the server you need to access.
#Step 2: Activate Rescue Mode
- Select the server on which you would like to reset your root password.
- Press the "Actions" button in the top right corner of your client portal.

- In the drop-down menu, select the option labeled "Enter rescue mode".

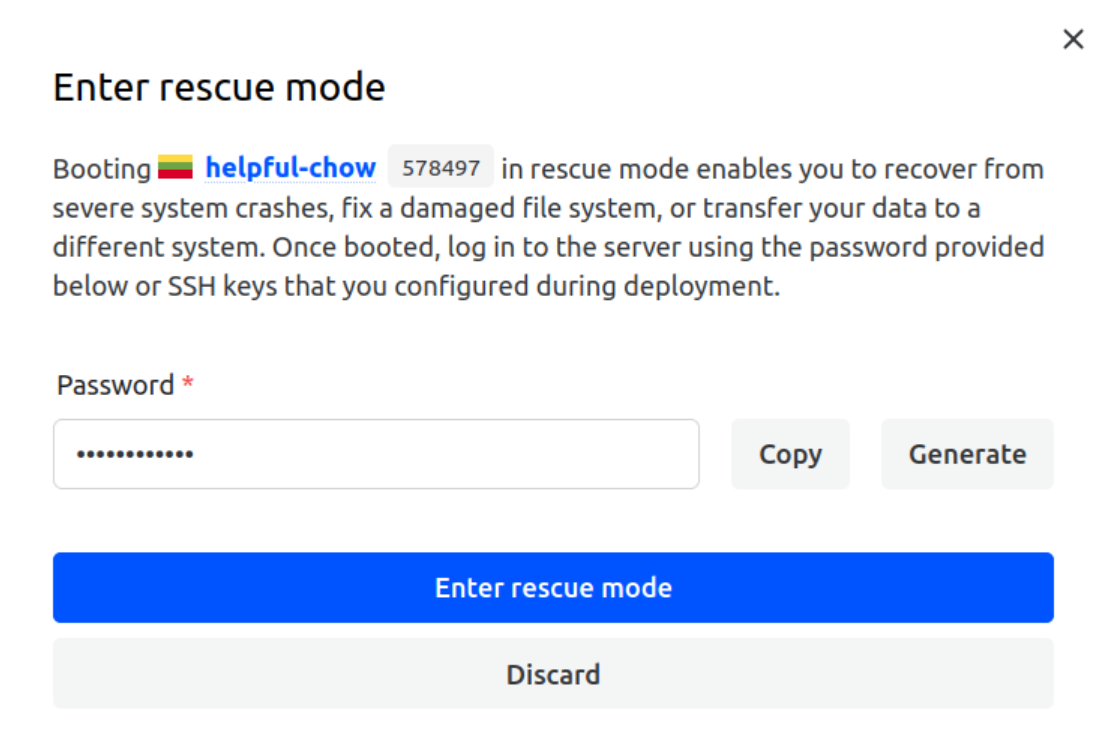
- A pop-up window will appear, asking you to generate a temporary password. This password allows you to access your server while it’s booted into the rescue environment.

- Press the blue button labeled “Enter rescue mode” to proceed.
- Wait for a few minutes while your server reboots into “Rescue Mode”.

- When your server is successfully booted into “Rescue Mode”, you will see a notification in blue text indicating that your server is up and running in the live environment.


#Step 3: Connect to Your Server
- Use an SSH client to connect to your server. The IP address will be displayed in the Cherry Servers client portal.
- The username is "root" and the password will be the one you generated previously. For security reasons, this password is not displayed again, so ensure you have it noted down.
- If you are having trouble using SSH, please visit our dedicated SSH guide for Windows and Linux.
#Step 4 Mount the Root Filesystem
- Identify the root filesystem partition. Usually, it will be something like “/dev/sda1” or “/dev/nvme0n1p1”. If you are using a RAID configuration, it may look like “/dev/md127” or “/dev/md1".
Example output. In this example, "/dev/md127" is the RAID device and the root partition:
lsblkOutput
root@7215:~# lsblk NAME MAJ:MIN RM SIZE RO TYPE MOUNTPOINTS loop0 7:0 0 413.6M 0 loop /media/root-ro loop1 7:1 0 63.9M 1 loop /snap/core20/2318 loop2 7:2 0 87M 1 loop /snap/lxd/29351 loop3 7:3 0 38.8M 1 loop /snap/snapd/21759 sda 8:0 0 232.9G 0 disk ├─sda1 8:1 0 1M 0 part └─sda2 8:2 0 232.9G 0 part └─md127 9:127 0 232.8G 0 raid1 sdb 8:16 0 232.9G 0 disk ├─sdb1 8:17 0 1M 0 part └─sdb2 8:18 0 232.9G 0 part └─md127 9:127 0 232.8G 0 raid1 - Mount the root filesystem to a directory, such as “/mnt”.
If using RAID, the command might look like this:
mount /dev/sda2 /mntmount /dev/md127 /mnt
#Step 5: Reset the Root Password
- Chroot into the mounted filesystem using:
chroot /mnt - Reset the root password using the “passwd” command.
passwd root - Enter a new password. For security reasons, your input will not be shown, but is being accurately recorded.
Output
root@10031:~# sudo chroot /mnt root@10031:/# passwd root New password: Retype new password: passwd: password updated successfully
#Step 6: Exit and Reboot
- Exit the "chroot" environment with:
exit - Unmount the root filesystem using:
unmount /mnt - Access the Cherry Servers client portal again.
- Select your server from the list.
- Press the "Actions" button in the top right corner of the client portal.
- Click on "Exit rescue mode" from the drop-down menu.

- Wait for a few minutes while your server reboots into its normal operating mode.

#Step 7: Verify the New Root Password
- After the server reboots, login with the new root password to ensure the reset was completed successfully.
To enable easier access to your server and simultaneously improve security, it is always recommended to add an SSH key. This will prevent unauthorized access and make it easier for you to log in. Please visit our dedicated tutorial to add an SSH key to your server.
Was this article helpful?
Thanks for the feedback!