How to Add a Missing Drive on Windows Servers
When you deploy a Windows Server instance or attach a new disk, there can be instances when the drive does not appear automatically under "This PC". This does not necessarily mean the disk is broken or misconfigured, it simply needs to be initialized and formatted before the operating system can use it. The system may display new disks as offline, unallocated, or not initialized. These must be manually configured using the Disk Management utility.
In this tutorial, we will walk you through the process of detecting, initializing, partitioning, and formatting a new drive on Windows Server using the built-in Disk Management utility. Whether you are adding a secondary storage disk, preparing a volume for backups, or setting up an additional data partition, these steps will help you get the job done reliably.
#Step-by-Step Instructions
#Step 1: Open the Disk Management Utility
Once your additional drive is physically attached to the Windows Server (whether via virtualization or direct hardware connection), the next step is to access the Disk Management utility, which allows you to manage all connected storage devices. To open Disk Management, follow these steps:
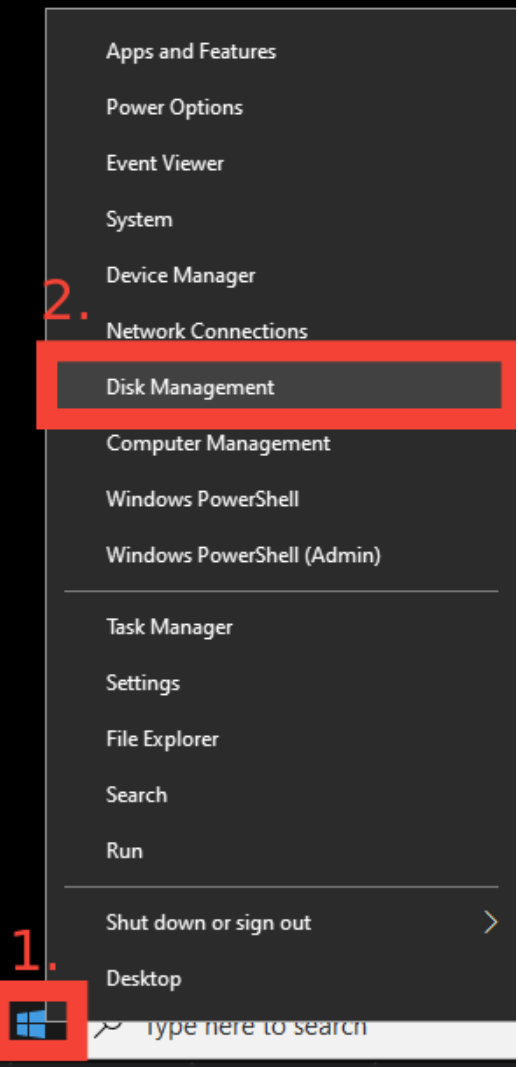
- Right-click on the Start menu (or press Win + X on your keyboard).
- From the context menu, select “Disk Management”.

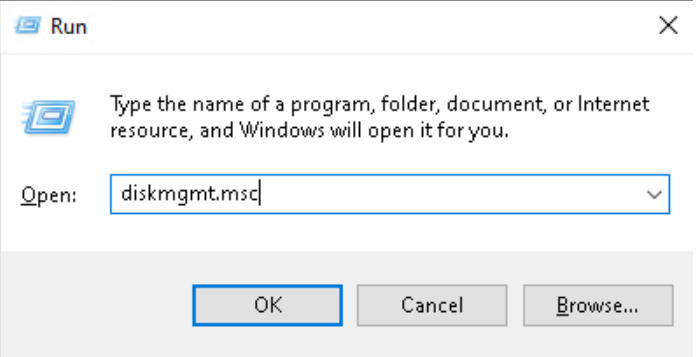
- Alternatively, you can press Win + R to open the Run dialog box, type “diskmgmt.msc”, and press Enter.
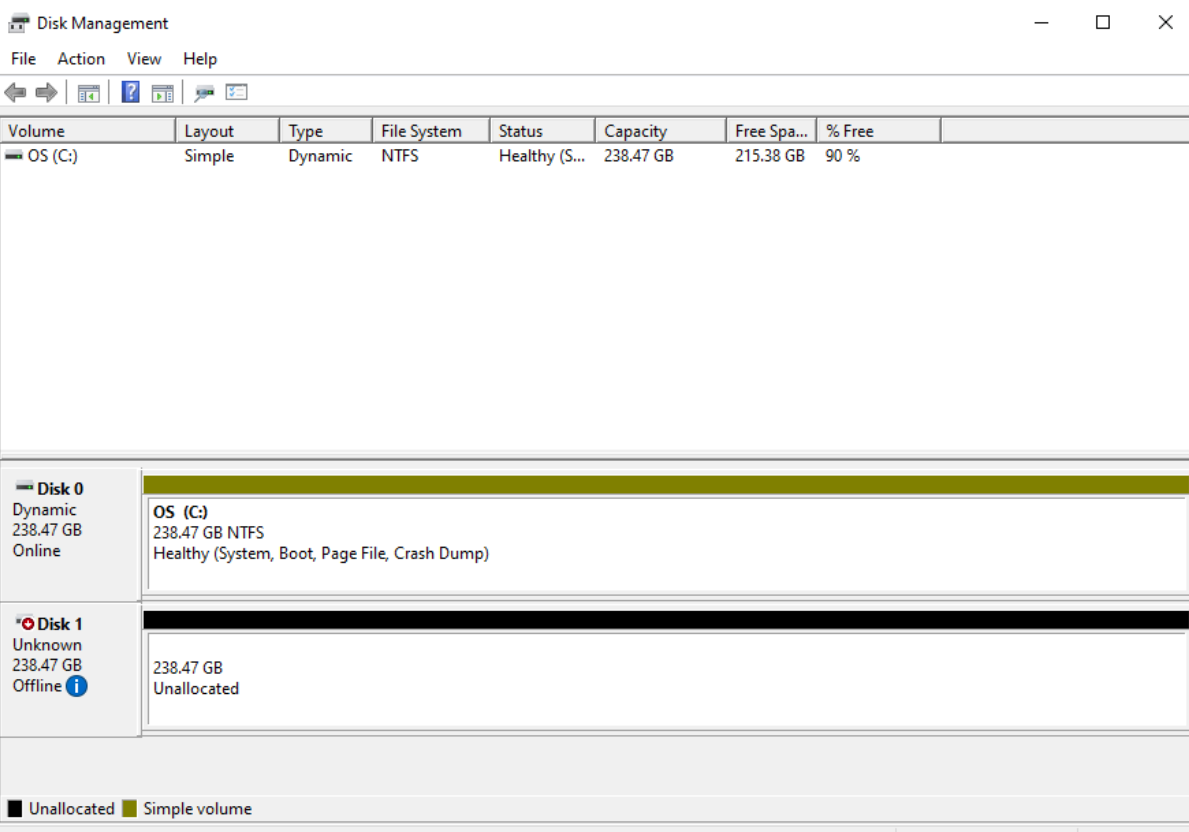
 The Disk Management window will now launch, displaying a list of all currently attached storage devices.
These include system drives, data partitions, and any newly connected disks.
The Disk Management window will now launch, displaying a list of all currently attached storage devices.
These include system drives, data partitions, and any newly connected disks.

What to Expect
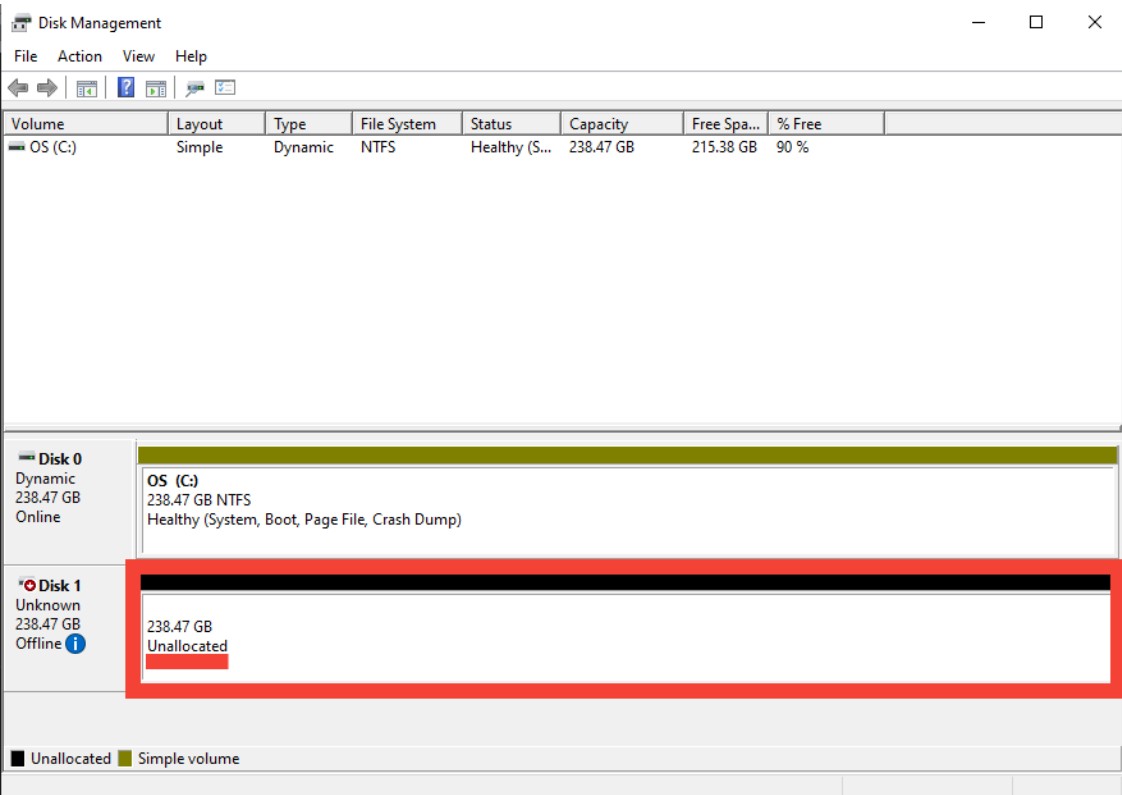
- If the new disk has never been initialized, it will appear in the bottom panel as “Disk 1” (or another number), marked as “Unknown” and “Not Initialized”.
- It may also be labeled as “Unallocated”, meaning no partitions have been created yet.

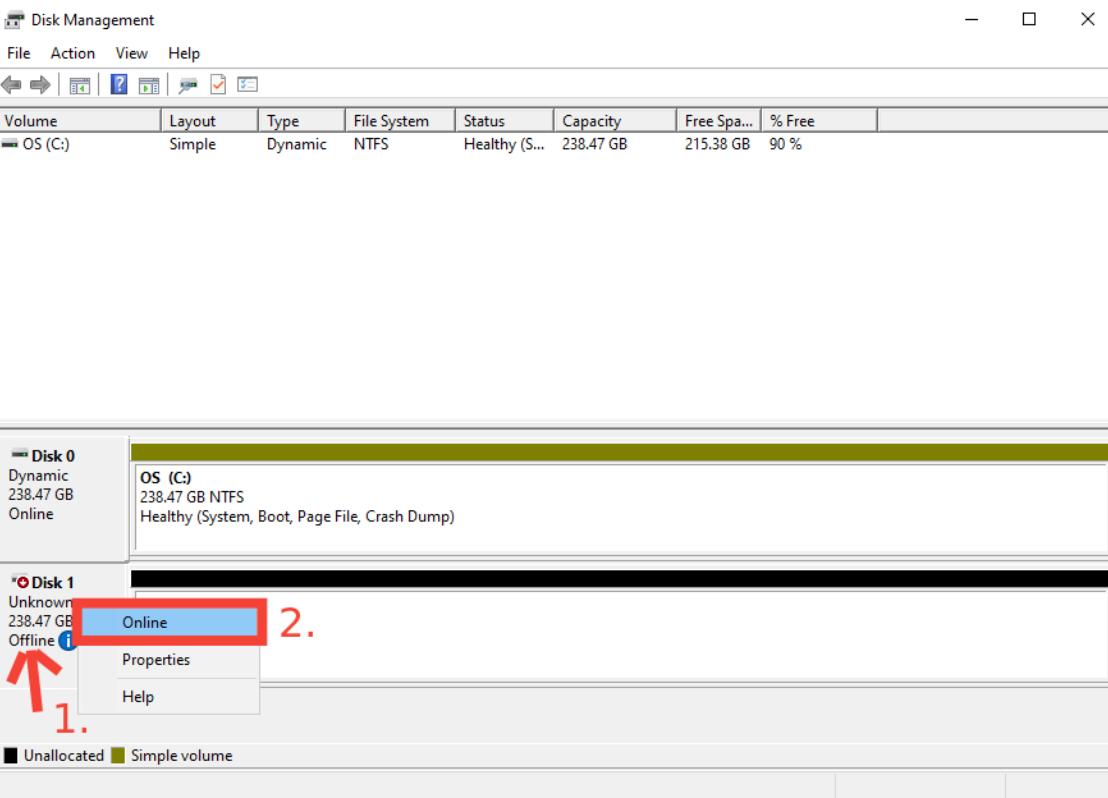
- In some cases, the disk may appear as "Offline", and you will need to right-click on the disk label and select "Online" before proceeding.

#Step 2: Initialize the Disk
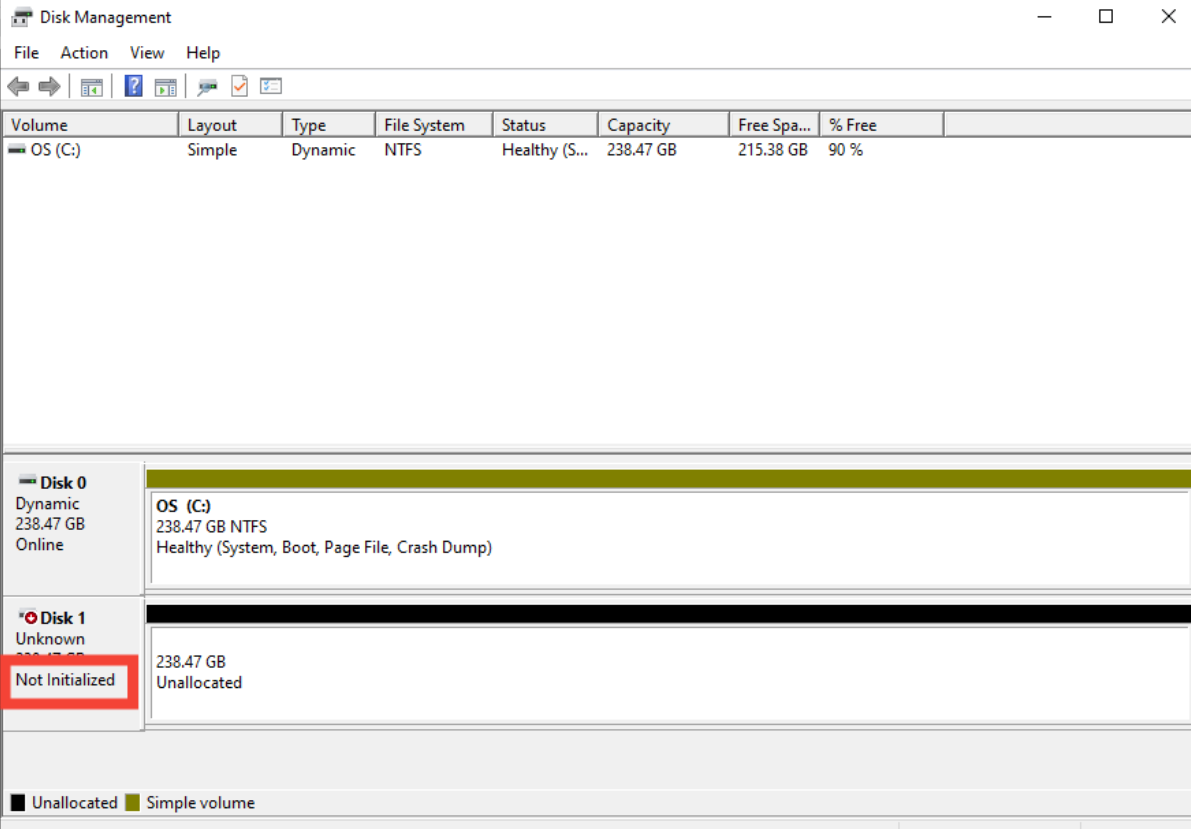
Once the new disk has been brought online, it still cannot be used until it is initialized. Initialization is a necessary process that prepares the drive to be formatted and written to by Windows. Without initialization, the system will not recognize the disk for storage purposes, even if it appears in Disk Management.
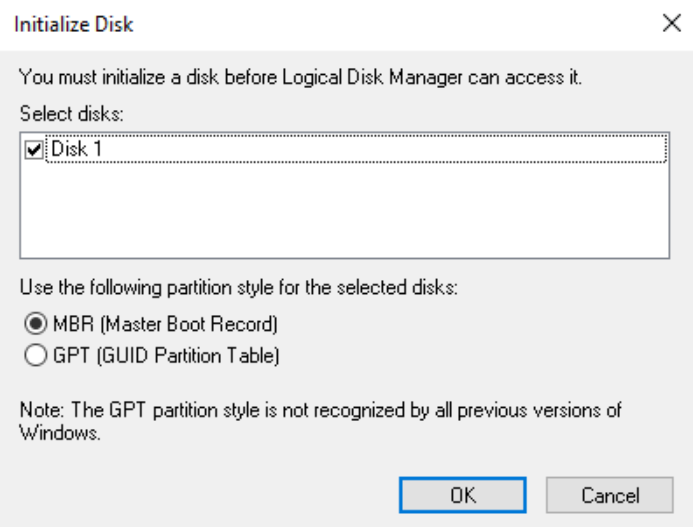
After bringing the disk online, it will now show a status of “Not Initialized”. At this point, you need to define a partition style before continuing. This is where you choose between the MBR Master Boot Record (MBR) and GUID Partition Table (GPT) schemes.
 To begin initializing the disk, follow these steps:
-
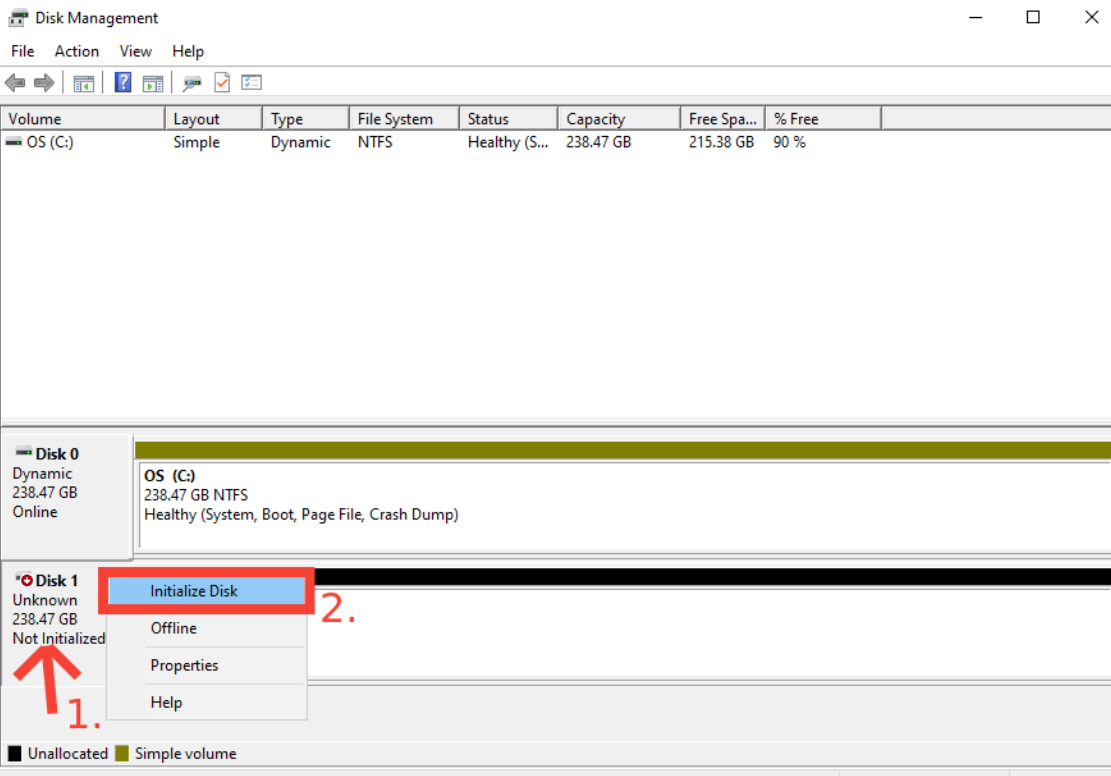
In the Disk Management window, right-click on the newly online disk that says “Not Initialized”.
-
From the context menu, select “Initialize Disk”.
 You will now see a dialog box prompting you to select the partition style. If your drive is larger than 2TB, you must choose GPT, as MBR does not support partitions beyond that size. GPT is also a preferred option for modern systems installed with UEFI firmware.
If you are working on an older system, or with drives smaller than 2TB, MBR may be more compatible.
 If you are unsure which partition style to use or what best fits your server configuration, you can always contact our support team at support@cherryservers.com, we will be happy to assist you in making the right choice for your use case.
 -
Once you have selected your preferred partition style, click OK to proceed. The disk is now initialized and ready to be formatted and partitioned in the next steps.
#Step 3: Create a New Volume and Format the Drive
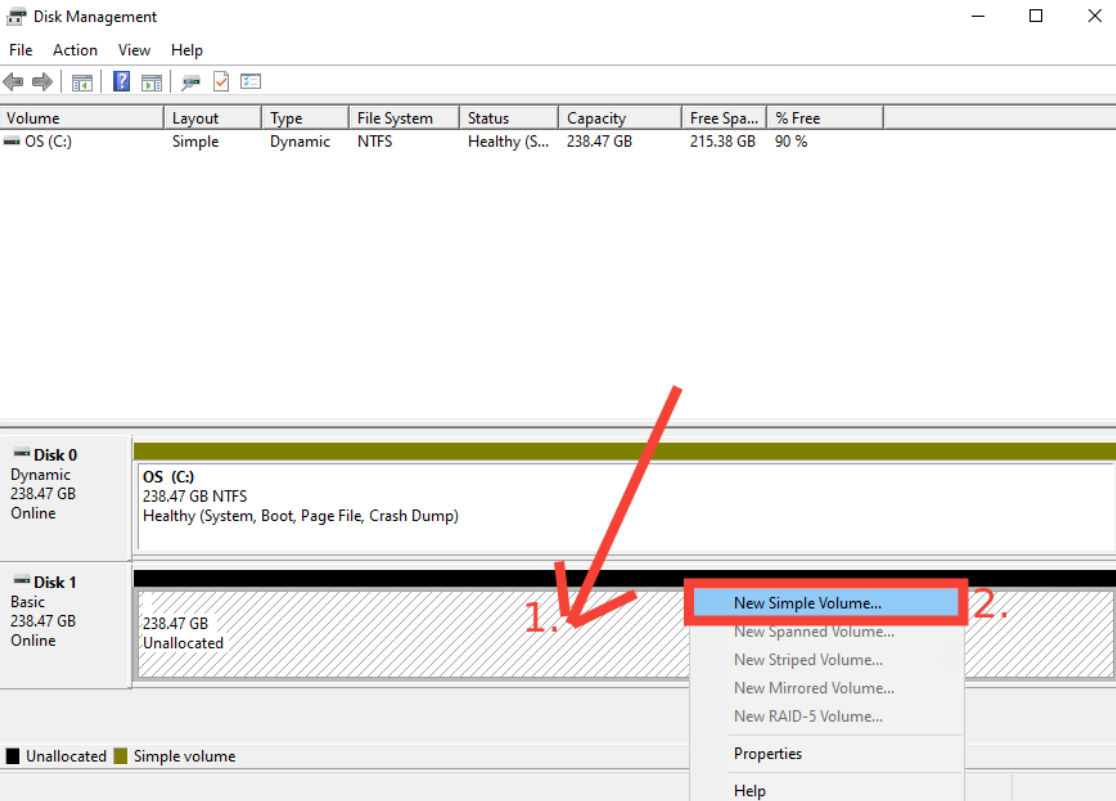
Once the disk has been initialized, it will appear as unallocated space in Disk Management. In order to use this storage, first a new volume needs to be created and formatted with a file system (typically NTFS). This process will make the drive visible and usable in Windows.
-
Right-click the unallocated space on the new disk.
-
From the context menu, select “New Simple Volume…” to launch the volume creation wizard.

-
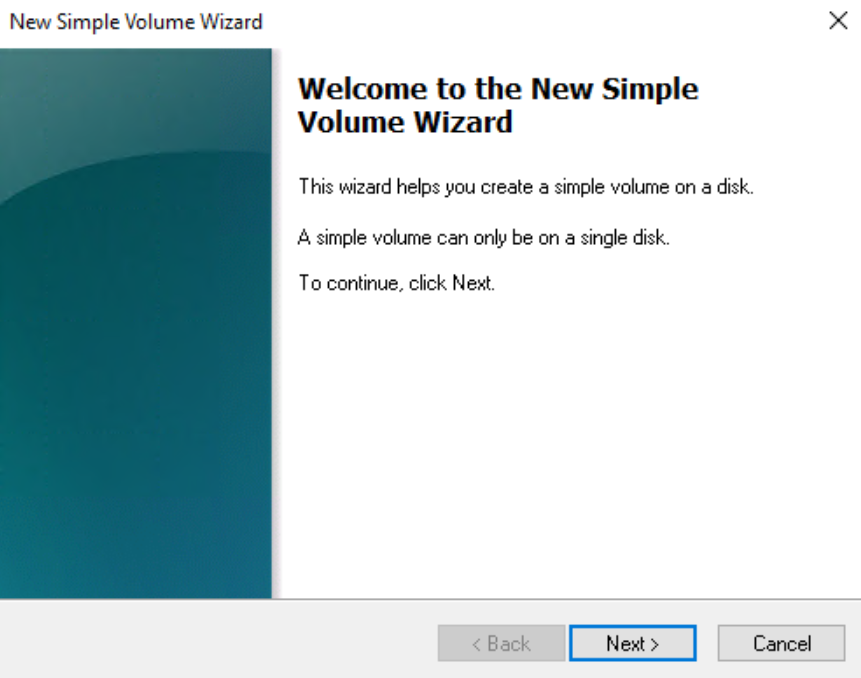
The New Simple Wizard that pops up will guide you through the configuration process for the new volume, allowing you to specify the size, assign a drive letter, and format partitions.

-
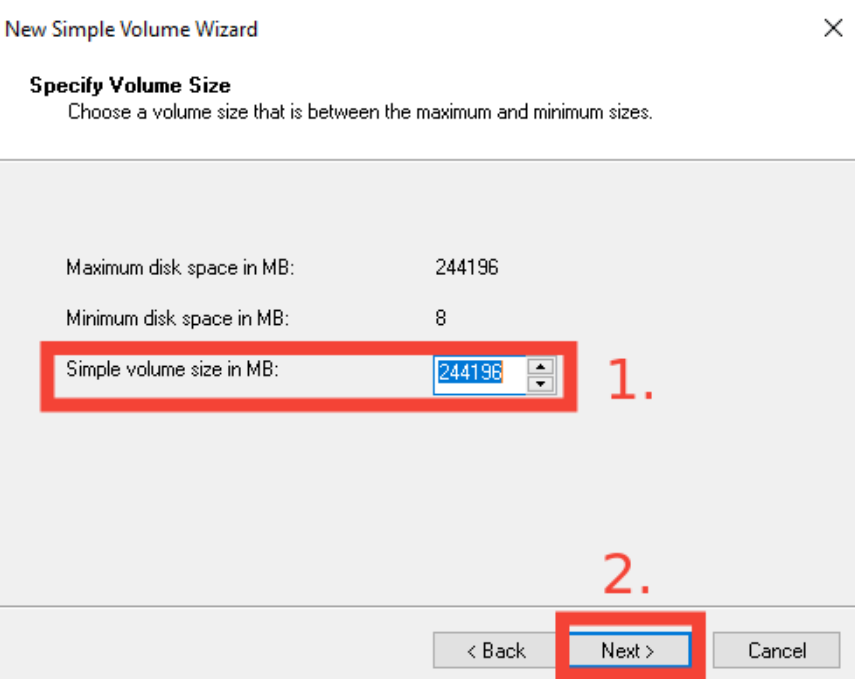
Specify volume size.
You can accept the maximum available space, or adjust it based on your needs. For most use cases, using the full capacity will suffice.

-
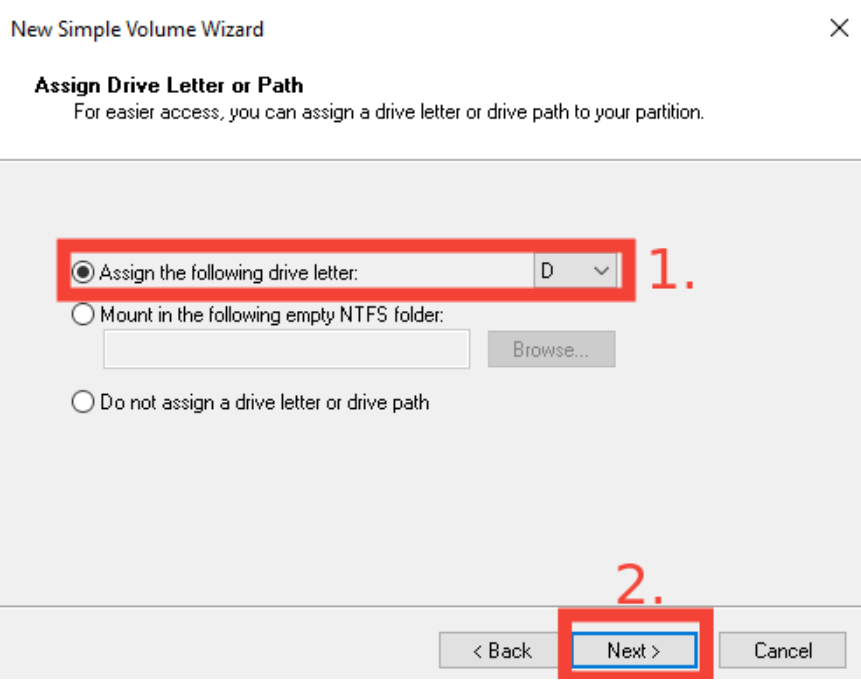
Assign a drive letter.
Choose a letter (such as D: or E:) that is not already in use by other drives. This will be how the new volume appears in File Explorer. Then click “Next”.

-
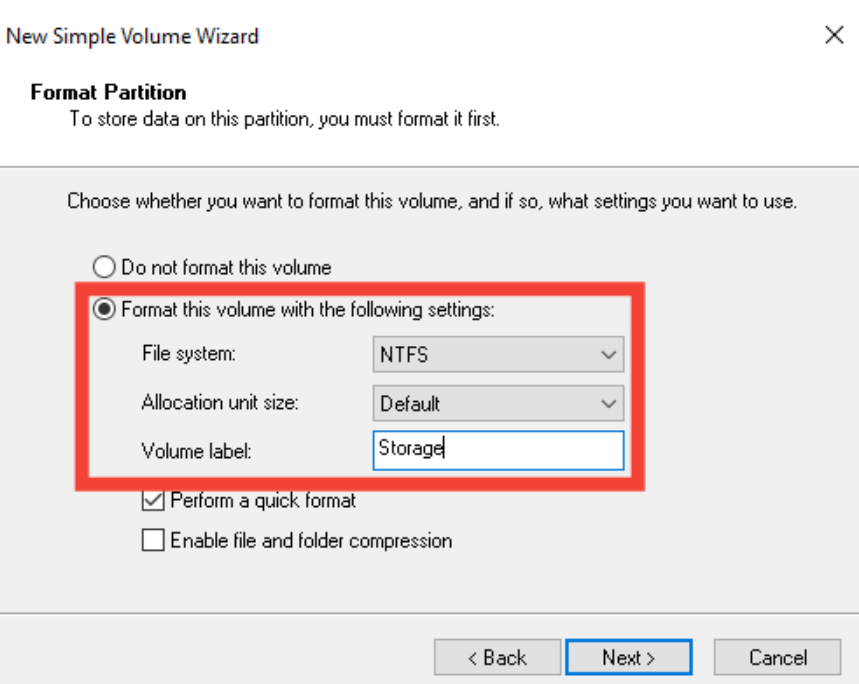
Format the partition – choose the file system (typically NTFS) and allocation unit size (leave as Default unless you have specific requirements).
You may also provide a volume label, such as “Data” or “Backup”.

-
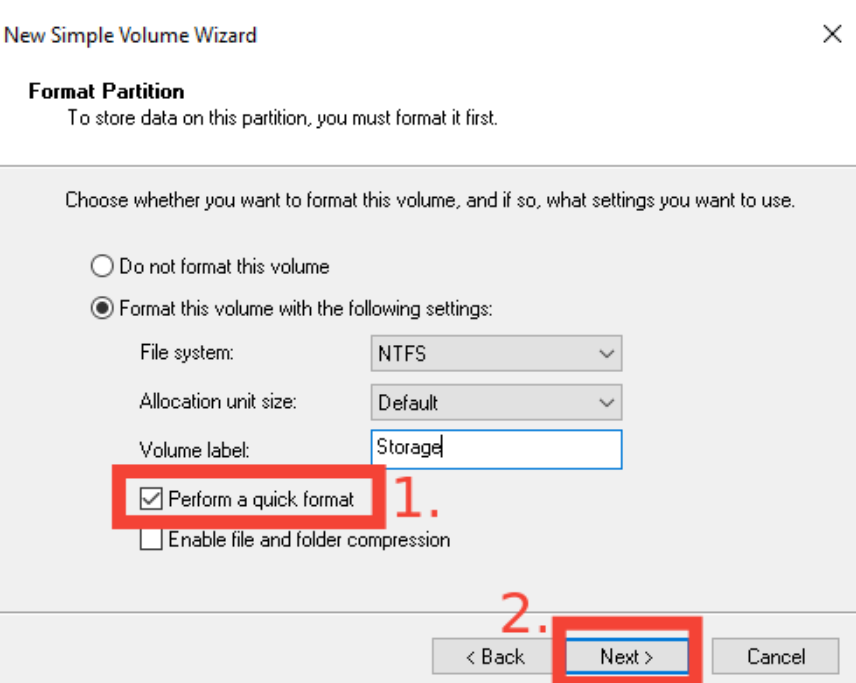
Enable Quick Format. You can leave this box checked unless you require a full format for data wiping purposes.

-
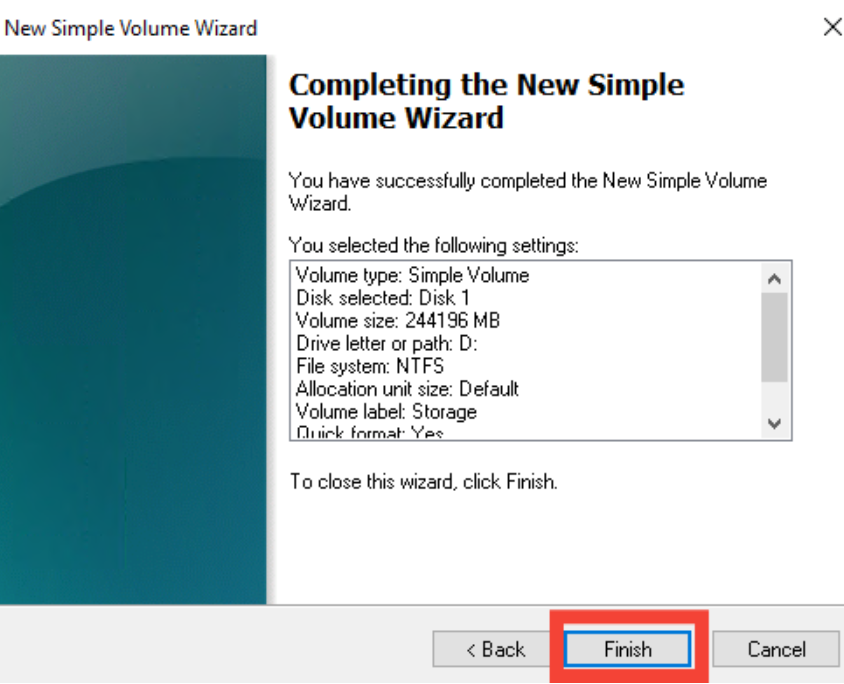
Click Finish to apply all settings. Windows will format the new partition and it will be ready for use in a few seconds.

-
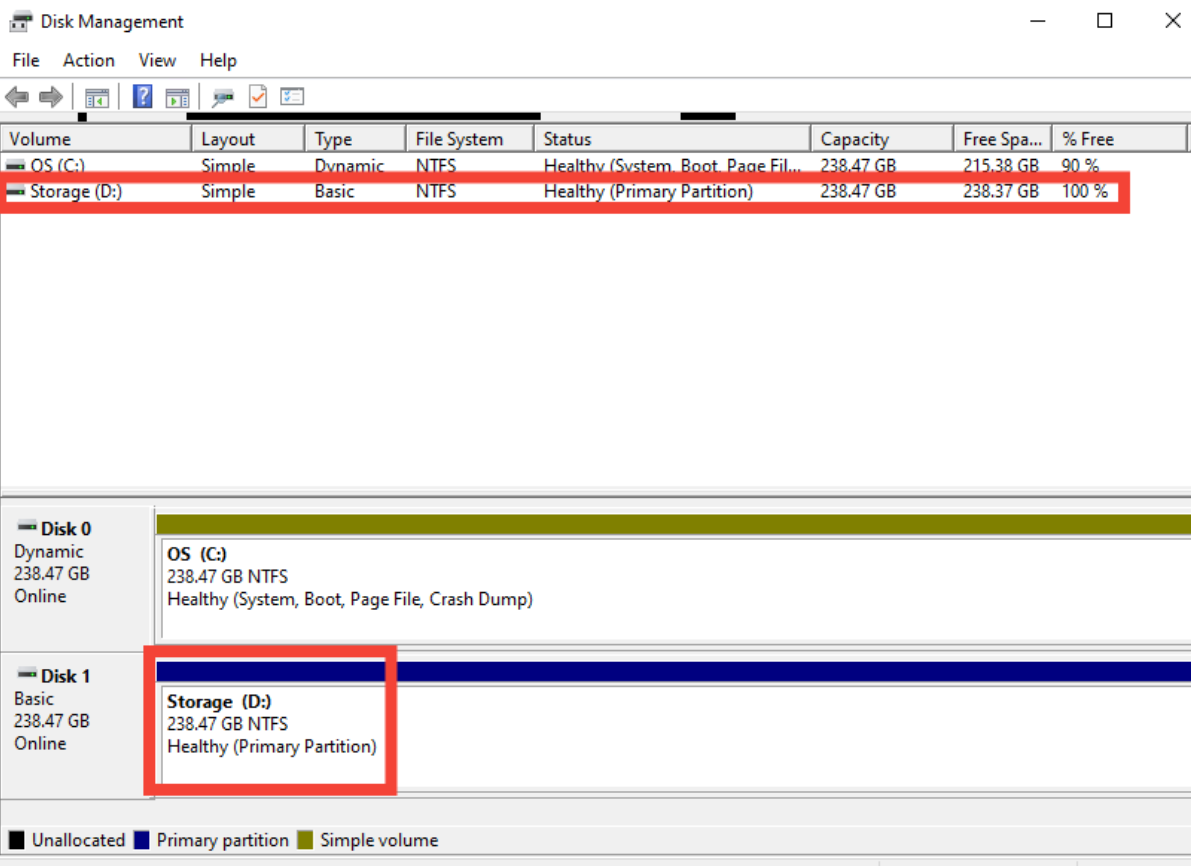
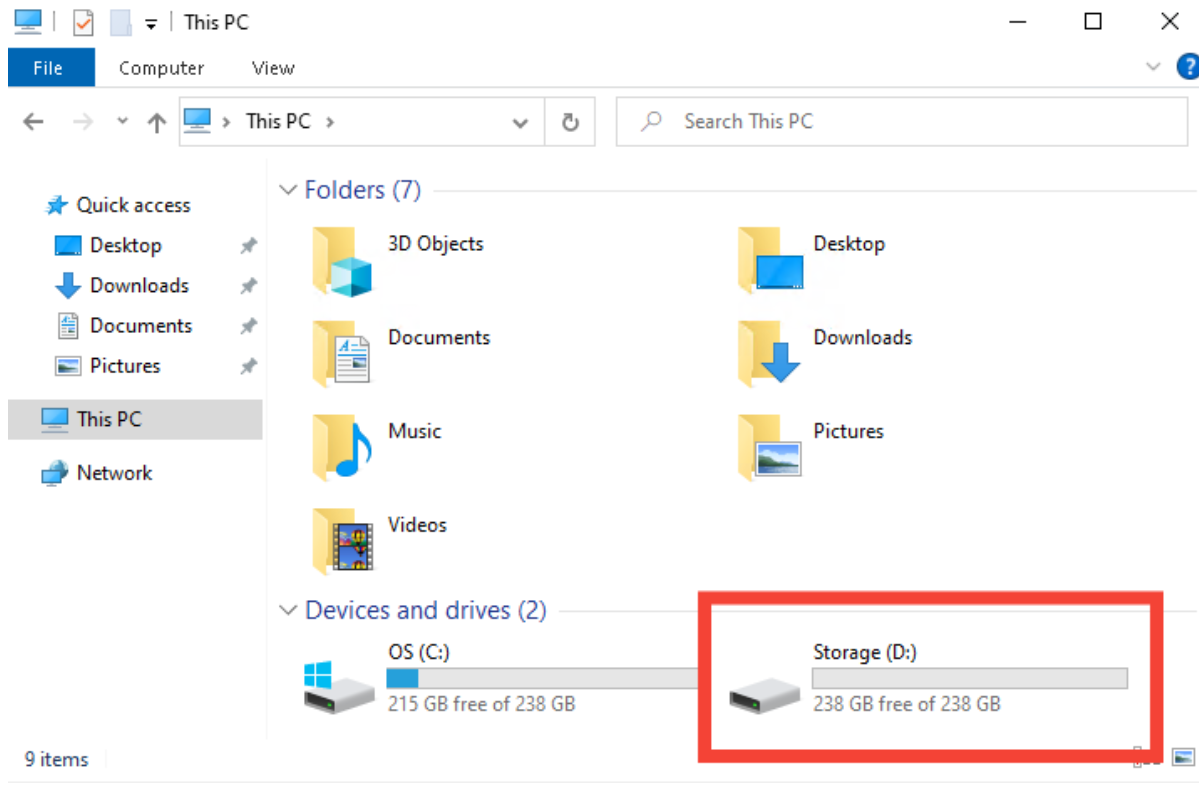
Once formatting is complete, the volume status should show as “Healthy (Primary Partition)”, and the drive will appear in File Explorer, ready to store files.

 In some rare cases, the drive may not be displayed immediately. In the event that this happens, rebooting your server should prompt Windows to refresh its volume table and display the new drive correctly in the system.