How to Install and Access a GUI on Ubuntu Servers for Remote and Local Use
Ubuntu Servers are known for their efficiency, minimalism, and focus on command-line-based administration.
By default, Ubuntu servers do not come with a graphical interface, allowing them to operate in a resource efficient and headless mode. However, in some cases, a graphical user interface (GUI) can improve server management accessible, especially for system administrators or users who are less comfortable with the terminal and prefer a visual approach.
This guide will walk you through the steps to install a GUI on an Ubuntu Server instance and show how to connect to it both locally, via the console, and remotely using VNC or RDP. You are able to choose your desktop environment, depending on your system’s available resources. The most common options are GNOME, Xfce, LXDE, and KDE Plasma.
The GUI can be accessed through the console, or remotely using VNC or RDP, but you can also switch back to a non-graphical environment at any time by changing the system target.
#Instructions to Install and Access a GUI on Ubuntu Servers
#Step 1: Update Your System
Before beginning any installations, it is crucial to ensure that your Ubuntu Server is fully up to date. Updated packages include the latest security patches, feature improvements, and bug fixes, reducing the chances of running into issues during or after the GUI installation process. To begin, you will need access to the server's terminal. You can do this either through a remote SSH connection or by using remote console, If you are unfamiliar with this process, please view our dedicated guides:
- First, we need to refresh the list of available packages and apply any necessary upgrades. Depending on how long ago your system was last updated, this step may take several minutes to complete. Open your terminal and run the following command:
sudo apt update && sudo apt upgrade -y - Once the update finishes, it is recommended to reboot your server to ensure that all updates, especially kernel or system service upgrades, are fully applied before proceeding:
After the reboot, log back in via SSH or the local terminal, and you’ll be ready to continue with the desktop environment installation.
sudo reboot
#Choose a Desktop Environment
Ubuntu supports a variety of desktop environments, each with different capabilities in terms of performance, resource usage, and visual features. Before installing, it is important to choose one that fits your server's hardware and use case. Some commonly used desktop environments are:
- GNOME (ubuntu-desktop) - the default Ubuntu desktop environment, offering a complete and polished experience. It includes a full suite of applications but is relatively heavy on resources.
- Xfce (xubuntu-core) - a lightweight and fast desktop environment that is ideal for virtual servers or machines with limited RAM and CPU power. It offers a minimal footprint while remaining user friendly.
- LXDE (lubuntu-core) - one of the lightest GUI options available. Perfect for extremely resource constrained environments or minimal use cases where performance is the highest priority.
- KDE Plasma (kubuntu-desktop) - a modern and feature rich desktop that delivers an attractive, Windows like experience. While it is visually appealing, KDE also requires more system resources.
If you are unsure which environment to choose, we recommend starting with Xfce, as it provides a good balance between usability and system load. On the other hand, if you are looking for a full desktop experience with most Ubuntu tools per-installed, then GNOME may be the optimal choice. Any of these environments can be installed using a single command.
#Step 3: Install the Desktop Environment
Installing your desktop environment on Ubuntu is a relatively straightforward process thanks to the apt package manager. Please note that installing a GUI may pull in hundreds of packages, depending on the environment. Ensure your system has enough available storage and that the installation process is not interrupted.
Below we have provided commands for installing each of the recommended desktop environments.
-
Installing GNOME (full Ubuntu Desktop).
Installing the GNOME desktop environment along with a wide range of pre-installed applications such as Firefox, LibreOffice, and other system utilities is straightforward and suitable for users who want a complete system with little setup effort. If you want the full desktop experience, similar to what you get when installing Ubuntu Desktop, run the following command:
sudo apt install ubuntu-desktop -y
-
Installing Xfce (lightweight option).
For a minimal, resource efficient setup, we recommend Xfce. It includes only the essential components of a desktop interface, making it ideal for servers and virtual machines with modest specifications. This installs the core desktop without extra applications, allowing you to manually add only what you need later. To install Xfce (Xubuntu Core), use the following command:
sudo apt install xubuntu-core -y
-
Installing LXDE (ultra lightweight).
If system resources are extremely limited, LXDE is a great alternative. It is even lighter than Xfce and ideal for headless servers where you want a GUI without additional software overhead. Run the following command:
sudo apt install lubuntu-core -y
You may encounter the error "E: Unable to locate package lubuntu-core". This usually means the universe repository is not enabled on your server. To resolve this, run the following commands before installing:
sudo add-apt-repository universe
sudo apt update
Then install the full Lubuntu desktop environment instead:
sudo apt install lubuntu-desktop -y
This ensures all necessary packages are available and properly installed.
- Installing KDE Plasma (feature rich environment). If you prefer a modern, feature rich interface with advanced graphical elements, consider installing KDE Plasma. Run the following command:
sudo apt install kubuntu-desktop -y
#Step 4: Install a Display Manager
A display manager is the service responsible for presenting the login screen and launching your desktop environment after boot. Without a display manager, even if a GUI installed, your server will boot into the command line interface (CLI) by default. Different desktop environments prefer different display managers, but you can choose the one that best suits your setup. Recommended display managers:
- GDM3 (GNOME display manager) – The default for GNOME. Visually polished, but slightly heavier on system resources.
- LightDM – a lightweight alternative that works well with Xfce, LXDE, and even GNOME.
- SDDM – preferred by KDE Plasma, offering smooth animations and integration. For a lightweight and universal solution, we recommend installing LightDM. Use the following command:
sudo apt install lightdm -y
During installation, you will be prompted to choose a default display manager. Use the arrow keys to highlight your selection (e.g., lightdm), then press ENTER to confirm.
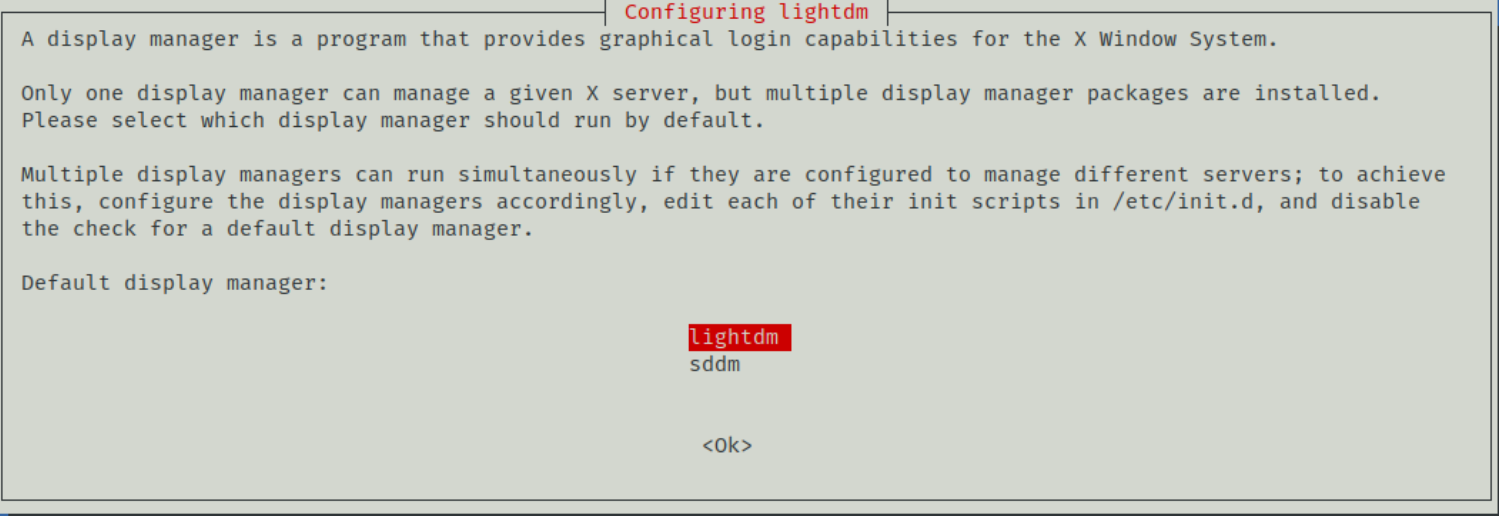 In the event that the prompt does not appear, or you wish to reconfigure your default display manager later, you can run:
sudo dpkg-reconfigure lightdm
Once the display manager has been installed and configured, your system is almost ready to launch the desktop environment.
#Step 5: Enable the GUI to Start Automatically
By default, Ubuntu Server boots into a multi-user target, which provides a non-graphical command-line interface. To have your newly installed desktop environment load automatically after each boot, you will need to change the system's target to graphical.target. This ensures that the system will launch the display manager and graphical interface right after startup, providing a GUI login screen every time the server reboots.
- To check the current boot target, run:
systemctl get-default - If your server returns "multi-user.target", it means it is still set to boot into text mode only. You can change this to graphical mode using the following command:
sudo systemctl set-default graphical.target
This command sets the GUI mode as the default run-level, allowing the desktop environment to start automatically on each boot.
#Step 6: Reboot the System
After setting the graphical target and completing all installation steps, it is time to reboot your server so that the changes can take full effect. Rebooting ensures that the display manager, graphical interface, and desktop environment are properly initialized on startup. To reboot your server, simply enter:
sudo reboot
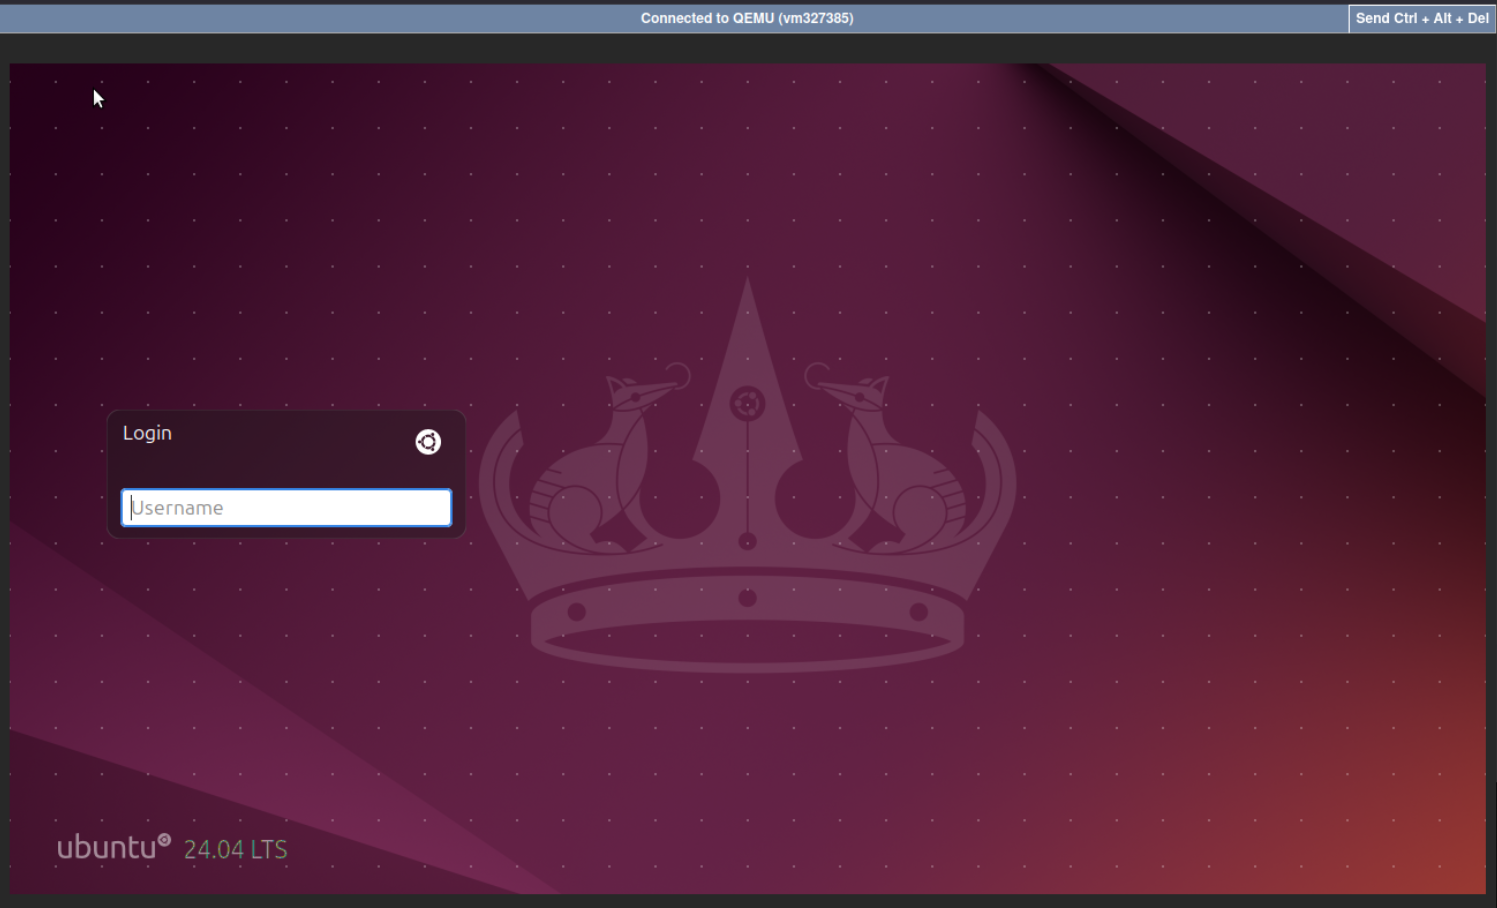
The server will shut down and automatically start again. Once the system has fully booted, you should be greeted by the graphical login screen of the desktop environment you installed earlier. If you are connected through a remote console such as the KVM/IPMI/VNC console, you will be able to view the login screen in real time.
#Step 7: Connect to the GUI Remotely
Once the desktop environment is installed and configured, you may want to access it remotely from your local computer. The two most common methods for GUI based remote access are VNC and RDP.
Option 1: VNC (Virtual Network Computing)
VNC allows you to connect to your server's graphical interface using a VNC client.
- To install the VNC server on Ubuntu, run:
sudo apt install tightvncserver -y - After installation, you can start the server and set a password. You may also be prompted to create a view only password. You can skip this if it's not needed.
vncserver - Once the server is running, it will listen on port 5901 by default (which corresponds to :1 display). You can now connect to it using any VNC client.
Option 2 RDP (Remote Desktop Protocol)
xRDP allows you to connect to your Ubuntu desktop using the built-in Remote Desktop Connection app on Windows or any RDP compatible client. To install xRDP, use:
sudo apt install xrdp -y
Once installed, the xRDP service should start automatically. You can verify with:
sudo systemctl status xrdp
This should show an output similar to:
Output● xrdp.service - xrdp daemon
Loaded: loaded (/usr/lib/systemd/system/xrdp.service; enabled; preset: enabled)
Active: active (running) since Mon 2025-06-02 20:21:53 EEST; 1min 7s ago
Docs: man:xrdp(8)
man:xrdp.ini(5)
Process: 3255 ExecStartPre=/bin/sh /usr/share/xrdp/socksetup (code=exited, status=0/SUCCESS)
Process: 3264 ExecStart=/usr/sbin/xrdp $XRDP_OPTIONS (code=exited, status=0/SUCCESS)
Main PID: 3265 (xrdp)
Tasks: 1 (limit: 2310)
Memory: 860.0K (peak: 1.5M)
CPU: 19ms
CGroup: /system.slice/xrdp.service
└─3265 /usr/sbin/xrdp

Jun 02 20:21:52 knowledge-base2 systemd[1]: Starting xrdp.service - xrdp daemon...
Jun 02 20:21:52 knowledge-base2 xrdp[3264]: [INFO ] address [0.0.0.0] port [3389] mode 1
Jun 02 20:21:52 knowledge-base2 xrdp[3264]: [INFO ] listening to port 3389 on 0.0.0.0
Jun 02 20:21:52 knowledge-base2 xrdp[3264]: [INFO ] xrdp_listen_pp done
Jun 02 20:21:52 knowledge-base2 systemd[1]: xrdp.service: Can't open PID file /run/xrdp/xrdp.pid (yet?) after start: No such file or directory
Jun 02 20:21:53 knowledge-base2 systemd[1]: Started xrdp.service - xrdp daemon.
Jun 02 20:21:54 knowledge-base2 xrdp[3265]: [INFO ] starting xrdp with pid 3265
Jun 02 20:21:54 knowledge-base2 xrdp[3265]: [INFO ] address [0.0.0.0] port [3389] mode 1
Jun 02 20:21:54 knowledge-base2 xrdp[3265]: [INFO ] listening to port 3389 on 0.0.0.0
Jun 02 20:21:54 knowledge-base2 xrdp[3265]: [INFO ] xrdp_listen_pp done
If the service is not running, start and enable it:
sudo systemctl enable xrdp
sudo systemctl start xrdp
xRDP listens on port 3389. You can connect using a remote desktop client by entering your servers IP address and logging in with your Linux credentials.

#Step 8 Managing and Disabling the GUI When Not Needed
Once the GUI is installed and working, you may want more control over when it runs. While the graphical interface is useful, it does consume additional system resources, something you might not want on production servers or headless setups. Fortunately, you have the following options:
-
Temporarily switch to CLI mode.
If you only want to disable the GUI for the current session (e.g., for performance or troubleshooting), you can switch to a command-line interface (CLI) using the following command to immediately exit the graphical environment and switch the system to CLI mode without rebooting the system:
sudo systemctl isolate multi-user.target
-
Permanently disable the GUI from starting on boot.
To prevent the graphical interface from launching automatically during system boot, instead going directly to a CLI environment. You can change the default system target with:
sudo systemctl set-default multi-user.target
-
Re-enable the GUI later.
If you want to switch back to booting into the GUI again, simply change the default target back to graphical. This is helpful for systems that occasionally require GUI access but primarily operate as headless servers:
sudo systemctl set-default graphical.target
You’re all set up! You now have the flexibility to run your Ubuntu Server with or without a GUI, depending on your needs.