Public IP Subnet
#What Is a Public IP Subnet?
A Public IP subnet is an isolated segment of a network that uses a range of public IP addresses to improve routing by efficiently dividing and handling public and private traffic.
Cherry Servers public IP subnets are available in all regions for dedicated bare metal servers only.
Please keep in mind that once an IP address from an IP subnet has been assigned to a server, it may not be possible to move any further IP addresses from that subnet to a different server at a later time.
By default, public IP subnets use IPv4 addresses. It is also possible to order a public IP subnet with IPv6 addresses. For more information, please visit our dedicated IPv6 page.
#How Does a Public IP Subnet Work?
IP subnets come in ranges with a minimum amount of IP addresses included. Available ranged with Cherry Servers currently are:
- /29 (8 IP addresses / 5 usable IPs),
- /28 (16 IP addresses / 13 usable IPs),
- /27 (32 IP addresses / 29 usable IPs),
- /26 (64 IP addresses / 61 usable IPs).
The public IP subnet will reserve three IP addresses from this range for network configuration:
- 1 Network IP,
- 1 Gateway IP,
- 1 Broadcast IP.
These three IP addresses will be responsible for routing by your public IP subnet, and will not be available for general server use.
For example: An IP subnet range of 203.0.113.0/29 has been ordered. This range has eight IP addresses, three of these addresses are required for routing, and are dedicated and configured as follows:
- 203.0.113.0 – Network IP address (unusable for services),
- 203.0.113.1 – Gateway IP address (unusable for services),
- 203.0.113.7 – Broadcast IP address (unusable for services).
This means that only the remaining addresses, listed below, are available for use.
- 203.0.113.2,
- 203.0.113.3,
- 203.0.113.4,
- 203.0.113.5,
- 203.0.113.6. The image below demonstrates the exact topology of the IP subnet.
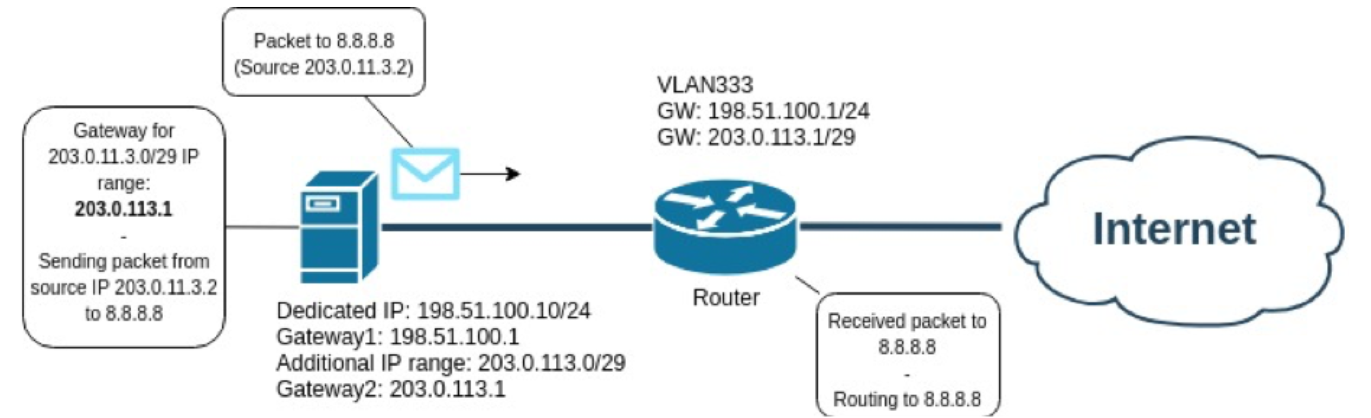
Effectively, An additional IP range is configured in addition to the Management IP address (198.51.100.10). When your server application uses the source address from your IP Subnet, it queries the Gateway IP address of your IP Subnet (203.0.113.1) , instead of the default Gateway IP address of your server (198.51.100.1).
#How to Order
Clients can order a public IP subnet at any time, however only subnet ranges /29 and /28 can be automatically deployed. For ranges /27 and /26, please contact our dedicated support engineer team.
You can order a public IP subnet from the client portal in the following ways.
On Server Deployment
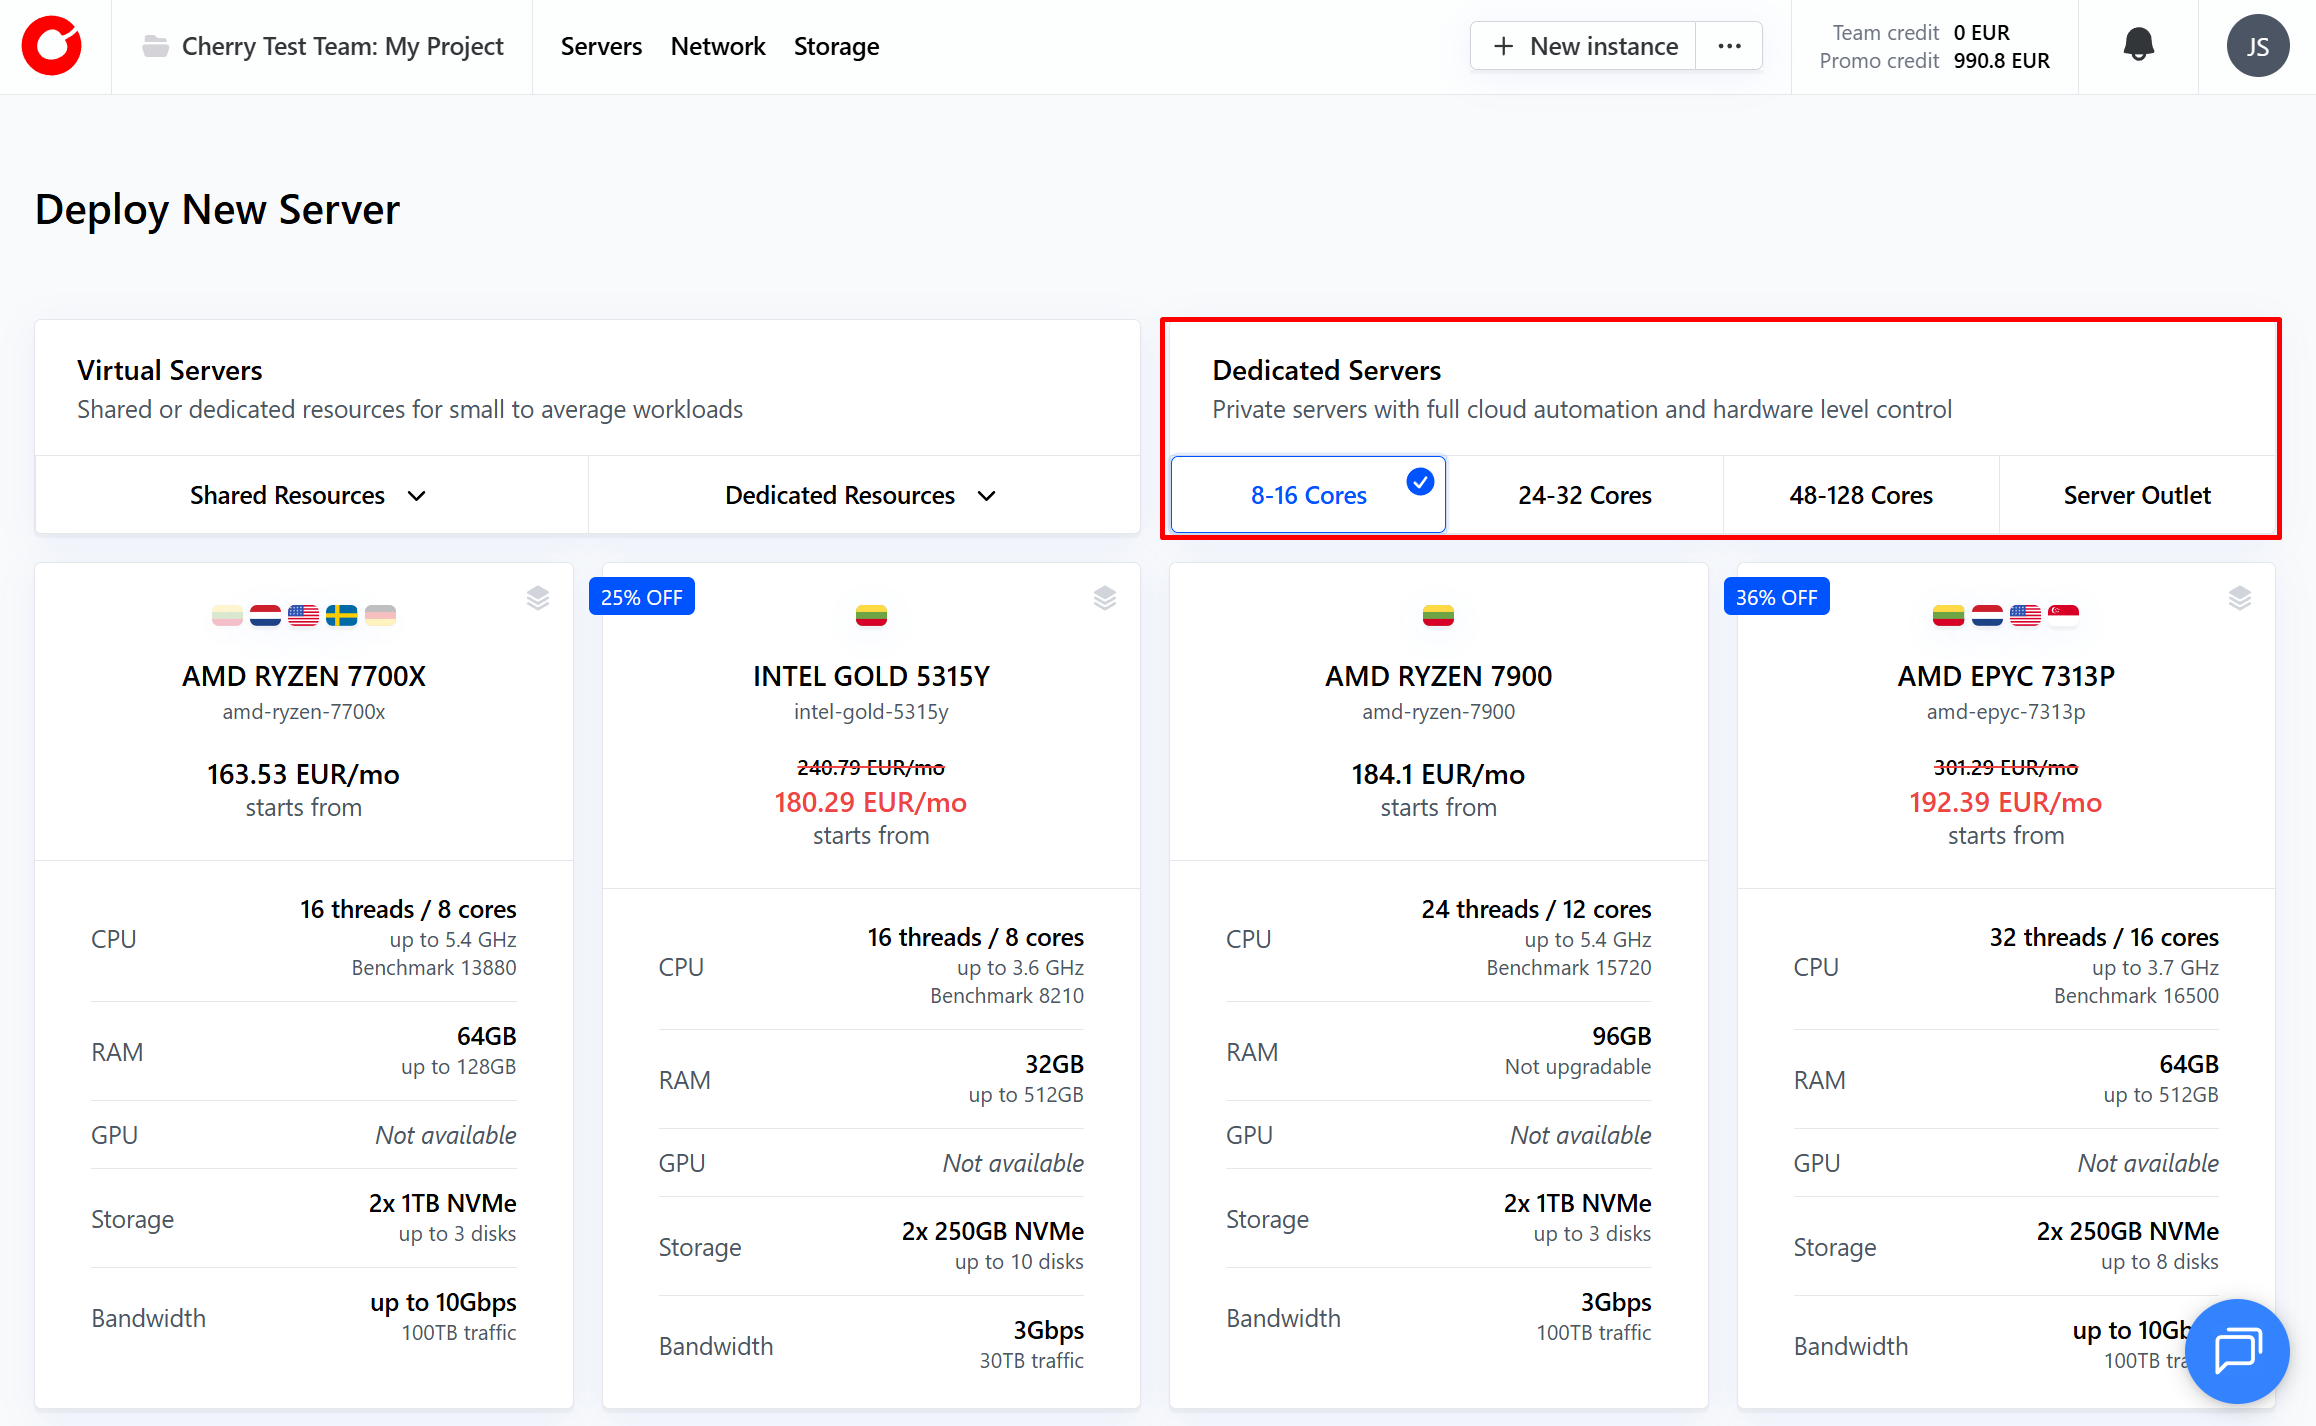
NOTE: Public IP subnets can only be deployed with dedicated bare metal servers.
-
Select the server plan that best suits your needs.

-
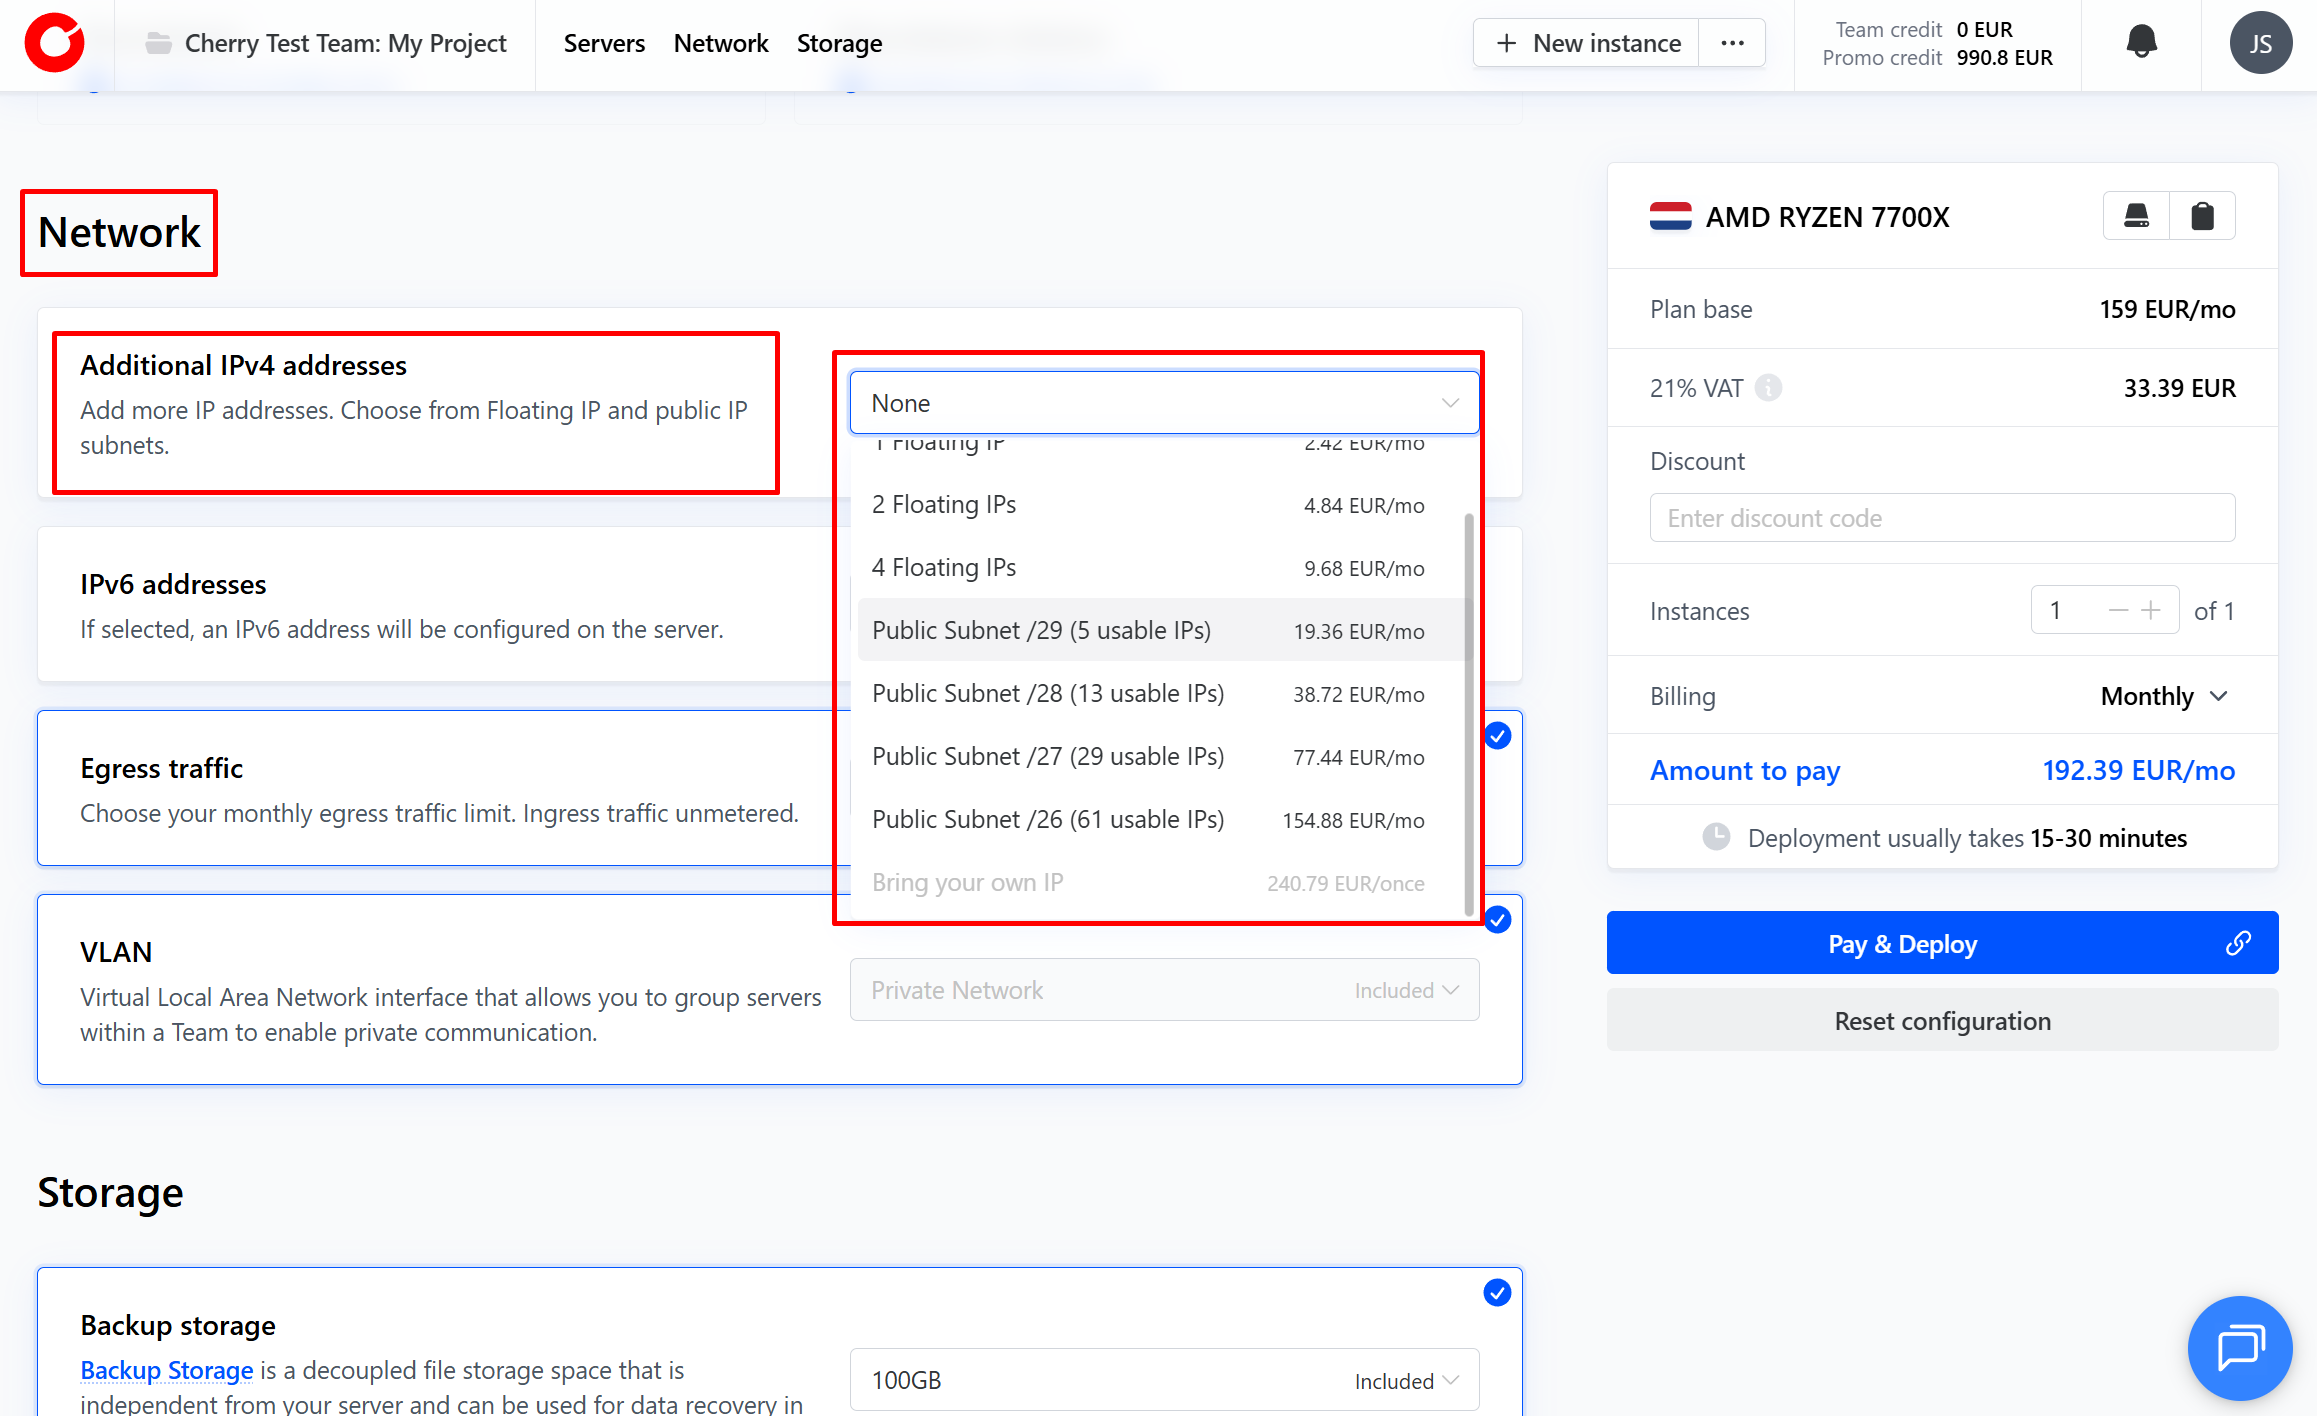
You will be automatically directed to the configuration step. Scroll down until you reach the “Network” section. In the “Additional IPv4 Addresses” box, activate the dropdown menu, and select your IPv4 subnet.

-
When you deploy your server, your public IP subnet will instantly be ready.
From the client portal
On the home page:
-
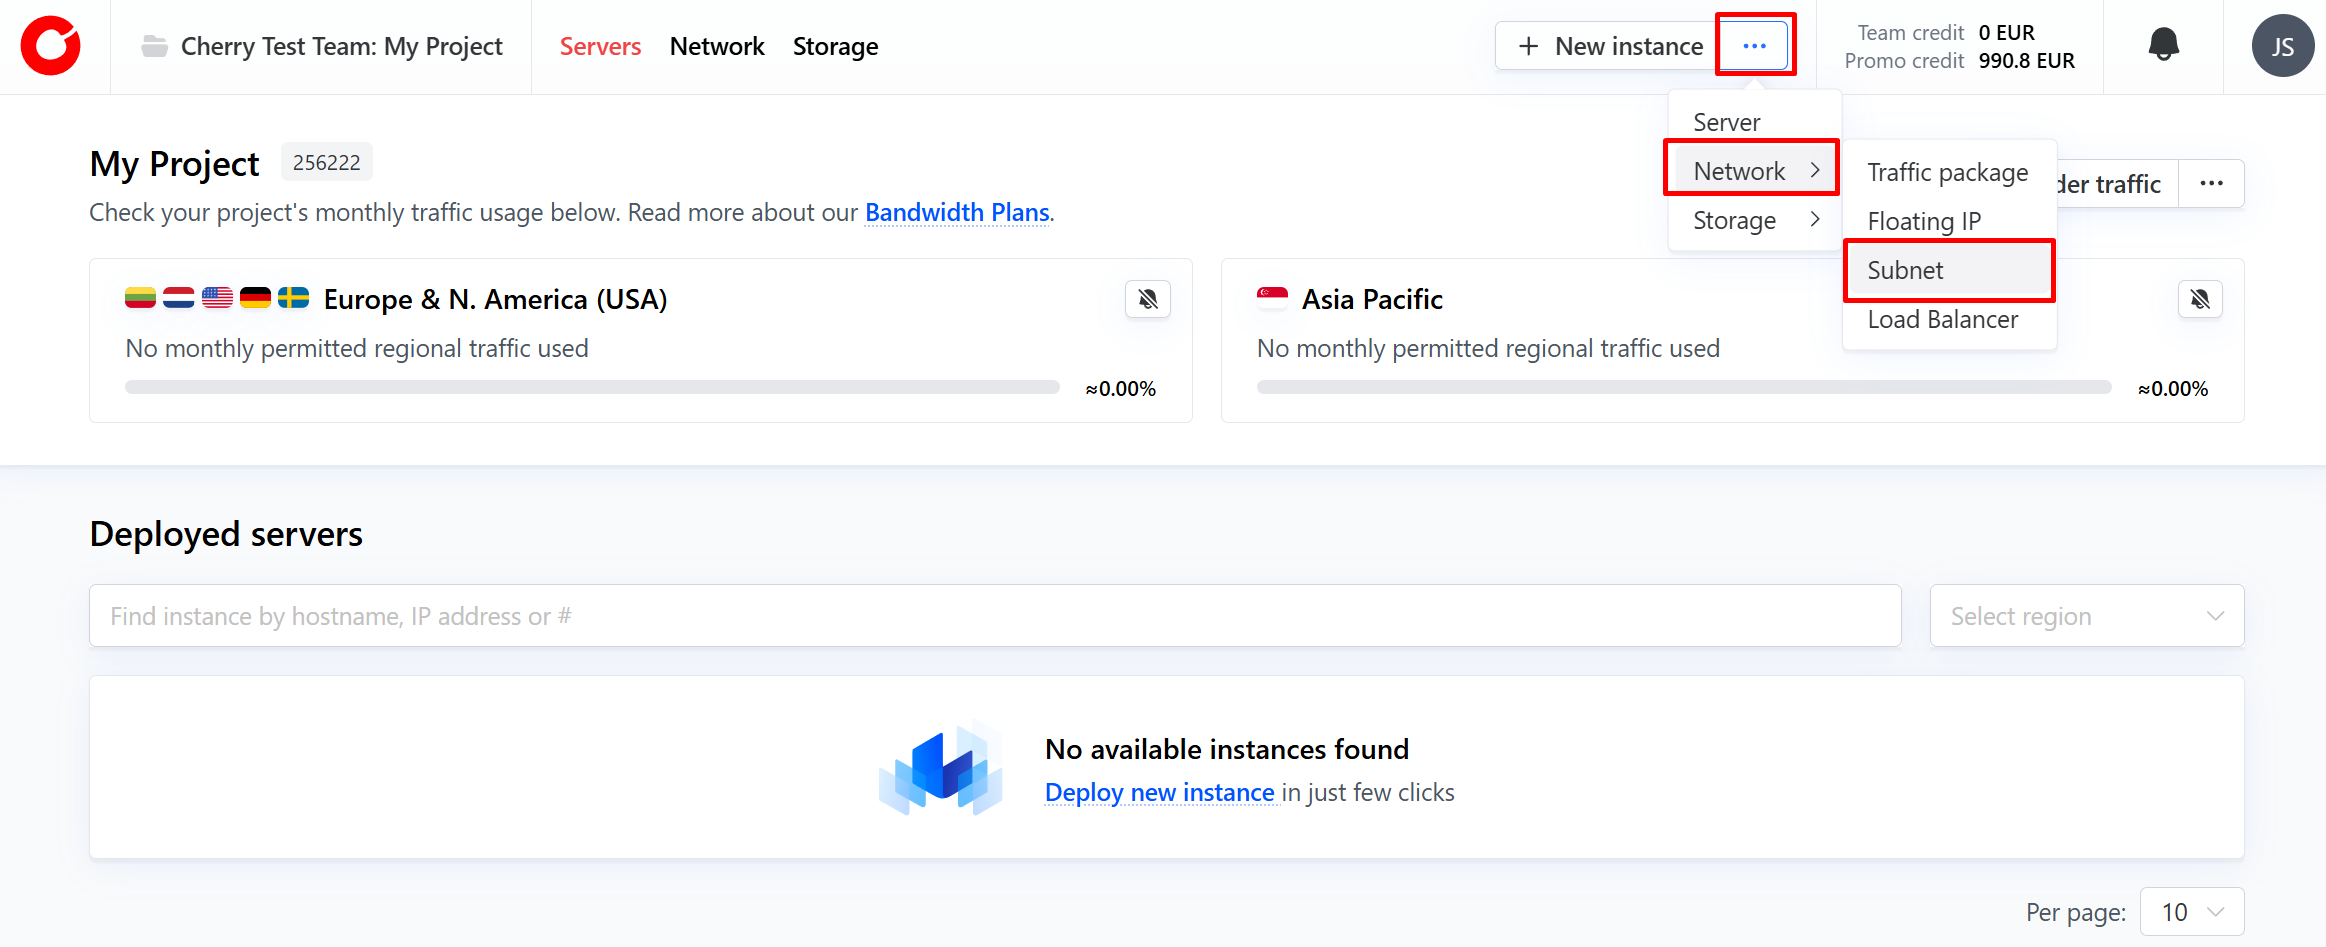
On the client portal home page, click the three dots next to the “New Instance” button in the top-right hand corner. Click “Network” from the dropdown menu and select “Subnet”.

-
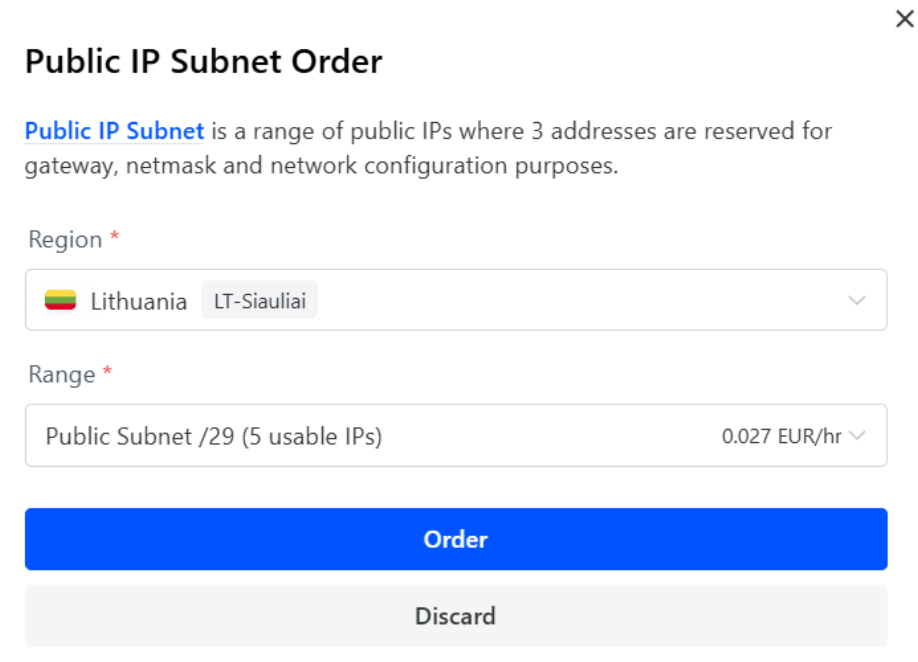
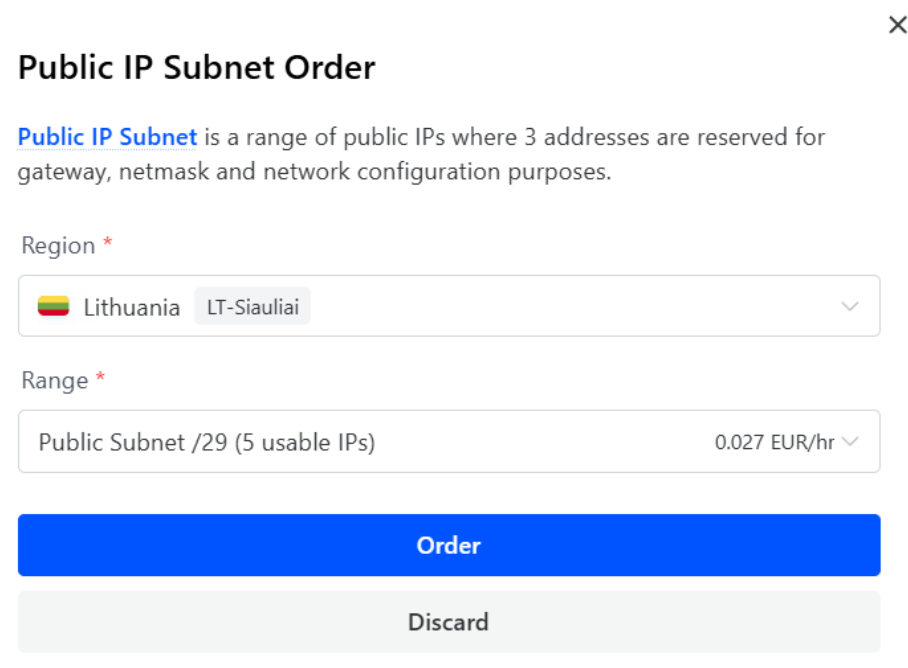
Select the region of the server you would like the subnet to operate in, and the subnet range you need, and click “Order”.

From the Network section:
-
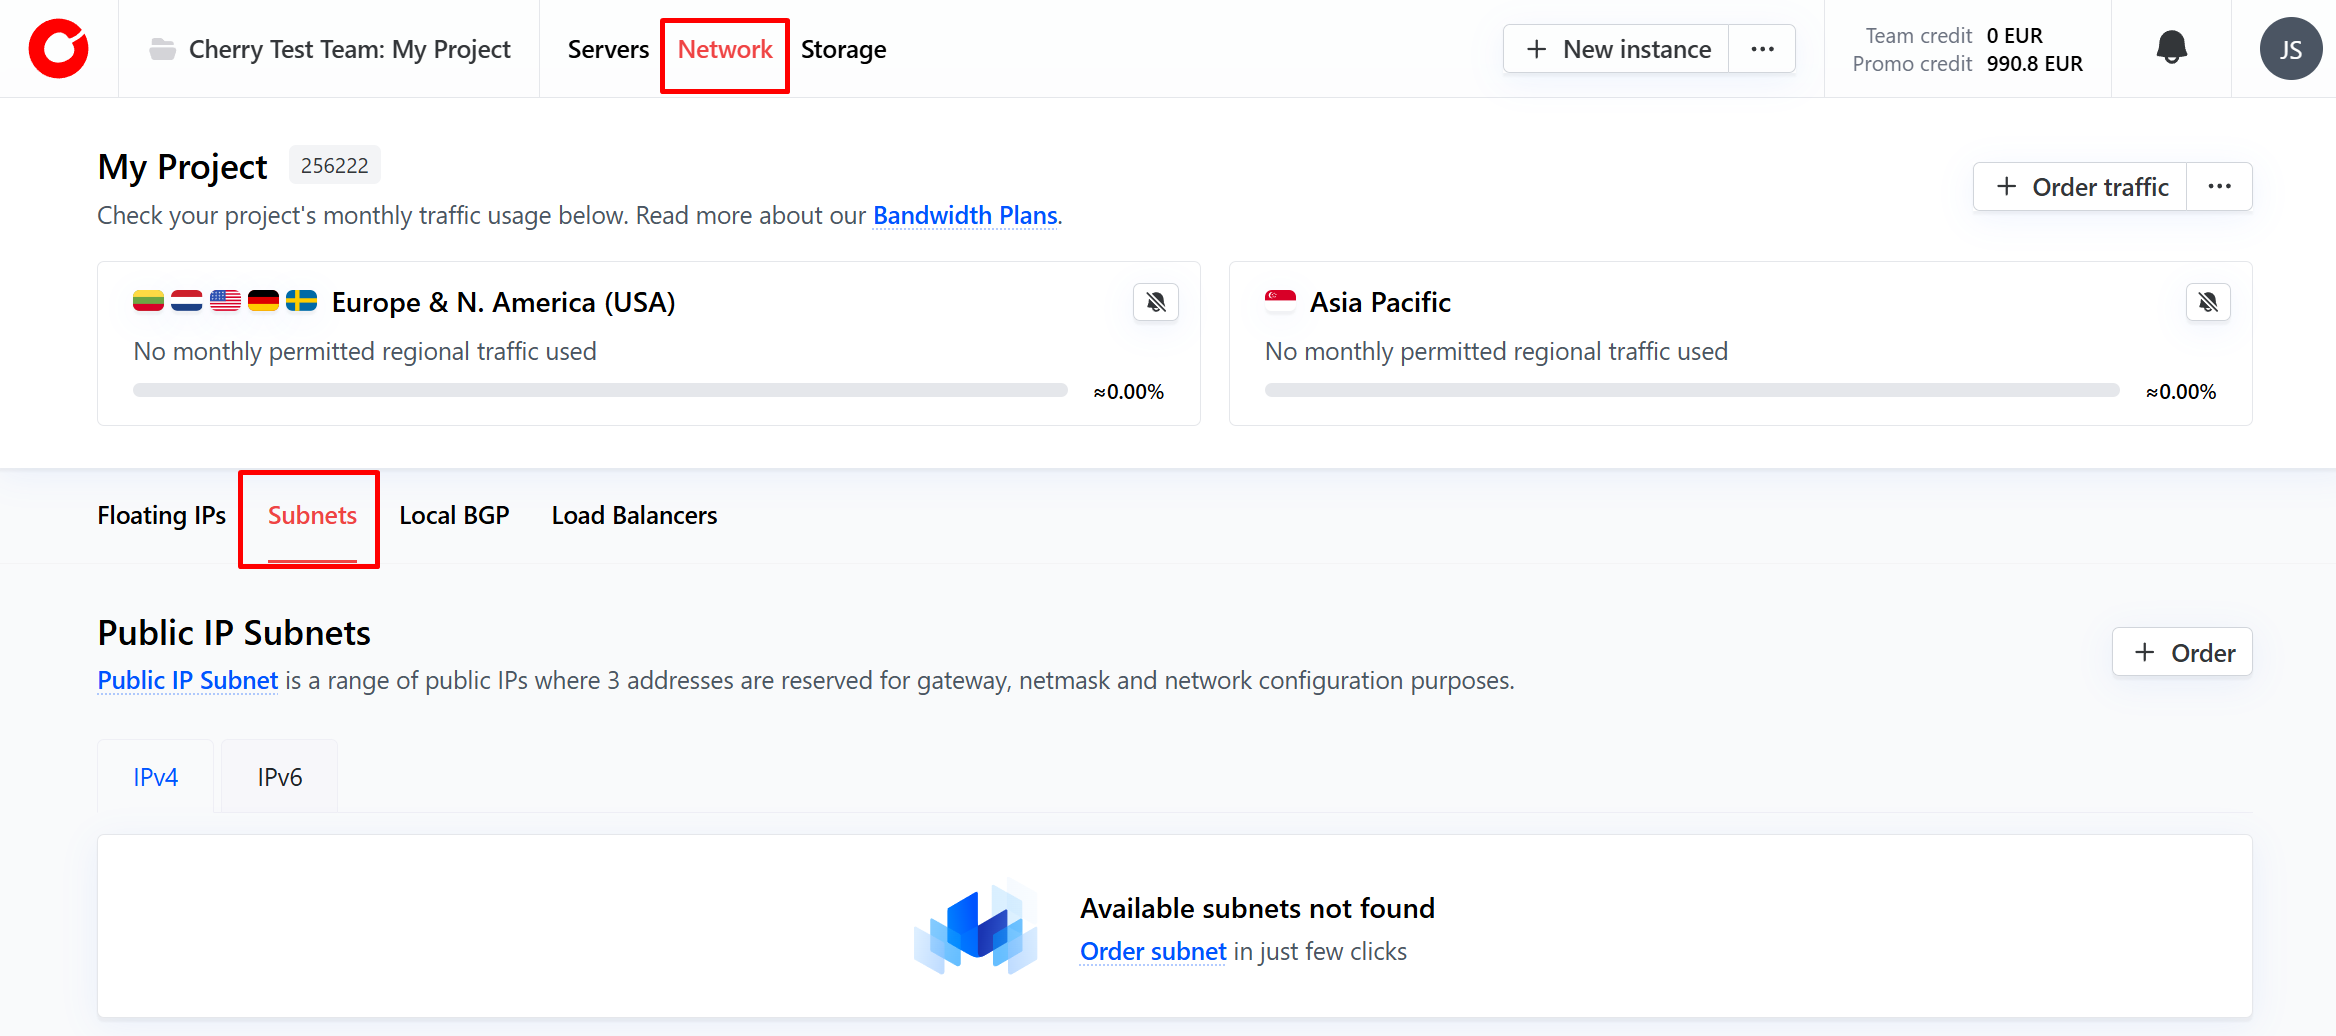
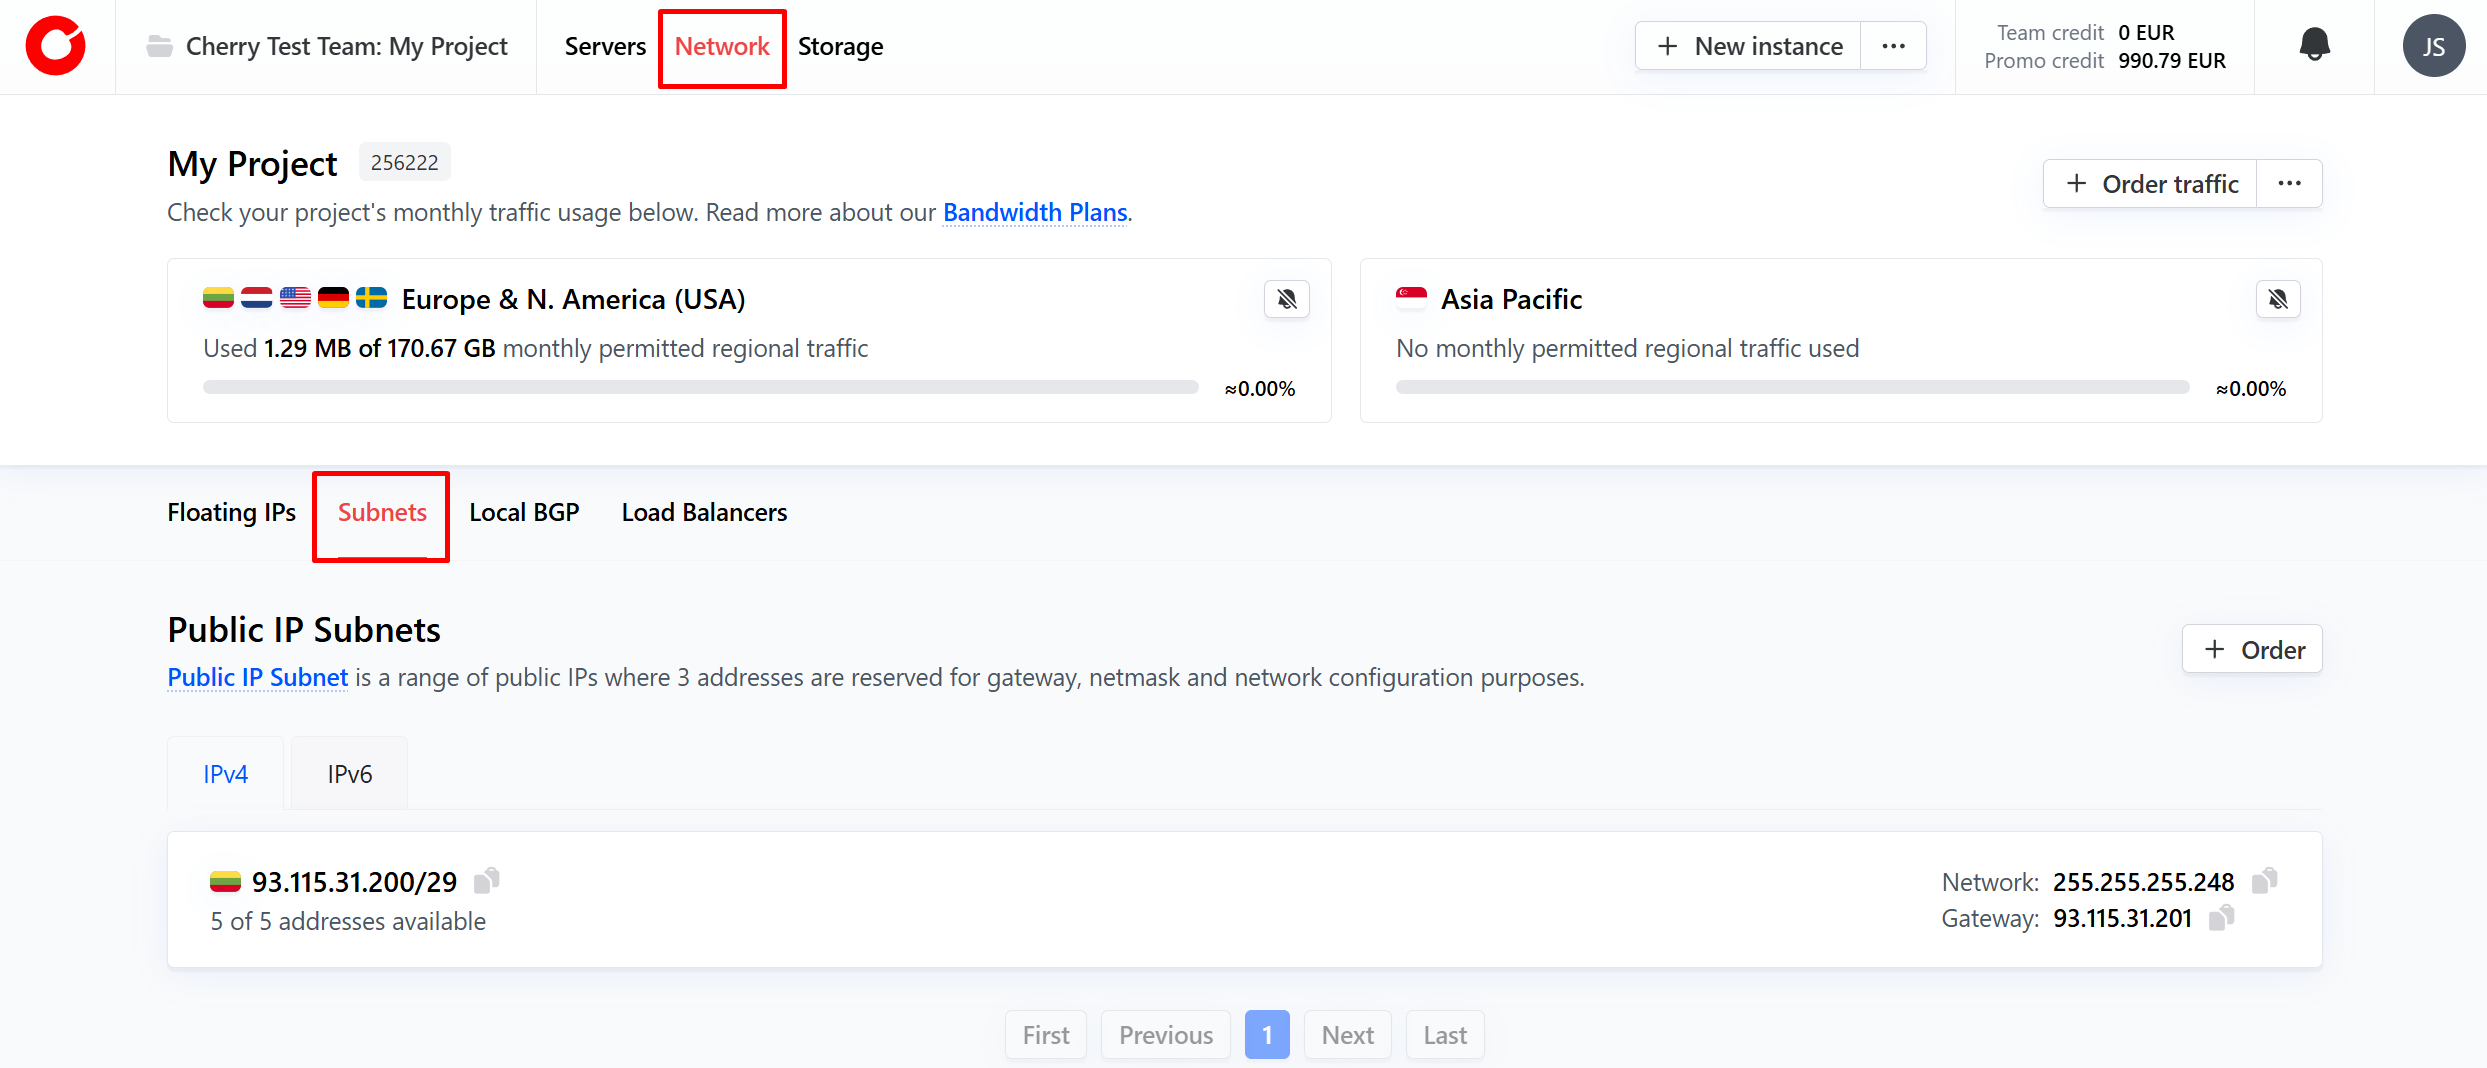
On the client portal home page, click “Network” at the top of the page, and navigate to the “Subnets” tab.

-
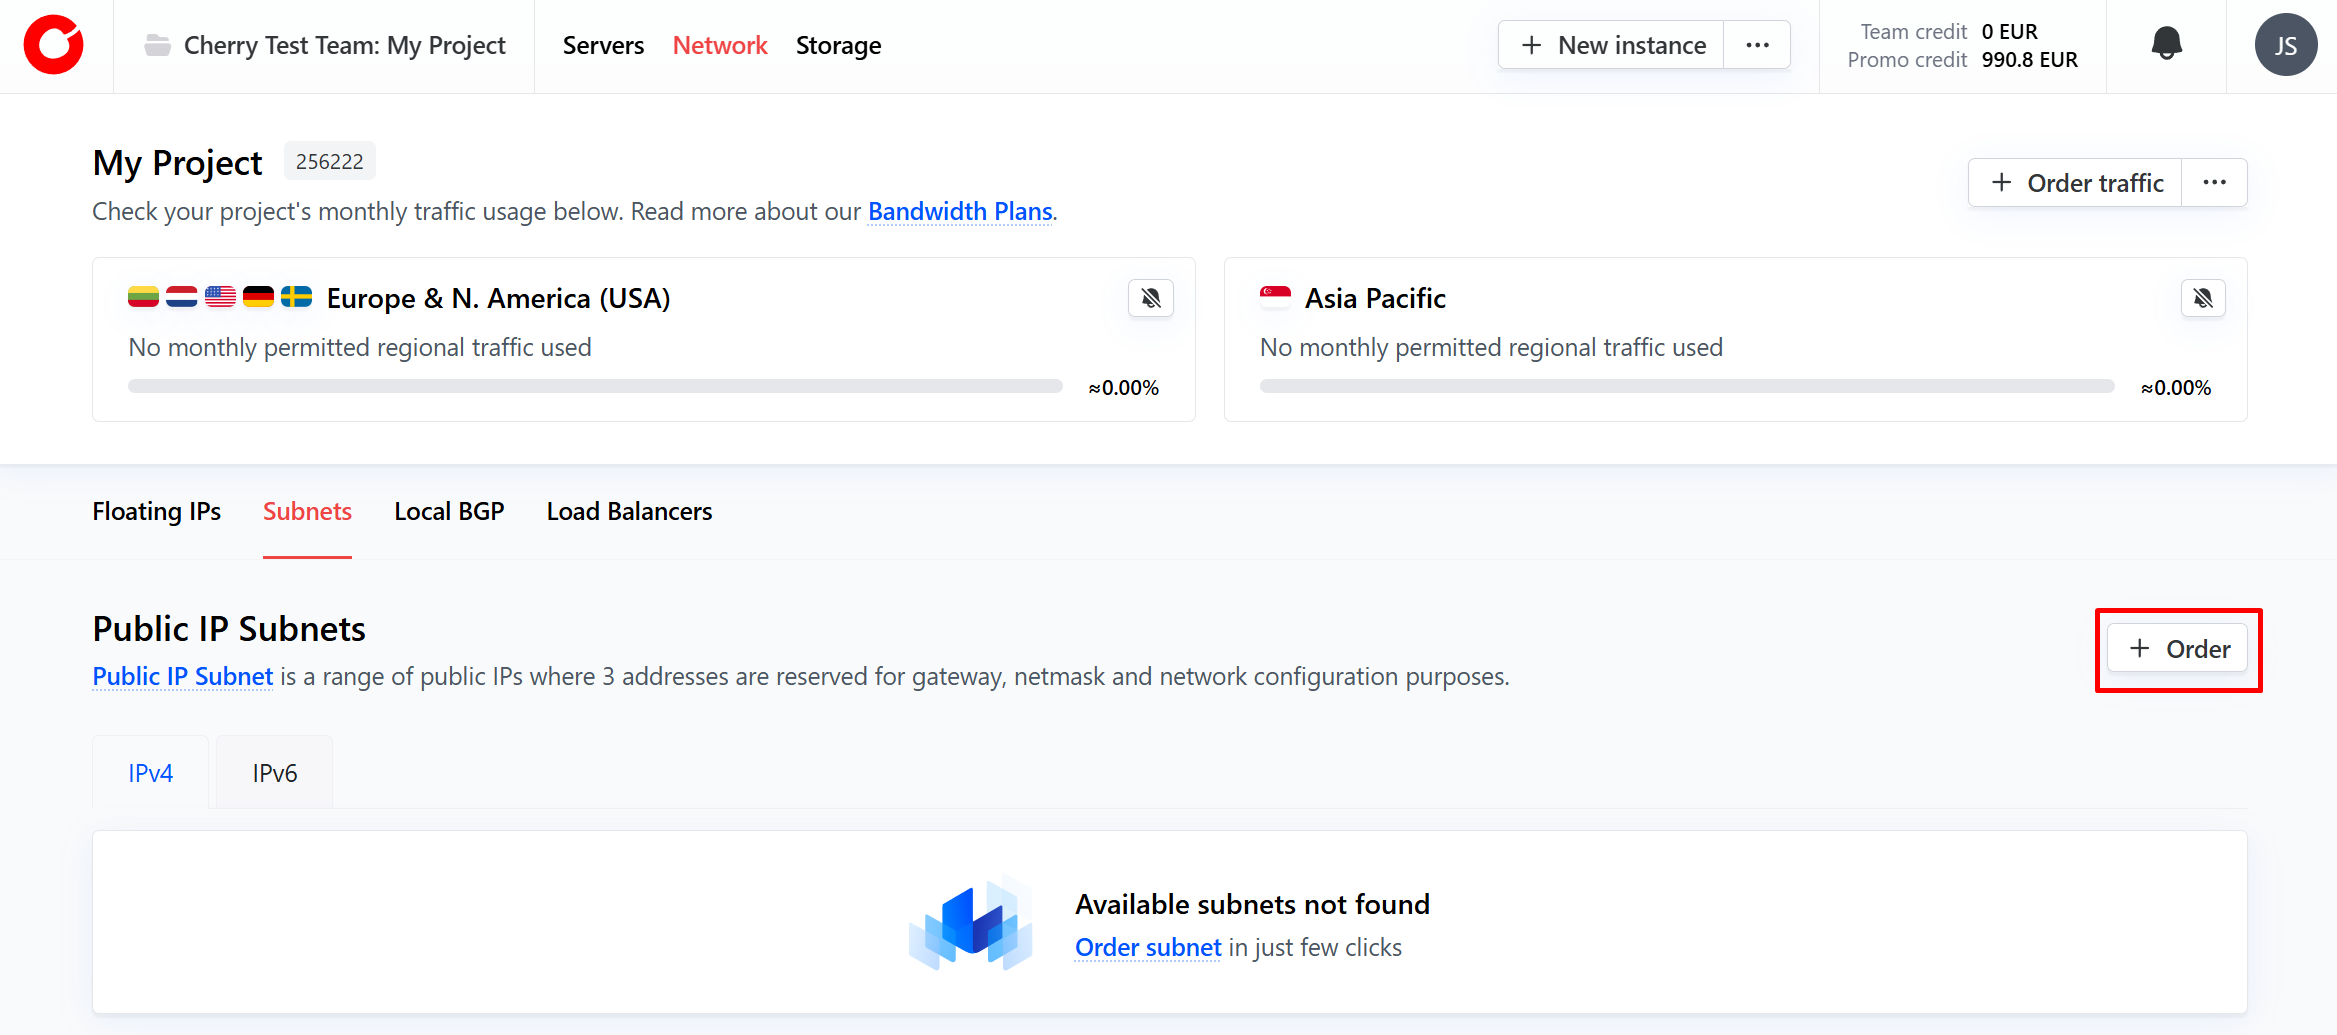
Click the “order” button in the top right corner of the tab.
-
Select the region of the server you would like the subnet to operate in, and the subnet range you need, and click “Order”.

Your public IP subnet is now available for use, and can be configured and attached according to your needs.
#How to Manage Your Public IP Subnet
You can view all of your active public IP subnets on the client portal at any time by clicking “Network” at the top of the page and navigating to the “Subnets” tab.
Here you can manage and configure your IP subnets to meet your needs. Simply click on the subnet you’d like to manage to get started.
IP addresses
To manage your overall subnet, you can perform the following actions by clicking the “Manage” button in the top right corner on the tab.
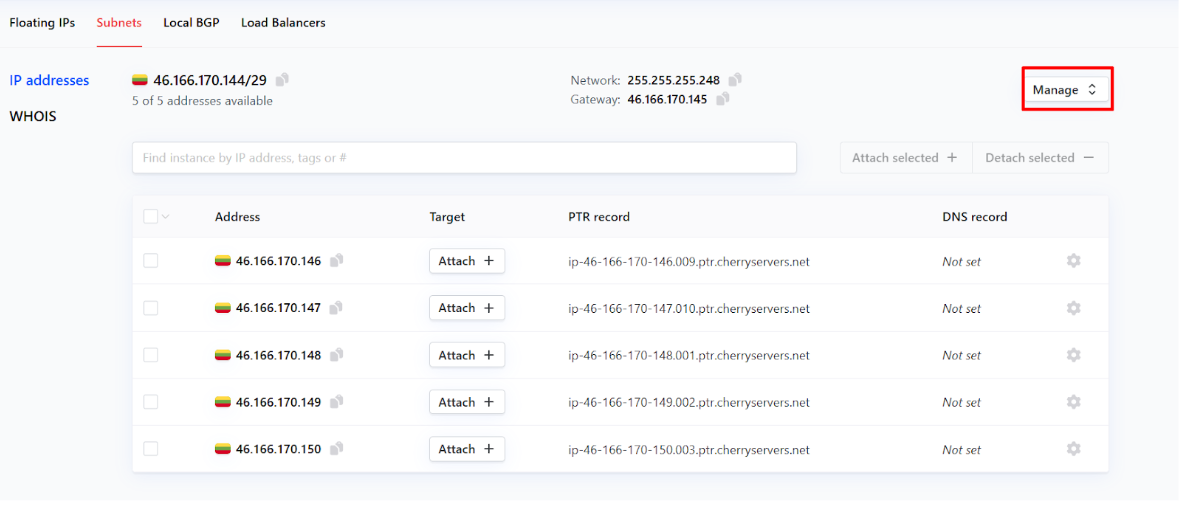
- Edit details;
- Add tags - a metadata label to help organize and manage your IP subnet;
- Terminate - end your public IP subnet service.
You can attach and alter your available IP addresses, either by clicking “Attach” in the target column on unattached IP addresses, or by clicking the cog next to each address.
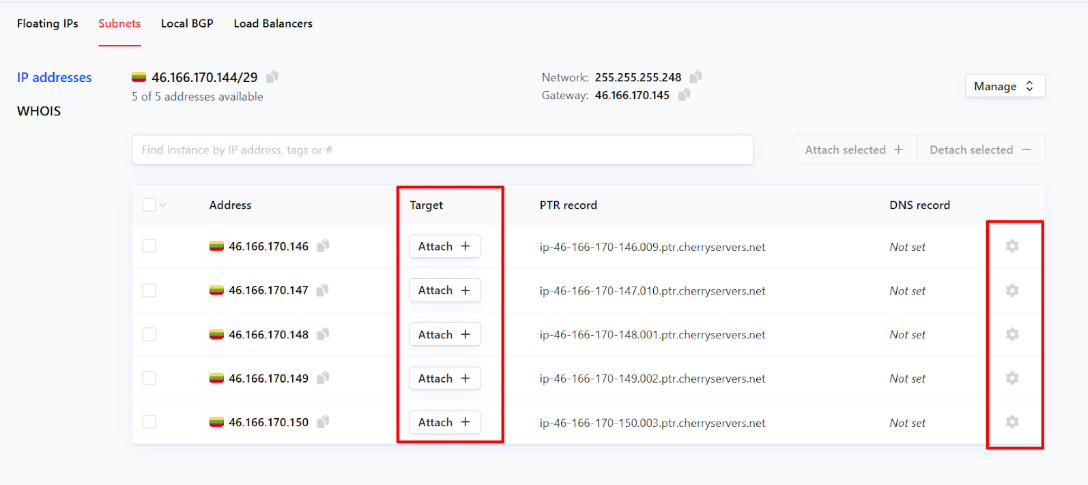
For each IP address, you may perform the following operations:
- Attach - connect the IP subnet IP address to a server;
- Edit;
- PTR record - used for reverse DNS lookups. This is assigned by default;
- DNS record;
- Add tag - a metadata label to help organize and manage your IP subnet IP addresses.
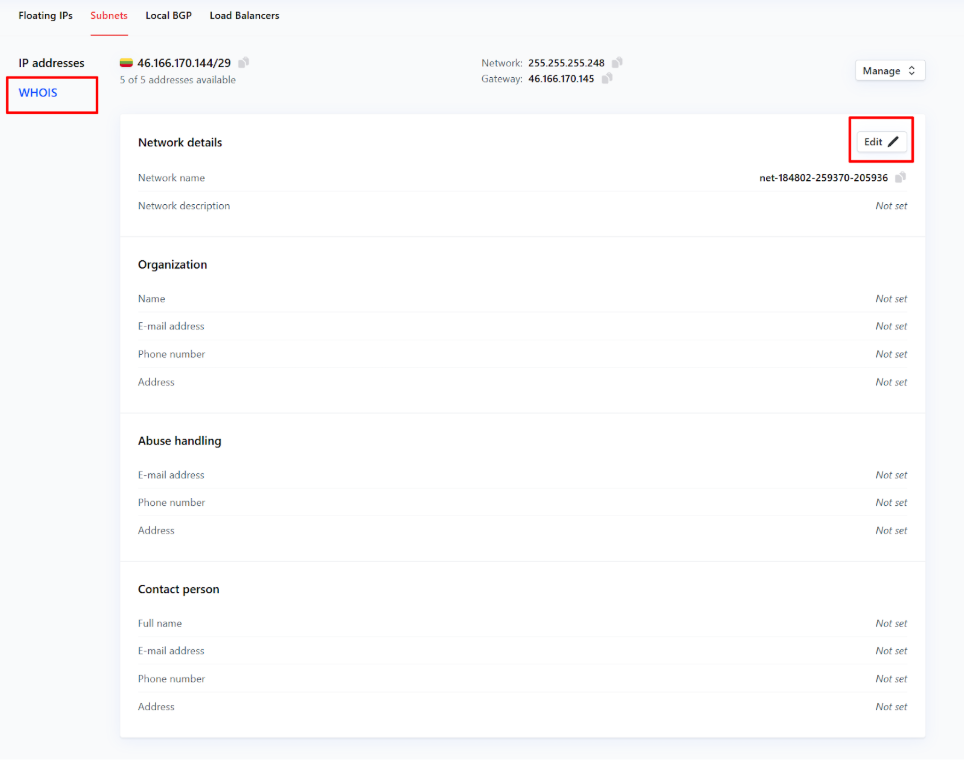
WHOIS
In the WHOIS section of your public IP subnet page, you can add:
- A description of the network,
- Contact information about your organization,
- Who to contact about detected abuse instances,
- Personal details for the individual responsible for the use of the subnet.
Simple click “Edit” to get started.