How to Configure BOND and VLAN on Windows Server
Network bonding (NIC Teaming) is a tool that enhances redundancy and bandwidth by combining multiple network adapters into a logical interface. Similarly, Private VLAN groups servers within a team, allowing private interactions as if they were on the same physical network, improving security and efficiency.
By default, Cherry Servers use LACP bonding for redundancy, except for legacy models found under the Server Outlet tab. Proper LACP bonding configuration is crucial to avoid network issues such as latency and slow data transfer, and fortunately Windows Server provides a built-in GUI for NIC Teaming, making it easier to configure network bonding.
Please note that private VLANs work only with servers that belong to the same project and are located in the same region (e.g., Lithuanian servers can communicate with other Lithuanian servers but not with those in Singapore, Sweden, etc.).
#Instructions to Configure Network bonding (NIC Teaming)
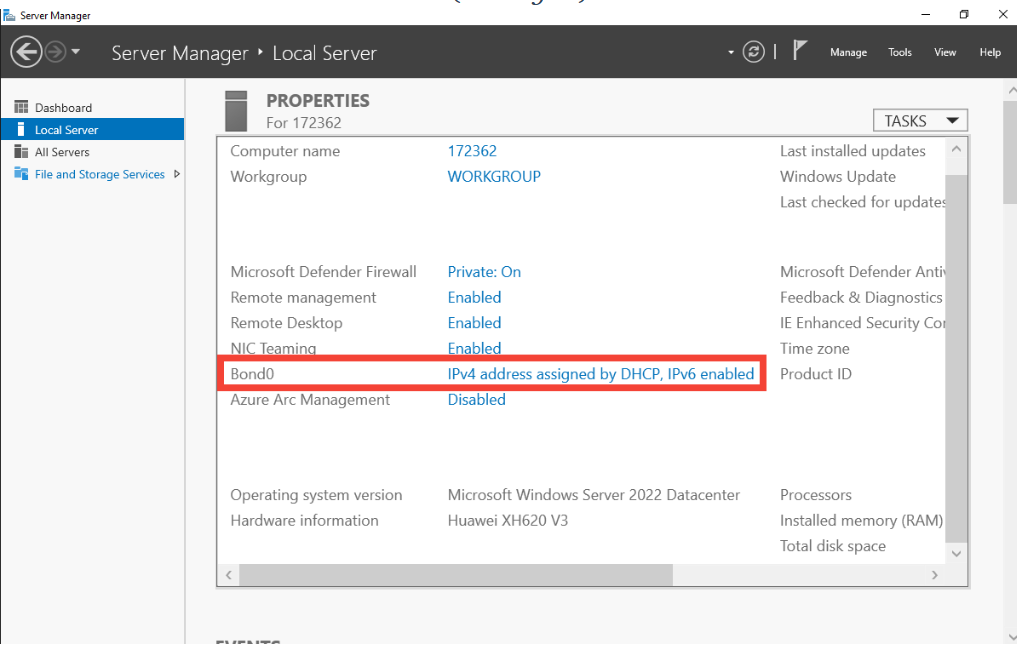
#Step 1: Enable NIC Teaming:
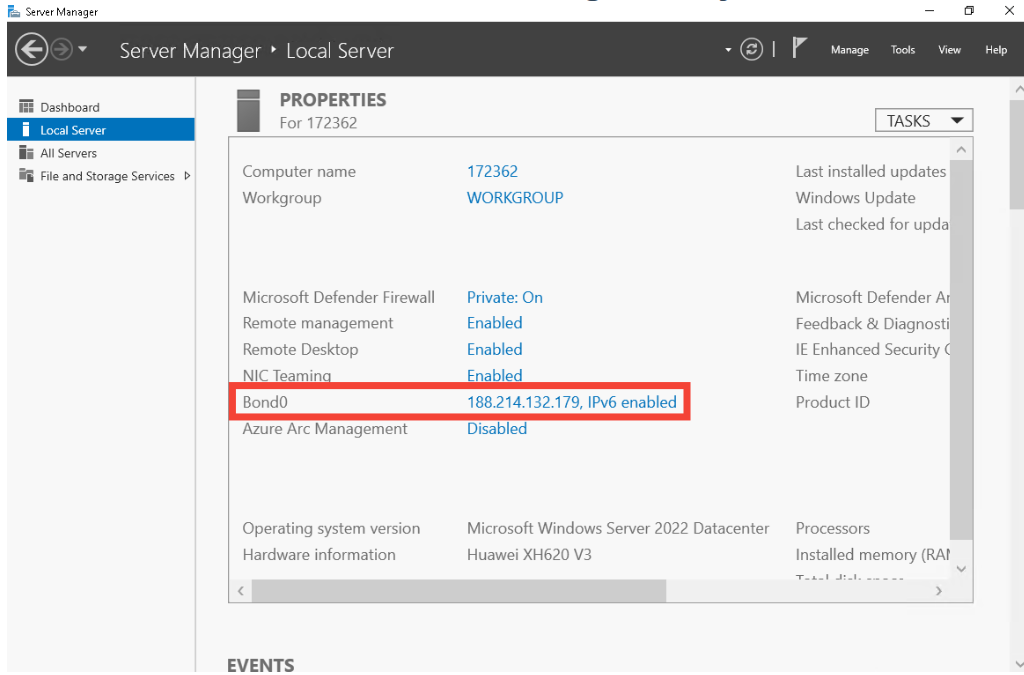
- Open "Server Manager", navigate to "Local Server," and check the status of "NIC Teaming."

- If Enabled, NIC Teaming is already configured, and no further action is required.
- If Disabled, continue with the following steps to enable it.

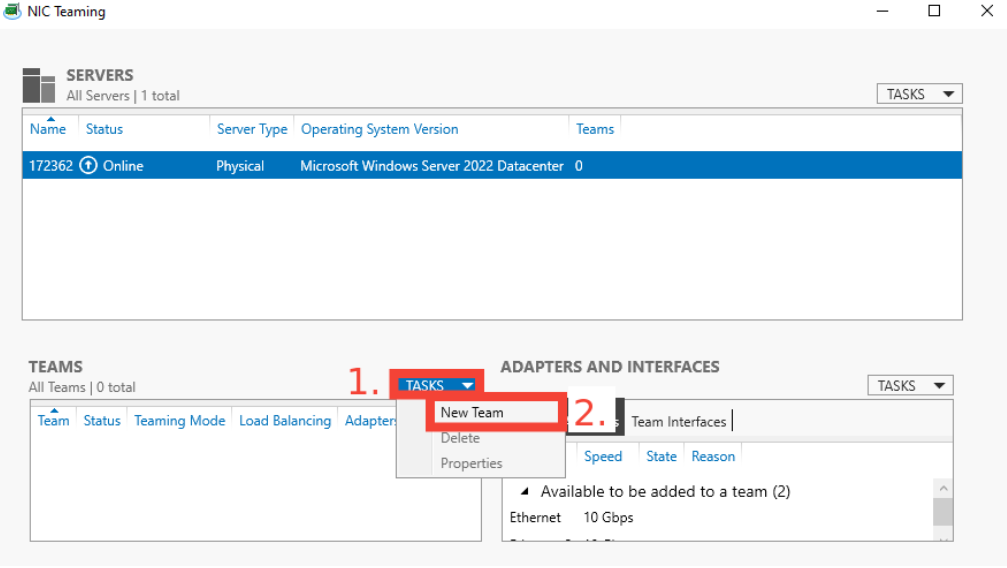
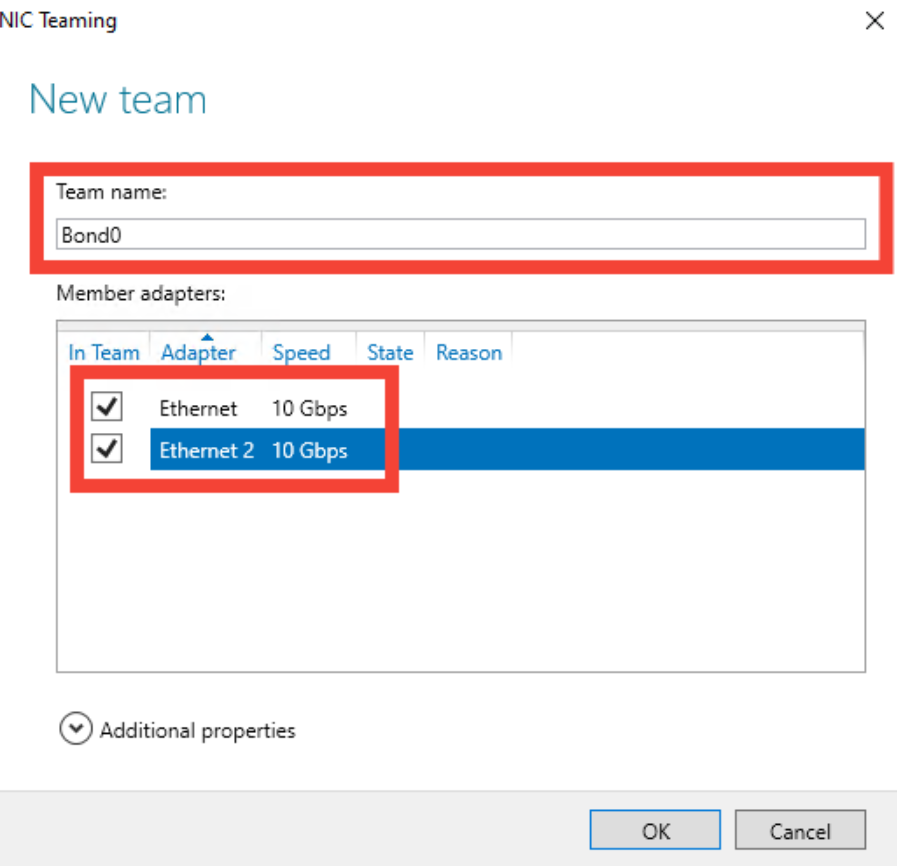
#Step 2: Create a New BOND (NIC Team).
- Click "Tasks" under the NIC Teaming section and select "New Team."

- Provide a name (e.g., Bond0) and select the network adapters to include. If your system displays four adapters, select only the first two for bonding instead of all available adapters.

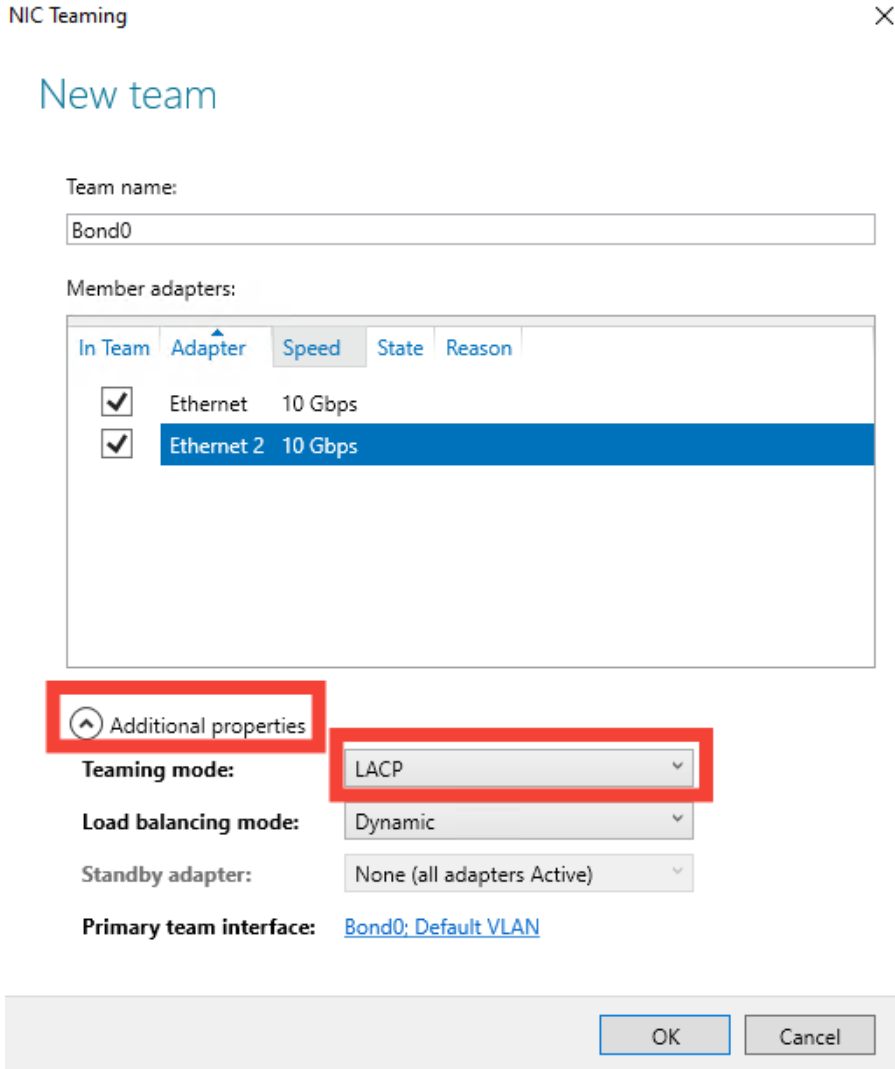
#Step 3: Configure Additional Properties
- In "Additional Properties," set the teaming mode to LACP (Link Aggregation Control Protocol).

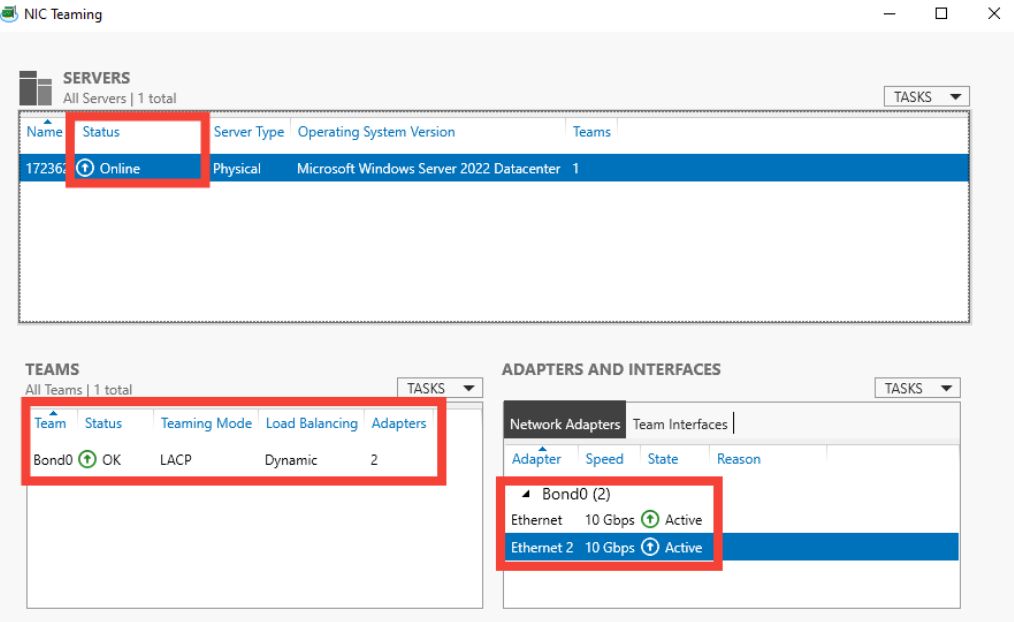
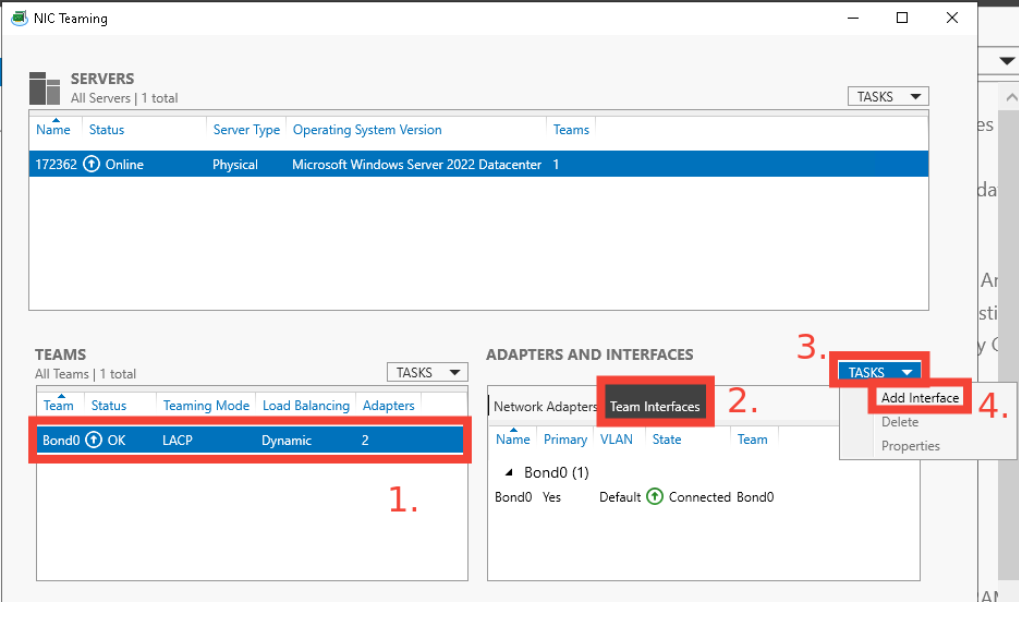
- Once configured correctly, your NIC Teaming interface should appear as shown in the screenshot, with an active status and LACP mode enabled.

#Step 4: Configure IP Address Settings
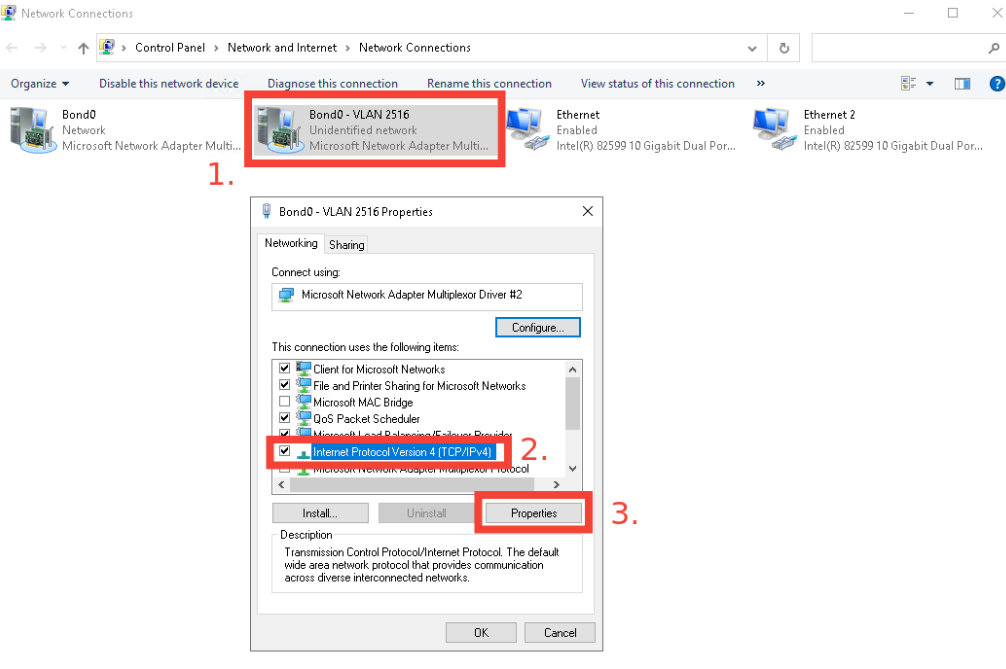
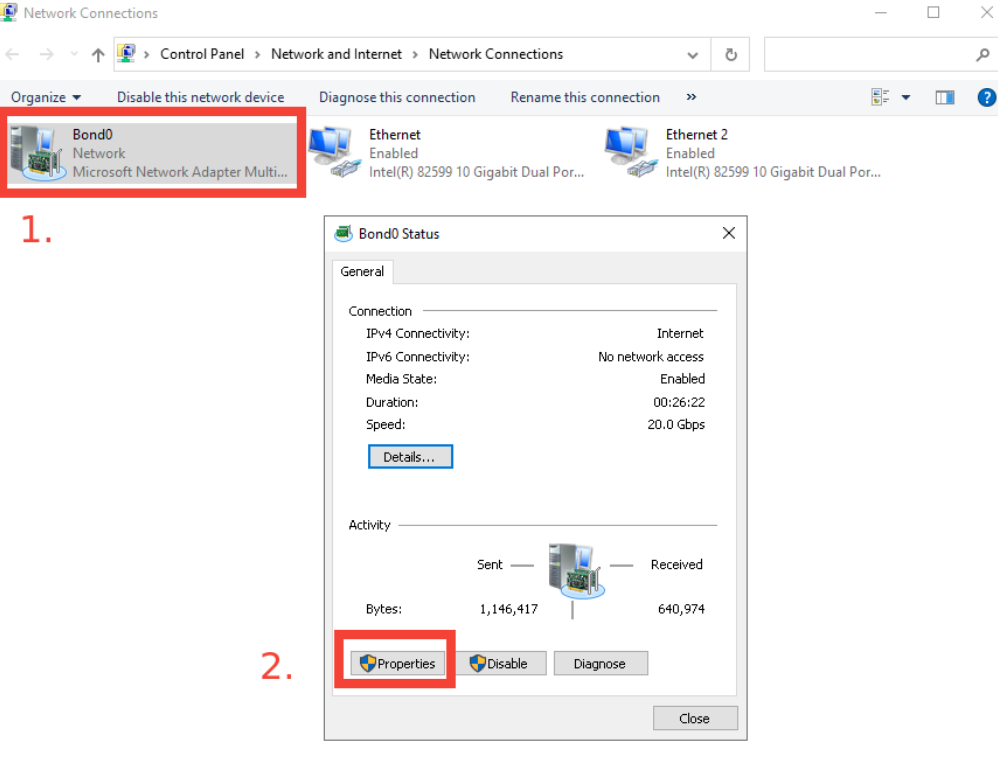
- After creating the BOND, click the IP address in "Server Manager" to open the "Network Connections" window.

- Locate the BOND interface, double-click it, and select Properties.

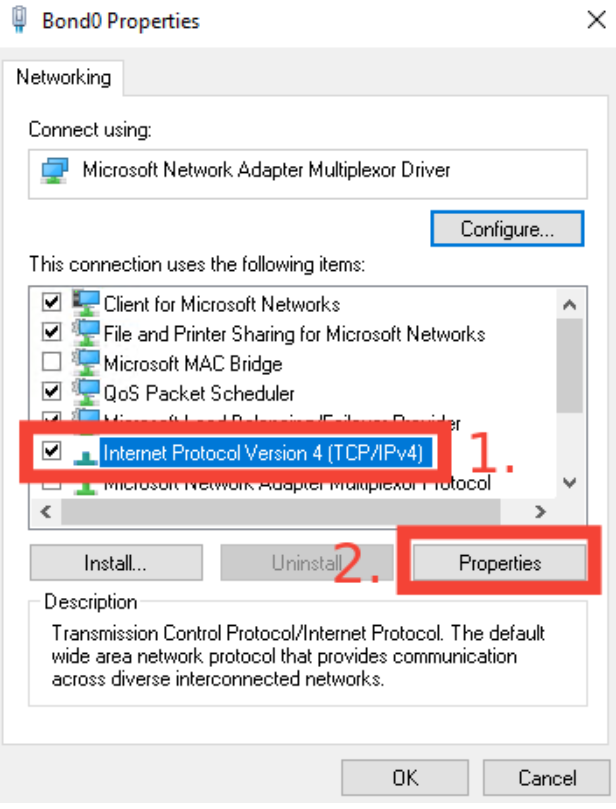
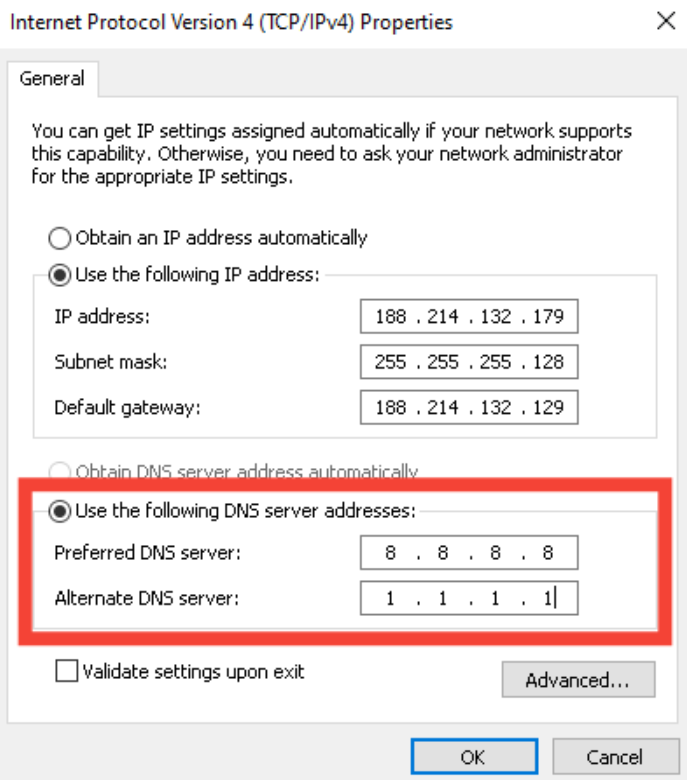
- Choose "Internet Protocol Version 4 (TCP/IPv4)" and click Properties.

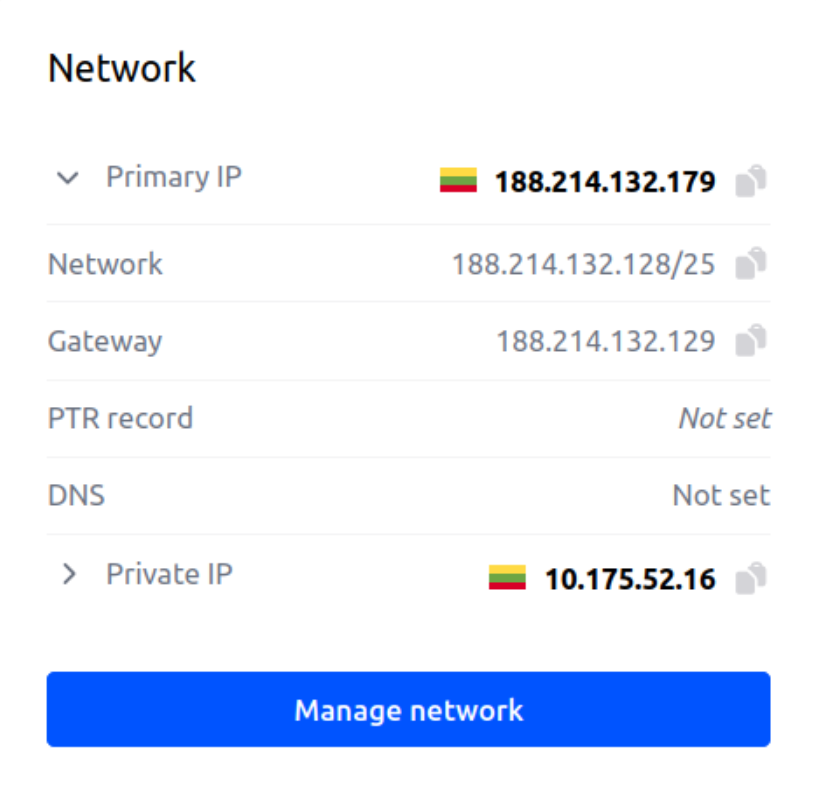
- Note down your static IP, subnet mask, and gateway IP found in the network tab of the Cherry Servers client portal.

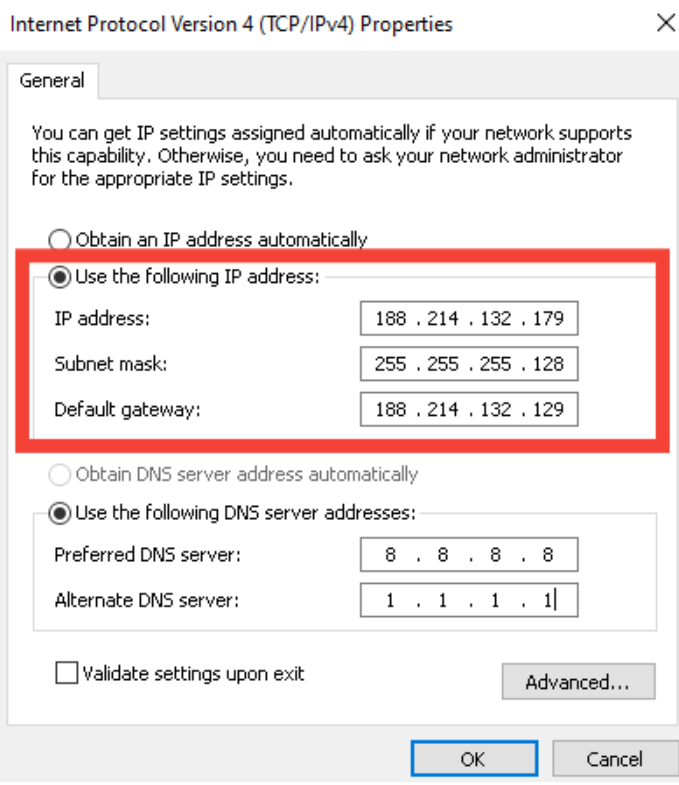
- Enter the static IP, subnet mask, and gateway in your client portal.

- Set preferred and alternate DNS servers (e.g., Google DNS: 8.8.8.8, Cloudflare DNS: 1.1.1.1).

#Step 5: Verify and Apply Configuration
- Restart the network interfaces or reboot the server to apply the changes.
- Confirm the team status via the Server Manager.

#Instructions to Configure VLAN
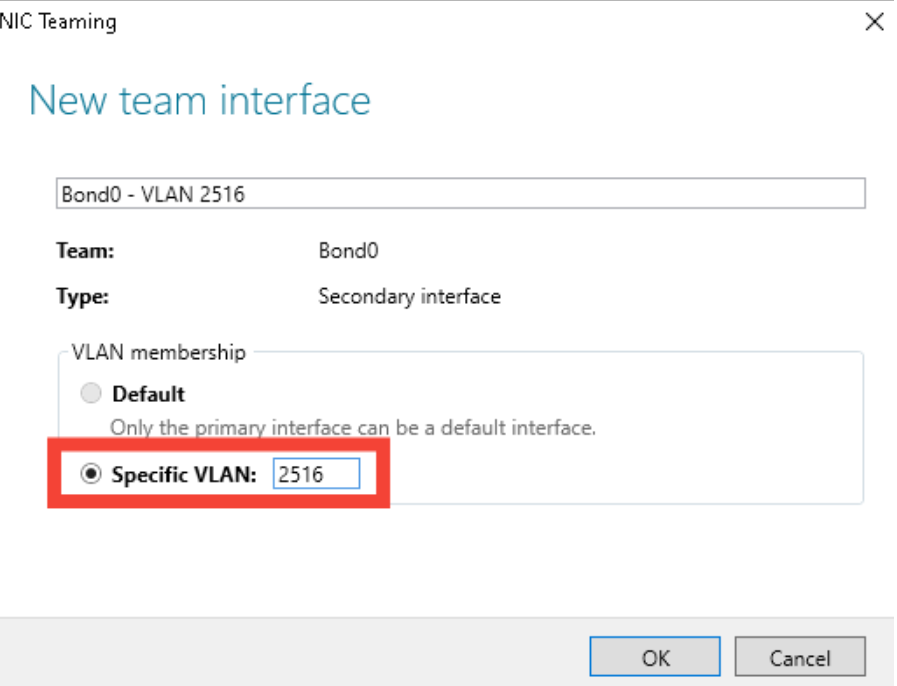
#Step 1: Add VLAN interface
- Open "NIC Teaming," select the created BOND interface, and click "Tasks" -> "Add Interface."

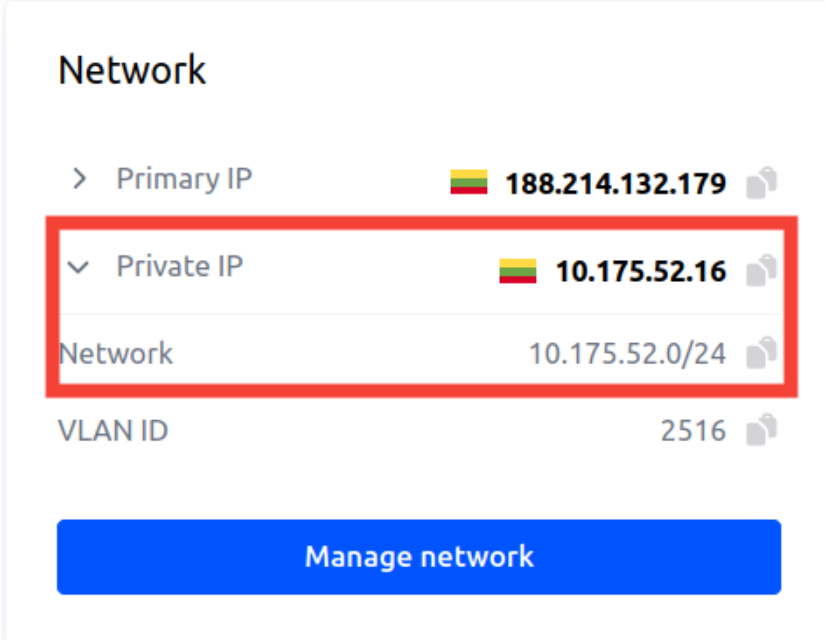
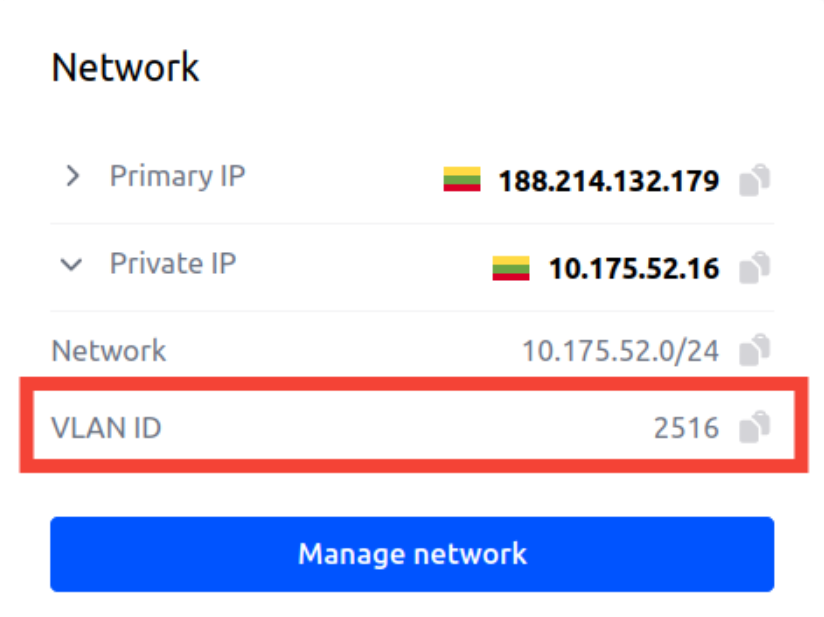
- Note down your VLAN ID found in the client portal under the network tab.

- Enter the VLAN ID from your client portal under "Specific VLAN."
- Press the “OK” button to confirm the changes.
#Step 2: Configure VLAN Settings
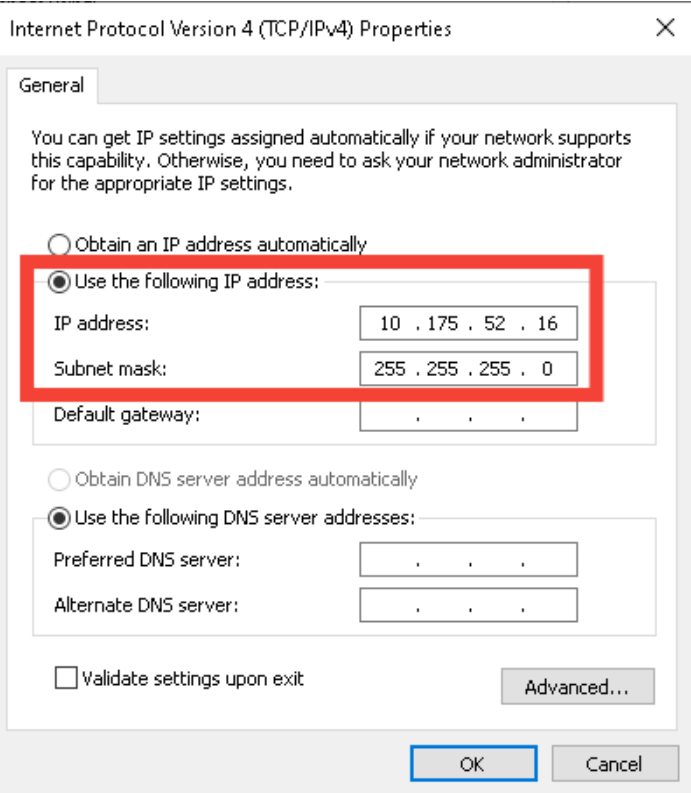
- Go to "Network Connections," locate the VLAN interface, and tick "Use the following IP address" to manually configure the IP settings.

- Note down your server's private IP address and subnet mask found in the client portal under the network tab.

- Enter the IP address and subnet mask in the custom fields.

- After applying the settings, verify connectivity by pinging other servers within the same project and location.