How to Assign Floating IP Addresses in Ubuntu and Debian 12
Having a floating IP address is helpful in handling various services or applications on the same server. While a static IP address provides a fixed address for each server, floating IP addresses have the advantage of being movable from one server to another as needed.
For Ubuntu, this guide will cover floating IP assignment for all server types running Ubuntu 20.04, 22.04, and 24.04 operating systems. For the Debian 12 operating system, these steps are intended for VPS and VDS servers only.
If you have essential data on your server when you find yourself in need of assigning a floating IP address, it is advised that you configure it manually, as covered in step 3.
#Instructions to Assign Floating IP Addresses
#Step 1: Access the Client Portal
- Log in to your client portal.
- Click on the "Network" button at the top of the menu bar (see Fig. 1).

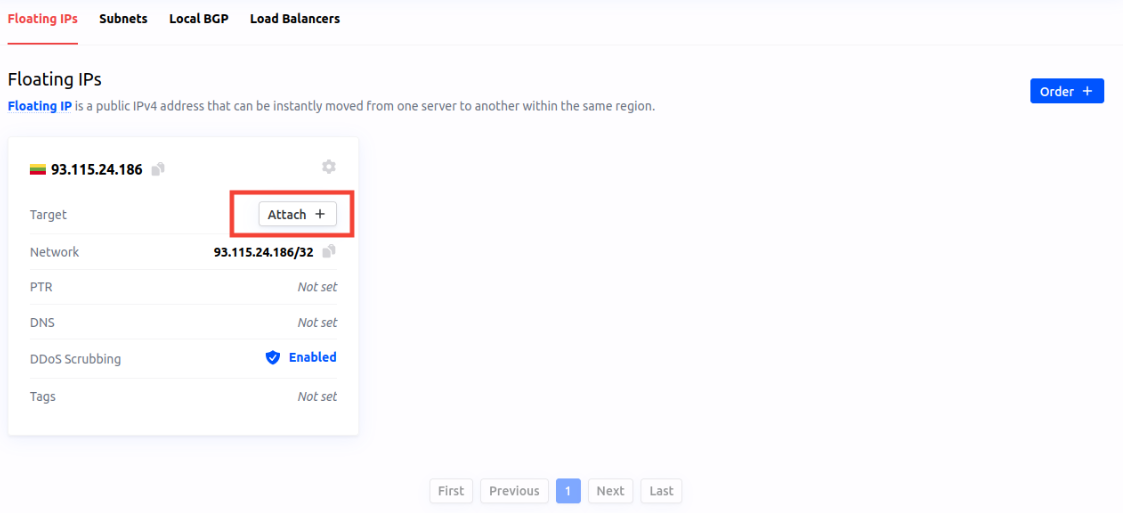
#Step 2: Verify Your Floating IP Address
In the "Network" section, confirm that a floating IP address is linked to an instance.
Assign it using the "Attach +" button.
#Step 3: Configure the Floating IP Address Manually
-
Navigate to the “netplan” directory by running command:
cd /etc/netplan/ls -
Look for files ending in “.yaml”. For example, you might see "50-cloud-init.yaml".
Output
root@test-kb-new:~# echo "network: {config: disabled}" | sudo tee /etc/cloud/cloud.cfg.d/99-disable- network-config.cfg network: {config: disabled} -
Edit the configuration file using:
nano 50-cloud-init.yaml -
Add your floating IP address.
In the "addresses" section of the file, add your new floating IP address using the /32 subnet notation. This should go below your public IP address, as shown below using 93.115.24.186/32 as an example.
# This file is generated from information provided by the datasource. Changes # to it will not persist across an instance reboot. To disable cloud-init's # network configuration capabilities, write a file # /etc/cloud/cloud.cfg.d/99-disable-network-config.cfg with the following: # network: {config: disabled} network: ethernets: ens3: addresses: - 5.199.161.89/32 - 93.115.24.186/32 dhcp4: false match: macaddress: 54:52:00:98:a3:bf nameservers: addresses: - 8.8.8.8 - 8.8.4.4 routes: - on-link: true to: 0.0.0.0/0 via: 192.168.0.1 set-name: eth0 ens4: addresses: - 10.168.195.19/24 version: 2 -
Save the changes, to do this:
- Press Ctrl + X to exit.
- Press Y to confirm you want to save the changes.
- Press Enter to finalize the save.
-
Apply the Configuration using command:
sudo netplan apply
#Step 4 Ensure Configuration Persists Through Reboots
To ensure that your changes stick after a reboot, you must make sure to turn off Cloud-init's network configuration. To do this, create the persistence configuration file and add the following configuration:
echo "network: {config: disabled}" | sudo tee /etc/cloud/cloud.cfg.d/99-disable-network-config.cfg
Your Floating IP is now successfully set up and will persist through any reboots.