How to Mount an ISO Image on Dedicated Servers Using JAVA Console
Mounting ISO images on dedicated servers allows seamless operating system installations and other essential server management tasks. The steps outlined in this guide build upon our other tutorials for accessing management consoles and explicitly focus on launching the JAVA console to complete the ISO mounting process.
Before proceeding, please ensure you are familiar with accessing server remote management consoles. For more information, you can refer to our dedicated guide to accessing and managing servers via Cherry Servers client portal.
#Instructions to Mount an ISO Image on Dedicated Servers Though JAVA
#Step 1: Log in to Cherry Servers Client Portal
- Open your web browser and visit the Cherry Servers client portal login page.
- On the login page, enter your email address and password to access your account.
- Click the "Login" button to proceed to the client portal dashboard.
#Step 2: Select your server
- Look for the server you want to manage from the main dashboard by browsing the displayed list.
- Click on the server's name to open its details page and access various management features and settings.
#Step 3: Access the console
- On the server details page, click the "Console" button at the top-right corner of the interface.

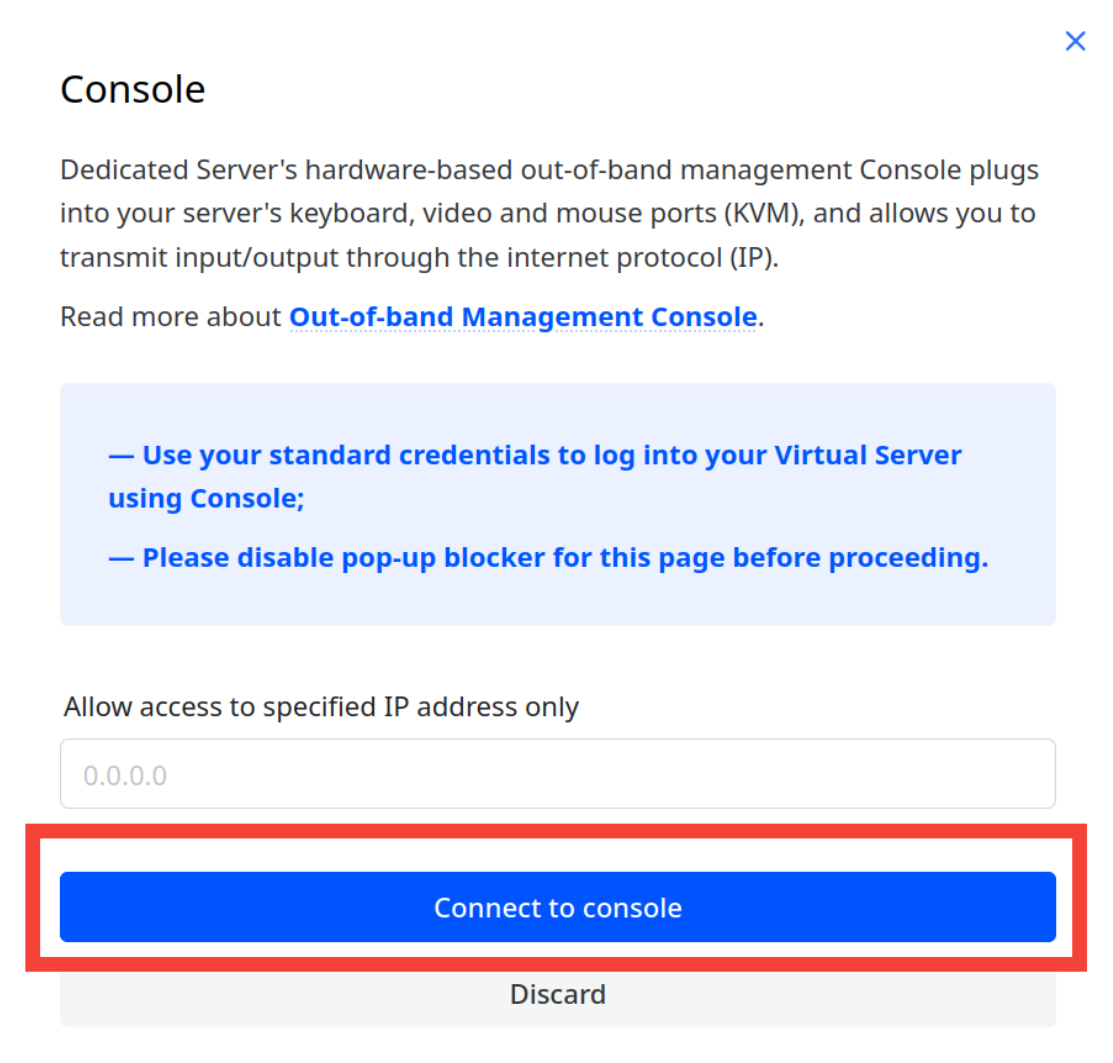
- Click on the "Console" button. You will be prompted to provide your device's public IP address to enable secure access to the console.
- Click the blue "Connect to console" button to open a browser tab with the server's interface.

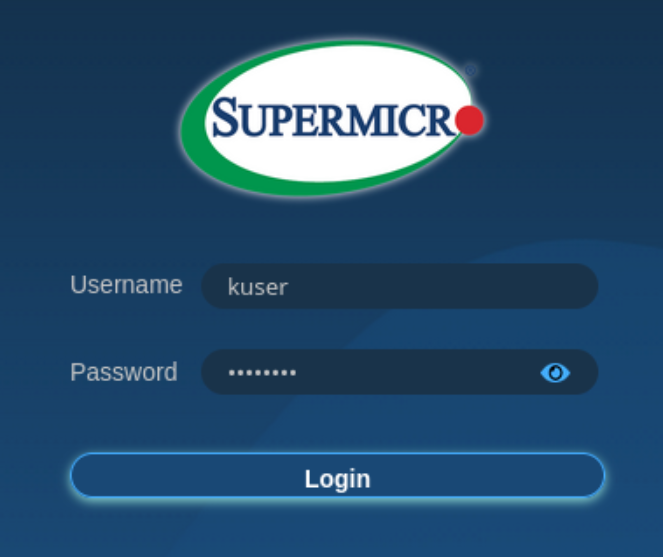
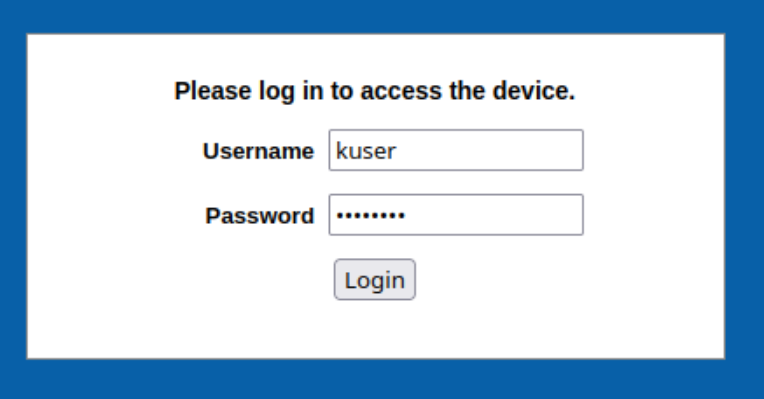
- Once the server interface opens in a new browser tab, you must log in with the credentials provided during server deployment. The default username for the console is "kuser". If you no longer have the console password, you can follow the steps below to reset it.

OPTIONAL - Reset Console Password.
- Return to the client portal and click the "Actions" button at the top-right corner.

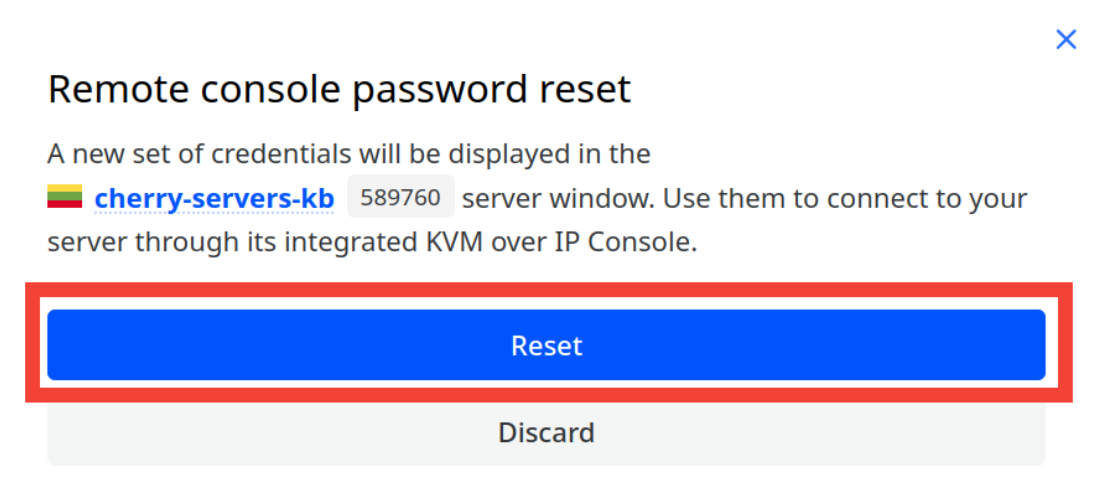
- Select "Reset console password" from the drop-down menu to generate a new password.
- You can confirm the reset action by clicking the blue "Reset" button in the pop-up window.

- Once the password reset is complete, the new credentials will be displayed in the client portal for use in accessing the console.

#Step 4: Launch the JAVA console and mount the ISO file
Older Supermicro management console
- Log in to the older Supermicro management console.
Use your credentials to log in to the interface.

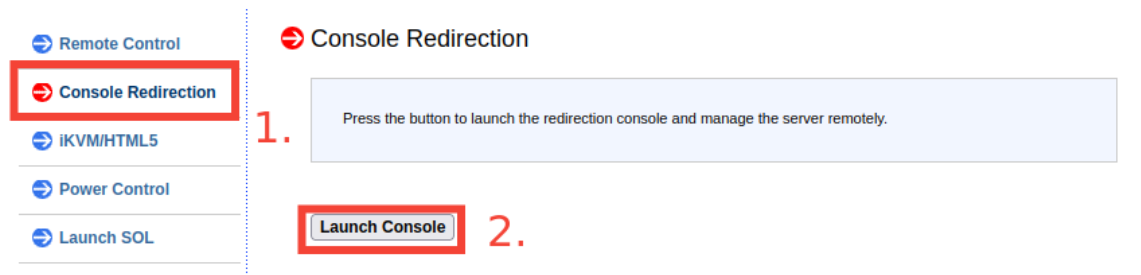
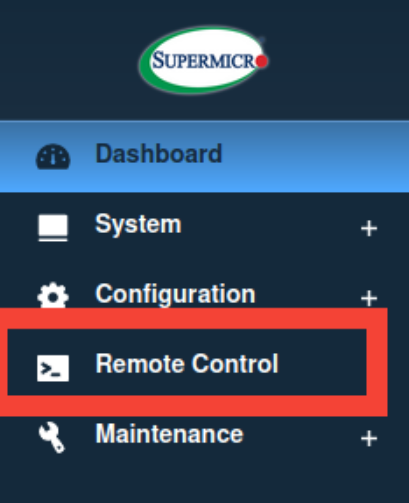
- Navigate to the Remote Control tab.
Locate and click the "Remote Control" tab from the main menu to access management options.

- Launch the JAVA Console.
Under the "Console Redirection" section, select the "Launch Console" button to download the .jnpl file needed to open the JAVA console.

- Open the downloaded .jnpl file.
Locate and open the downloaded .jnpl file (e.g., launch.jnpl) to launch the JAVA console on your local computer.

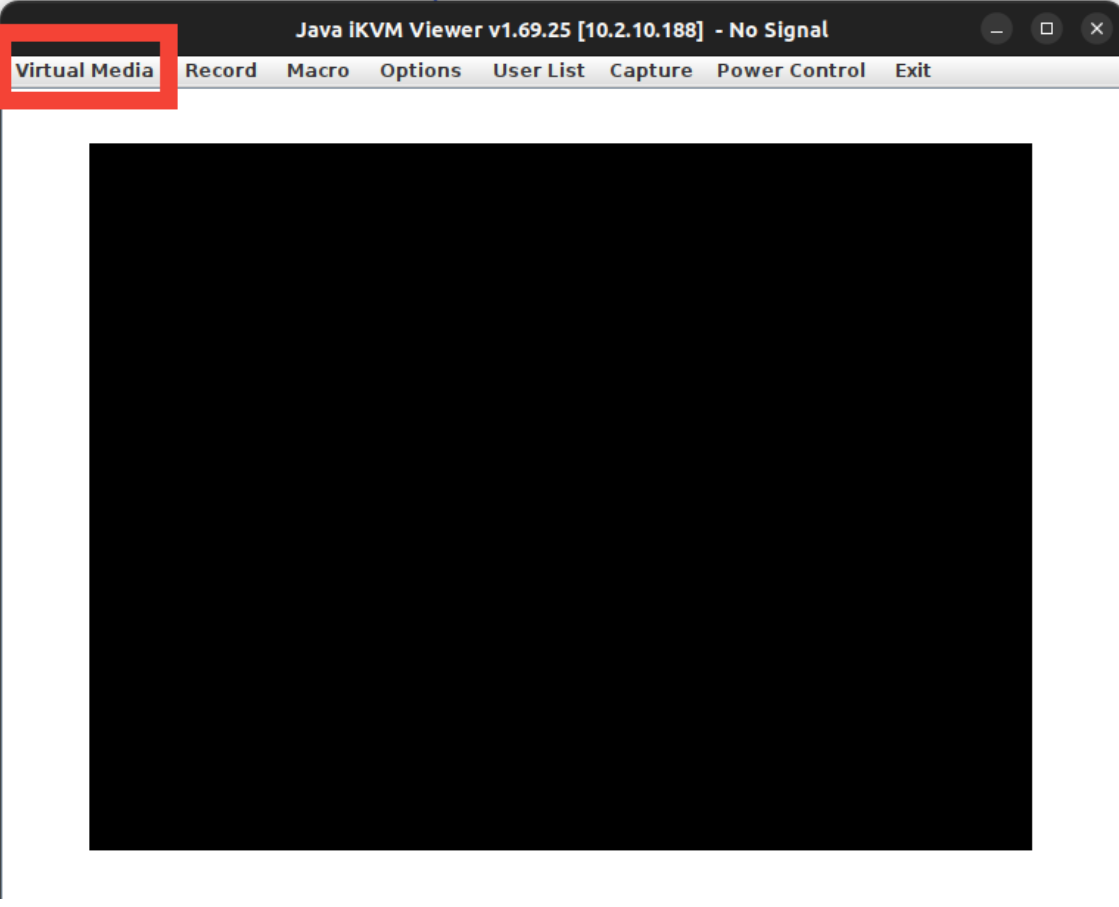
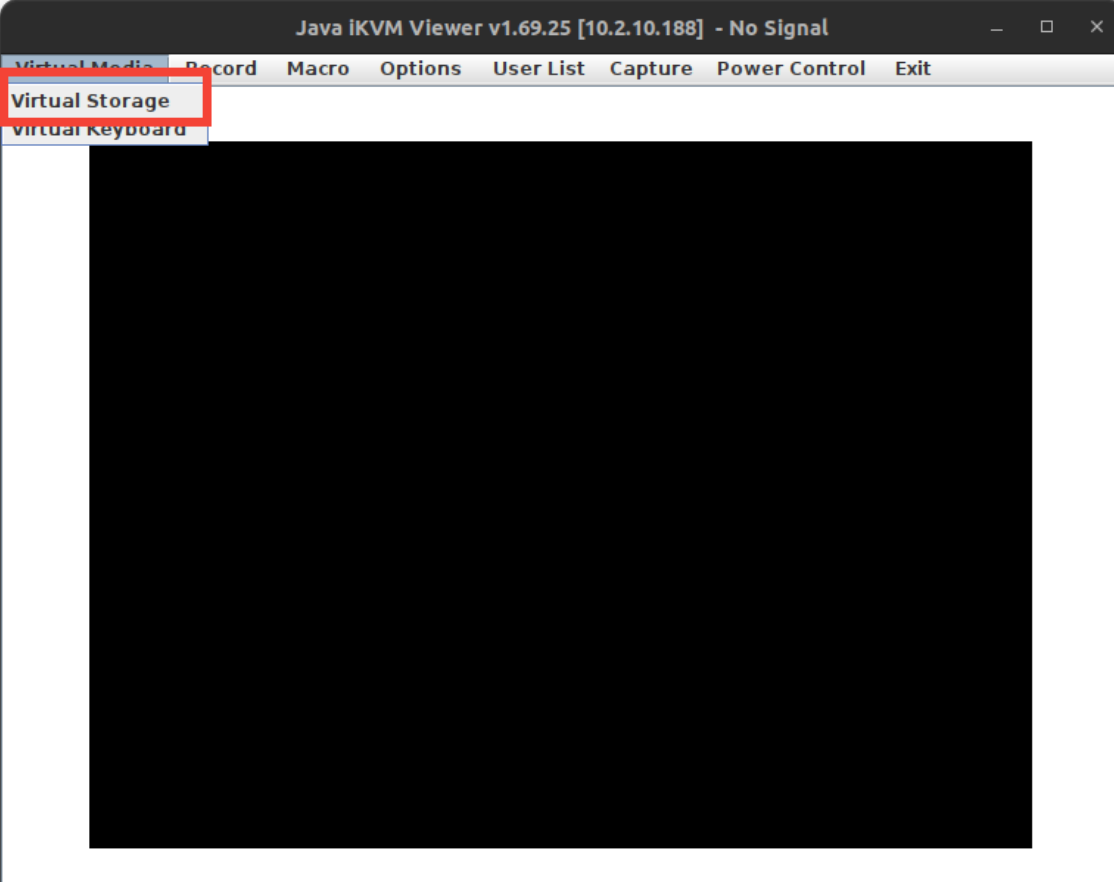
- Open the Virtual Media menu.
Once the JAVA console is launched, click on the "Virtual Media" option at the interface's top-left corner.

- Access the Virtual Storage option.
From the drop-down menu under "Virtual Media," select "Virtual Storage" to mount the ISO image.

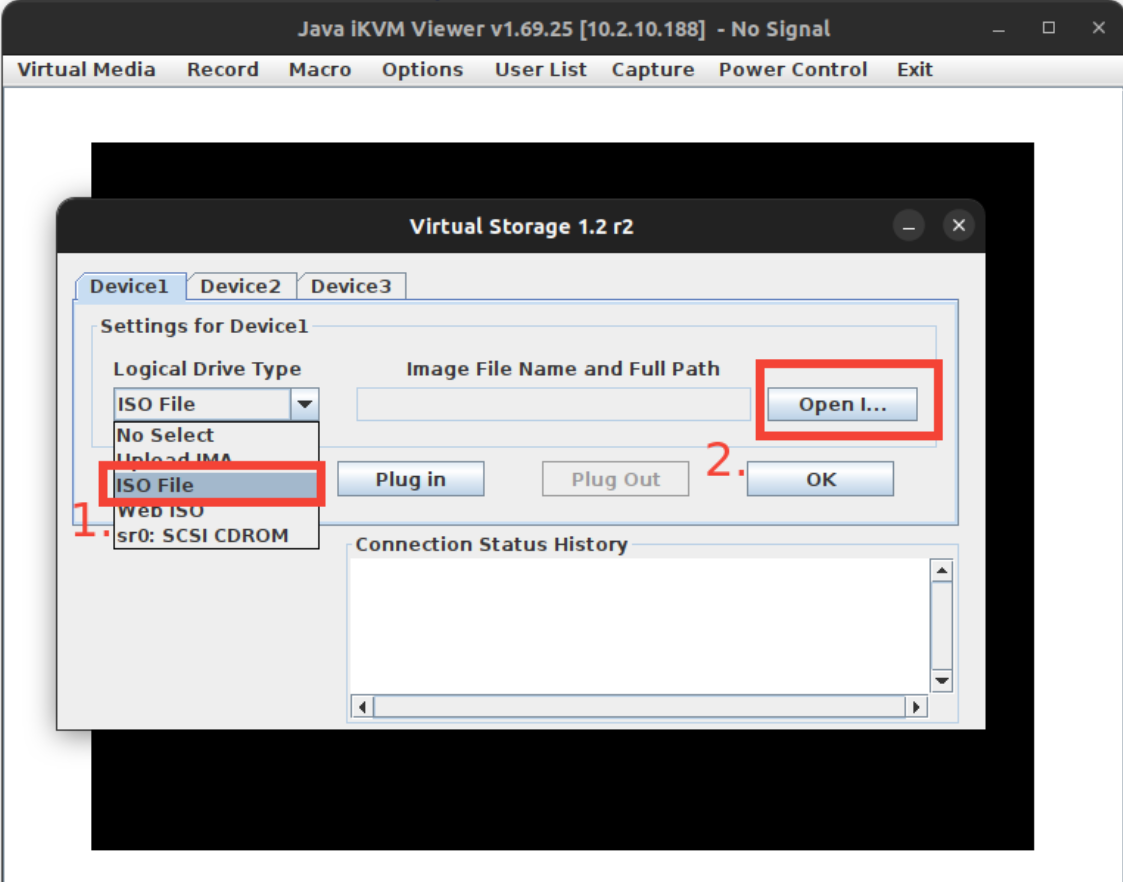
- Select and load your ISO image.
A new window will appear. Under "Logical Drive Type", choose "ISO File" from the drop-down menu. Then, use the "Open" button to browse and select the ISO file stored on your local computer.

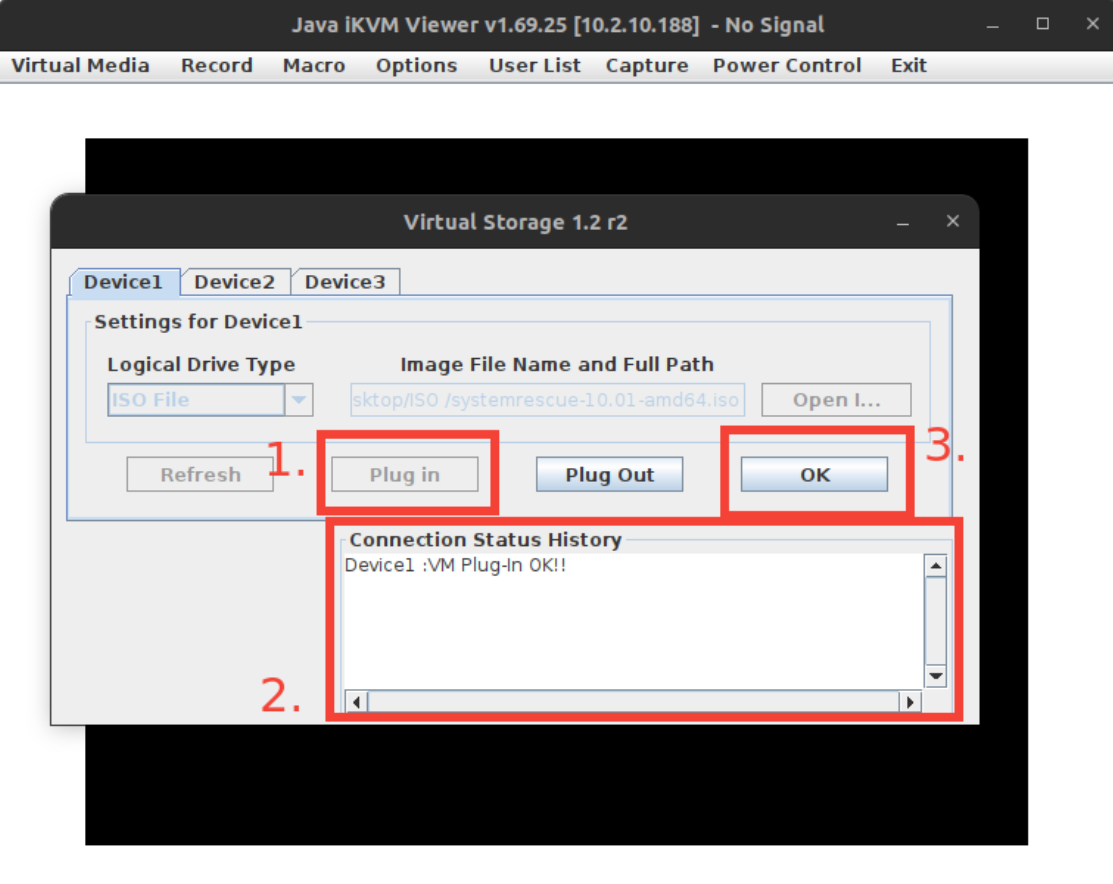
- Mount the ISO image.
Once the ISO file is selected, click on the "Plug In" button followed by the "OK" button to complete the mounting process. The "Connection Status History" will confirm the successful mounting with a "VM Plug-In OK!!" message.

- Reboot the server. After mounting the ISO image, power on or reboot your server. Access the boot menu during the boot process to ensure the server boots from the mounted ISO.


Newer Supermicro management console
- Log in to the newer Supermicro management console.
Use your credentials to log in to the interface.

- Navigate to the Remote Control tab.
From the main menu, locate and click on the "Remote Control" tab to access management options.

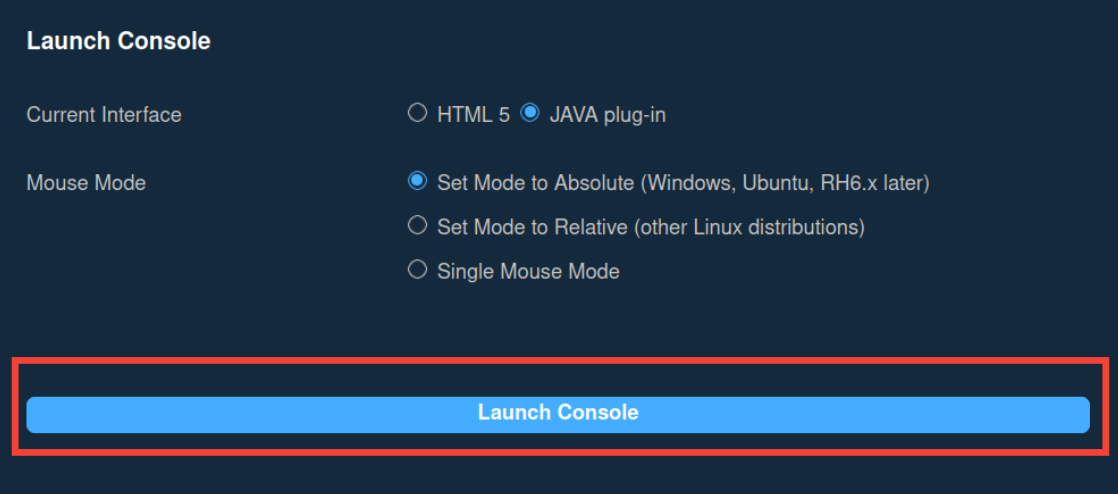
- Launch the console selection menu. In the "Remote Control" section, you’ll find the console options, where you can choose between "HTML5" and "JAVA Plug-in".
- Select the "JAVA Plug-in" option by clicking the radio button.

- Launch the JAVA Console.
After selecting "JAVA Plug-in", click the "Launch Console" button to download the .jnpl file needed to open the JAVA console.

- Open the downloaded .jnpl file.
Locate the downloaded .jnpl file (e.g., launch.jnpl) on your local system and open it to launch the JAVA console.

- To open the Virtual Media menu, load the ISO, and mount it, follow the same steps as in the "Older Supermicro Management Console" section above.


Huawei management console
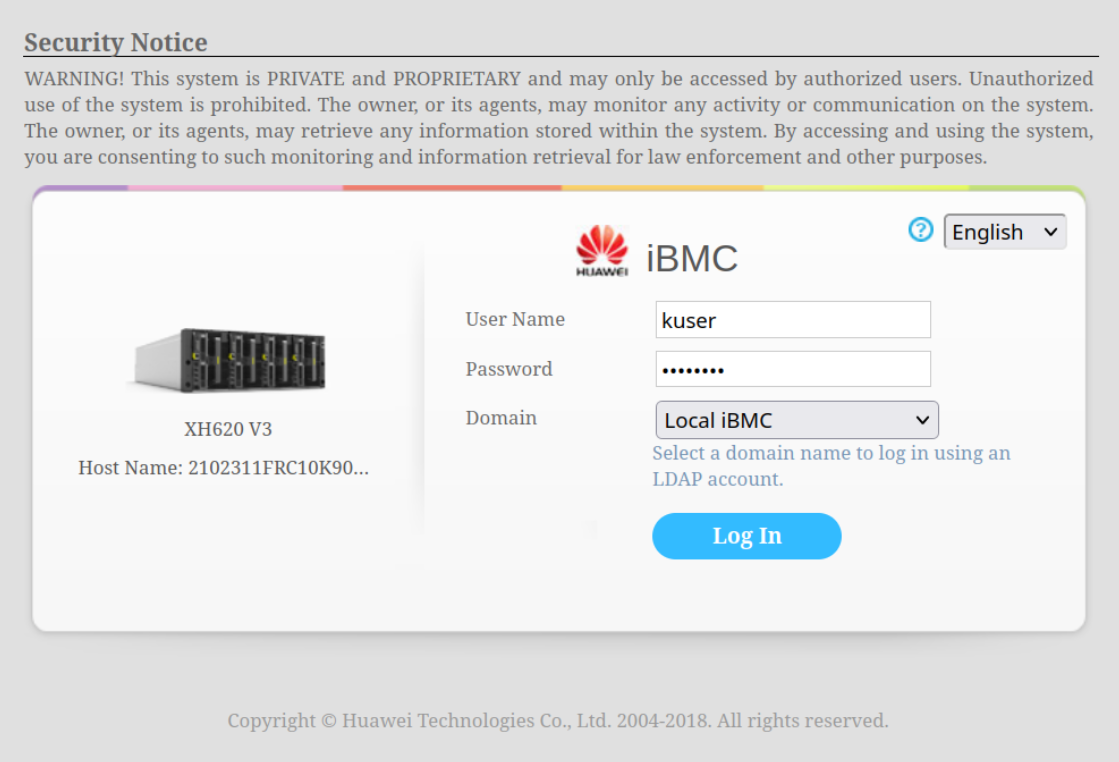
- Log in to the Huawei iBMC interface.
Use your credentials to access the Huawei server management console.

- Navigate to the Remote Console tab.
Click on the "Remote Console" tab from the main menu to proceed to the console options.

- Launch KVM Console:
After clicking on "Remote Console", you will have the option to launch either a "Private Console" or a "Shared Console".
- Private Console: Only one session can be active at a time.
- Shared Console: Allows up to two active sessions.

- Launch the JAVA Console. After selecting either "Private Console" or "Shared Console", the system will prompt you to download the .jnpl file required to open the JAVA console.
- Open the downloaded .jnpl file.
Locate the downloaded .jnpl file (e.g., kvm.jnpl) on your local system and open it to launch the JAVA console.
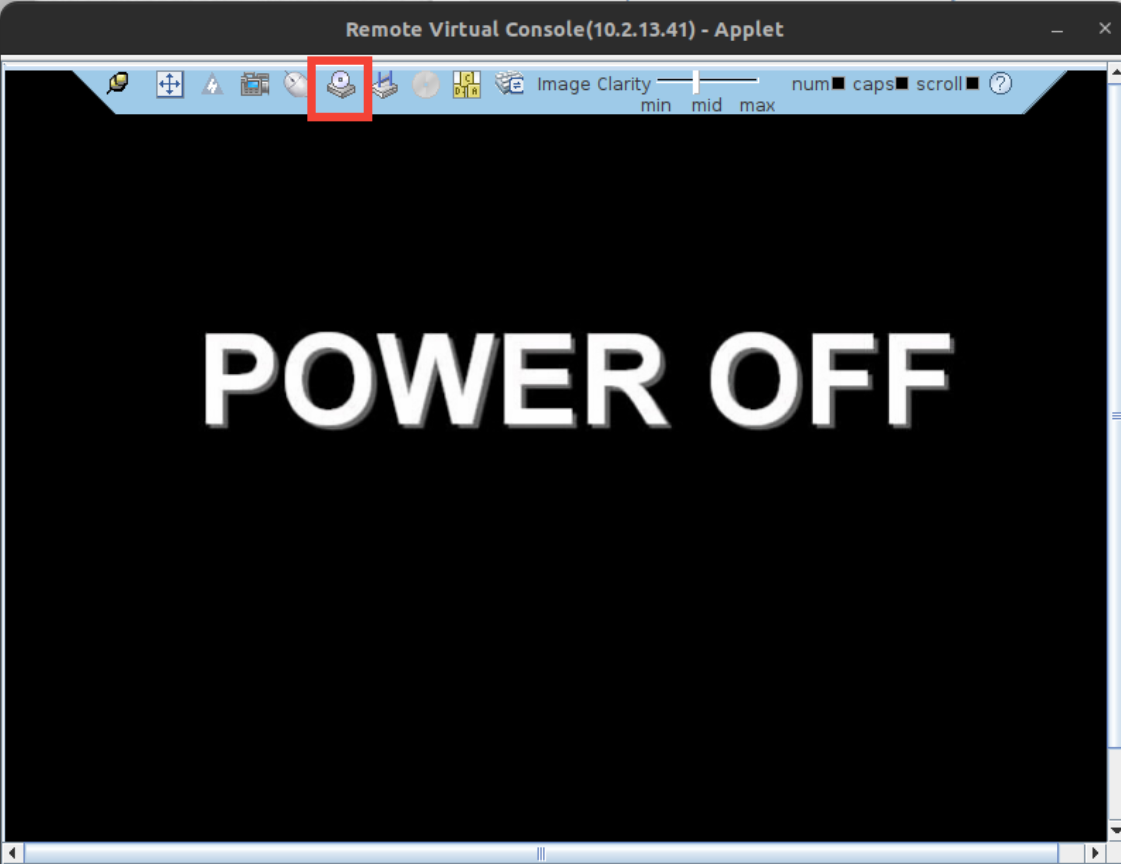
- Open the Virtual Media menu:
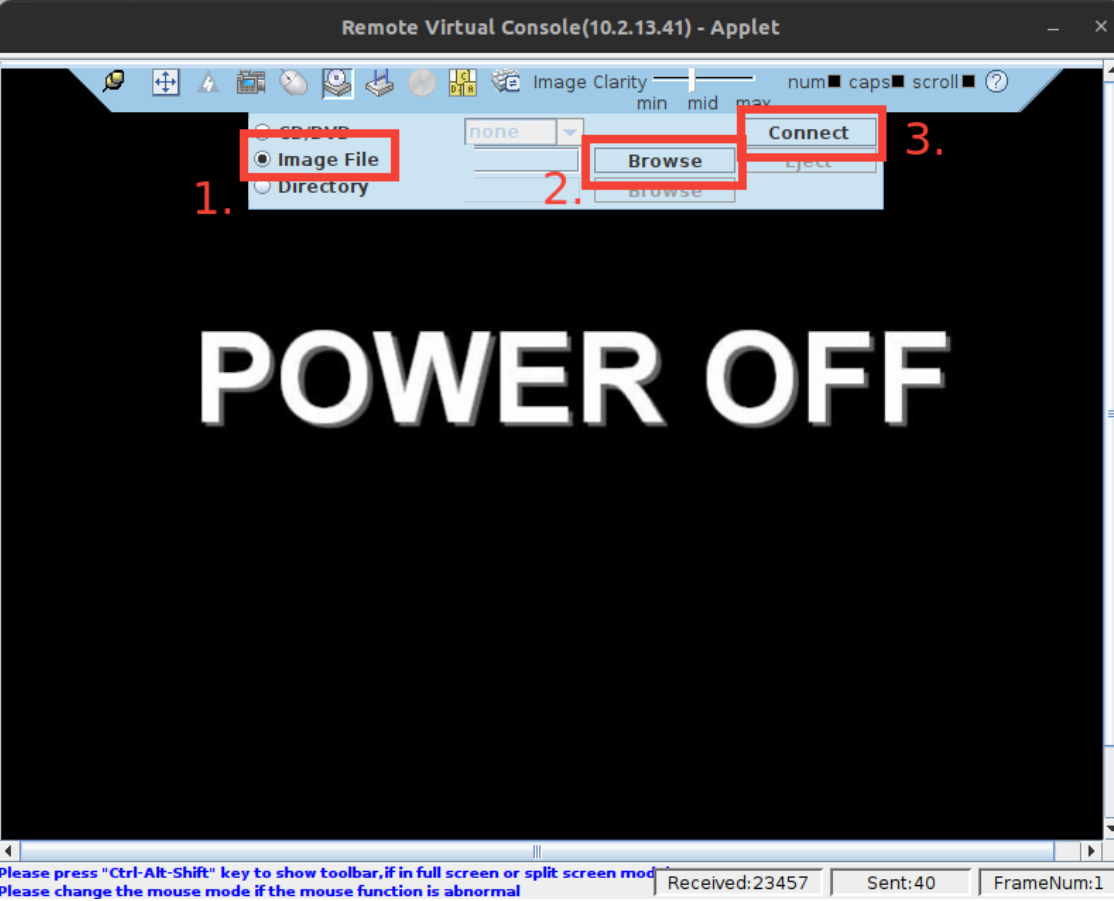
After launching the JAVA console, locate the toolbar at the top of the screen and click on the "Virtual Media" icon.

- Select and load your ISO image.
In the Virtual Media menu:
- Select "Image File" as the option.
- Click the "Browse" button to locate and upload the ISO image file from your local system.
- Once selected, press the "Connect" button to mount the ISO.

- Reboot the server.


After mounting the ISO image, power on or reboot your server, and access the boot menu during the boot process to ensure the server boots from the mounted ISO.
Intel management console
- Log in to the Intel management console.
Use your credentials to access the Intel server management console.

- Navigate to the Remote Control tab.
Click on the "Remote Control" tab in the main menu to proceed to the console options.

- Launch the JAVA Console.
On the right side of the "Console Redirection" section, select the "Launch Console" button to download the .jnpl file required to open the JAVA console.

- Open the downloaded .jnpl file.
Locate the downloaded .jnpl file (e.g., jviewer.jnpl) on your local system and open it to launch the JAVA console.
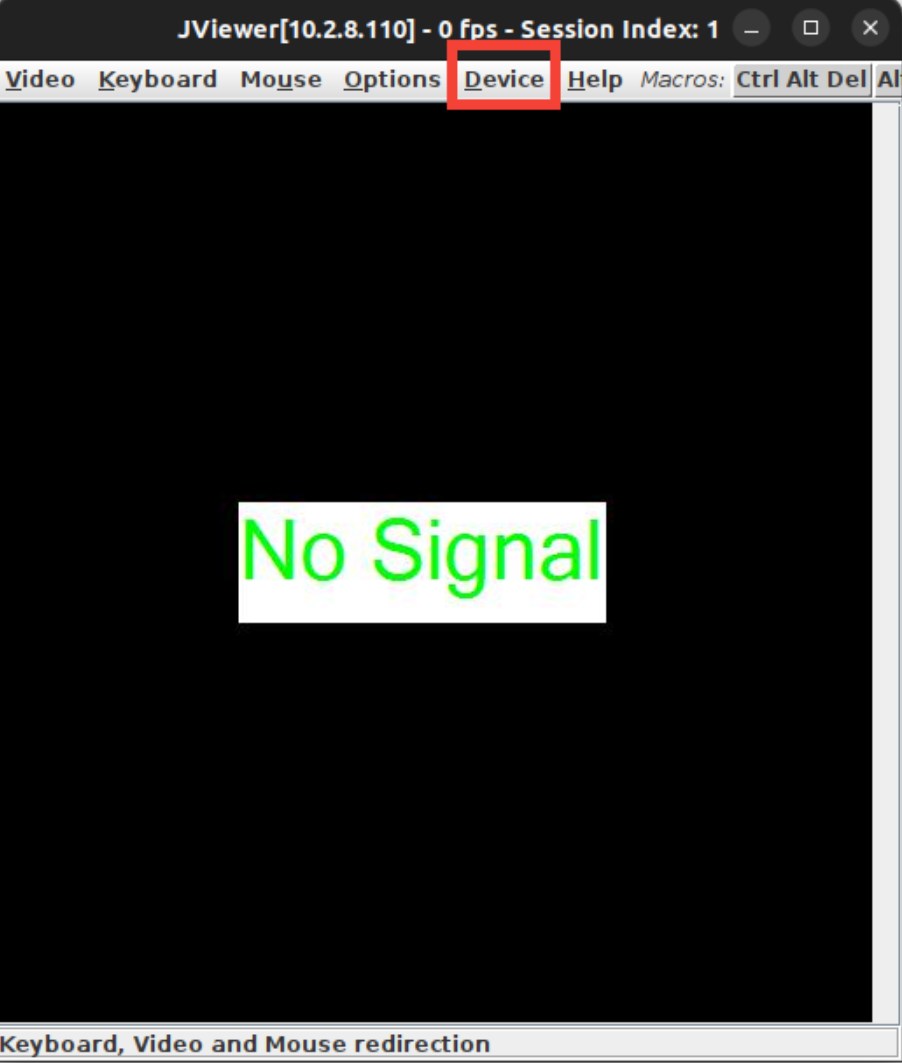
- Open the Device menu.
Once the JAVA console is launched, locate and click on the "Device" option on the toolbar at the top of the interface.

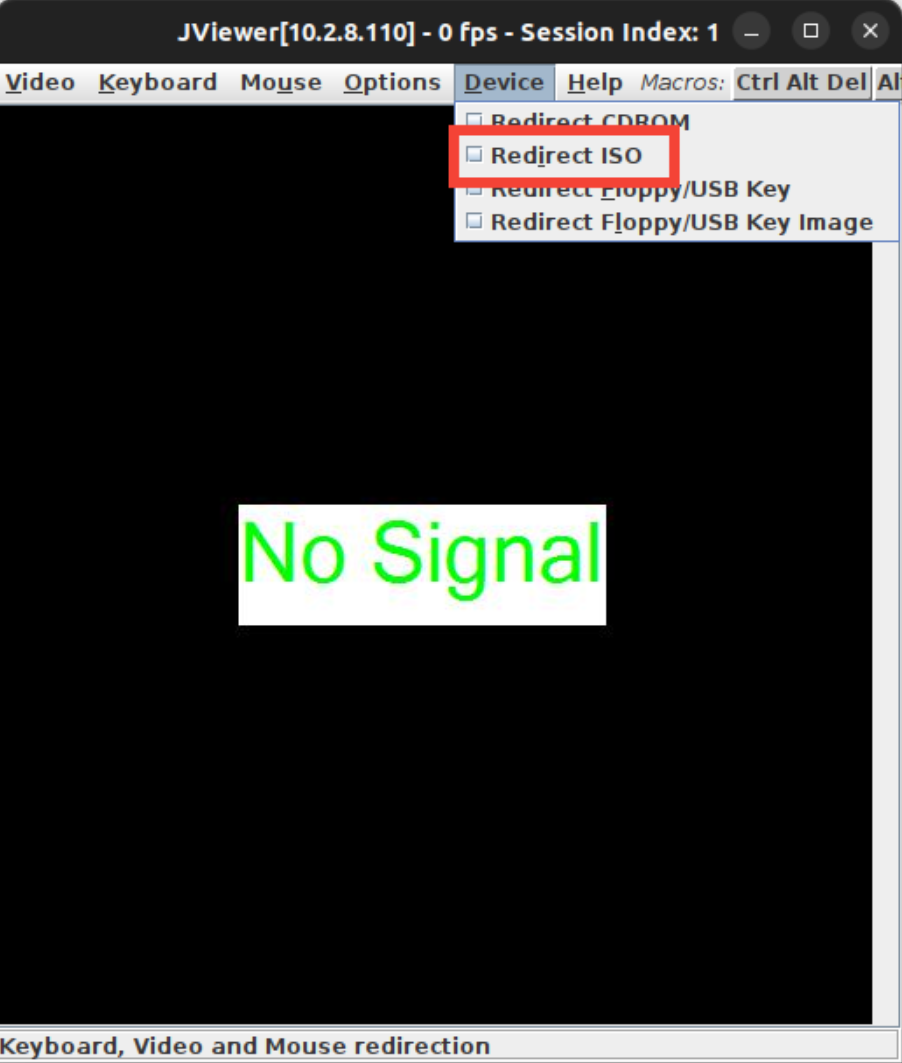
- Redirect the ISO image.
- From the "Device" menu, select "Redirect ISO" to proceed with mounting the ISO image.
- Confirm the selection to mount the ISO.

- Reboot the server. After mounting the ISO image, power on or reboot your server. Access the boot menu during the boot process to ensure the server boots from the mounted ISO.


Was this article helpful?
Thanks for the feedback!