How to Access and Manage Your Servers Through Cherry Servers Client Portal
Remote management consoles are crucial for server administrators, offering monitoring, maintenance, and troubleshooting features. This guide will show you how to access your dedicated bare metal servers, virtual private servers (VPS), and virtual dedicated servers (VDS) through the Cherry Servers client portal.
For dedicated servers, this guide will demonstrate IP KVM (keyboard, video, mouse) consoles for Supermicro, both legacy and new versions, Huawei, and Intel servers through the Cherry Servers client portal, and how to reset the console password. For VPS and VDS, we'll cover how the Virtual Networking Console (VNC) console is used.
Please ensure that your browser supports access to remote management consoles. Support for popular browsers is as follows:
- Supermicro management consoles are supported by Firefox, Chrome, and Safari browsers.
- Huawei management consoles are supported by Firefox and Chrome browsers.
- The Chrome browser supports Intel management consoles. MacOS is only compatible with Supermicro management consoles.
We also recommend familiarizing yourself with the following terms:
- BMC (Baseboard Management Controller)
- IPMI (Intelligent Platform Management Interface)
- KVM (Keyboard, Video, Mouse) over IP
- VNC (Virtual Network Computing) console.
#Instructions to Access the Console Through the Cherry Servers Client Portal
The steps for accessing the console are the same regardless of which server you have.
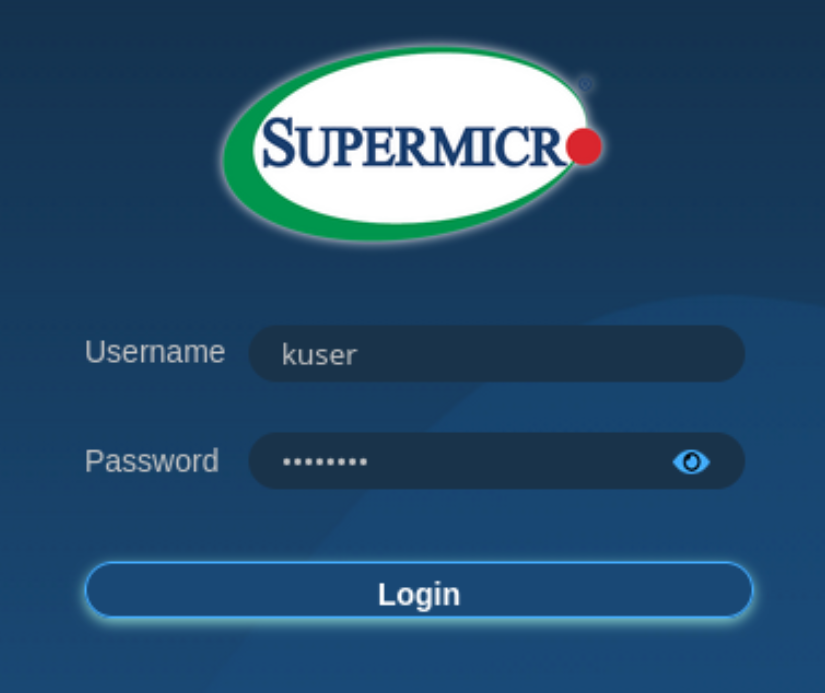
#Step 1: Log in to Cherry Servers client portal
- Open a web browser.
- Navigate to the Cherry Servers client portal login page.
- Enter your username and password to log in.
#Step 2: Select Your Server
- In the dashboard, find and select the server you want to manage.
- Click on the server to open its details page.
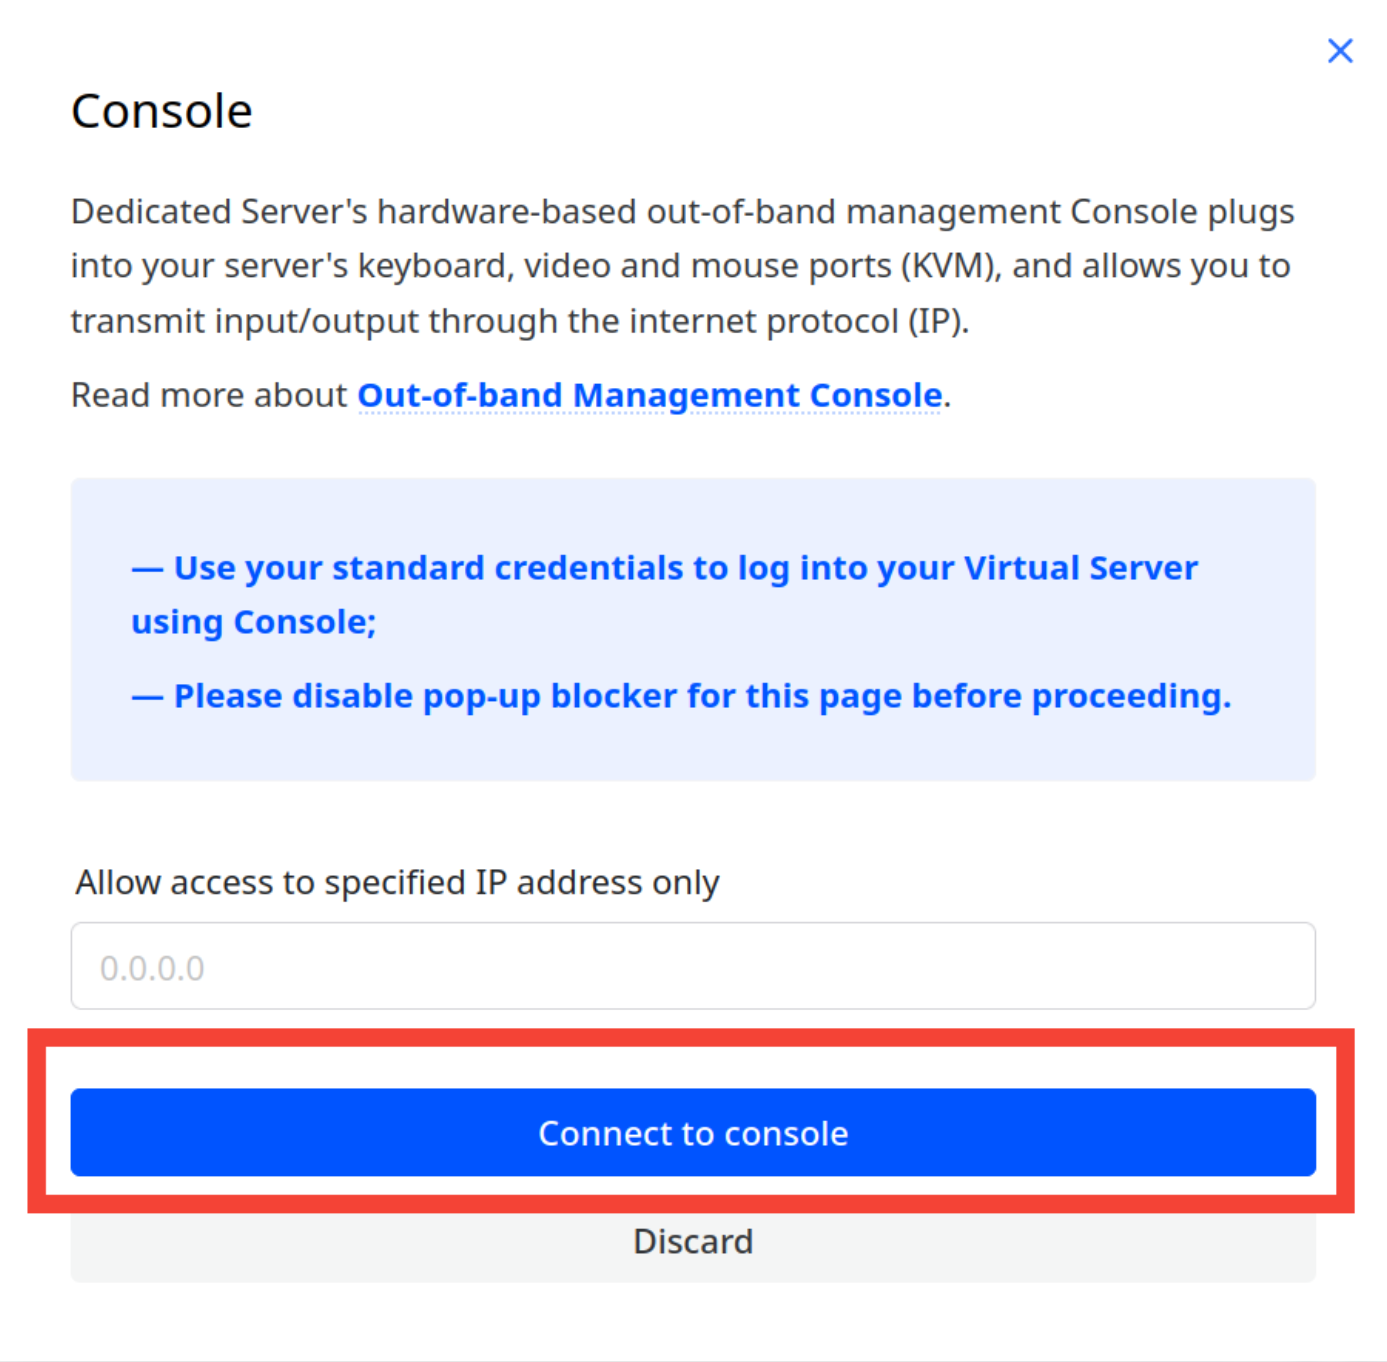
#Step 3: Access the Management Console
- Click the "Console" button located at the top right side of the client portal.

- Provide your device's public IP address to create access to the console.
- Press the "Connect to console" button.

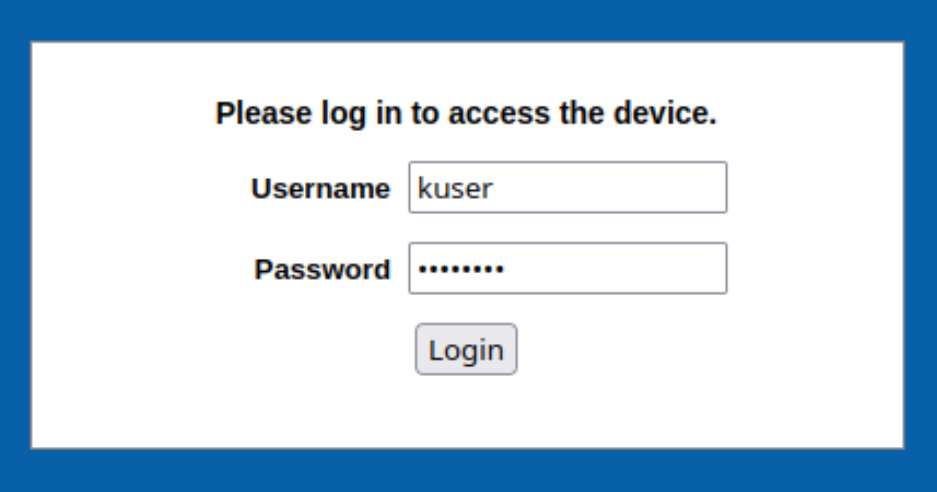
- After pressing the "Connect to console" button, you must provide credentials to access the console. Both server and console credentials will be displayed 24 hours after deployment. After 24 hours, the credentials will be removed from the client portal due to security reasons. The default username to log into the console is always "kuser". If for any reason you lose access to the console password, follow the tutorial at the end of this section to reset it.

#How to Access Dedicated Servers Through KVM Consoles
Instructions for accessing your dedicated bare metal server via KVM may differ depending on the management console employed. Below you will find instructions for the range of consoles you may encounter.
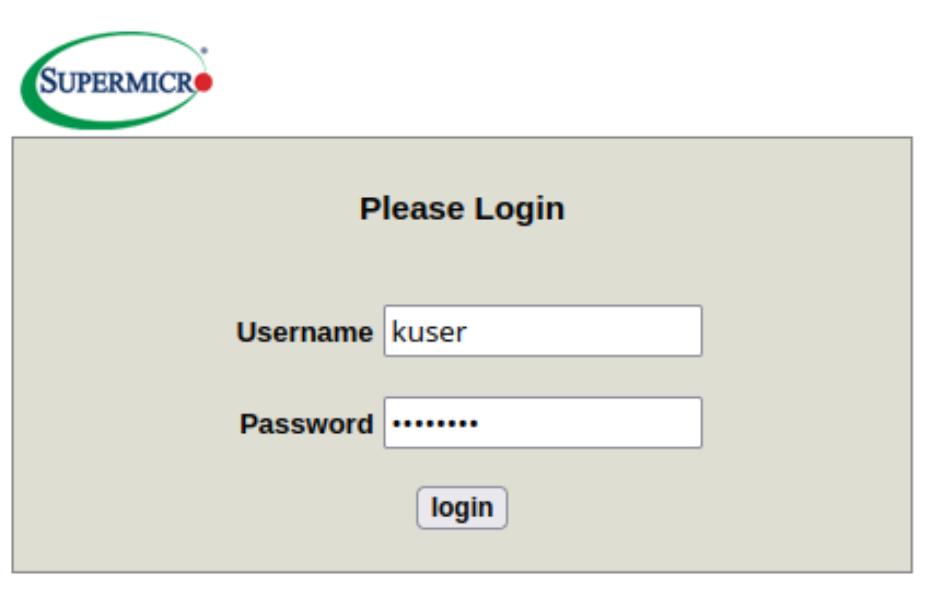
#Older Supermicro Management Console
- Log in to the Supermicro management console: Use your credentials to log in.

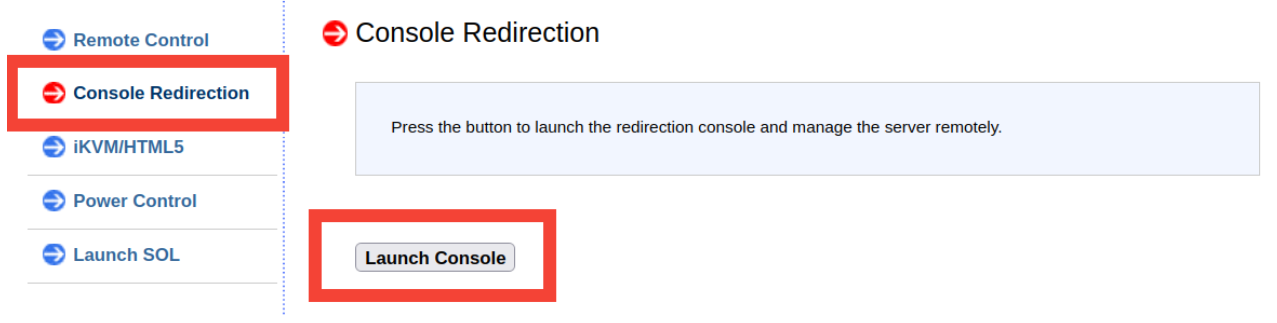
- Navigate to the remote control tab: Click on the "Remote Control" tab in the main menu.

- Launch KVM console: You have two options here:
- Option 1 - Select the "Console Redirection" option and click on the "Launch Console" button to download the .jnpl file.

- Option 2 - For HTML5 console, press the "iKVM/HTML5" button and then press the "iKVM/HTML5" button again to launch the HTML5 console.

- Option 1 - Select the "Console Redirection" option and click on the "Launch Console" button to download the .jnpl file.
- Remote control and management: Use the KVM console to remotely control and manage your server as if you were physically present. If you cannot see any options to access KVM through HTML5, please contact Cherry Servers support for help.


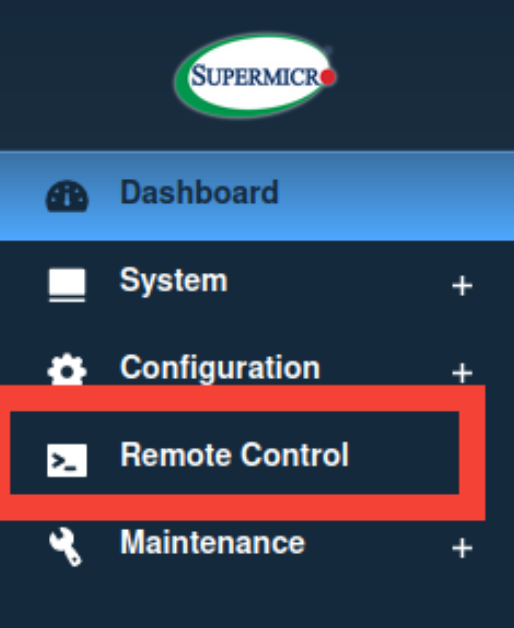
#Newer Supermicro Management Console
- Log in to the Supermicro management console: Use your credentials to log in.

- Navigate to the Remote Control Tab: Click on the "Remote Control" tab in the main menu.

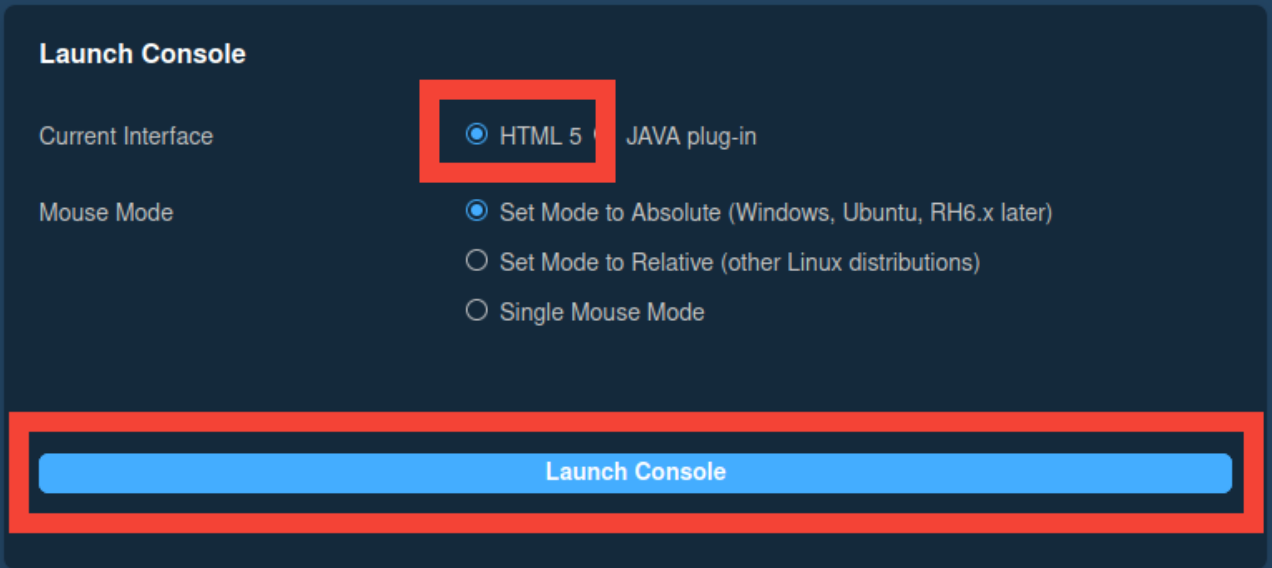
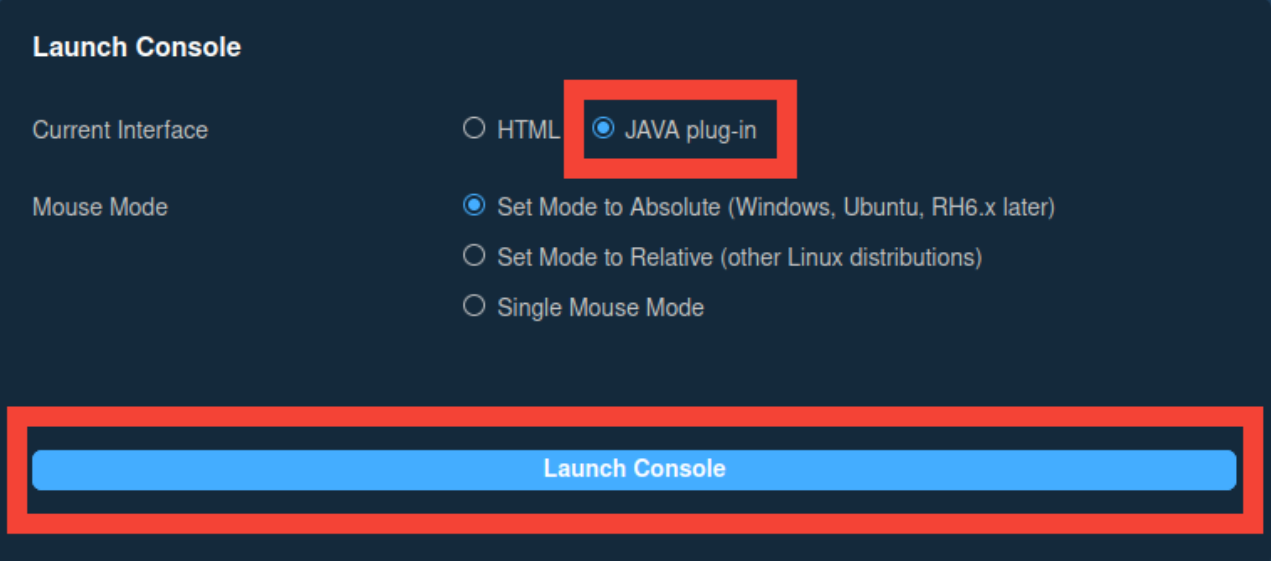
- Launch KVM Console: After you press "Remote Control" you will have two options:
- Option 1 - Select "HTML 5" and then click the "Launch Console" button to access the HTML5 console.

- Option 2 - Select "JAVA plug-in" and click the "Launch Console" button to download the .jnpl file.

- Option 1 - Select "HTML 5" and then click the "Launch Console" button to access the HTML5 console.
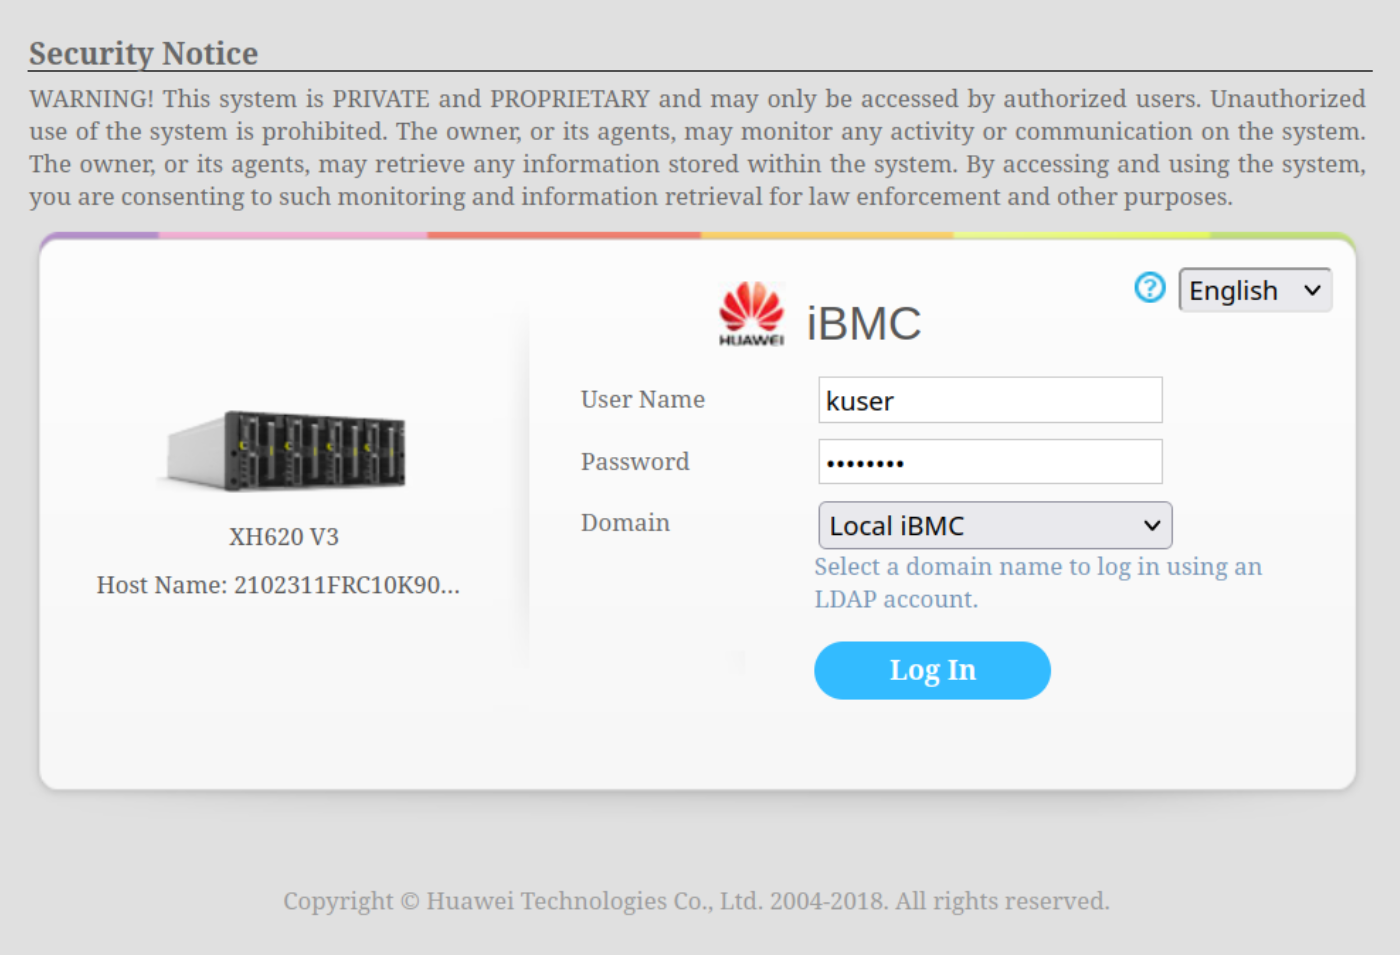
#Huawei Management Console
- Log in to the Huawei management console: Use your credentials to log in.

- Navigate to the Remote Console tab: Click on the "Remote Console" tab in the main menu.

- Launch KVM Console: After clicking on "Remote Console", you will have the option to launch a private or shared console:
- Private Console - only one session can be active,
- Shared Console - up to two sessions can be active.


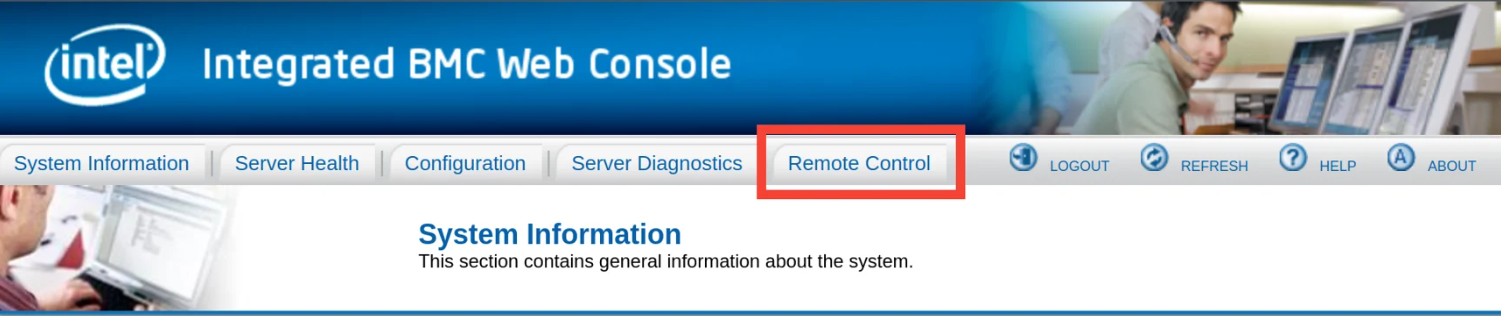
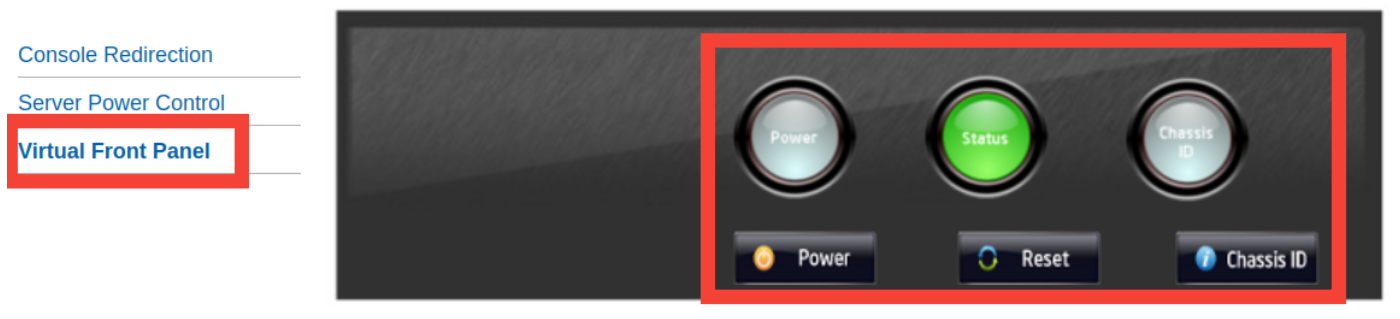
#Intel Management Console
- Log in to the Intel management console: Enter your credentials to log in.

- Navigate to the Remote Control tab: Click on the "Remote Control" tab in the main menu.

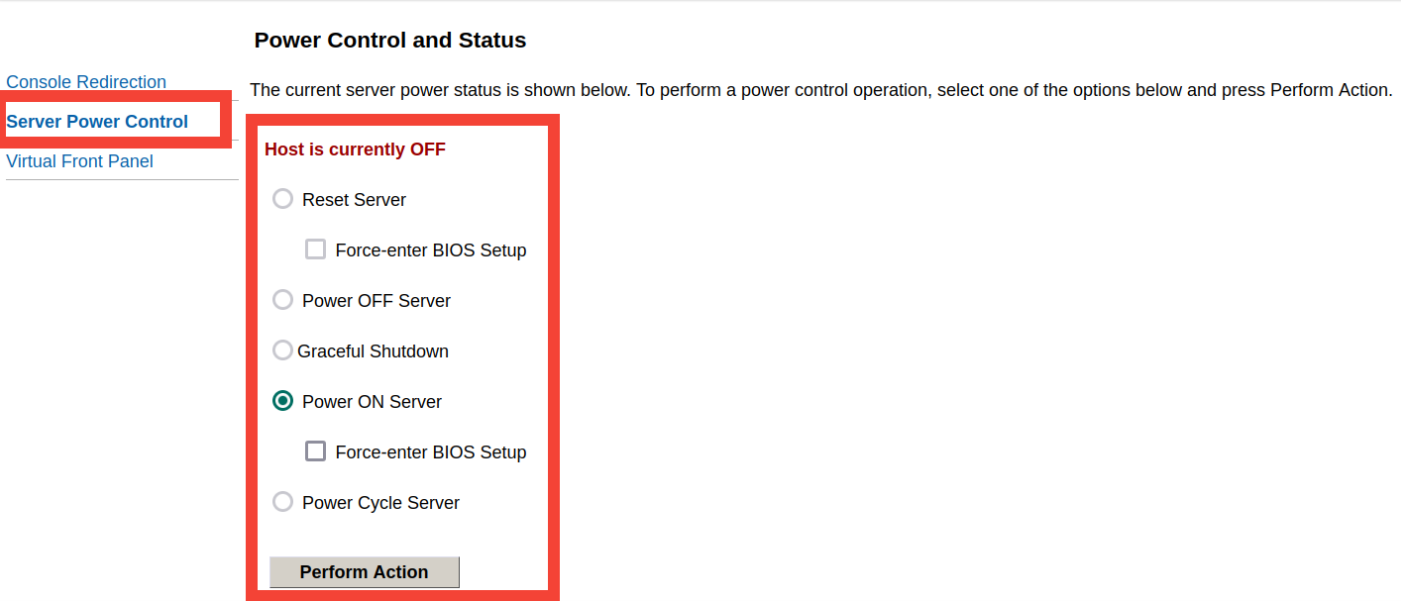
- Launch the KVM Console. There are 3 options:
- Press "Console Redirection" then press "Launch Console" to download the .jnpl file.

- Press "Server Power Control" to control server power.

- Press "Virtual Front Panel" to see the server's current status.

- Press "Console Redirection" then press "Launch Console" to download the .jnpl file.

#How to Access VNC Console for VPS/VDS Servers
- Access the VNC console: In the Cherry Servers client portal, navigate to the VPS/VDS server details page.
- Click the "Console" button at the client portal's top right side.
- Provide your device's public IP address to create access to the console.
- Press the "Connect to console" blue button.
- Remote control and management: Use the VNC console to manage your VPS/VDS server as needed.

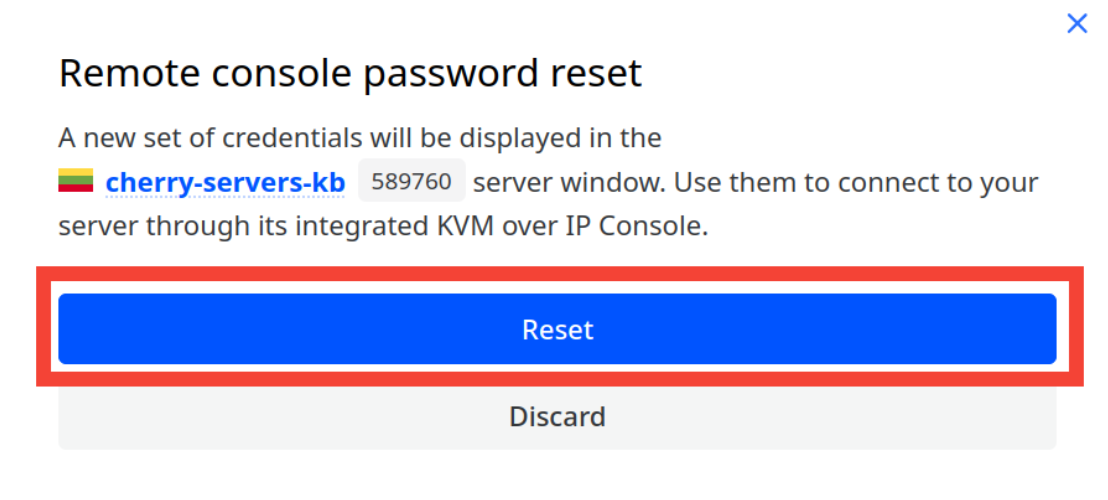
#How to Reset Console Password:
- Press the "Actions" button located at the top right of the client portal

- Select the "Reset console password" option from the drop-down menu.

- A pop-up window will appear. Press the blue "Reset" button to proceed.
 After the password reset, the new credentials will be displayed in your client portal.