Load Balancer
#What Is a Load Balancer?
A load balancer is a managed PROXY service that allows clients to automatically distribute incoming HTTP, HTTPS, and TCP requests across available servers. This system ensures that traffic flow remains balanced across the network, minimizing the risk that any one server becomes overwhelmed with requests or experiences downtime.
In the event that a server is down for any reason, such as troubleshooting or maintenance, the server is automatically removed from the available servers list by the load balancer service, while requests will continue to be served to the remaining active, running servers.
#Use Cases
The purpose of using a load balancer may vary depending on the communication protocol. Some examples of uses for each protocol are:
- Http - with a web application on two identical servers, the load balancer can be used to distribute requests between them via a single entry point;
- Https (requires SSL certificate) - In this case, the load balancer does not need to configure SSL encryption, removing encryption loads from servers, improving ease of configuration, maintenance, and high efficiency when handling large numbers of incoming requests;
- Tcp - the load balancer can distribute load between MySQL servers.
#Available Plans
Cherry Servers’ load balancer service is available in the Lithuania - Siauliai, Germany - Frankfurt, Netherlands - Amsterdam, and Sweden - Stockholm regions.
We currently offer eight load balancer plans which can be flexibly scaled up or down depending on your needs. The main parameters to consider when ordering are CPU, bandwidth and traffic requirements. One CPU we provide can server up to 10,000 sessions, directly depending on the client’s application, which can be HTML, PHP, or HTML + PHP + MySQL. The plans are:
| Load Balancer Plan | Number of vCPUs | Max Active Sessions | Approx. Max RPS | Egress Traffic | Bandwidth |
|---|---|---|---|---|---|
| 1 | 1 | 10,000 | 10,000 | 250 | 1TB |
| 2 | 2 | 20,000 | 20,000 | 500 | 2TB |
| 3 | 3 | 30,000 | 30,000 | 750 | 4TB |
| 4 | 4 | 40,000 | 40,000 | 1,000 | 8TB |
| 5 | 5 | 50,000 | 50,000 | 1,250 | 12TB |
| 6 | 6 | 60,000 | 60,000 | 1,500 | 15TB |
| 7 | 7 | 70,000 | 70,000 | 1,750 | 18TB |
| 8 | 8 | 80,000 | 80,000 | 2,000 | 20TB |
#How to Order a Load Balancer
Load balancers are ordered as a separate service from server deployments. The survive operates within the project and the associated VLAN it is deployed within, and runs exclusively over a private network to ensure optimal speed and security.
You can order a Load balancer from the client portal home page:
-
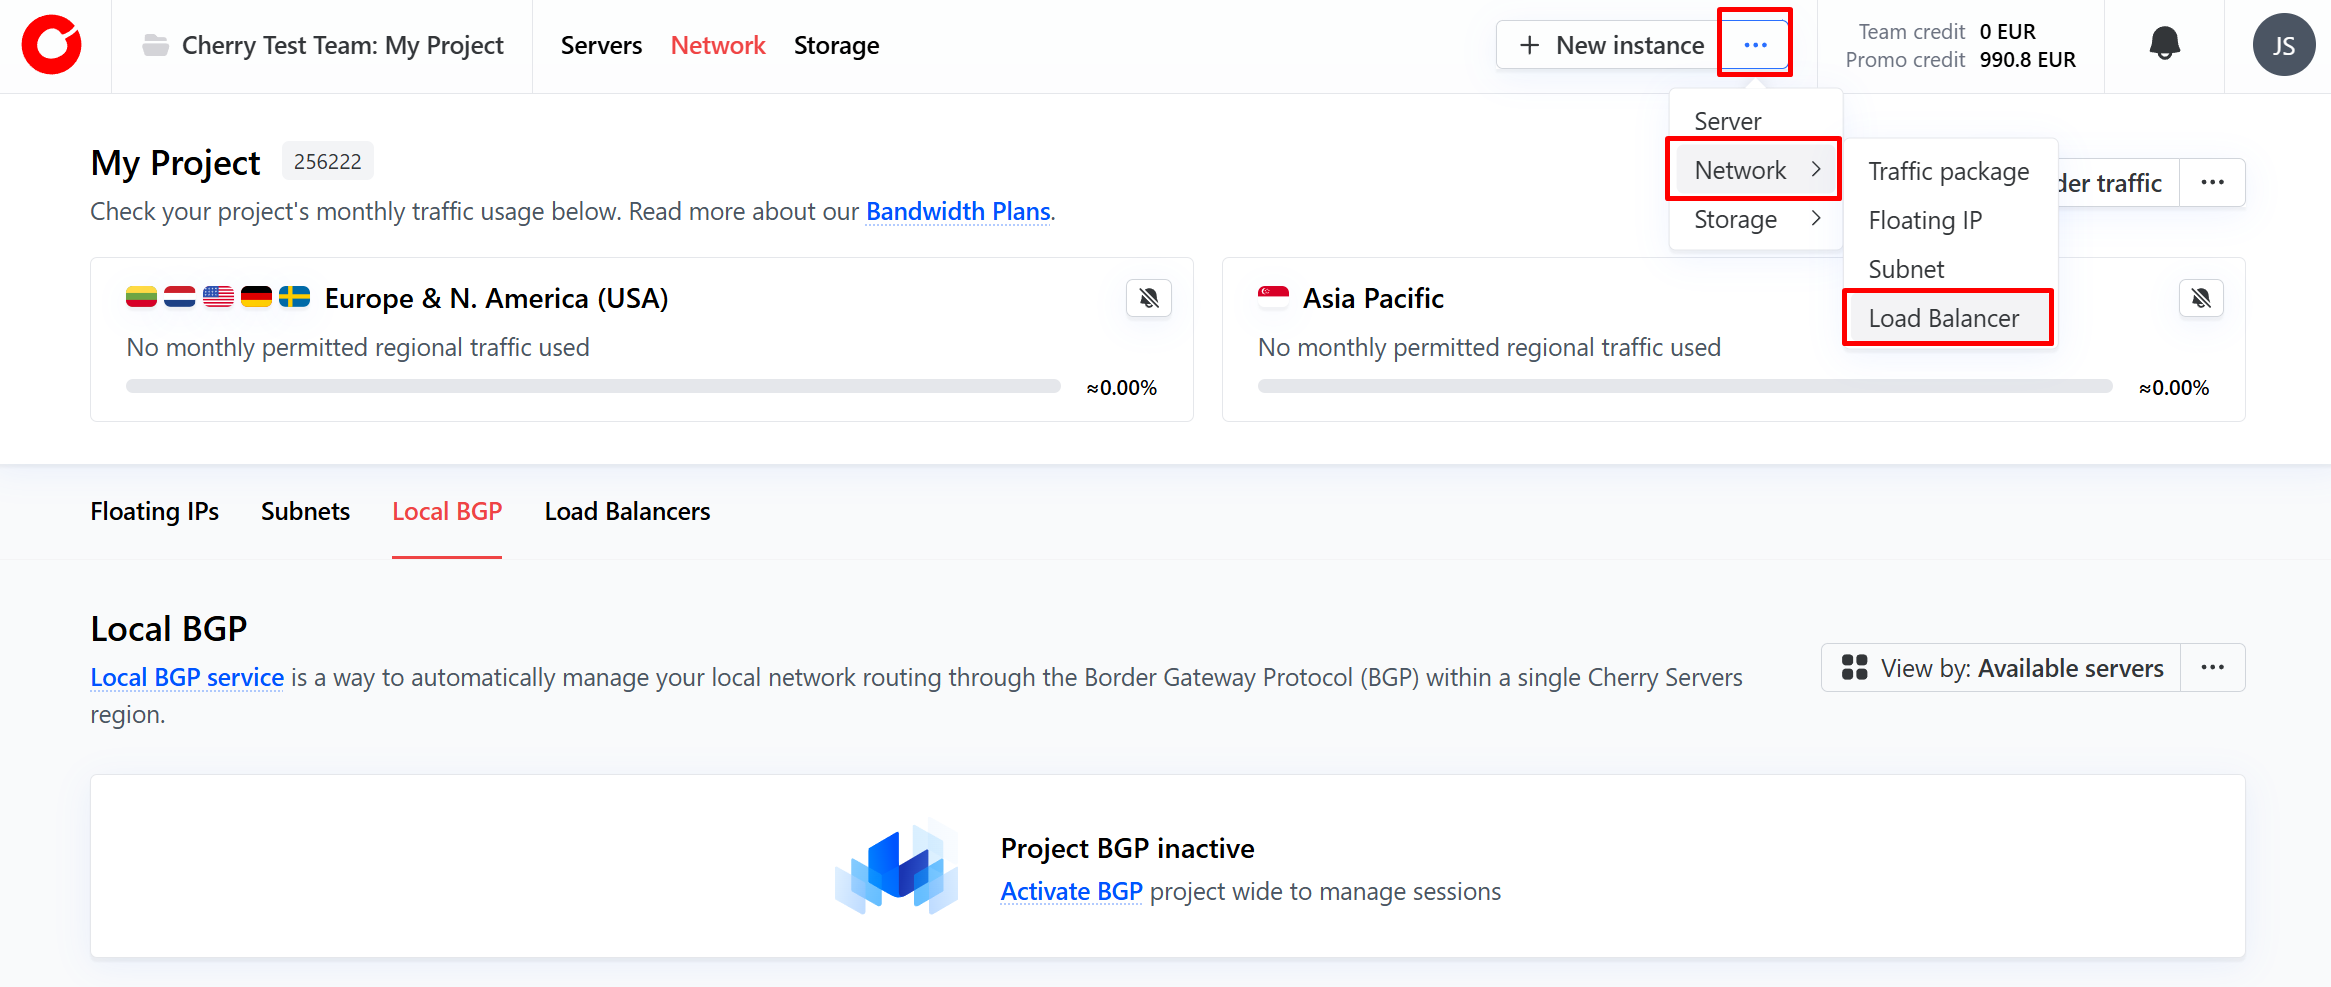
On the Cherry Servers client portal home page, click the three dots next to the “New Instance” button in the top right hand corner, click “Network” from the dropdown menu and select “Load Balancer”.

-
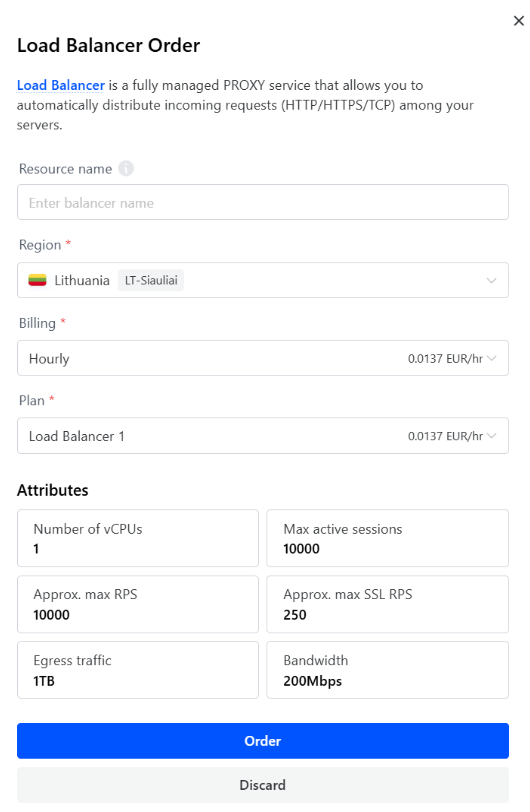
In the pop-up window that appears, name your load balancer, select the region you would like to deploy it to, indicate your billing preference, and choose which load balancer survive you wish to utilize. Once done, simply click “Order”.

-
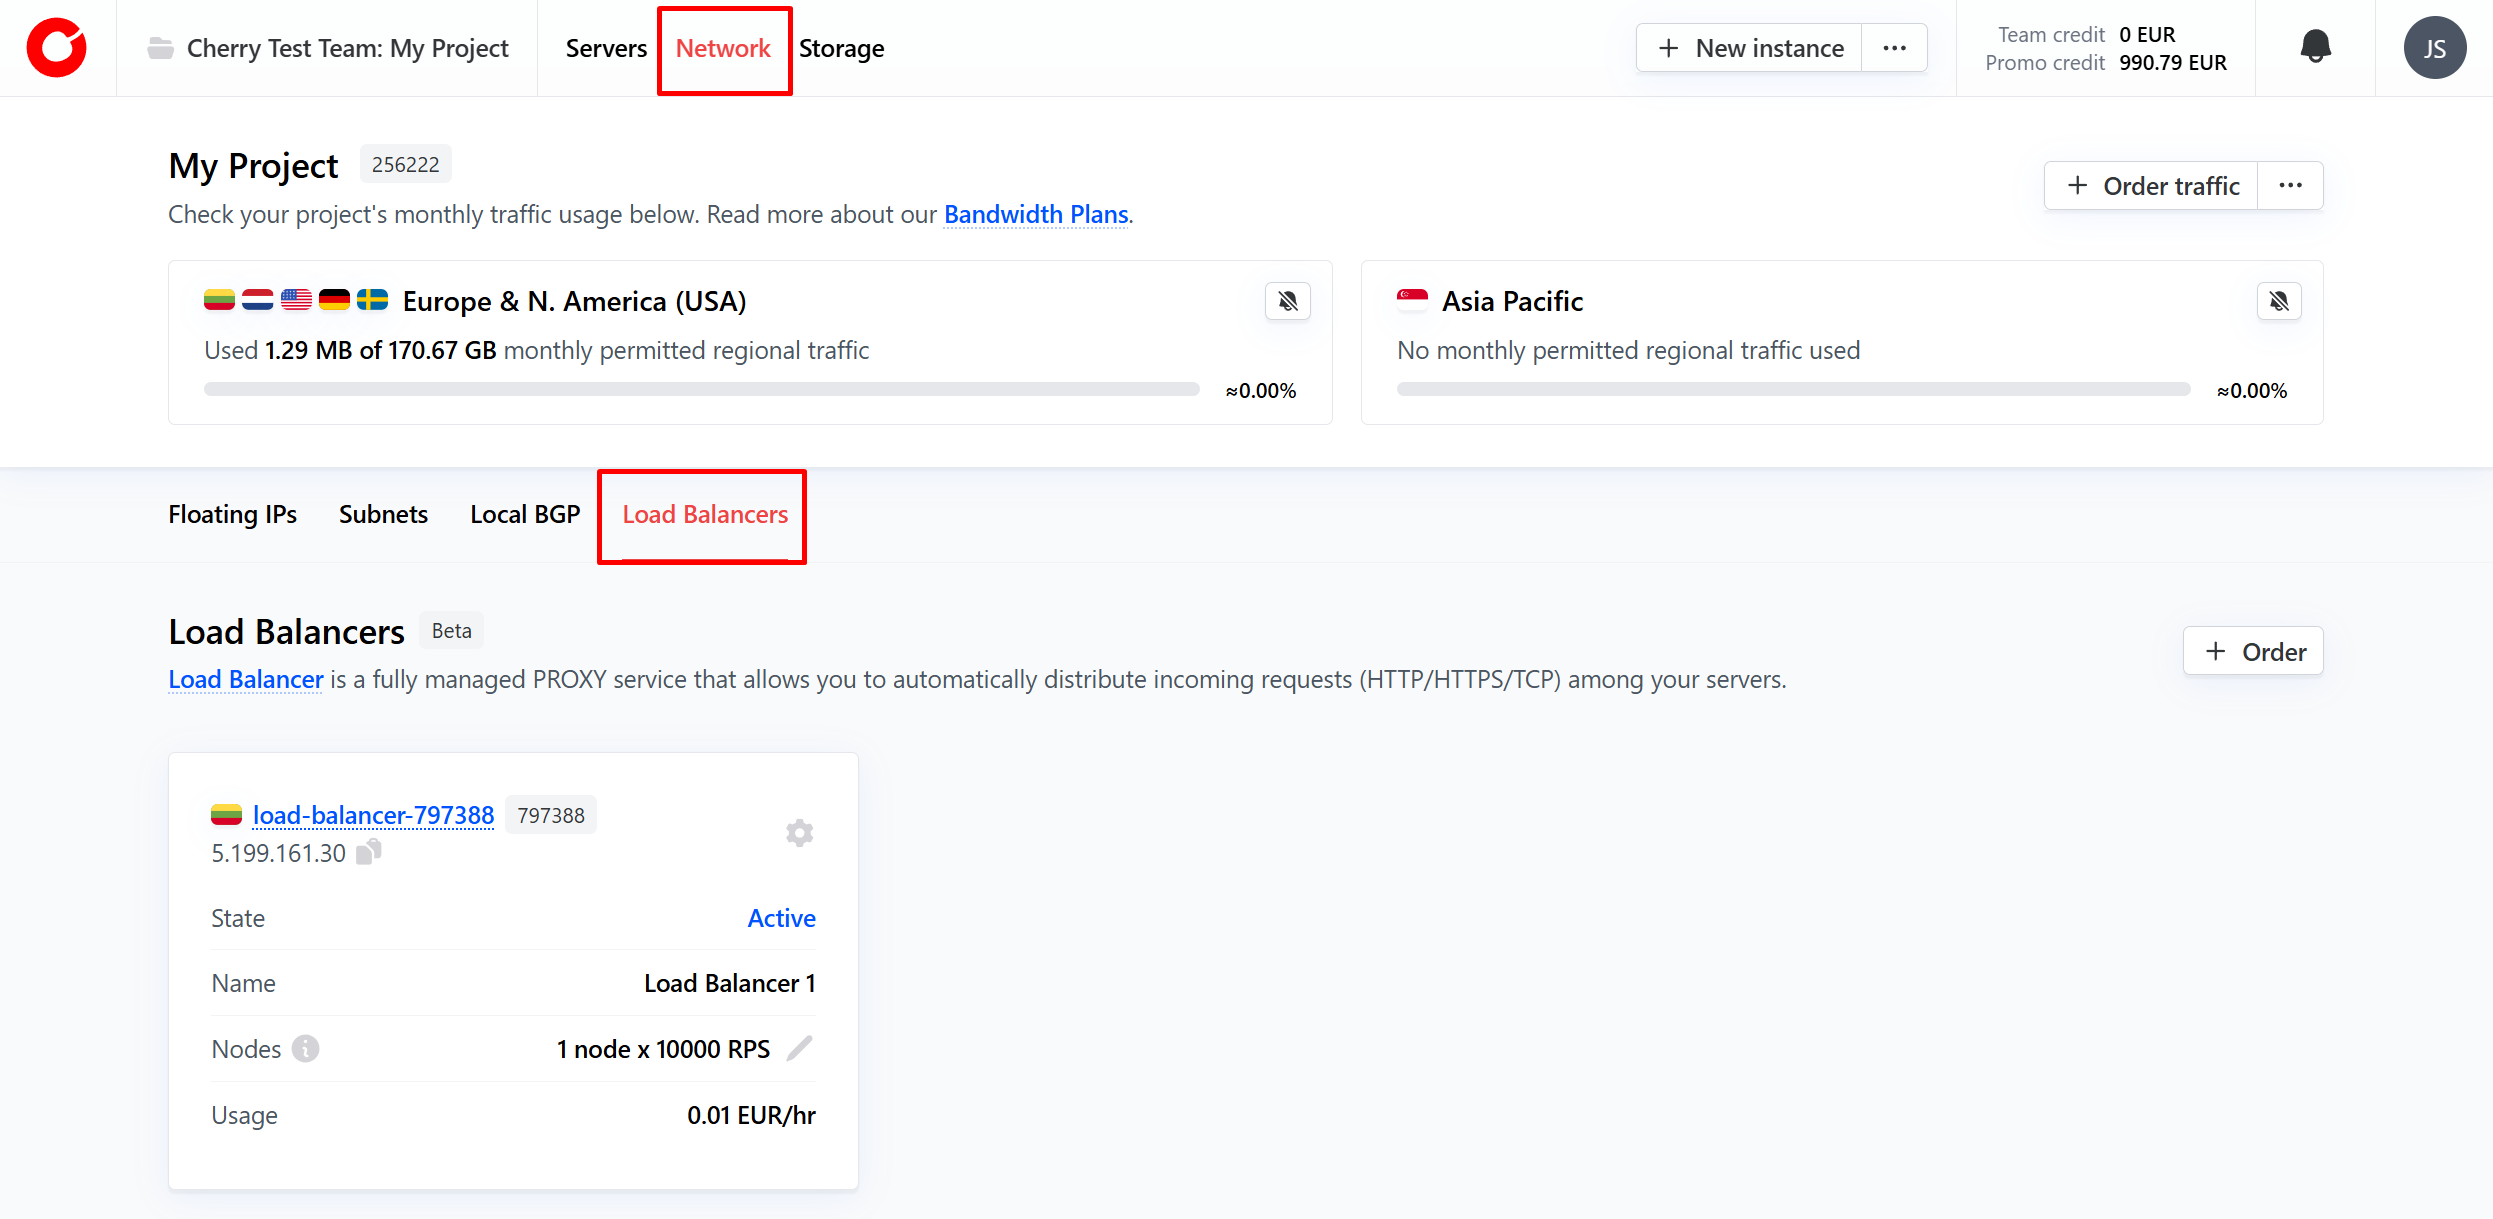
Alternatively, to order, you may navigate to the “Network” section of the client portal at the top of the page and select the “Load Balancer” tab. Click “Order” in the top right-hand corner of the tab, and fill out the form as shown above.

Your chosen load balancer plan will be deployed within approximately five minutes.
#Load Balancer Management
After ordering the service, you may manage and configure the load balancer to your liking, including which servers within the project to include in the service. You can find your load balancer overview, which shows all currently deployed load balancers, by navigating to the network section of the client portal, and selecting the “Load Balancer” tab.
Once you click the load balancer you would like to manage, you may configure the service to meet your needs. Below is an explanation of each section of the load balancer management overview.
#Settings
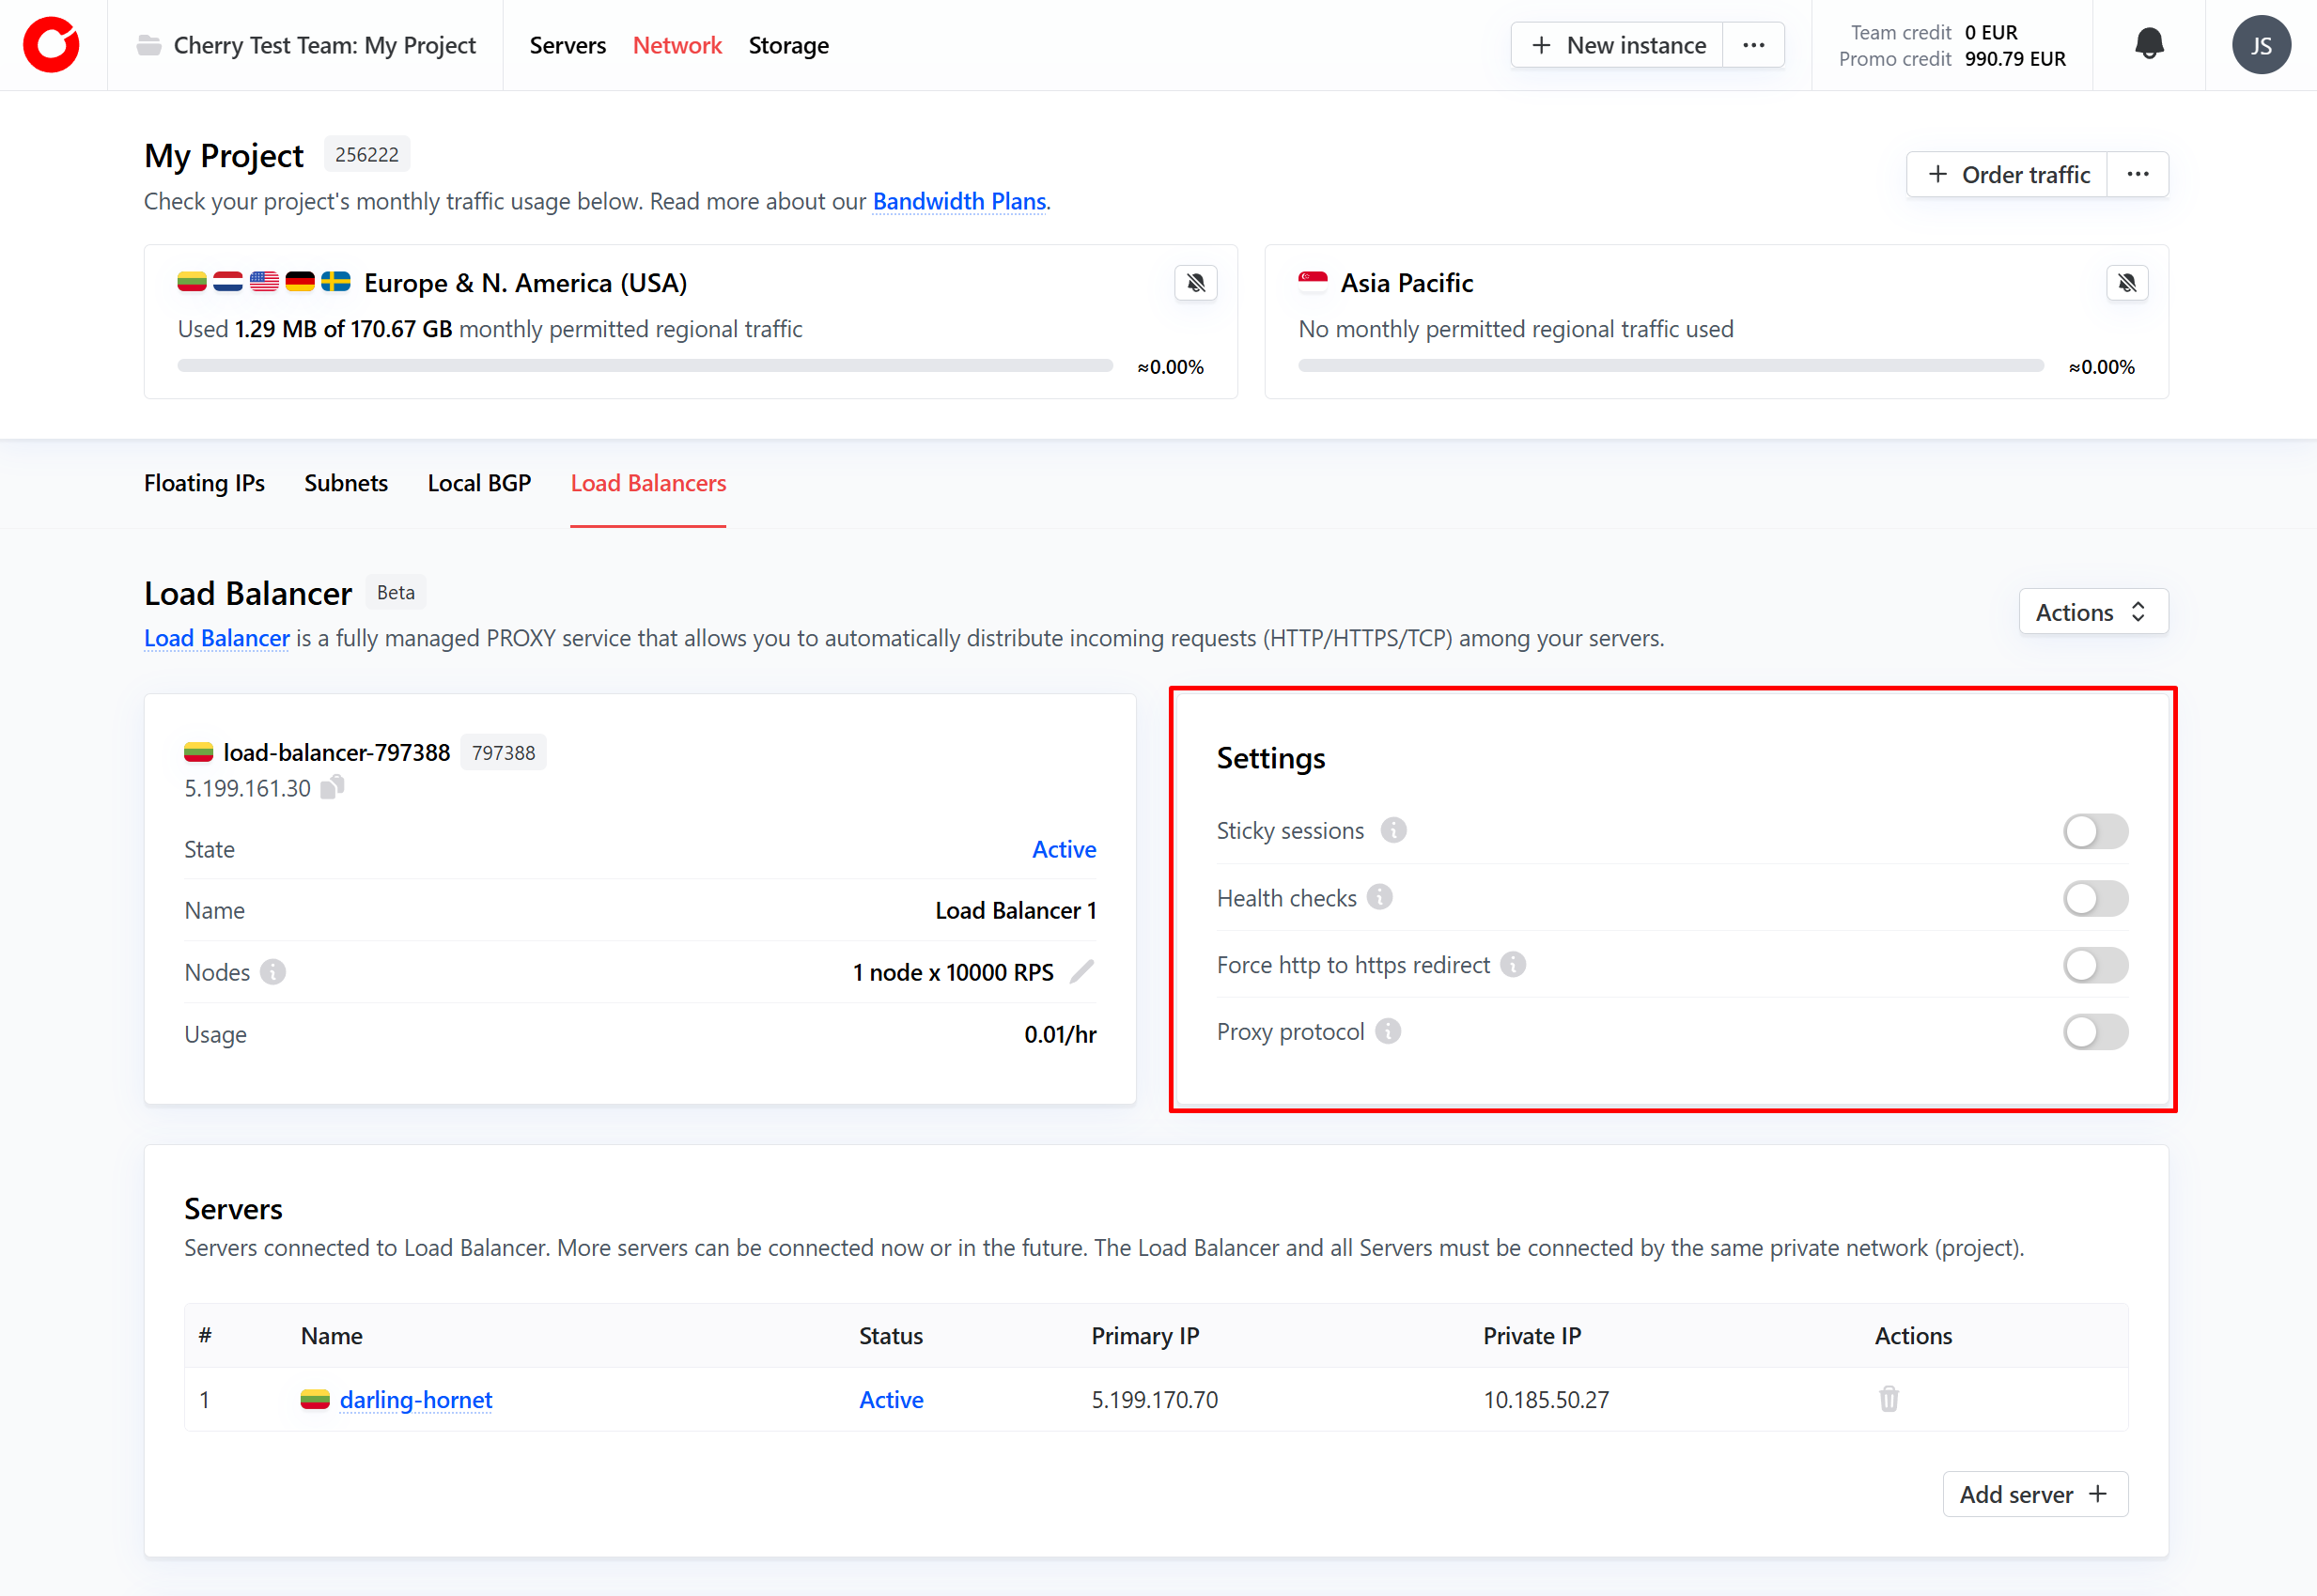
In the settings box on the right side of the management overview, you may toggle a variety of options to apply certain restrictions and requirements to incoming traffic distribution. These are:
- Sticky sessions - when active, the load balancer will use a cookie to route subsequent requests from the same client to the same server;
- Health checks - when active, only requests that pass health checks will be forwarded to servers;
- Force http to https redirect - when active, causes all http traffic to be redirected to https via a 307 redirect;
- Proxy protocol - when active, preserves a client’s IP address when it passes through a proxy.
#Forwarding
The “Forwarding” box enables you to set custom rules for the load balancer, server status on a per rule basis, add and manage SSL certificates, and view an overview of the load balancer’s performance.
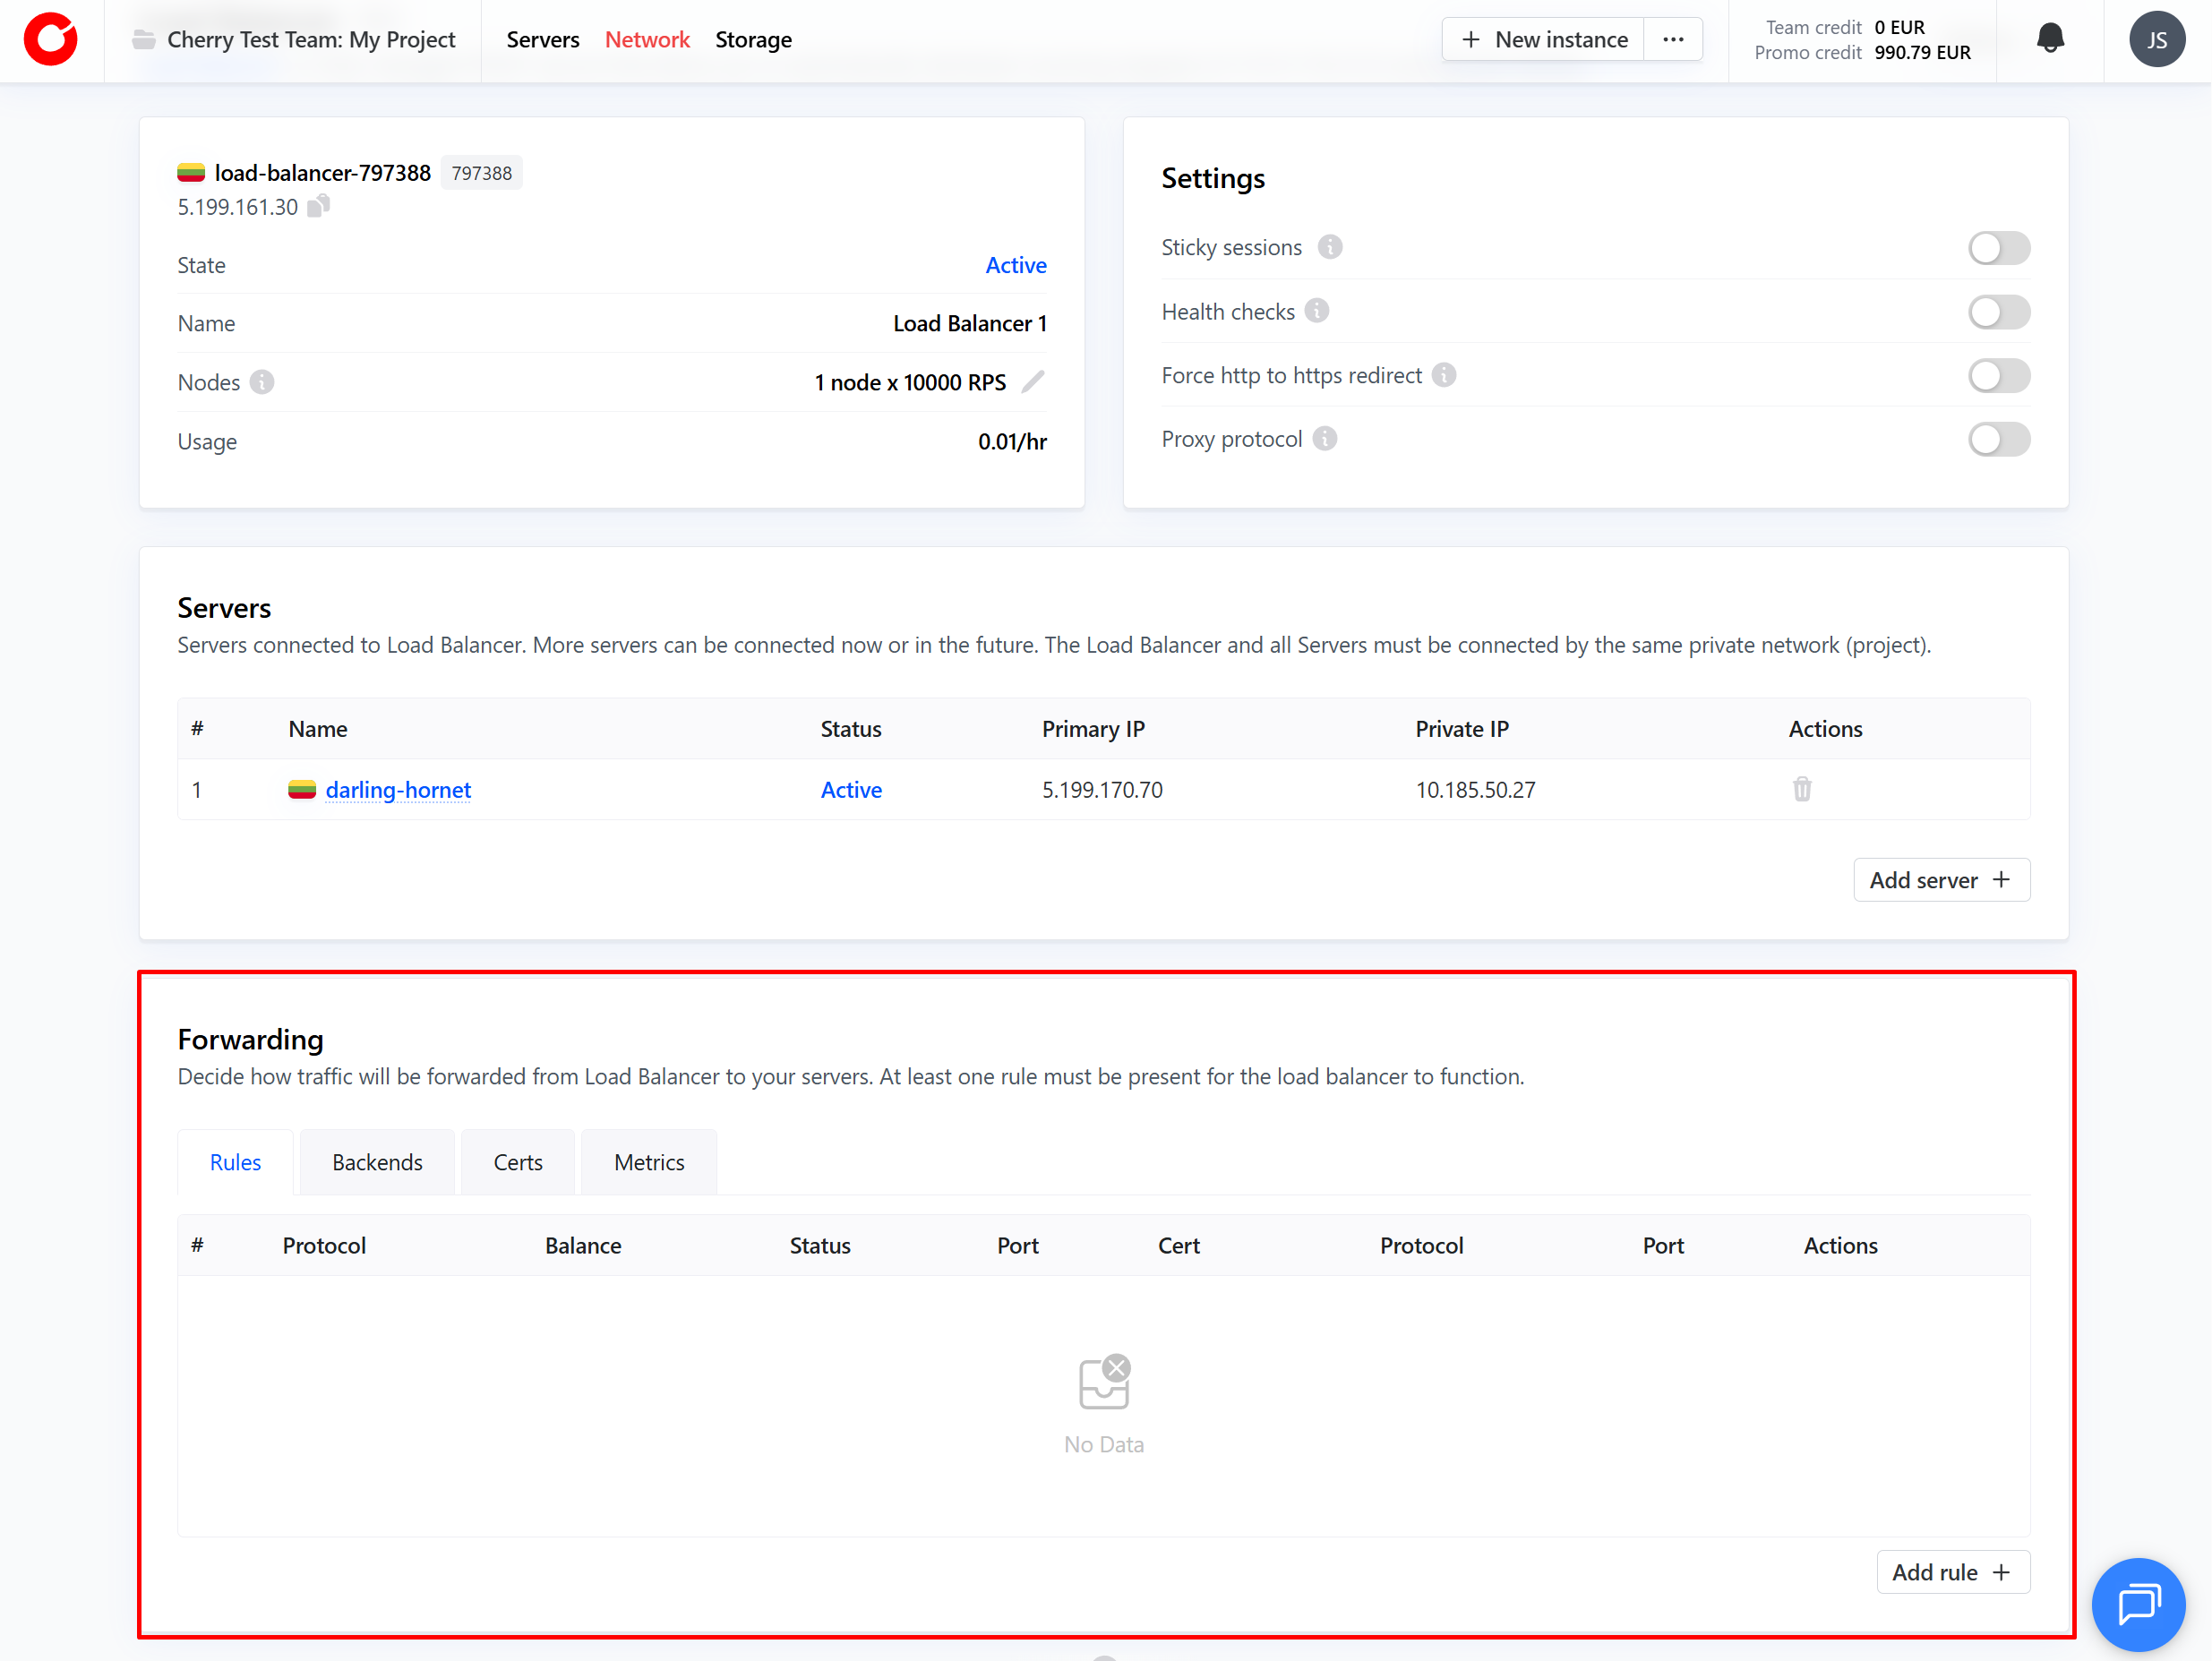
Each tab is explained in greater detail below.
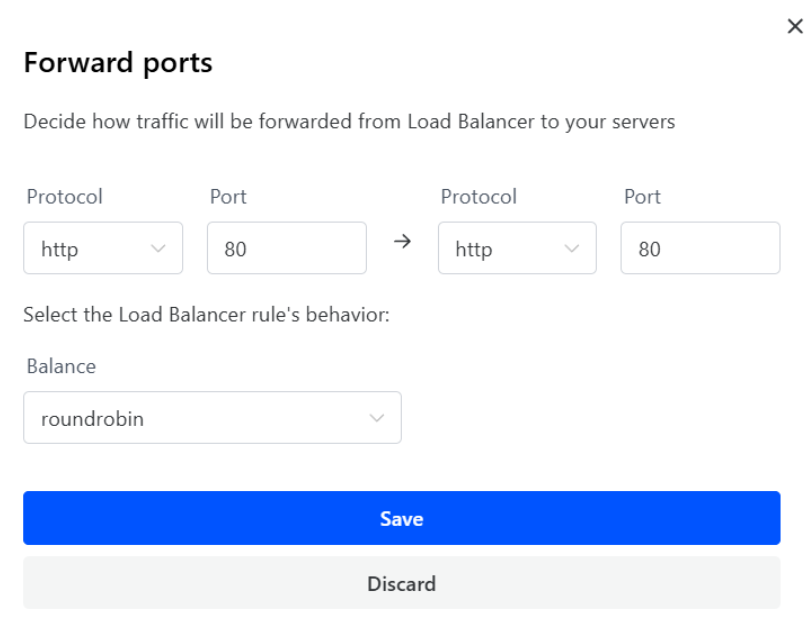
Rules for Distributing Traffic with a Load Balancer
In the “Rules” tab, you may add rules to specify the conditions under which distribution takes place. You may specify:
- The port and protocol to which requests should arrive;
- The port and protocol through which the server will server traffic;
- Supported protocols are http, http2, https (requires valid SSL certificate), and tcp;
- The algorithm through which traffic will be distributed between servers;
- Round robin (roundrobin) - forwards traffic requests across each server according to their assigned weight—the higher the weight, the more requests the server is sent;
- Static round robin (static-rr) - forwards traffic requests across each server in sequential order;
- Least connection (leastconn) - forwards traffic requests to the server that currently has the least active connections at the time the request is made;
- Source - preserves the incoming request’s original IP when forwarding it to the server.
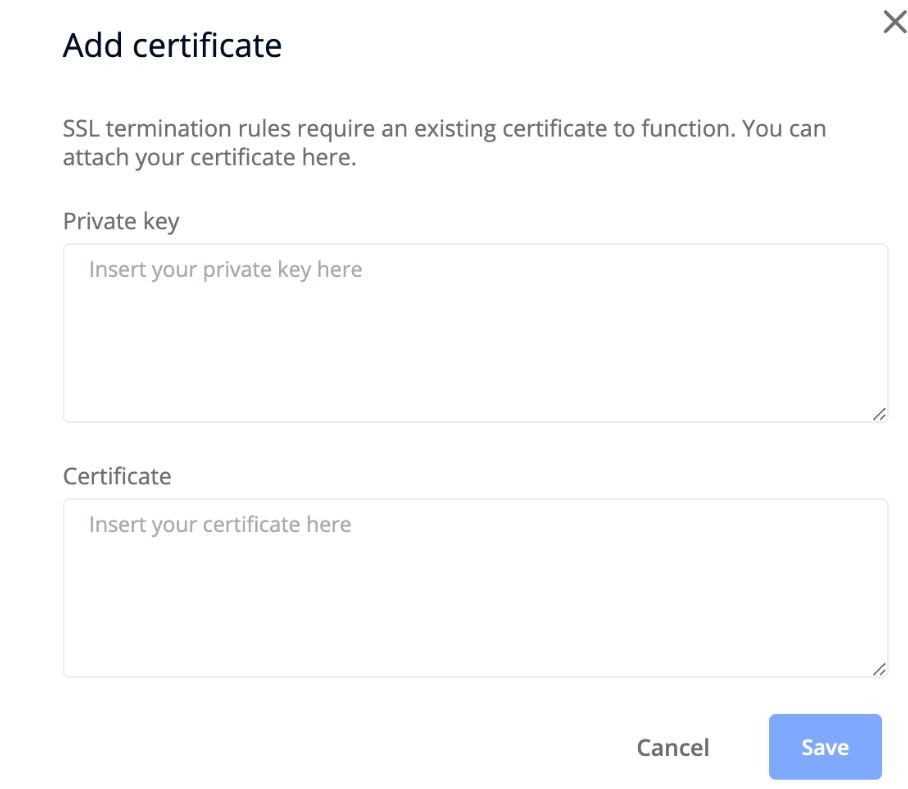
SSL Certificate
In order to use https protocol rules, you must first add an SSL certificate to the load balancer.
You can add a new SSL certificate by selecting the “Certs” tab of the forwarding box, and clicking the “Add certificate” button at the bottom of the box.
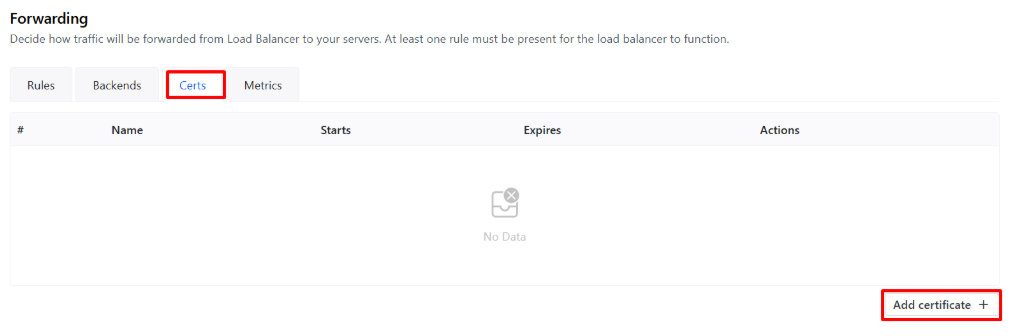
You will be required to specify the certificate’s private and public keys.
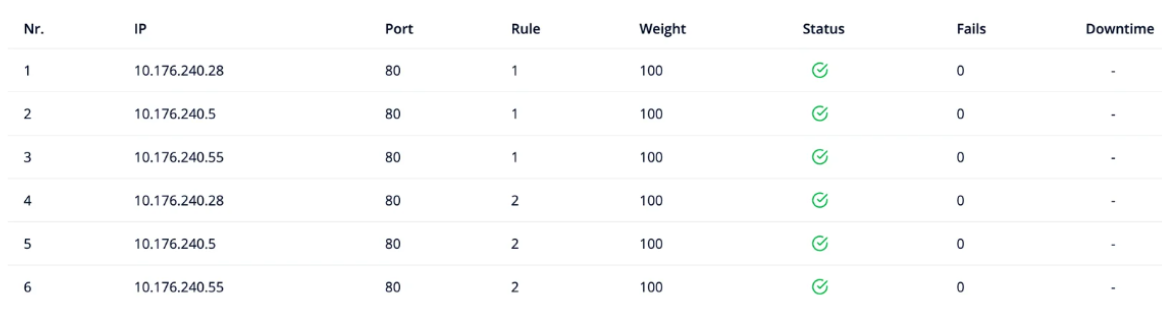
Backends
In the “Backends” tab, clients can view the server status for each specific rule. The information you can see here is:
- The private IP address of the server, through which that server is accessible to the load balancer;
- The port with which the client's server or servers must be configured;
- Rule number;
- Server weight;
- Current server status, which reflects whether it can receive traffic, according to the parameters of the rule;
- How many times a specific server was unavailable;
- How long the server was unavailable.
Metrics
The “Metrics” tab provides an overview of the load balancer’s performance, such as which resources, and how many of each, are being used in real-time.

You may adjust the displayed data by changing the timeframe, and how often data is refreshed using the dropdown menus in the top right-hand corner of the tab.
#Server Management
Once load balancer forwarding rules have been established, a complete list of servers and their current status will become visible in the “Servers” box. Here, you can view the server’s basic routing information, and whether the load balancer is ready to serve incoming traffic.
If the load balancer is properly set up, the status for each server will be listed as “Active”. If for any reason the status is not active, you may view the issue by hovering over the status.

You may add any servers that you would like the load balancer to apply its service to by clicking the “Add server” button at the bottom of the box, and selecting any of your eligible servers.