Terminate a Service
Whether moving to a different server plan, canceling an additional service that no longer works for you, or sadly ending your time with us, Cherry Servers offers a simple and convenient way to terminate your services in a hassle-free way with no strings attached.
Please note that if you terminate a server, tertiary services, such as IP addresses, load balancers, and backup storage, will be disconnected from the related server, but will continue to run and use your account balance until independently canceled. Please ensure that you have canceled all services intended to avoid incurring additional charges to your account.
#Instructions to Terminate a Server
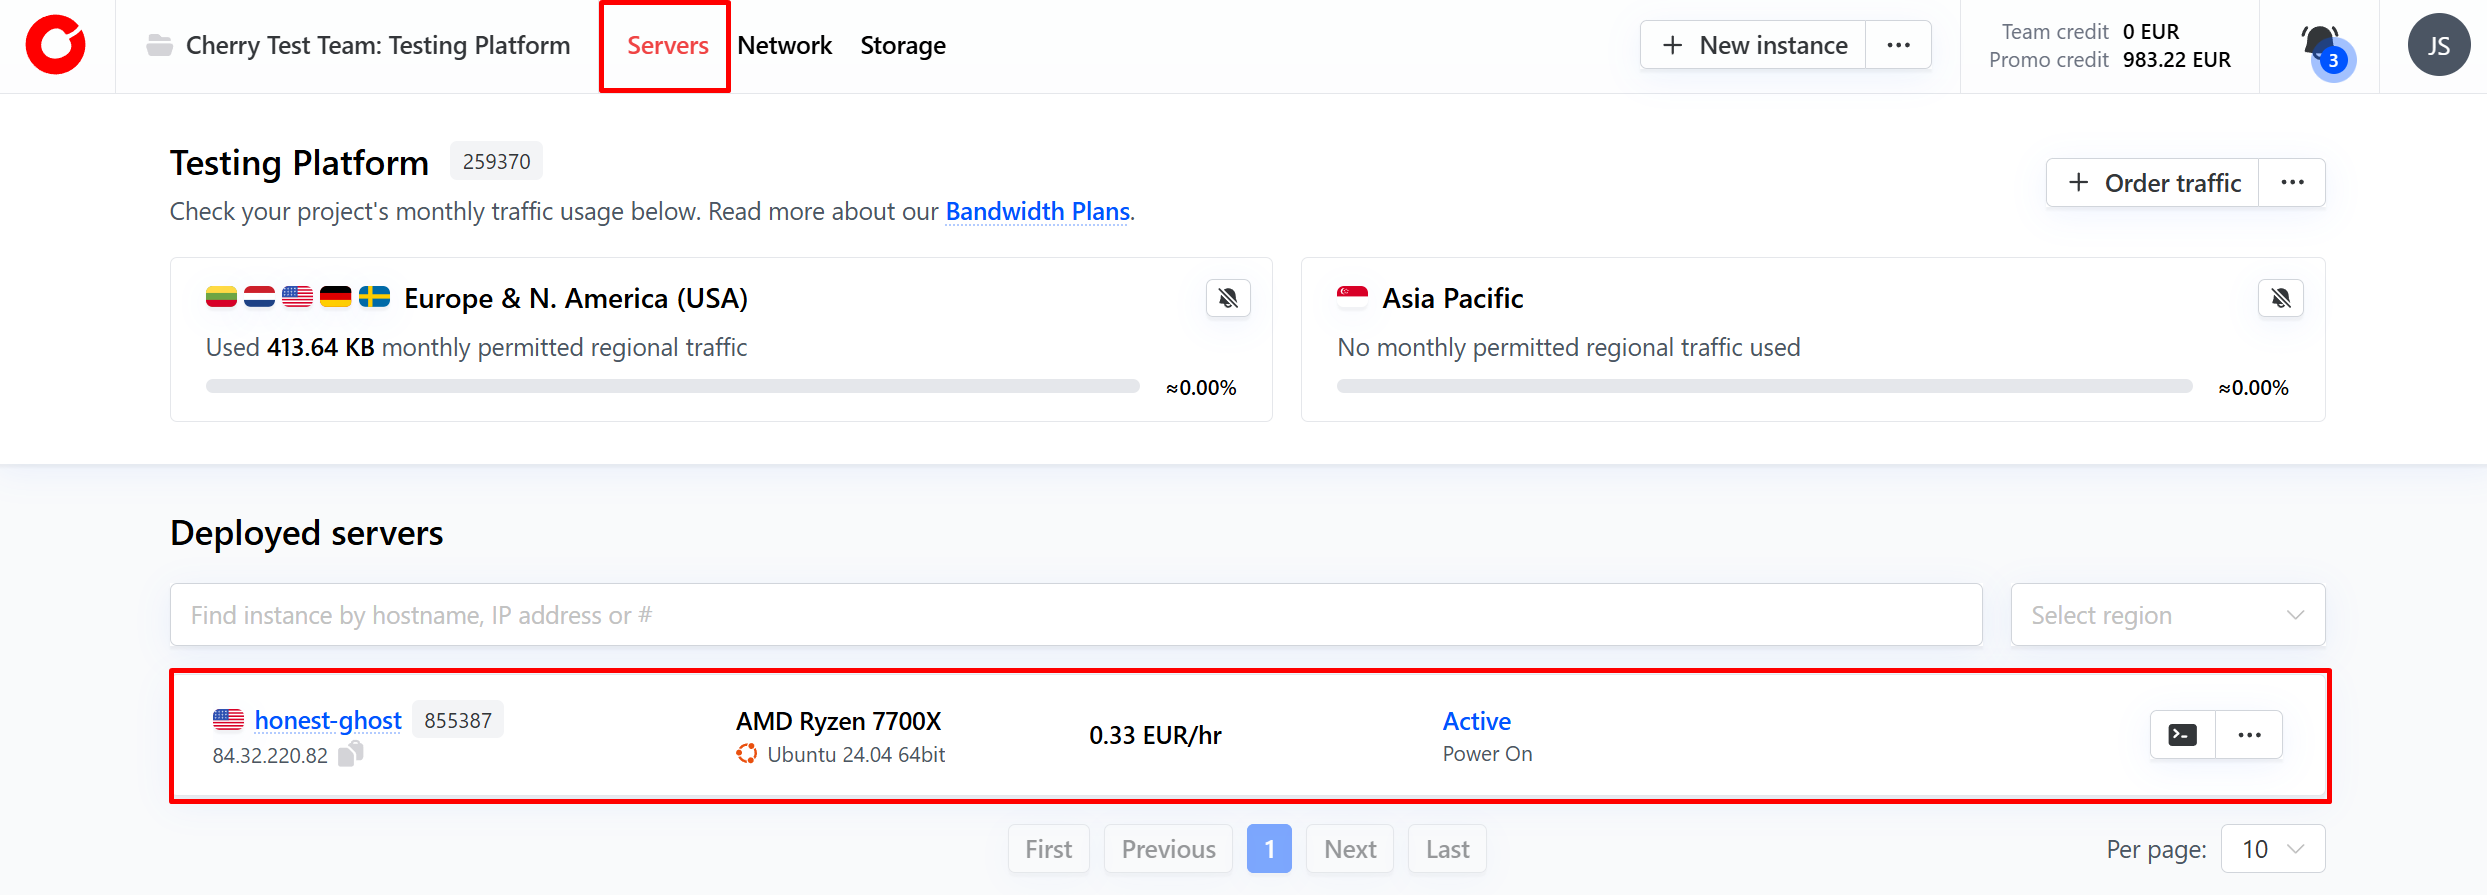
- From the client portal home page, navigate to the “Servers tab” at the top of the page and select the server you wish to terminate.

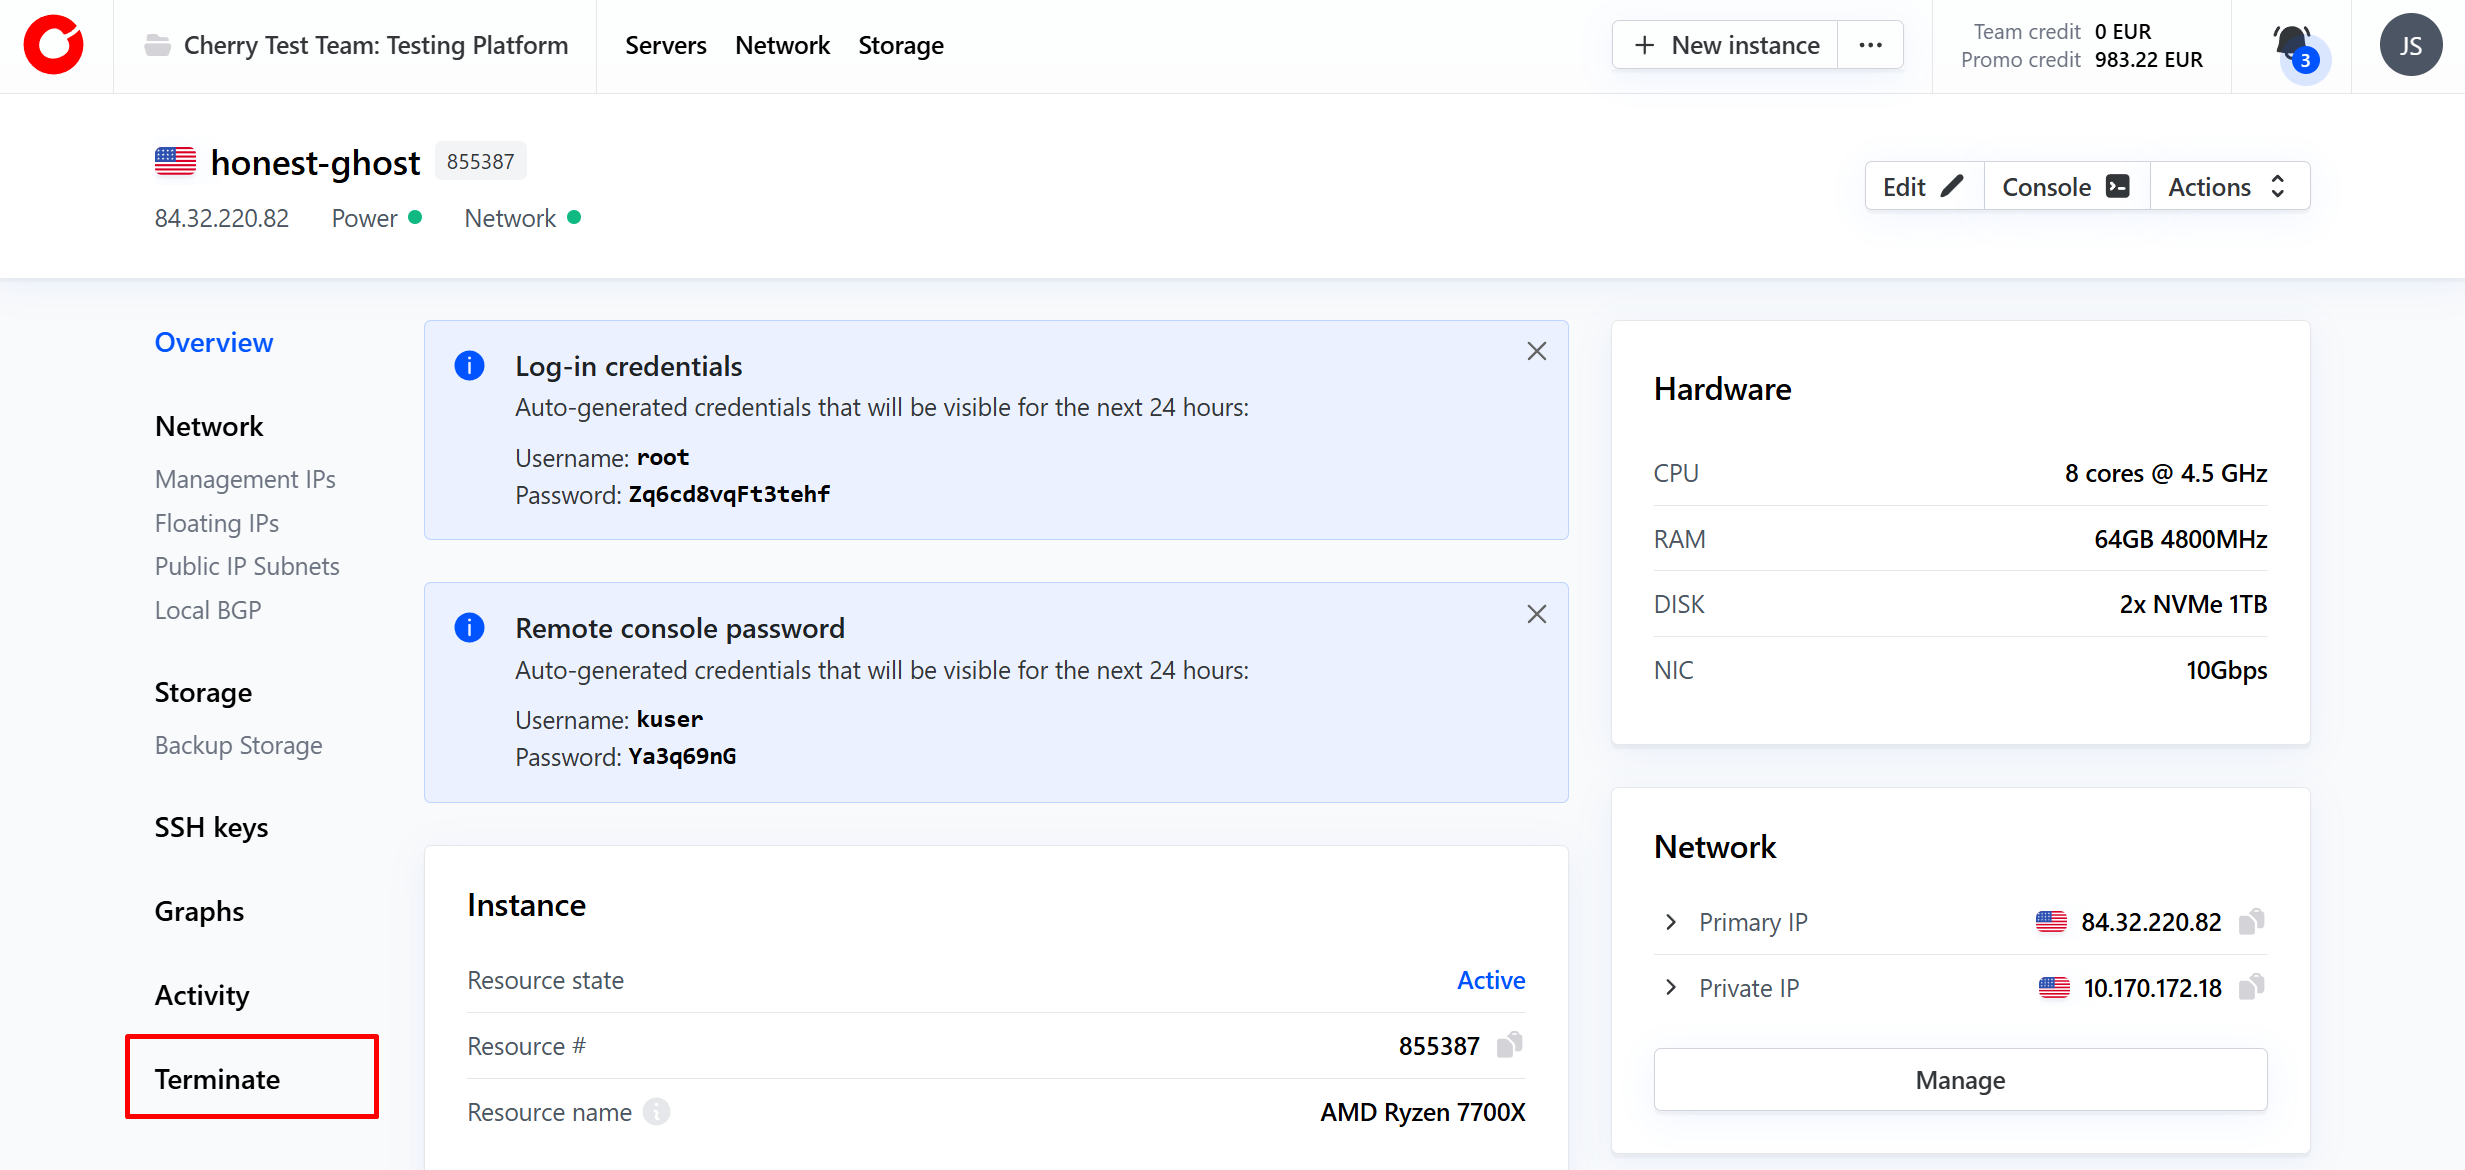
- On the server dashboard, click “Terminate” found in the menu on the left side of the page.

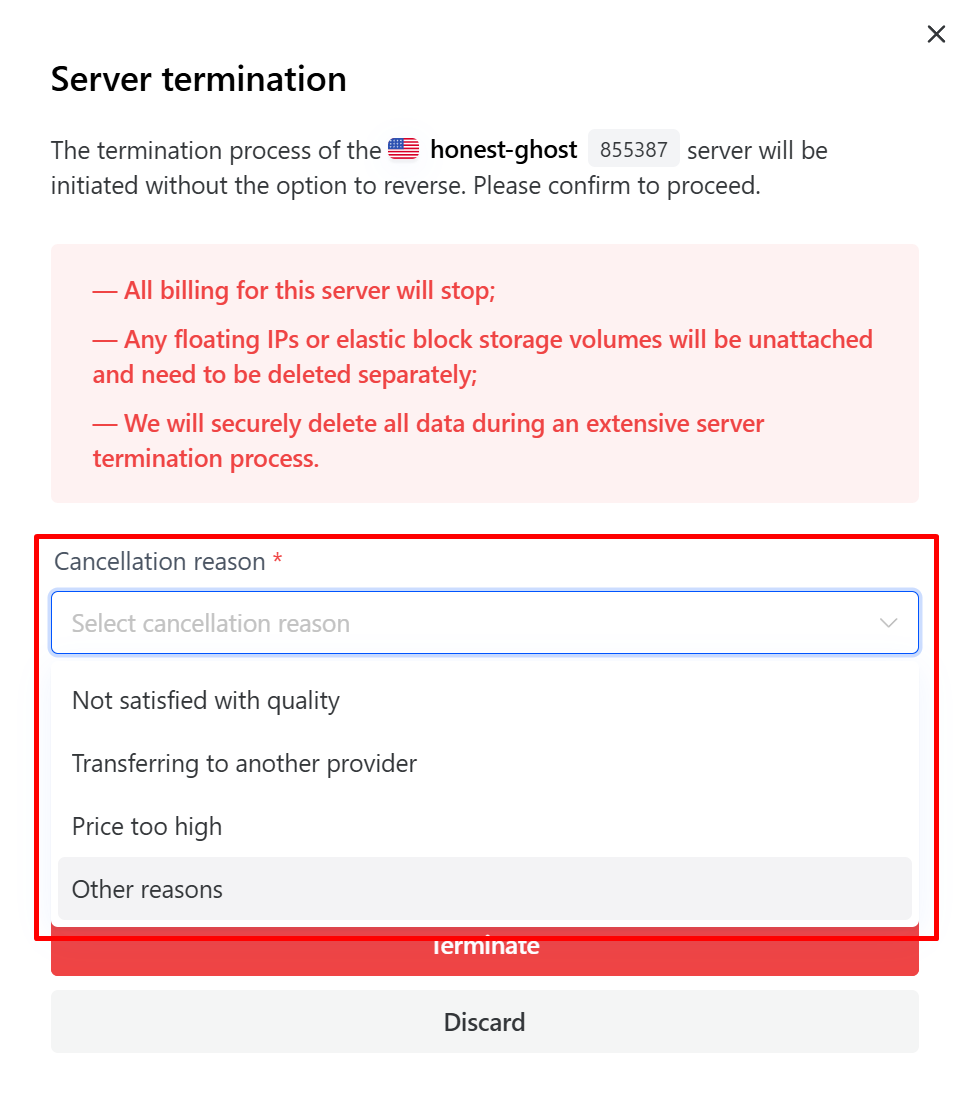
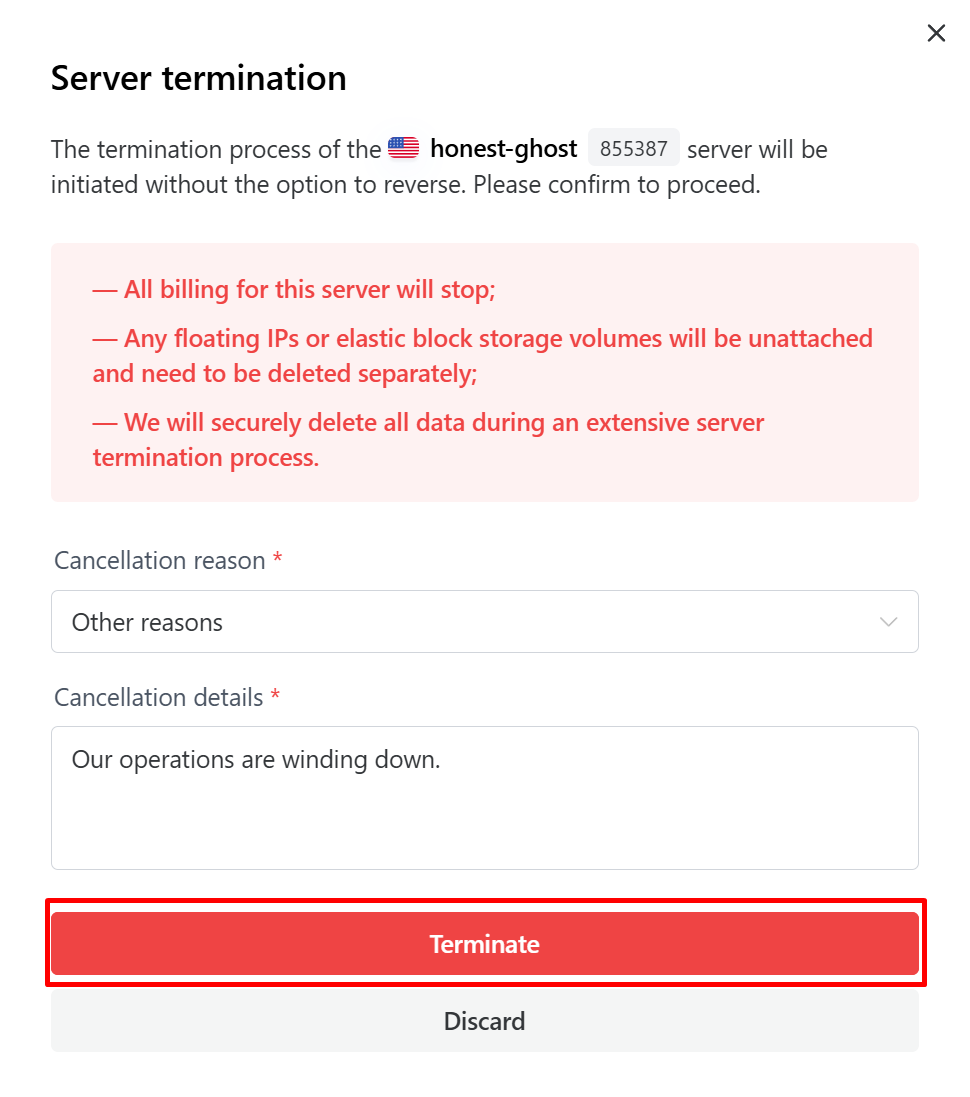
- In the pop-up window that appears, you will be required to indicate the reason for terminating the server.

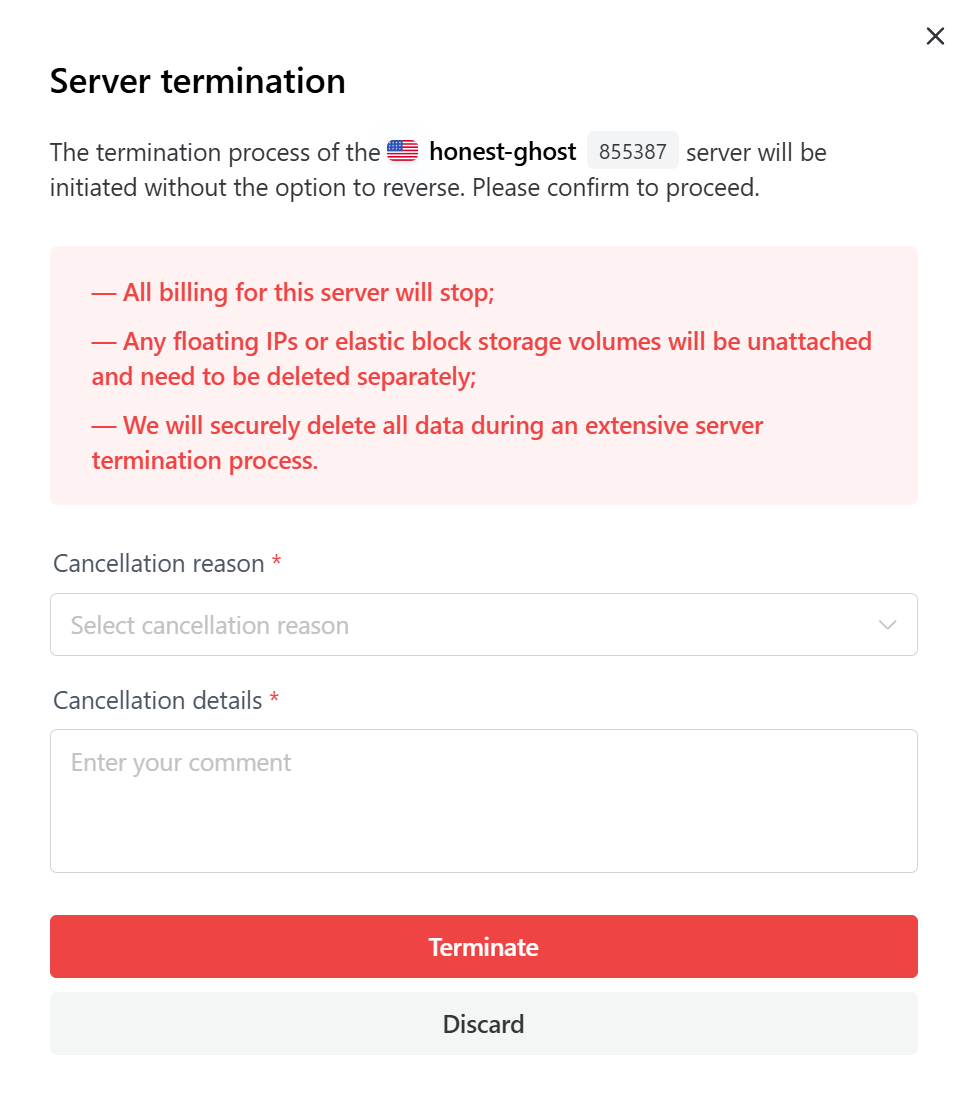
If you are ending your time with Cherry Servers, we highly encourage you to leave feedback in the textbox. This way we can ensure that we improve our services for you and other users in the future to meet your server infrastructure needs.
 4. Click “Terminate” to finalize the process.
 Your server will immediately begin winding down and no additional charges will be incurred for the hardware.
#Instructions to Terminate Additional Services
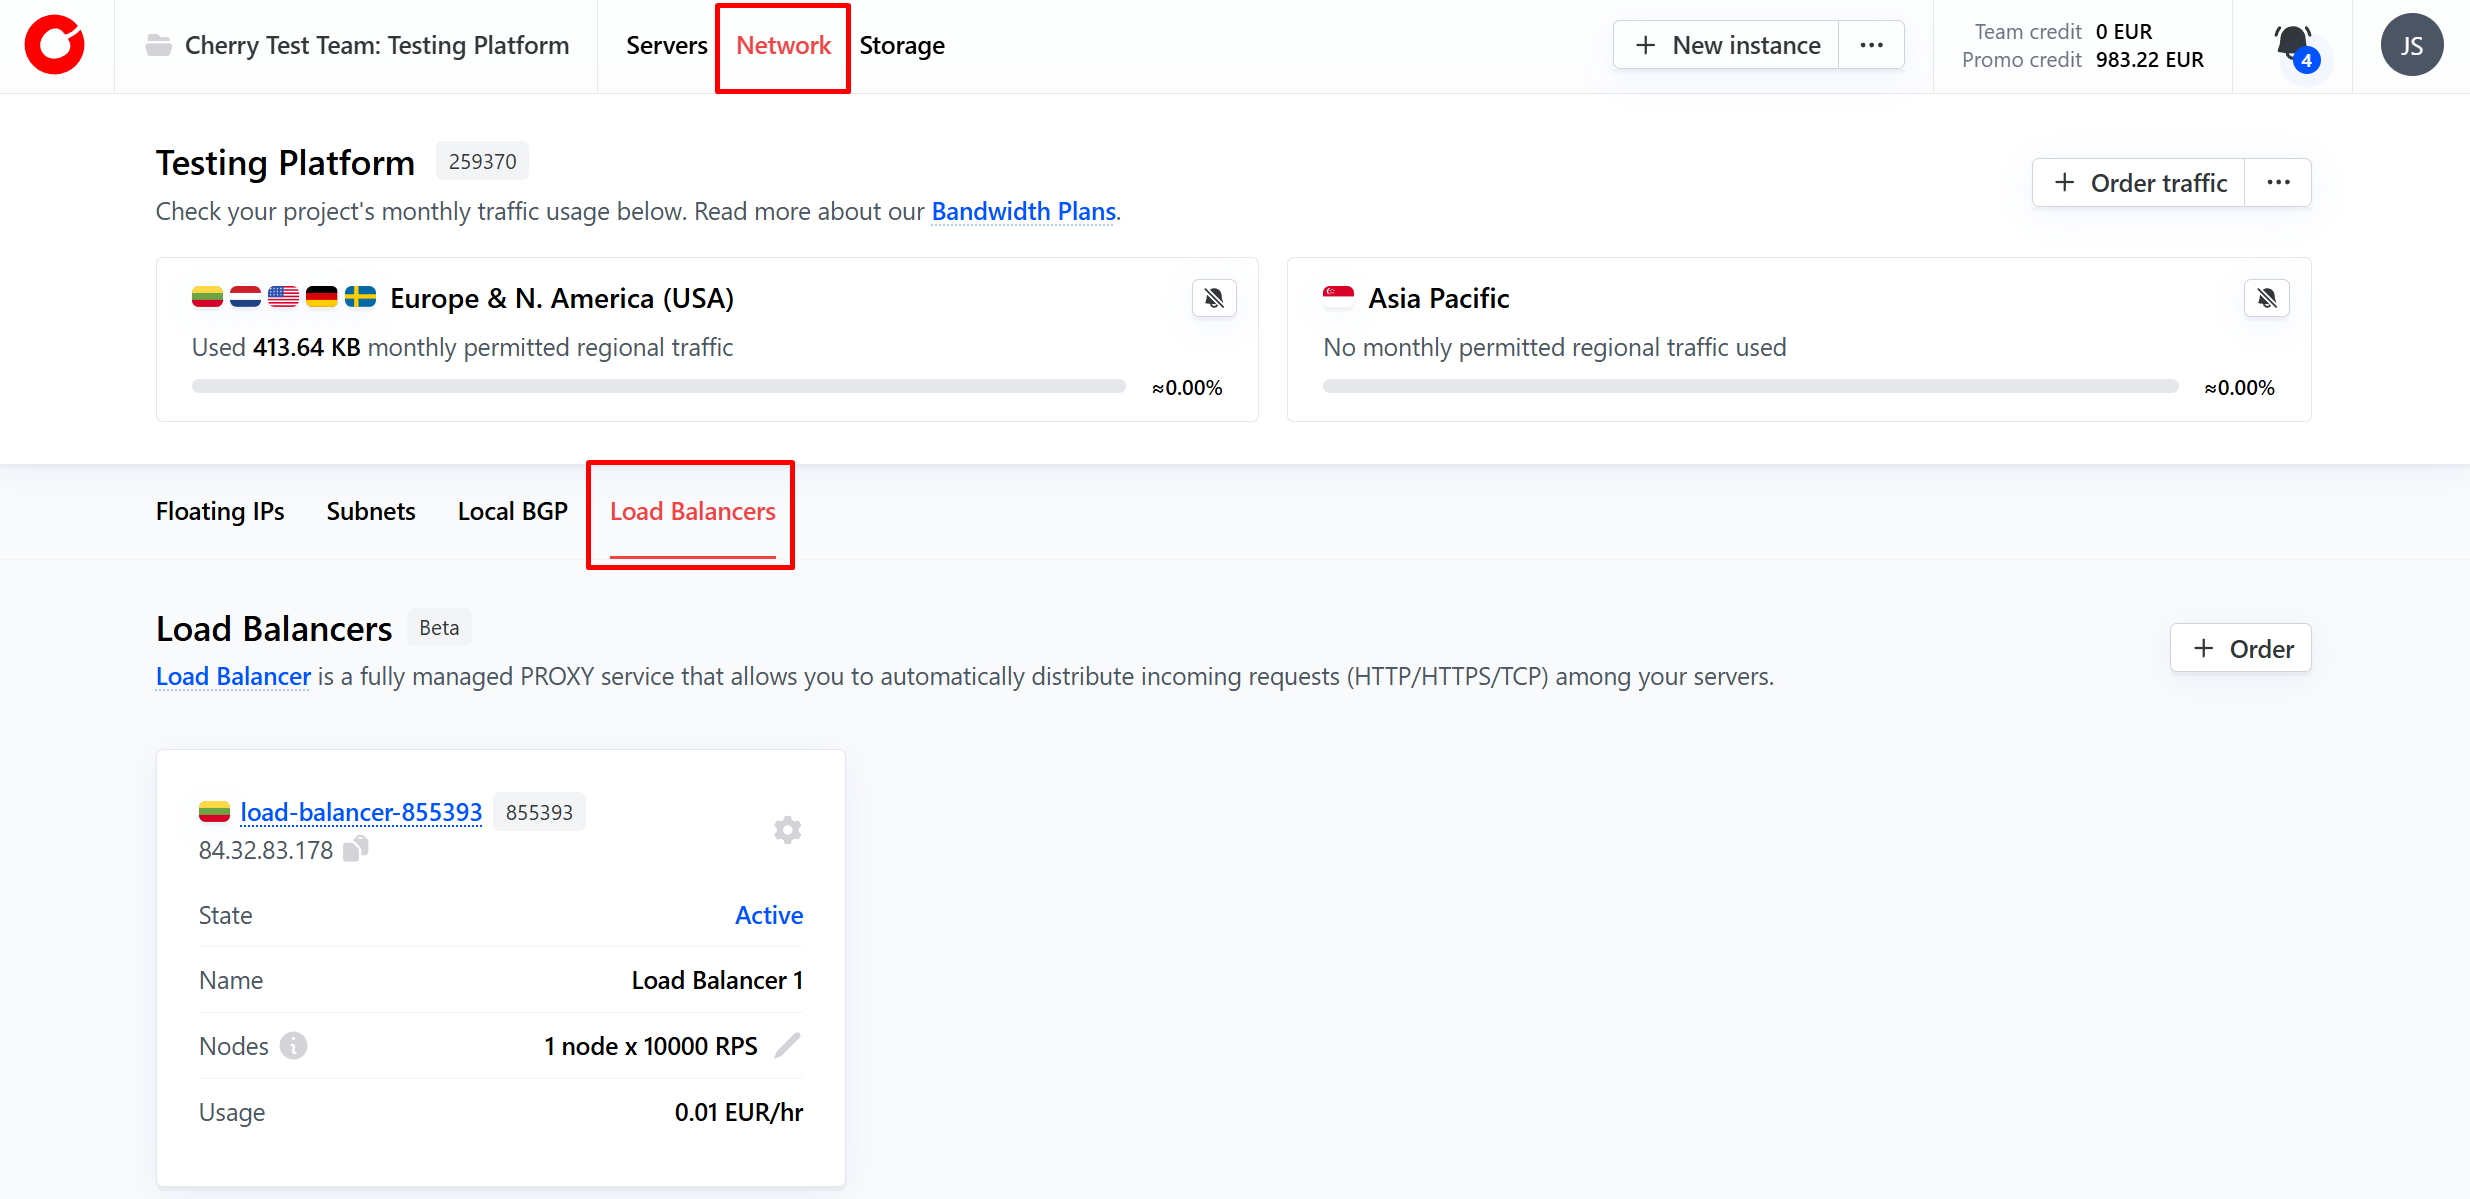
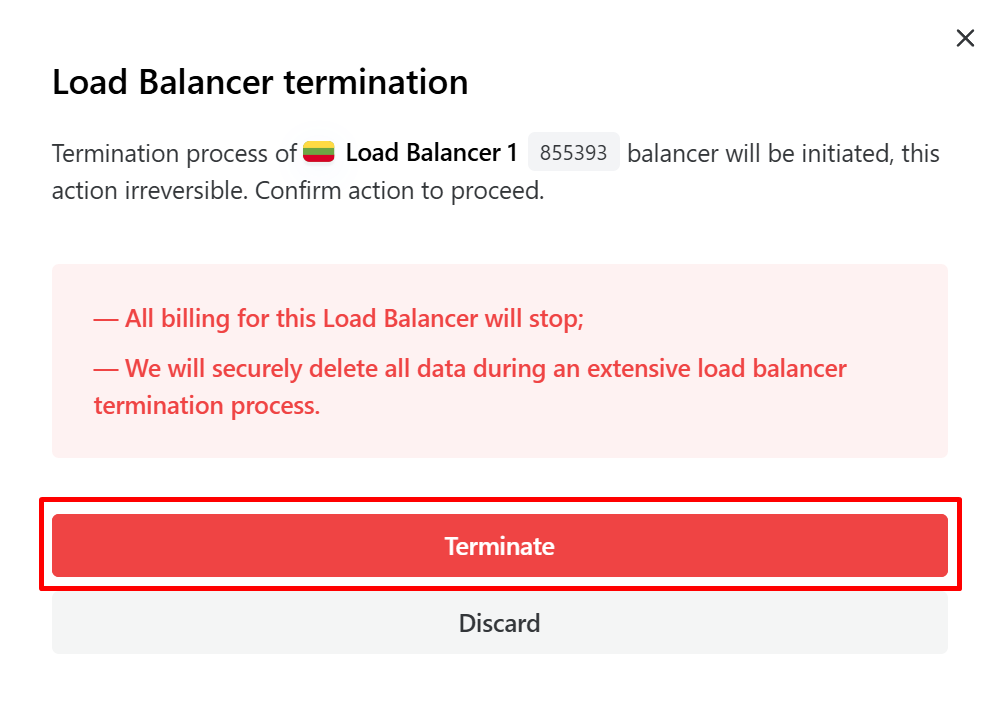
- From the client portal home page, navigate to the service category you wish to cancel, and then select the sub-category for the specific service. In this example, we will cancel a load balancer.

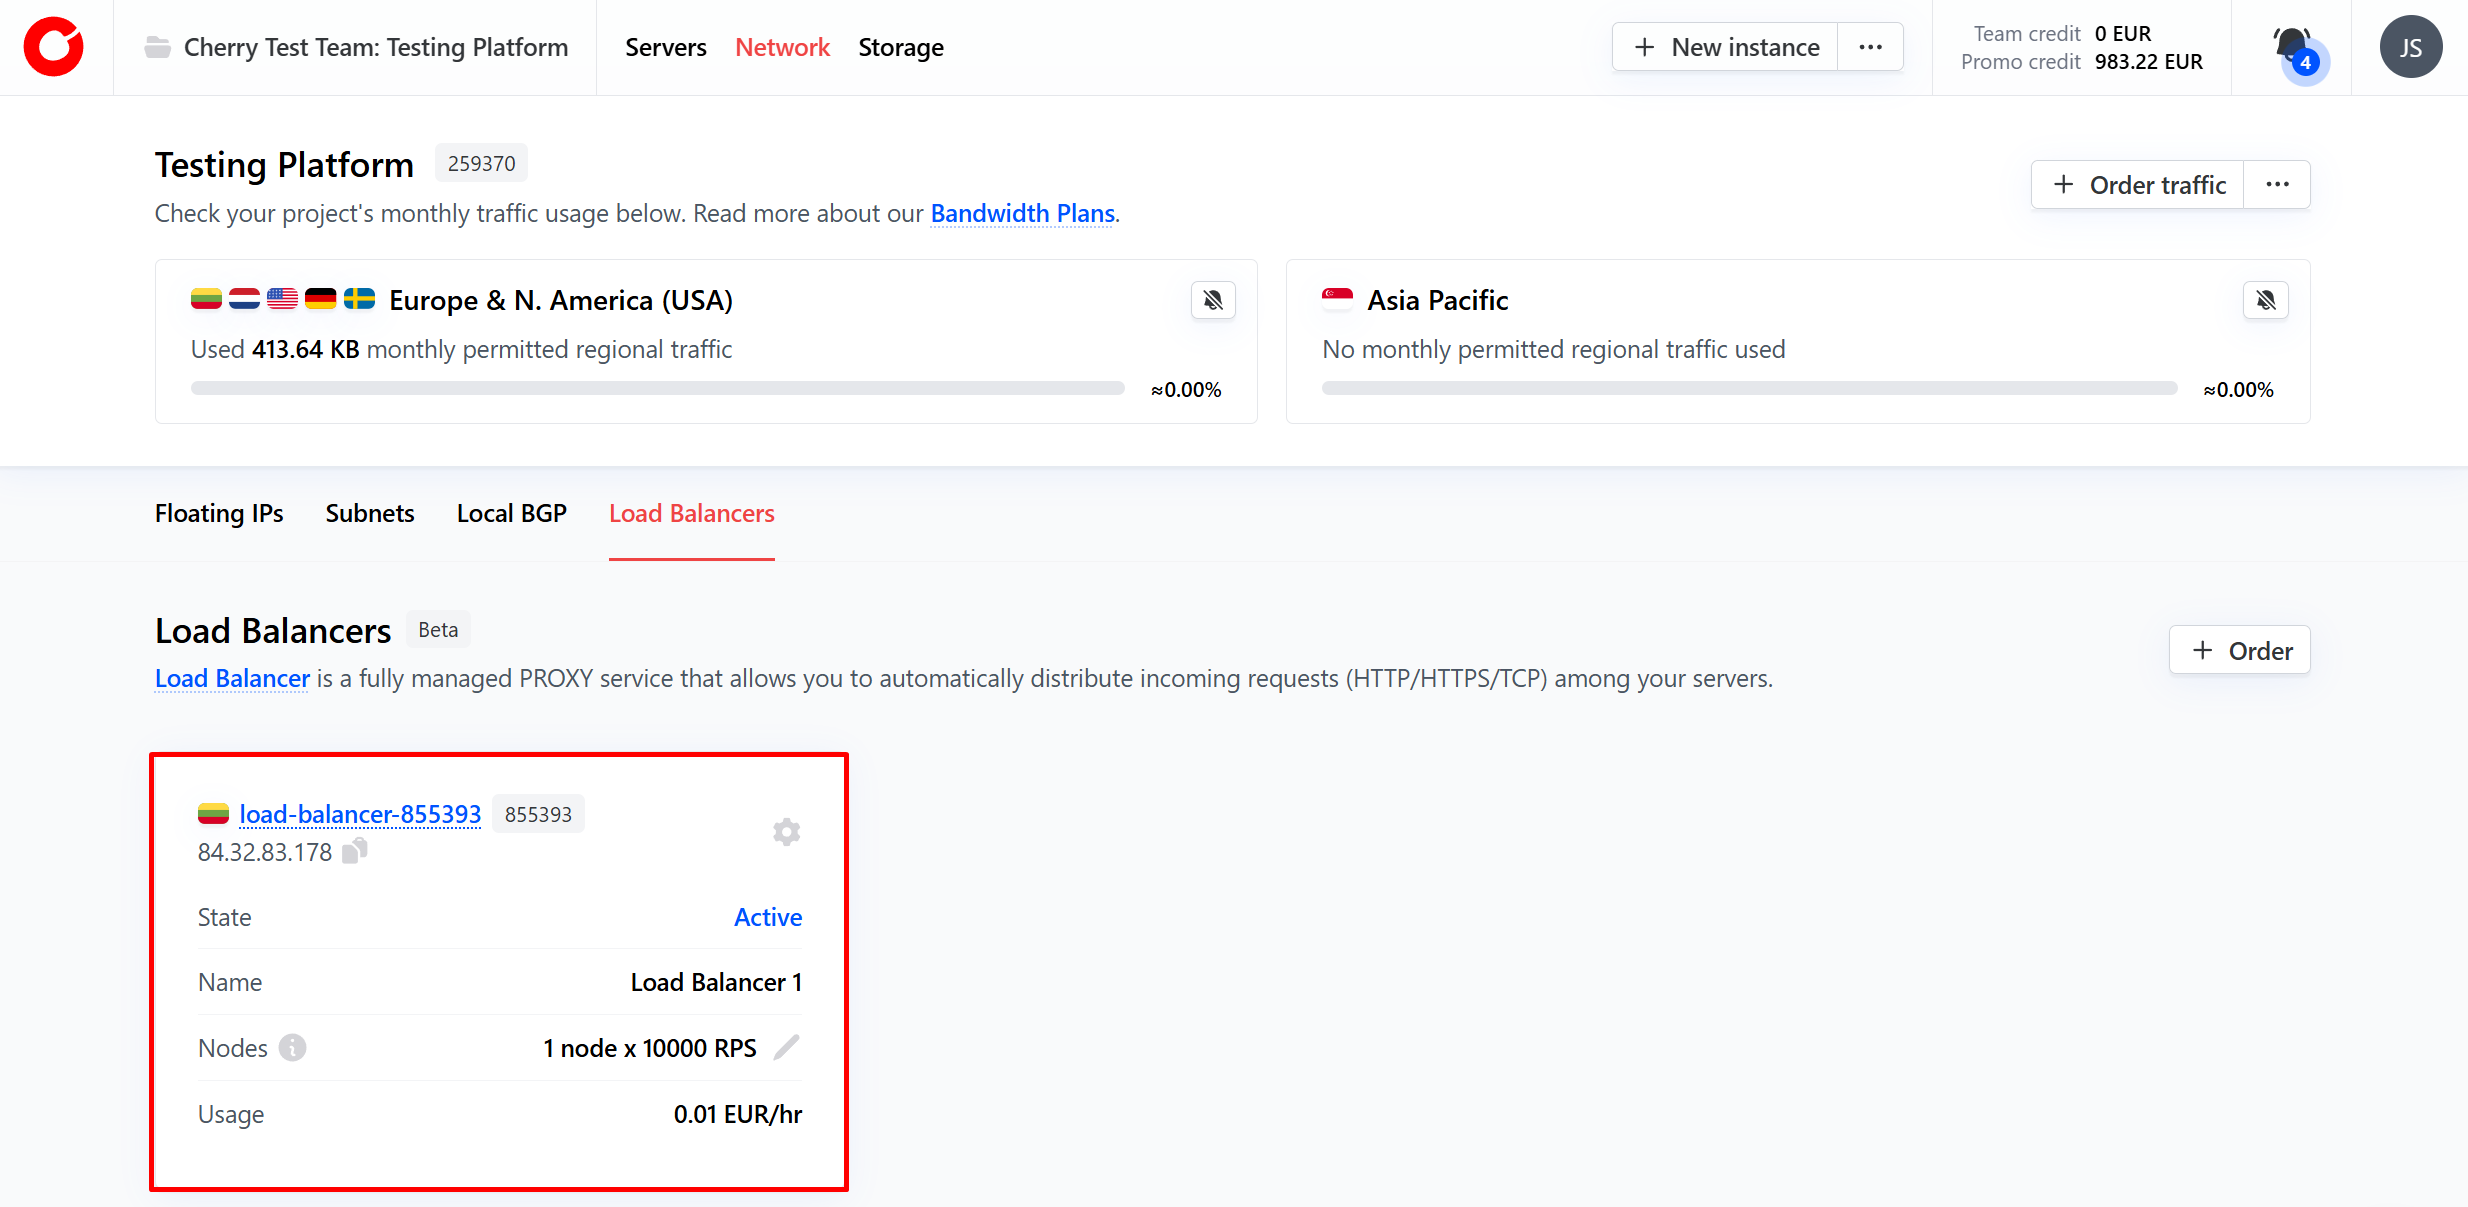
- Select the specific service you would like to cancel.
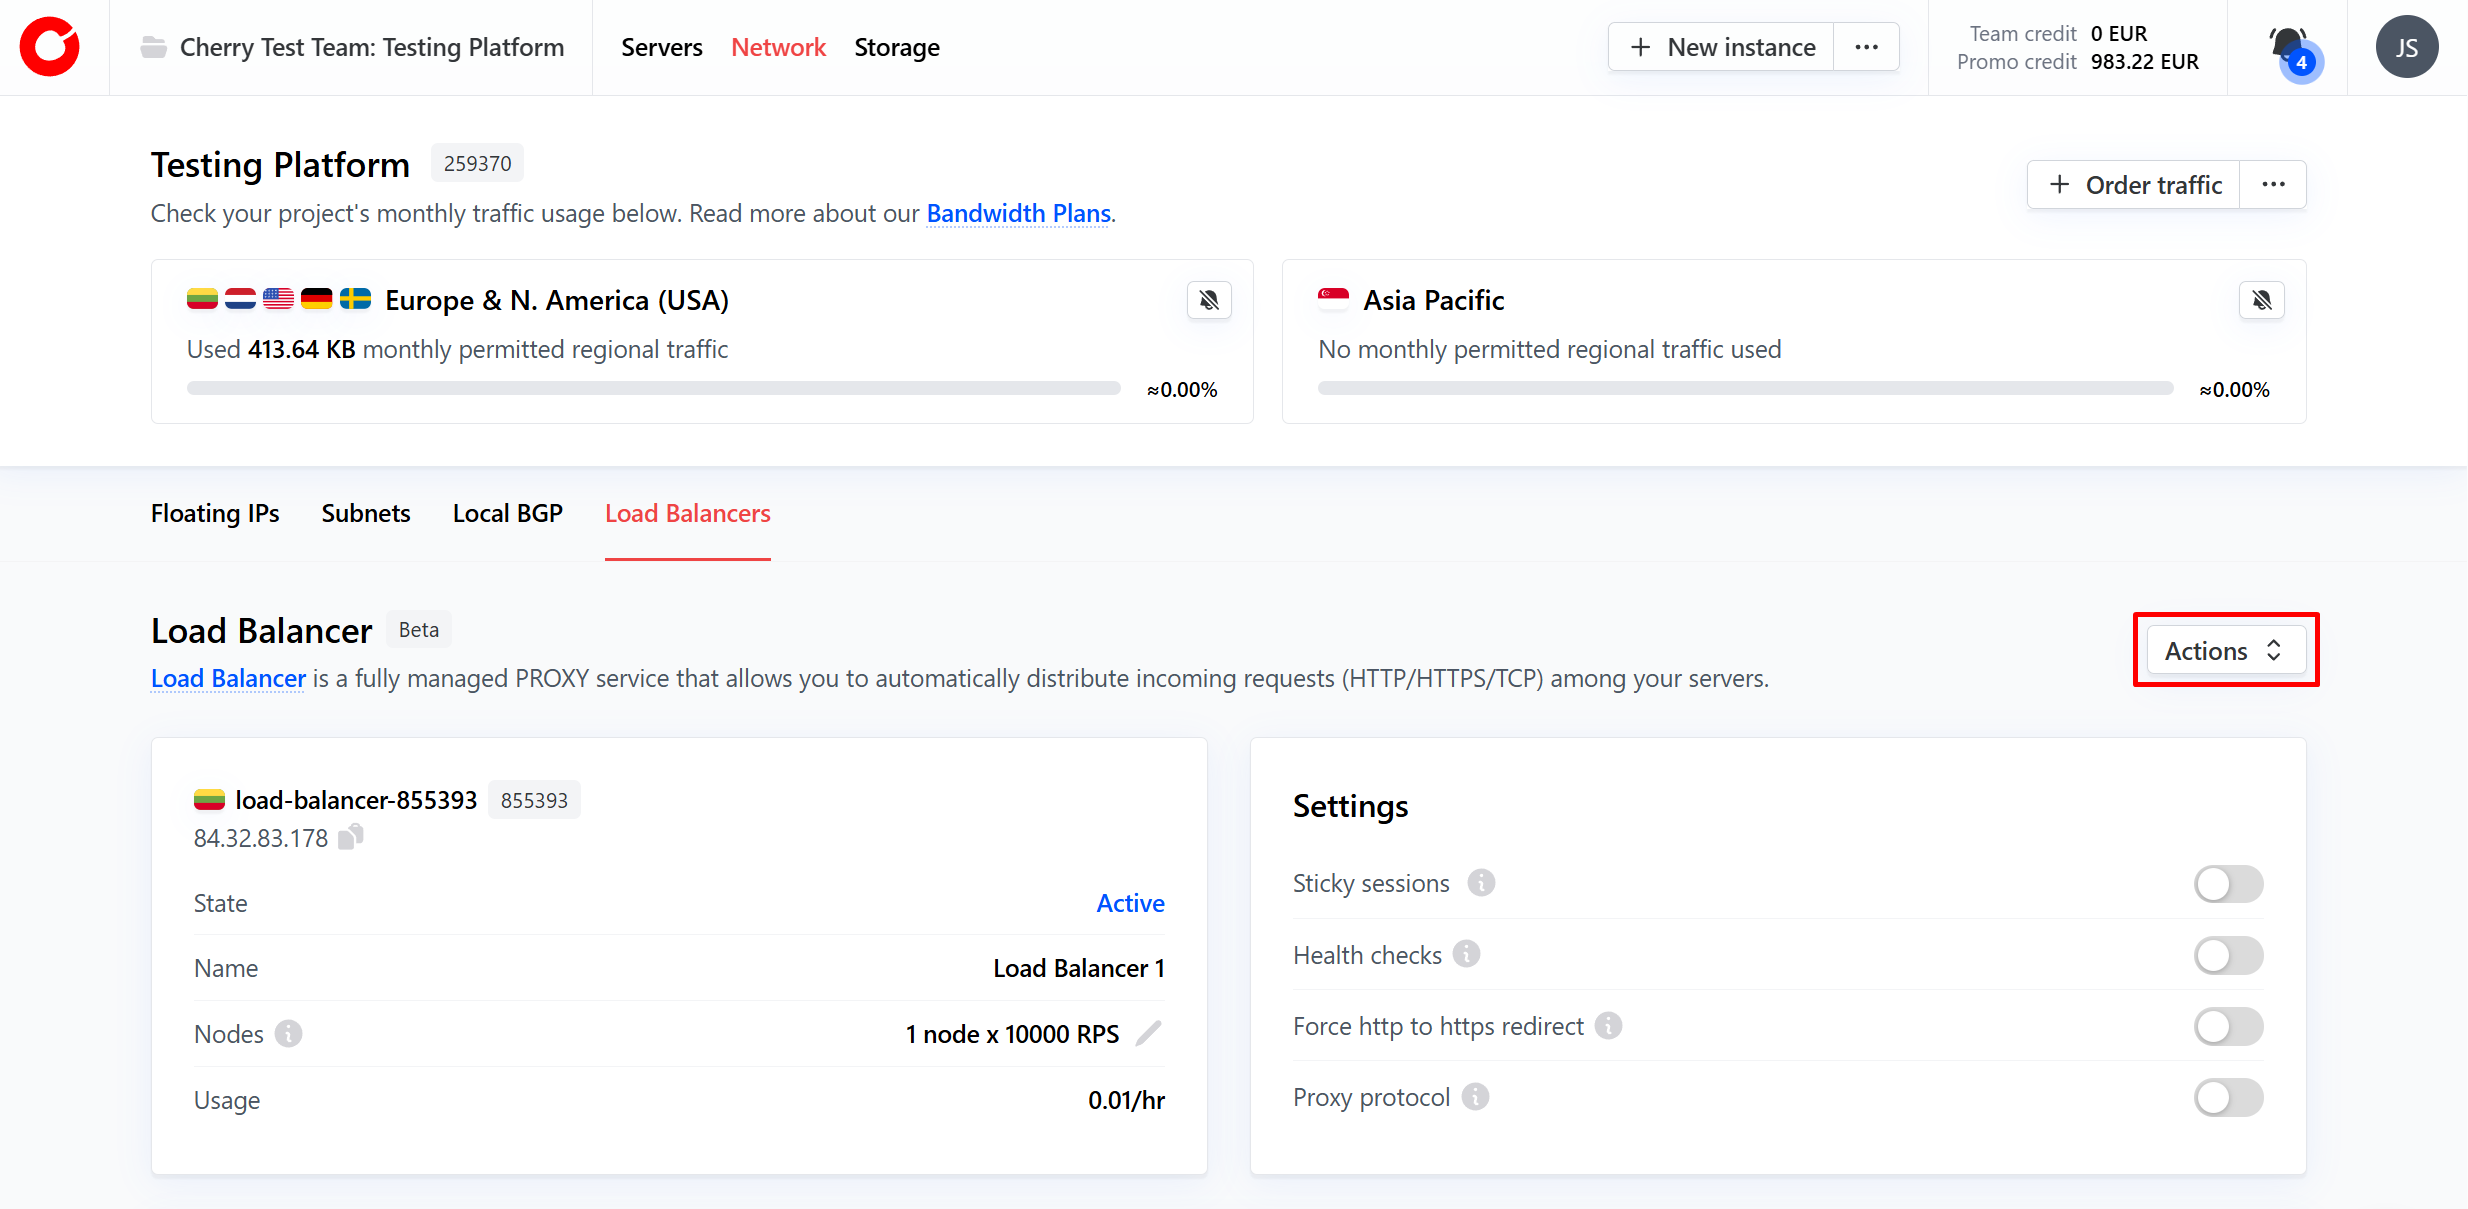
- On the service dashboard, click the “Actions” button in the top-right hand corner.
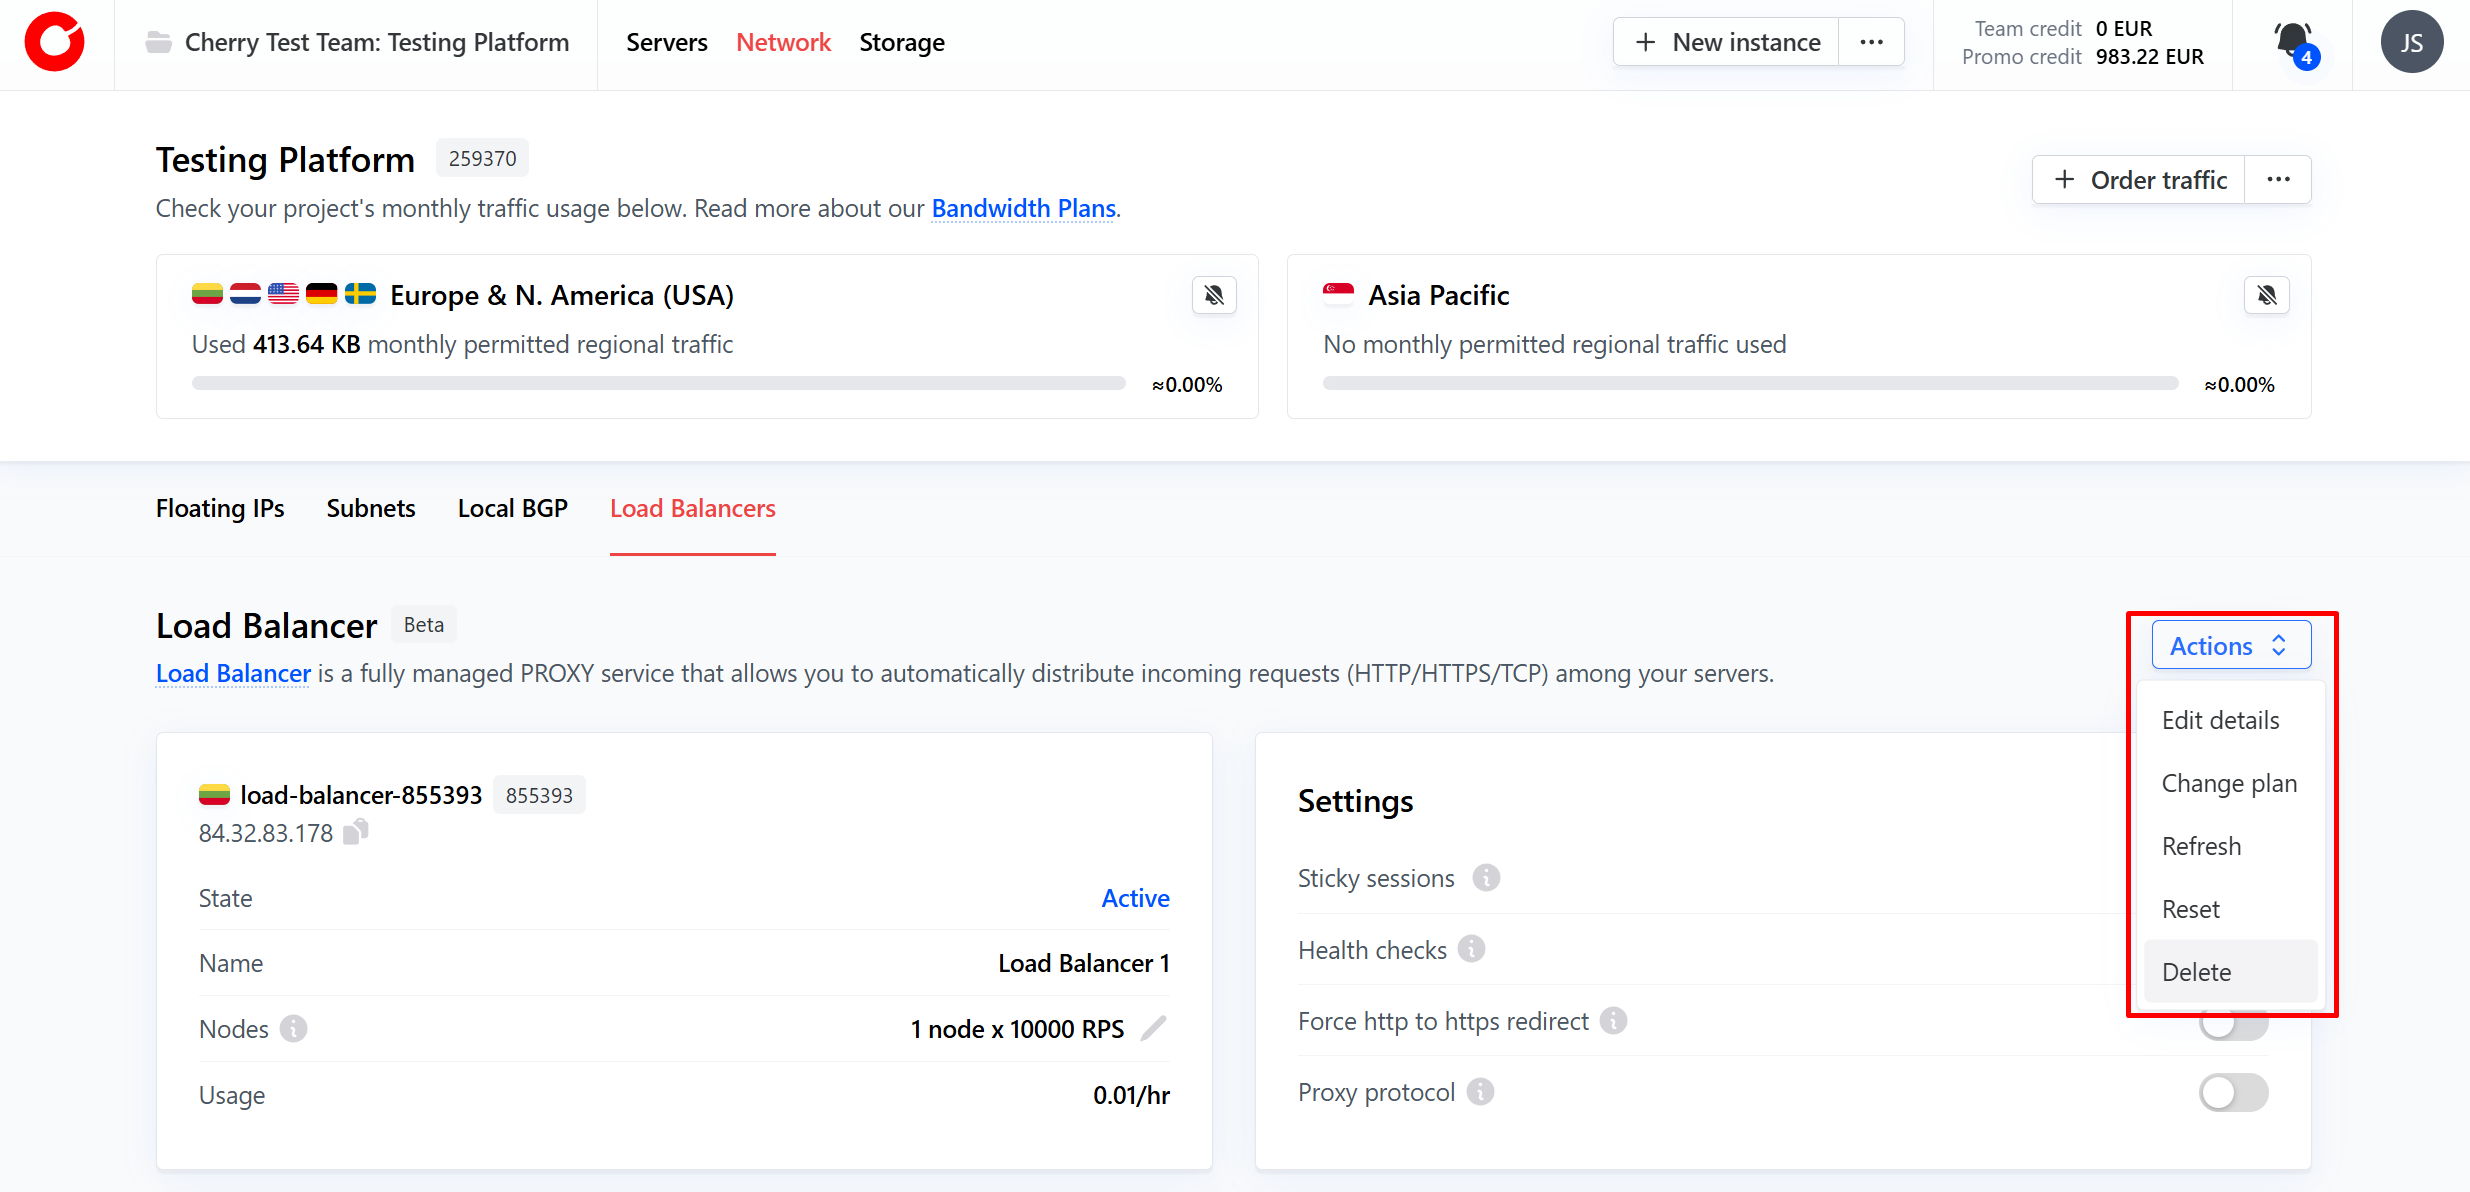
- From the dropdown menu, select “delete”.
- In the pop-up window that appears, simply click “Terminate”.
 Your service will be canceled immediately.